Advertisement
Supply List
Item
1 x 4 x 10'
1 x 6 x 8'
1 x 3 x 8'
1 x 2 x 8'
2 x 3 x 8'
3-1/2" square x 15-1/2" leg
Wood glue
2-1/2" pocket hole screw
1-1/4" pocket hole screw
2" finish nails
Finish of choice
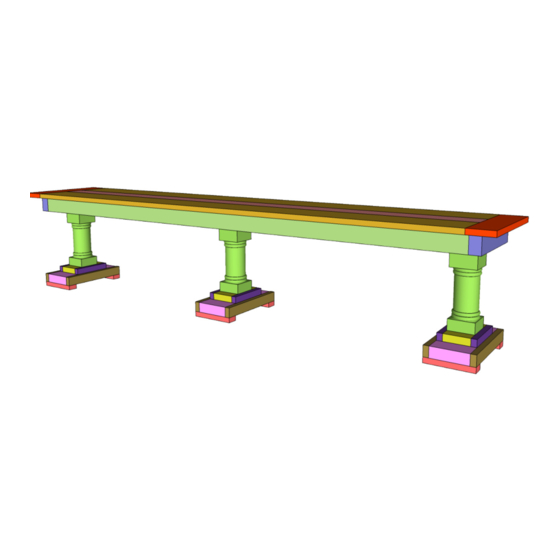
Three Leg Bench
Copyright © 2014 Shanty-2-Chic.com
Quantity
Description
1
Pine or whitewood board
2
Pine or whitewood board
1
Pine or whitewood board
2
Pine or whitewood board
3
Pine or whitewood board
3
20
44
handful
Advertisement
Table of Contents

Related Manuals for Shanty 2 CHIC Three Leg Bench


Summary of Contents for Shanty 2 CHIC Three Leg Bench
- Page 1 Three Leg Bench Copyright © 2014 Shanty-2-Chic.com Supply List Item Quantity Description 1 x 4 x 10’ Pine or whitewood board 1 x 6 x 8’ Pine or whitewood board 1 x 3 x 8’ Pine or whitewood board 1 x 2 x 8’...
- Page 2 -2-C hanTy hree...
- Page 3 Assemble the bench top with wood glue and 1-1/4” pocket hole screws. Start with the interior long pieces and add the breadboard ends last. Assemble the bench frame with wood glue and pocket hole screws. Start with the perimeter using 2-1/2” pocket hole screws.
- Page 4 Start building the three legs. Glue and nail the first blocks in place, Glue and nail the second pair of blocks onto the other sides. Using glue and 2-1/2” pocket hole screws attach the next blocks to the leg. Make sure the pocket holes are on the bottom.
- Page 5 Add the 1 x 2 trim pieces to the long sides of the legs with wood glue and finish nails. Finish the legs by adding the foot pads to the bottom with wood glue and finish nails. Make sure the nail heads are not sticking out or it will scratch your floor! Secure the legs to the rest of the bench with wood glue and finish nails.
Need help?
Do you have a question about the Three Leg Bench and is the answer not in the manual?
Questions and answers