Table of Contents
Advertisement
Available languages
Available languages
Quick Links
Advertisement
Chapters
Table of Contents

Related Manuals for ECOVACS ROBOTICS DEEBOT D63S


Summary of Contents for ECOVACS ROBOTICS DEEBOT D63S
- Page 1 说明书 Manual Arahan Instruction Manual...
- Page 2 说明书 ................2 Manual Arahan............18 Instruction Manual............36 衷心感谢您购买科沃斯优质出品的地面清洁机器人 DEEBOT !希望您使用愉快。 我们相信它会帮助您拥有更整洁的家庭环境,并为您省下更多时间,做更有意义 的事情。 智生活 享人生 在使用中如遇任何问题, 请联系我们的售后服务中心, 将有专业人员为您解答问题。 更多详情请至科沃斯官网:www.ecovacs.com 本资料产品以实物为准,我公司保留产品更新的权利,如有变动,恕不另行通知。 再次感谢您选择 DEEBOT !...
-
Page 3: Table Of Contents
目录 1. 安全规范 ......................2 2. 产品组成 ......................3 2.1 包装内容物 ....................3 2.2 技术参数 ....................3 2.3 部件名称 ....................4 3. 产品使用 ......................6 3.1 注意事项 ....................6 3.2 快速操作 ....................7 3.3 模式选择 ....................9 3.4 预约设置 ....................11 4. -
Page 4: 安全规范
1. 安全规范 使用产品时,请保持一贯的警惕性,遵循以下事项: 使用产品前请仔细阅读此说明书。 请保存好说明书。 1. 产品不能由 8 岁以下儿童或精神上有障碍的人使用。若需要使用,请在监护人的监督指导 下进行。请不要让儿童骑坐在产品上,或将产品作为玩具玩耍。 2. 针对产品在清扫中可能出现的问题,应及早排除。清理地面上的电源线和细小物品避免产 品在清洁过程中受阻。 将地毯的边穗翻折到地毯下, 并使垂挂的窗帘、 桌布等不要接触地面。 3. 若存在诸如楼梯等悬空环境,请先测试产品看其是否可以检测到悬空区域边缘而不跌落。 应在悬空区域边缘设置防护栏以防产品跌落。 应确保该防护设施不会引发绊倒等人身伤害。 4. 请按照说明书的指示使用产品。仅使用制造商推荐或销售的附件。 5. 确保电源电压符合充电座上标注的电压。 6. 仅在室内家庭环境中使用。请勿在室外、商业及工业场所使用。 7. 仅使用制造商专配的原装可充电电池及充电座。严禁使用不可充电电池,电池规格信息请 参考“技术参数”。 8. 使用产品前确保尘盒、过滤材料已安装到位。 9. 禁止在有明火或易碎物品的环境中使用产品。 10. 禁止在极热(高于 40℃)或极冷(低于 -5℃)的环境中使用产品。 11. 禁止人体的头发,衣服,手指等其他部位靠近产品的开口和运作部件。 12. 请勿在婴幼儿睡眠的房间里使用产品。 13. -
Page 5: 产品组成
2. 产品组成 2.1 包装内容物 Instruction Manual 遥控器(含电池) 主机 充电座 说明书 (2)边刷 新生代清理小工具 2.2 技术参数 主机型号 D63S 工作电压 额定功率 12V DC 充电座型号 CH1118D 额定输入电压 额定输出电压 100-240V AC 14.5V DC 额定输出电流 额定功率 0.75A 遥控器型号 输入电压 3V DC RC0917 电池及规格 Ni-MH SC 2100mAh * 因产品持续改善需要,本公司保留对产品进行的任何技术、设计变更权利,解释权归本公司所有。... -
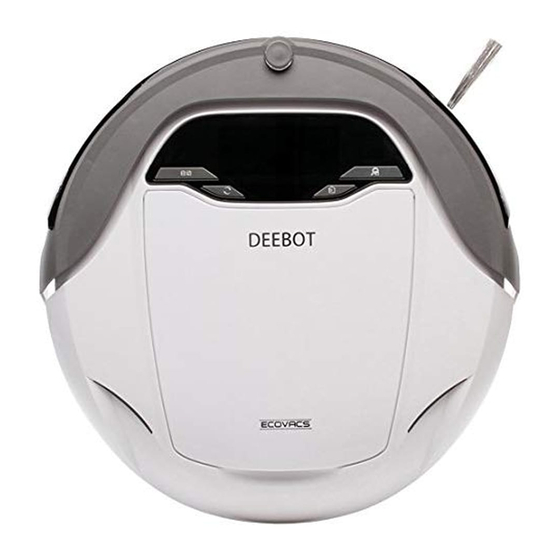
Page 6: 部件名称
2. 产品组成 2.3 部件名称 主机 1. 状态指示灯 10. 滚刷固定螺丝 2. 面盖 11. 滚刷 3. 控制面板 12. 万向轮 4. 显示屏 13. 驱动轮 5. 信号接收器 14. 底部电源开关 6. 红外防撞感应器 15. 电池盖 7. 充电极片 16. 电池盖固定螺丝 8. 边刷 17. 灰尘感应器 9. 下视传感器 18. 尘盒 控制面板... - Page 7 2. 产品组成 充电座 1. 锁扣 2. 充电极片 3. 充电座上盖 4. 信号发射器 5. 防滑带 6. 充电基座 遥控器 1. 暂停键 2. AUTO 键 3. 定点模式键 4. 沿边模式键 5. 方向键 6. 精扫模式键 7. 返回充电键 8. 信号发射器 尘盒 1. 尘盒提手 4. 精细过滤棉 2. 尘盒锁扣 5.
-
Page 8: 产品使用
3. 产品使用 3.1 注意事项 主机工作前,请参考如下指引检查清扫区域。 散落地面的电源线等杂物可能绊住或缠绕产 请将地毯流苏边卷起或在短毛地毯上工作。 品,使用前请务必移除。 家居底部不足 10CM 的空隙可能卡住产品, 若清理区域有台阶或楼梯,请运行主机以确 若需清扫,请垫高家具。 保其下视传感器可以检测到落差。复式层边 缘应放置防护栏确保产品安全运行。... -
Page 9: 快速操作
3. 产品使用 3.2 快速操作 充电准备 安装充电座:将充电座上盖插入充电座底座上 的对接口,将底座后方的锁扣滑至左侧以锁定 充电座上盖。 安放充电座:将充电座平坦靠墙放置,左右 0.5m 及前方 1.5m 内不要放置物品,且不要 有镜子等反射面较强的物体。 连接电源。 安装边刷 请将边刷安装在主机底部卡槽中,按压边刷直 至听到咔擦声。 打开主机 打开主机底部电源开关,“O”为关机“I”为 开机。 主机不执行工作时,建议不要关闭主机底部 电源开关,使其保持充电状态,以便更好的 进行下一次的工作。... - Page 10 3. 产品使用 主机充电 将主机放至充电座,对准充电极片。 首次使用,请连续充电 12 小时以上; 主机上的状态指示灯及显示屏中电池电量指 示灯闪烁,充电中,若熄灭,充电完成。 启动清扫 通过主机或遥控器的 AUTO 键均可启动自动 清扫模式。 若需要选择其他模式,请参考【模式选择】 章节。 暂停工作 主机工作中,按下主机上任意键,或使用遥控 器上的暂停键,暂停主机。 主机暂停状态下,可以按需通过遥控器操控 主机前后左右行进。主机在暂停状态下不执 行清扫。...
-
Page 11: 模式选择
3. 产品使用 3.3 模式选择 为适应不同地面状况,实现深度清洁,本产品设有多种清扫模式,可按需通过主机控制面板或遥控 器选择。 切换清扫模式时,请先暂停主机。 AUTO 模式 最常用的清扫模式,主机自动进行清扫,遇到障碍物后自主改变方向; 精扫模式 当主机以精扫模式工作时,灰尘感应灵敏度加大,清扫更细致。... - Page 12 3. 产品使用 定点模式 沿边模式 适用于垃圾较为集中对地面环境,主机在指定区 针对室内边角处进行清扫, 主机沿固定物体 (如 域进行集中清扫。 墙壁)的周边进行清扫。 以上两种模式仅可通过遥控器选择。 返回充电模式 主机在清扫过程中,能感知自身电量不足,自主启动“返回充电”模式,自动寻找充电座进行充电; 也可通过主机控制面板或遥控器上的返回充电键,指令主机启动“返回充电”模式。...
-
Page 13: 预约设置
3. 产品使用 3.4 预约设置 为方便清扫, 本产品设有 “循环预约” 功能, 可以通过主机, 设定当前时间为预约清扫时间。 预约成功后, 主机将每天按所设时间自动执行清扫工作。 设定循环预约 短按主机上的 键,显示屏上 指示灯亮起,主机即刻执行预约后的首次清扫, 并在每天同一时 间自动执行清扫。 例:若当前时间为“09:00”,按下 键, 指示灯亮起。主机在每天“09:00”自主执行清扫工作。 09:00 AM 09:00 AM 取消循环预约 可通过如下两种方式中任意一种取消循环预约: 按下遥控器上任意模式键以取消循环功能。主机显示屏 熄灭,循环功能取消。 按下主机上任意键(除底部电源开关)暂停工作,再按任意模式键以取消循环功能。主机显示屏 熄灭,循环功能取消。 若需重新设置“循环预约”时间,可先取消当前预约设置,然后在您想要设置的时间点,按照 如上操作步骤,重新设置“循环预约”。 若关闭主机,则当前所设“循环预约”时间失效。 09:00 AM 09:00 AM... -
Page 14: 维护保养
4. 维护保养 在对主机及其配件进行清理维护时,请关闭主机,拔下充电座电源。 4.1 尘盒与滤材 取出尘盒,打开尘盒锁扣,清理垃圾。 取下滤材组件,高级过滤棉不建议水洗,可 轻拍去灰。 冲洗尘盒,精细过滤棉及滤网。 晾晒尘盒和过滤组件,保持干燥以保证其使 用寿命。... -
Page 15: 滚刷与边刷
4. 维护保养 4.2 滚刷与边刷 配合使用新生代清理小工具,清理配件,效果更佳。小工具有尖锐边缘,使用时请小心。 清理滚刷 用硬币松开滚刷固定螺丝,取出滚刷。使用新生代清理小工具割开缠绕在滚刷上的毛发,便于清理。 清理边刷 拔出边刷,用干抹布擦拭边刷及边刷槽。... -
Page 16: 其他组件
4. 维护保养 4.3 其他组件 清理万向轮,减少毛发缠绕。 使用新生代清理小工具的刷子或毛毡边清理 下视感应器,保证感应器灵敏度。 使用新生代清理小工具的刷子或毛毡边清理 使用干抹布擦拭充电极片,请分别清理主机 灰尘感应器,保证有效的灰尘识别。 底部和充电座的充电极片。 长期不使用本产品,请取出电池妥善保存。若出现电池漏液情况,请穿戴防护性手套移除电池, 并将电池槽擦拭干净。 电池深度放电或长期未使用时,其容量可能减小,建议激活。 激活方法:手动将主机放上充电座,充电 3 分钟后移出,反复 3 次后,正常充电 3~5 小时。 本产品使用高寿命电池,无需经常更换。若需更换,可联系本公司售后服务或参考以下方式进 行更换。 更换方法:a. 卸下电池盖固定螺丝,移除电池盖。 b. 将电池与主机的插件拔出,取出电池; c. 将新电池的插件按正负极插入,装好电池盖并固定,更换完成。... -
Page 17: 故障排除
5. 故障排除 产品使用过程中,若遇以下情况。可对照查询,自主解决。 序号 故障情况 可能原因 解决方法 主机底部电源开关未打开。 打开主机底部电源开关。 主机与充电座的充电极片未 确保主机与充电座的充电极片充分对接。 充分接触。 主机无法充电。 主机开机,充电座未连接电 主机不执行工作时,建议使其保持开机状态 源,导致电量损耗。 进行充电,以便更好的进行下一次工作。 激活电池。手动将主机放上充电座,充电三 电池处于深度放电态。 分钟后移出, 重复该动作 3 次之后, 正常充电。 主机被地面上散乱电线、下 主机工作时陷入 主机会自主尝试各种方法脱困,若未能脱困, 垂的窗帘布或地毯须边等缠 困境。 建议手动帮助。 绕或阻碍。 主机工作中能感知电量不足, 此为正常情况,对主机进行充电即可。 自动返回充电。 未清扫完毕,主 主机的工作时间,因房间复 机返回充电。 杂程度、垃圾量和清扫模式 此为正常情况。 不同而有差异。 循环预约已取消。... - Page 18 Tahniah atas pembelian ECOVACS ROBOTICS DEEBOT! Kami berharap anda mendapat kepuasan bertahun-tahun. Kami percaya pembelian robot akan membantu mengekalkan kebersihan rumah anda dan memberikan kepada anda lebih banyak masa berkualiti untuk melakukan perkara-perkara lain. Live Smart. Enjoy Life. Sekiranya anda menghadapi situasi yang tidak dapat ditangani dengan baik dalam Manual Arahan ini, sila hubungi Pusat Perkhidmatan Pelanggan kami untuk bantuan juruteknik bagi mengatasi masalah spesifik atau soalan anda.
- Page 19 Kandungan 1. Arahan Keselamatan Penting..............18 2. Kandungan Pakej dan Spesifikasi Teknikal..........20 2.1 Kandungan Pakej..................20 2.2 Spesifikasi....................20 2.3 Rajah Produk...................21 3. Operasi dan Pengaturcaraan..............23 3.1 Perhatian sebelum Pembersihan.............23 3.2 Mula Pantas.....................24 3.3 Pemilihan Mod Pembersihan..............26 3.4 Penjadualan Pintar.................28 4. Penyelenggaraan..................29 4.1 Bekas Habuk dan Penapis...............29 4.2 Berus Utama dan Berus Sisi..............30 4.3 Komponen-komponen Lain..............31 5.
-
Page 20: Arahan Keselamatan Penting
1. Arahan Keselamatan Penting Apabila menggunakan perkakas elektrik, langkah berjaga-jaga asas haruslah sentiasa diikuti, termasuk yang berikut: BACA SEMUA ARAHAN SEBELUM MENGGUNAKAN (PERKAKAS INI) SIMPAN ARAHAN INI 1. Perkakas ini bukan bertujuan untuk digunakan oleh kanak-kanak di bawah umur 8 tahun atau golongan yang tiada pengetahuan mengenai penggunaannya yang betul. - Page 21 1. Arahan Keselamatan Penting 20. Jangan menggunakan Dok Pengecasan jika ia rosak. 21. Jangan gunakan dengan kord kuasa atau bekas yang rosak. Jangan gunakan Perkakas atau Dok Pengecasan jika ia tidak berfungsi dengan betul, telah dijatuhkan, rosak, ditinggalkan di luar rumah, atau bersentuhan dengan air. Ia mesti dibaiki oleh pembuat atau ejen perkhidmatannya bagi mengelakkan bahaya.
-
Page 22: Kandungan Pakej Dan Spesifikasi Teknikal
2. Kandungan Pakej dan Spesifikasi Teknikal 2.1 Kandungan Pakej Instruction Manual Alat Kawalan Jauh Robot Dok Pengecasan Manual Arahan dengan Bateri (2) Berus Sisi Alat Pembersihan Pelbagai Fungsi 2.2 Spesifikasi Model D63S Voltan Penggunaan 12V DC Kuasa Ditarafkan Model Dok Pengecasan CH1118D Voltan Input Ditarafkan 100-240V AC... -
Page 23: Rajah Produk
2. Kandungan Pakej dan Spesifikasi Teknikal 2.3 Rajah Produk Robot 1. Petunjuk Cahaya Status 10. Skru Berus Utama 2. Penutup Atas 11. Berus Utama 3. Panel Kawalan 12. Roda Universal 4. Skrin Panel Kawalan 13. Roda Pemanduan 5. Penerima Inframerah untuk Kawalan Jauh 14. - Page 24 2. Kandungan Pakej dan Spesifikasi Teknikal Dok Pengecasan 1. Butang Kunci/Lepas 2. Pin Dok Pengecasan 3. Tudung Atas Dok Pengecasan 4. Penjana Isyarat Inframerah 5. Jalur Antigelincir 6. Tapak Dok Pengecasan Alat Kawalan Jauh 1. Butang Jeda 2. Butang Mod AUTO 3.
-
Page 25: Operasi Dan Pengaturcaraan
3. Operasi dan Pengaturcaraan 3.1 Perhatian sebelum Pembersihan Keluarkan kord kuasa dan objek kecil dari tingkat yang boleh menjerut produk. Remove power cords and small objects from Produk ini tidak sesuai untuk digunakan pada permaidani panjang berjumbai. Sebelum the floor that could entangle the product. menggunakan produk ini berhampiran kawasan permaidani atau pada kawasan permaidani pendek berjumbai, sila lipat sisi permaidani ke... -
Page 26: Mula Pantas
3. Operasi dan Pengaturcaraan 3.2 Mula Pantas Kedudukan Dok Pengecasan Memasang Dok Pengecasan: Masukkan Tudung Atas Dok Pengecasan ke dalam slot pada Tapak Dok Pengecasan. Luncurkan butang Kunci/ Lepas di belakang Dok Pengecasan ke kiri untuk mengunci Tudung Atas pada tempatnya. Penempatan: Letakkan Dok Pengecasan pada permukaan lantai rata menghadap dinding dengan tapaknya serenjang ke lantai. - Page 27 3. Operasi dan Pengaturcaraan Mengecas DEEBOT 6 Letakkan DEEBOT 6 pada Dok Pengecasan dengan memastikan Hubungan Pengecasan pada DEEBOT 6 dan Pin Dok Pengecasan membuat sambungan. Caskan DEEBOT 6 untuk sekurang-kurangnya 12 jam sebelum penggunaan pertama. Penunjuk Cahaya Status pada bahagian atas robot dan Paparan Bateri pada Skrin Panel Kawalan robot berkelip apabila DEEBOT 6 sedang dicas dan berhenti apabila DEEBOT 6...
-
Page 28: Pemilihan Mod Pembersihan
3. Operasi dan Pengaturcaraan 3.3 Pemilihan Mod Pembersihan DEEBOT 6 mempunyai beberapa Mod Pembersihan untuk dipilih bagi pembersihan lantai yang berbeza dengan berkesan. Mod Pembersihan dipilih menggunakan Butang Panel Kawalan robot atau menggunakan alat kawalan jauh. Jedakan DEEBOT 6 sebelum menghidupkan Mod Pembersihan. Mod Pembersihan AUTO Ini adalah mod yang paling biasa digunakan. - Page 29 3. Operasi dan Pengaturcaraan Mod Pembersihan Spot Butang Mod Pembersihan Bucu Mod ini hanya untuk kawasan kotoran yang Mod ini sesuai untuk membersihkan tepi dan dipenuhi kekotoran atau debu. Dalam Mod penjuru bilik. Dalam Mod Pembersihan Bucu, Pembersihan Spot, DEEBOT 6 memberi DEEBOT 6 membersihkan di sepanjang tepi tumpuan kepada kawasan tertentu untuk (contohnya dinding).
-
Page 30: Penjadualan Pintar
3. Operasi dan Pengaturcaraan 3.4 Penjadualan Pintar DEEBOT 6 mempunyai fungsi Penjadualan Pintar. DEEBOT 6 boleh dijadualkan untuk membersihkan sekali sehari pada masa yang sama, walaupun tiada sesiapa berada di rumah. Tetapkan Penjadualan Pintar Tekan pada DEEBOT 6 untuk menetapkan waktu semasa sebagai waktu pembersihan dijadualkan. Penjadualan Pintar berjaya ditetapkan apabila penunjuk pada Skrin Panel Kawalan menyala. -
Page 31: Penyelenggaraan
4. Penyelenggaraan Sebelum melaksanakan pembersihan dan penyelenggaraan pada DEEBOT 6, alihkan Suis Kuasa Bawah kepada kedudukan DIMATIKAN dan cabut palam Dok Pengecasan 4.1 Bekas Habuk dan Penapis Bukan Penutup Atas DEEBOT 6 dan tanggalkan Tanggalkan penapis. Tepuk Penapis Berefisien Bekas Habuk. Buka Penutup Bekas Habuk dan Tinggi sehingga bersih. -
Page 32: Berus Utama Dan Berus Sisi
4. Penyelenggaraan 4.2 Berus Utama dan Berus Sisi Alat Pembersihan Pelbagai Fungsi disediakan untuk penyelenggaraan mudah. Berhati-hati kerana alat ini mempunyai sisi yang tajam. Membersihkan Berus Utama. Tanggalkan Berus Utama dengan membuka skrunya. Gunakan Alat Pembersihan Pelbagai Fungsi untuk memotong dan mengeluarkan rambut yang melekat pada Berus Utama. Membersihkan Berus Sisi. -
Page 33: Komponen-Komponen Lain
4. Penyelenggaraan 4.3 Komponen-komponen Lain B e r s i h k a n R o d a U n i v e r s a l d e n g a n Lapkan Sensor Antijatuhan dengan berus mengeluarkan sebarang rambut yang atau Alat Pembersihan Pelbagai Fungsi tersangkut padanya. -
Page 34: Menyelesaikan Masalah
5. Menyelesaikan masalah Sila gunakan carta ini untuk menyelesaikan masalah bagi penggunaan DEEBOT 6. NO. Kegagalan Fungsi Punca-punca Penyelesaian Suis Kuasa Bawah di Alihkan Suis Kuasa Bawah robot ke bahagian bawah DEEBOT 6 kedudukan DIHIDUPKAN. tidak DIHIDUPKAN. Pastikan DEEBOT 6 bersambung dengan DEEBOT 6 tidak dapat Pin Dok Pengecasan. - Page 35 5. Menyelesaikan masalah NO. Kegagalan Fungsi Punca-punca Penyelesaian Fungsi Penjadualan Pintar Sila rujuk kepada bahagian 3.4 Penjadualan telah dibatalkan. Pintar untuk maklumat lanjut. Suis Kuasa Bawah di Alihkan Suis Kuasa Bawah robot ke bahagian bawah robot kedudukan DIHIDUPKAN. DEEBOT 6 DIMATIKAN.
- Page 36 Congratulations on the purchase of your ECOVACS Robotics DEEBOT! We hope it brings you many years of satisfaction. We trust the purchase of your new robot will help keep your home clean and provide you more quality time to do other things.
- Page 37 Contents 1. Important Safety Instructions..............36 2. Package Contents and Technical Specifications........38 2.1 Package Contents...................38 2.2 Specifications..................38 2.3 Product Diagram..................39 3. Operating and Programming..............41 3.1 Notes Before Cleaning................41 3.2 Quick Start....................42 3.3 Cleaning Mode Selection.................44 3.4 Intelligent Scheduling................46 4. Maintenance....................47 4.1 Dust Bin and Filters..................47 4.2 Main Brush and Side Brush..............48 4.3 Other Components..................49 5.
-
Page 38: Important Safety Instructions
1. Important Safety Instructions When using an electrical appliance, basic precautions should always be followed, including the following: READ ALL INSTRUCTIONS BEFORE USING THIS APPLIANCE. SAVE THESE INSTRUCTIONS 1. This Appliance is not intended to be used by children under 8 or anyone lacking knowledge on proper use. - Page 39 28. When not using the Charging Dock for a long period of time, please unplug it. 29. The Appliance must be used in accordance with the directions in this Instruction Manual. ECOVACS Robotics cannot be held liable or responsible for any damages or injuries caused by improper use.
-
Page 40: Package Contents And Technical Specifications
2. Package Contents and Technical Specifications 2.1 Package Contents Instruction Manual Remote Control Robot Charging Dock Instruction Manual with Batteries (2) Side Brushes Multi-Function Cleaning Tool 2.2 Specifications Model D63S Working Voltage 12V DC Rated Power Charging Dock Model CH1118D Rated Input Voltage 100-240V AC Rated Output Voltage... -
Page 41: Product Diagram
2. Package Contents and Technical Specifications 2.3 Product Diagram Robot 1. Status Light Indicators 10. Main Brush Screw 2. Top Cover 11. Main Brush 3. Control Panel 12. Universal Wheel 4. Control Panel Screen 13. Driving Wheels 5. Infrared Receiver for Remote Control 14. - Page 42 2. Package Contents and Technical Specifications Charging Dock 1. Lock/Release Button 2. Charging Dock Pins 3. Charging Dock Top Lid 4. Infrared Signal Generator 5. Anti-Slip Strips 6. Charging Dock Base Remote Control 1. Pause Button 2. AUTO Mode Button 3.
-
Page 43: Operating And Programming
3. Operating and Programming 3.1 Notes Before Cleaning Before Operating DEEBOT, take a few moments to survey the area to be cleaned and remove any obstacles. Remove power cords and small objects from The product is not suitable for use on long-pile carpet. -
Page 44: Quick Start
3. Operating and Programming 3.2 Quick Start Charging Dock Placement A s s e m b l e C h a r g i n g D o c k : I n s e r t t h e Charging Dock Top Lid into the slot on the Charging Dock Base. - Page 45 3. Operating and Programming Charge DEEBOT 6 Place DEEBOT 6 on the Charging Dock making sure the Charging Contacts on DEEBOT 6 and the Charging Dock Pins make a connection. Charge DEEBOT 6 for at least 12 hours before the first use. The Status Light Indicators on the top of the robot and the Battery Display on the robot’s Control Panel Screen blink when DEEBOT 6 is charging...
-
Page 46: Cleaning Mode Selection
3. Operating and Programming 3.3 Cleaning Mode Selection DEEBOT 6 has several Cleaning Modes for you to choose from to effectively clean different floors. Cleaning Modes are selected using the robot’s Control Panel Buttons or using the Remote Control. Pause DEEBOT 6 before switching Cleaning Modes. AUTO Cleaning Mode This is the most commonly used mode. - Page 47 3. Operating and Programming Spot Cleaning Mode Edge Cleaning Mode This mode is applicable for an area of highly This mode is good for cleaning the edges and concentrated dirt or dust. In Spot Cleaning Mode, corners of a room. In Edge Cleaning Mode, DEEBOT 6 focuses on a specific area to clean.
-
Page 48: Intelligent Scheduling
3. Operating and Programming 3.4 Intelligent Scheduling DEEBOT 6 has an Intelligent Scheduling function. DEEBOT 6 can be scheduled to clean once per day at the same time, even if nobody is at home. Set Intelligent Scheduling Press on DEEBOT 6 to set the current time as the scheduled cleaning time. Intelligent Scheduling is set successfully when indicator on the robot’s Control Panel Screen illuminates. -
Page 49: Maintenance
4. Maintenance Before performing cleaning and maintenance on DEEBOT 6, turn the Bottom Power Switch to the OFF position and unplug the Charging Dock. 4.1 Dust Bin and Filters Open DEEBOT 6’s Top Cover and remove the Remove the filters. Pat the High Efficiency Dust Bin. -
Page 50: Main Brush And Side Brush
4. Maintenance 4.2 Main Brush and Side Brush A Multi-Function Cleaning Tool is provided for easy maintenance. Handle with care, this cleaning tool has sharp edges. Cleaning the Main Brush Unscrew the Main Brush Screw and remove the Main Brush. Use the Multi-Function Cleaning Tool to cut off and remove any hair tangled around the Main Brush. -
Page 51: Other Components
4. Maintenance 4.3 Other Components Clean the Universal Wheel by removing any Wipe the Anti-Drop Sensors with the brush hair tangled around the Universal Wheel. or the felt side of the Multi-Function Cleaning Tool to maintain their effectiveness. Wipe the Dust Sensors with the brush or the Wipe the Charging Contacts and Charging felt side of the Multi-Function Cleaning Tool Dock Pins clean with a dry cloth. -
Page 52: Troubleshooting
5. Troubleshooting Please use this chart to troubleshoot common problems using DEEBOT 6. Malfunction Possible Causes Solutions The Bottom Power Switch Turn the Bottom Power Switch to the ON on the bottom of DEEBOT 6 position. is not turned ON. Be sure that DEEBOT 6 has made a DEEBOT 6 has not made connection with the Charging Dock Pins. - Page 53 5. Troubleshooting Malfunction Possible Causes Solutions The batteries in the Remote Replace with new batteries making sure Control need to be replaced. they are installed correctly. The Bottom Power Switch is Make sure DEEBOT 6’s Bottom Power turned OFF, or DEEBOT 6’s Switch is ON and fully charged.
- Page 54 DEEBOT 6-MS-IM2014R00...
Need help?
Do you have a question about the DEEBOT D63S and is the answer not in the manual?
Questions and answers