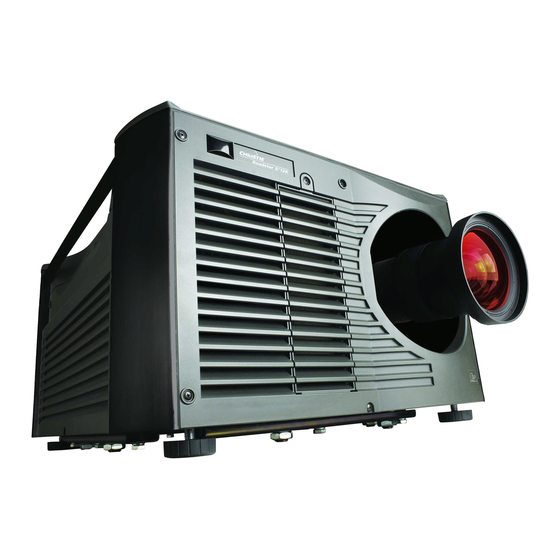
Christie Roadster S+12K Replacement Instructions Manual
Hide thumbs
Also See for Roadster S+12K:
- User manual (198 pages) ,
- Setup manual (82 pages) ,
- Brochure & specs (4 pages)
Table of Contents
Advertisement
Quick Links
Lamp and Filter Replacement Instructions
Introduction
Use the following instructions when replacing the lamp or filters in any of the projectors
listed in Table 1, below. The lamp is located at the rear of the projector (below the input
panel) and can be accessed by opening the lamp door. Use only a Christie approved Lamp
and Filter Kit for your specific projector model.
Table 1. Projector Models
Projector Model
Roadster S
+
12K
Roadster S
+
16K
Mirage S
+
14K
Roadster S
+
20K
Warnings
Lamp replacement MUST be performed by a qualified service technician.
Cool the lamp completely and handle by the housing only.
Install the correct wattage lamp supplied by Christie (Refer to Table 1. Projector
Models) and read the Lamp Replacement Procedure in its entirety before proceeding.
Do not touch the glass surface of the lamp. Fingerprints left on the surface can lead
to an intense accumulation of heat known as a "hotspot", which could potentially
result in the lamp shattering. It is recommended to wear clean, lint-free gloves and a
face shield when working with the lamp.
013-100049-03 (Rev.1)
Model Number
Lamp Type (Watts)
38-DSP210-01
38-DSP210-02
38-DSP210-52
38-DSP214-01
38-DSP214-03
38-DSP214-53
38-DSP214-04
38-DSP214-54
104-001001
104-001101-01
1 of 8 Pages
Lamp/Filter Kit Required
03-900519-01P
1.9kW
03-900519-01P
03-900519-51P
03-900518-01P
2.4kW
03-900518-01P
03-900518-51P
03-900518-01P
2.4kW
03-900518-51P
003-000306
3.0kW
003-000306-02
Advertisement
Table of Contents

Related Manuals for Christie Roadster S+12K


Summary of Contents for Christie Roadster S+12K
- Page 1 Table 1, below. The lamp is located at the rear of the projector (below the input panel) and can be accessed by opening the lamp door. Use only a Christie approved Lamp and Filter Kit for your specific projector model.
-
Page 2: Lamp Replacement Procedure
12K / 14K / 16K / 20K Lamp & Filter Instructions Lamp Replacement Procedure Please read before proceeding. WARNING Always power down and unplug the projector prior to servicing. Allow the lamps to cool before handling. STEP 1 - TURN THE LAMP OFF Press (power) to turn the projector off. - Page 3 12K / 14K / 16K / 20K Lamp & Filter Instructions STEP 5 - REMOVE THE LAMP MODULE Firmly grasp the handle and pull the lamp module straight out of the projector, as shown in Figure 3. Discard the lamp using safe disposal/recycling practices. Figure 3.
-
Page 4: Step 9 - Install The Air Filter
12K / 14K / 16K / 20K Lamp & Filter Instructions STEP 7 - RE-INSTALL LAMP RETAINING BAR Position the retaining bar along the bottom edge of the lamp module, with the ends positioned under the alignment guides. If the bar does not fit, push the lamp module in further. - Page 5 12K / 14K / 16K / 20K Lamp & Filter Instructions STEP 10 - RECORD THE SERIAL NUMBER OF THE NEW LAMP IMPORTANT Neglecting to enter a serial number causes the lamp timer to NOT reset to “0” and may cause the lamp life limit to expire prematurely. Plug in the projector and power it up.
-
Page 6: Filter Replacement Procedure
If operating in an extremely dusty environment the filter may have to be replaced sooner. Use the filter provided in the Christie approved Lamp and Filter Kit for the specific projector model. For more information, refer to Table 1. Projector Models. -
Page 7: Step 3 - Replace Filter
12K / 14K / 16K / 20K Lamp & Filter Instructions STEP 3 - REPLACE FILTER Remove the old filter and insert a new one. Follow the airflow arrows for correct orientation. Refer to Figure 8. The Roadster S+20K model has a rhomboid-shaped filter; therefore, insert the sharply angled corner first —... -
Page 8: Technical Support
12K / 14K / 16K / 20K Lamp & Filter Instructions Technical Support NORTH AMERICA CHRISTIE Digital Systems, Inc. CHRISTIE Digital Systems, Inc. 10550 Camden Drive 809 Wellington St. North Cypress, CA 90630 USA Kitchener, Ontario, Canada N2G 4Y7 Tel. 519-744-8005 (General) Tel.