Advertisement
Quick Links
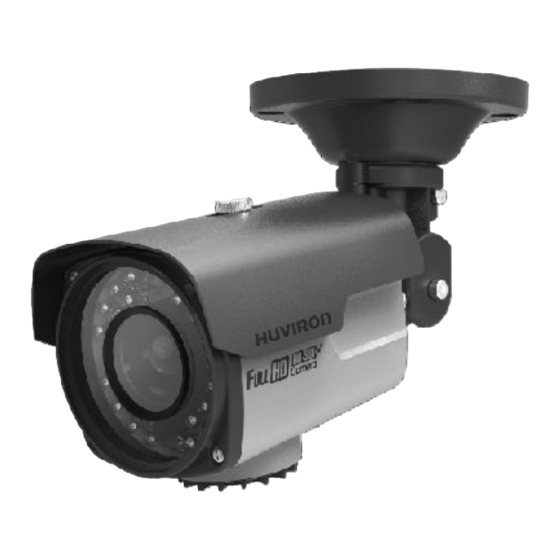
HD-SDI CAMERA
SK-P461(D)/HD21
MANUAL
CAUTION
1. Please study the instruction manual before your applications and
keep it for your future reference.
2. Do not flash LED light directly on the eyes when LEDs are on.
3. Do not install the camera on a unstable surface.
It will cause falling or other hazards.
4. Do not use improper power, it could cause fire or electric shock.
(Use the AC adaptor 12V DC regulated, 1.5A)
5. Do not disassemble or re-model the camera, it could cause fire,
electric shock or other hazards.
6. Stop using the camera when you find a malfunction like smoke or
unusual heat, it could cause fire or electric shock.
7. Due to the possibility of water leakage, do not cut or peel off the
cable. In case you cut or peel off the cable, the warranty will be void.
8. Do not adhere dangerous articles to the camera.
8. Do not adhere dangerous articles to the camera.
9. Please use the camera unit within given temperature and electricity limit.
10. Please make sure that installation should be done by qualified
service person only.
11. Do not disassemble the unit by yourself. When there is problem
with the unit please contact after-sale service center or the shop
where you bought.
FEATURE
1. 1/2.9" SONY CMOS
2. Full HD Resolution
3. DAY & NIGHT Function
4. WDR (Wide Dynamic Range)
5. 3D DNR Function
6. Privacy mask function 28 area
7. On Screen Display menu
8. Intelligent motion detection 4 area
9. Output : HD-SDI/CVBS
10. Protocol RS-485 : PELCO - P, PELCO - D
11. This camera is incredibly flexible to install with its 3-axis camera
All manuals and user guides at all-guides.com
construction, which makes the camera ceiling, wall or slope
mountable
12. This product is "waterproof" to resist rain, snow and other weather
factors(IP68)
13. 30M range visible in total darkness with 40pcs of IR LEDs.(Indoor)
If the product is to be put out of operation definitively,
take it to a local recycling plant for a disposal which
is not harmful to the environment.
ACCESSORIES
ANCHOR 6x30, 4EA
SCREW 4x35 TP1 PAN SUS, 4EA
WRENCH 3mm L TYPE, 1EA
SUNVISOR BOLT, 1EA
Extra video output cable for installation ,
1EA(option)
HOW TO INSTALL
1. Make a hole of Ø25mm in diameter for passing cable.
2. Drill four holes on the wall or ceiling and insert the anchors.
3. Arrange the cables and fix the screws.
ANCHOR 6x30, 4EA
SCREW Tp1 4x35, 4EA
BOLT
SUNVISOR
5-A. Loosen the bolt A, B, C-1 and C-2 by using the 3mm wrench
included.
6-A. Face the direction of the camera to monitor.
7-A. Tighen the bolt A, B, C-1, C-2 to complete adjustment.
Type - A
CAP
* Warnin g : This cap must screw tightly.
5-B. Loosen the bolt by using the 3mm wrench included.
6-B. Face the direction of the camera to monitor.
7-B. Tighten the bolt to complete adjustment.
Type
-
Ø6
Ø25
DIMENSION
Type
-
Type
-
WRENCH
BOL T C-1
BOL T A
BOL T C-2
BOLT B
B
BOLT
WRENCH
80.4
A
101.7
80.4
B
101.7
206.7
205.9
Advertisement

Related Manuals for Huviron SK-P461D/HD21


Summary of Contents for Huviron SK-P461D/HD21
- Page 1 All manuals and user guides at all-guides.com HD-SDI CAMERA construction, which makes the camera ceiling, wall or slope 5-A. Loosen the bolt A, B, C-1 and C-2 by using the 3mm wrench mountable included. SK-P461(D)/HD21 6-A. Face the direction of the camera to monitor. 12.
- Page 2 All manuals and user guides at all-guides.com 2. OSD menu structure CAMERA / STRUCTURE SPECIFICATION SK-P461D/HD21 Function Function Sub menu Summary Sub menu Summary VIDEO setting menu setting menu Image Sensor 1/2.9" SONY CMOS Adjust brightness level 0(dark) ~ 20(bright) BRIGHTNESS Setup Camera ID and baud-rate.