Table of Contents
Advertisement
Available languages
Available languages
Bench
Oscillating
Spindle Sander
Ponceuse
d'établi
à broche
oscillante
Lijadora de eje
oscilante de
banco
A20932_04-23-07_Rev. 2
Copyright © 2007 Delta Machinery
Instruction Manual
Manuel d'utilisation
Manual de instrucciones
FRANÇAIS (12)
ESPAÑOL (22)
www.deltamachinery.com
(800) 223-7278 - US
(800) 463-3582 - CANADA
SA350K
Advertisement
Table of Contents

Related Manuals for Delta SA350K


Summary of Contents for Delta SA350K
- Page 1 Spindle Sander Ponceuse d’établi à broche oscillante Lijadora de eje oscilante de banco A20932_04-23-07_Rev. 2 Copyright © 2007 Delta Machinery Instruction Manual Manuel d’utilisation Manual de instrucciones FRANÇAIS (12) ESPAÑOL (22) www.deltamachinery.com (800) 223-7278 - US (800) 463-3582 - CANADA...
-
Page 2: Table Of Contents
If you have any questions relative to its application DO NOT use the product until you have written Delta Machinery and we have advised you. Contact us online at www.deltamachinery.com or by mail at Technical Service Manager, Delta Machinery, 4825 Highway 45 North, Jackson, TN 38305. -
Page 3: General Safety Rules
FOR YOUR OWN SAFETY, READ THE INSTRUCTION MANUAL BEFORE OPERATING THE MACHINE. Learning the machine’s application, limitations, and specific hazards will greatly minimize the possibility of accidents and injury. WEAR EYE AND HEARING PROTECTION. ALWAYS USE SAFETY GLASSES. Everyday eyeglasses are NOT safety glasses. -
Page 4: Additional Specific Safety Rules
11. TO REDUCE THE RISK OF FIRE, do not sand or polish magnesium. 12. HOLD WORKPIECE FIRMLY ON THE SANDER TABLE. To prevent loss of control use a solid grip. 13. INSPECT MATERIALS FOR DEFECTS. Knots and splinters can be thrown from the machine with great force. -
Page 5: Power Connections
POWER CONNECTIONS A separate electrical circuit should be used for your machines. This circuit should not be less than #12 wire and should be protected with a 20 Amp time lag fuse. If an extension cord is used, use only 3-wire extension cords which have 3-prong grounding type plugs and matching receptacle which will accept the machine’s plug. -
Page 6: Functional Description
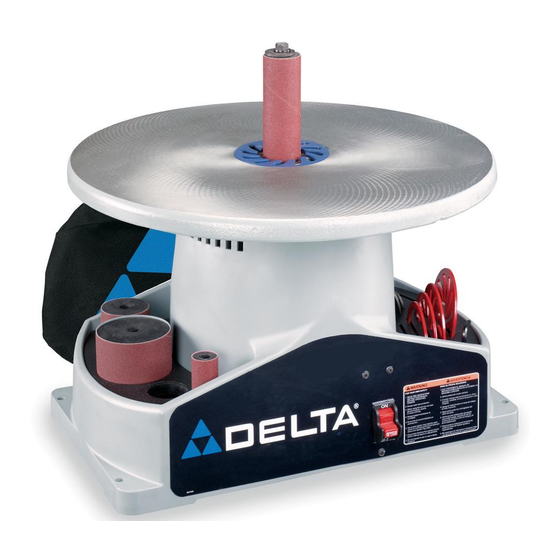
FUNCTIONAL DESCRIPTION FOREWORD The Delta Model SA350K has a large 18" diameter cast- iron table to support large workpieces. This machine has a heavy-duty motor assembly with a 1/4 H.P. direct drive induction motor for quiet, and smooth operation. -
Page 7: Assembly
For your own safety, do not connect the machine to the power source until the machine is completely assembled and you read and understand the entire instruction manual. Assembly for this machine takes less than 1/2 hour. 1. Carefully turn the machine upside down. Place it on a clean, firm, supporting surface. 2. - Page 8 4. Place the table insert (G) Figs. 7 & 8 over the abrasive sleeve (C) and in the cut-out on the table. NOTE: Arrows on the table insert indicate the top surface. 5. Use the compartments (H) Fig. 8 on the sides of the sander for storing workpieces or accessories. ATTACHING THE DUST BAG To attach the dust bag (B) Fig.
-
Page 9: Operation
OPERATIONAL CONTROLS AND ADJUSTMENTS STARTING AND STOPPING THE SANDER The on/off switch (A) Fig. 12 is located on the sander base. To turn the sander “ON”, move the switch up to the “ON” position. To turn the sander “OFF”, move the switch down to the “OFF”... -
Page 10: Troubleshooting
For assistance with your machine, visit our website at www.deltamachinery.com for a list of service centers or call the DELTA Machinery help line at 1-800-223-7278 (In Canada call 1-800-463-3582). KEEP MACHINE CLEAN Periodically blow out all air passages with dry compressed air. All plastic parts should be cleaned with a soft damp cloth. -
Page 11: Service
To register your tool for warranty service visit our website at www.deltamachinery.com. Delta will repair or replace, at its expense and at its option, any new Delta machine, machine part, or machine accessory which in normal use has proven to be defective in workmanship or material, provided that the customer returns the product prepaid to a Delta factory service center or authorized service station with proof of purchase of the product within two years and provides Delta with reasonable opportunity to verify the alleged defect by inspection. -
Page 12: Français
LES INSTRUCTIONS IMPORTANTES DE SURETE Lire et comprendre toutes instructions d'avertissements et opération avant MESURES DE SÉCURITÉ - DÉFINITIONS Ce guide contient des renseignements importants que vous deviez bien saisir. Cette information porte sur VOTRE SÉCURITÉ et sur LA PRÉVENTION DE PROBLÈMES D’ÉQUIPEMENT. Afin de vous aider à identifier cette information, nous avons utilisé... - Page 13 Des dommages à la machine et/ou des blessures pourraient s’ensuivre. 13. UTILISER LES ACCESSOIRES RECOMMANDÉS. L’utilisation d’accessoires non recommandés par Delta peut endommager la machine et blesser l’utilisateur. L’inobservation de ces règles peut conduire à des blessures graves. 14. UTILISER LE CORDON PROLONGATEUR APPROPRIÉ.
- Page 14 RÈGLES SPÉCIFIQUES ADDITIONNELLES DE SÛRETÉ 1. NE PAS FAIRE FONCTIONNER CET APPAREIL avant qu’il ne soit entièrement assemblé et installé conformément à ces directives. Un appareil mal assemblé peut provoquer des blessures graves. 2. DEMANDER CONSEIL à un superviseur, à un instructeur ou à...
- Page 15 RACCORDEMENTS ÉLECTRIQUES Un circuit électrique séparé doit être utilisé pour les machines. Les fils de ce circuit doivent être au moins de calibre 12. Ce circuitdoit être protégé par un fusible temporisé de 20 A. Si on utilise un cordon prolongateur, ce cordon doit être à trois fils, avoir unefiche à...
- Page 16 AVANT-PROPOS Le modèle SA350K de Delta comporte une grande table de 457,2 mm (18 po) en fonte pour soutenir les grandes pièces. Cet appareil est doté d’un moteur à induction robuste en prise directe de 1/4 HP pour un fonctionnement silencieux et régulier.
- Page 17 Pour votre propre sûreté, ne reliez pas la machine à la source d'énergie jusqu'à ce que la machine soit complètement assemblée et vous lisez et comprenez le manuel d'instruction entier. OUTILS NÉCESSAIRES POUR L’ASSEMBLEE L'ESTIMATION DE TEMPS D'ASSEMBLEE L’Assemblée pour cette machine prend moins de 30 minutes. Mettre l’appareil à...
- Page 18 ASSEMBLER LE CYLINDRE DE CONTACT, LE MANCHON ABRASIF ET LA PLAQUE AMOVIBLE FIG. 7 2-3/8" Placer la rondelle de diamètre (A) sur de broche. Sélectionner le manchon abrasif approprié pour la pièce. Glisser ce manchon abrasif (C), fig. 5 et 6, sur le cylindre de contact correspondant (D), fig. 5 et 6. Positionner cet assemblage sur l’adaptateur de broche.
- Page 19 L'OPERATION CONTROLE DE LE ET LES DÉMARRAGE ET ARRÊT DE LA MACHINE L'interrupteur (on-off) (A) fig. 12 est localisée sur la base. Pour allumer la ponceuse, déplacer le commutateur jusqu'à le « SUR » la position. Pour éteindre la ponceuse, descendre le commutateur au «...
- Page 20 Pour l'assistance avec votre outil, visiter notre site web à www.deltamachinery.com pour une liste de centres de maintenance ou appeler la ligne d'aide de Delta Machinery à GARDER LA MACHINE PROPRE Dégager régulièrement toutes les conduites d’air avec de l’air comprimé sec. Toutes les pièces en plastique doivent être nettoyées à l’aide d’un chiffon doux humide.
- Page 21 Two Year Limited New Product Warranty Delta will repair or replace, at its expense and at its option, any new Delta machine, machine part, or machine accessory which in normal use has proven to be defective in workmanship or material, provided that the customer returns the product prepaid to a Delta factory service center or authorized service station with proof of purchase of the product within two years and provides Delta with reasonable opportunity to verify the alleged defect by inspection.
-
Page 22: Español
Si usted tiene cualquiera pregunta el pariente a su aplicación no utiliza el producto hasta que usted haya escrito Delta Machinery y nosotros lo hemos aconsejado. La forma en línea del contacto en www. deltamachinery. com o por correoTechnical Service Manager, Delta Machinery, 4825 Highway 45 North, Jackson, TN 38305. -
Page 23: Normas Generales De Seguridad
13. UTILICE ACCESORIOS RECOMENDADOS. La utilización de accesorios y aditamentos no recomendados por Delta podría causar daños a la máquina o lesiones al usuario. 14. UTILICE EL CORDÓN DE EXTENSIÓN ADECUADO. - Page 24 NORMAS ESPECÍFICAS ADICIONALES DE SEGURIDAD Si no se siguen estas normas, el resultado podría ser lesiones personales graves. NO OPERE ESTA MÁQUINA hasta que no esté armada e instalada completamente, según las instrucciones. Una máquina montada de manera incorrecta puede provocar lesiones graves. SOLICITE EL ASESORAMIENTO de su supervisor, su instructor o alguna persona calificada si no está...
- Page 25 CONEXIONES A LA FUENTE DE ALIMENTACIÓN Debe utilizarse un circuito eléctrico independiente para las máquinas. Este circuito debe tener alambre de no menos del No. 12 y debe estar protegido con un fusible de acción retardada de 20 A. Si se utiliza un cordón de extensión, utilice únicamente cordones de extensión de tres alambres que tengan enchufes de tipo de conexión a tierra con tres terminales y un receptáculo coincidente que acepte el enchufe de la máquina.
- Page 26 DESCRIPCIÓN FUNCIONAL PROLOGO El modelo Delta SA350K tiene una gran mesa de hierro fundido de 457 mm (18") para sostener piezas de trabajo de gran tamaño. Esta máquina está equipada con un conjunto de motor para trabajo pesado con un motor de inducción de accionamiento directo, de 1/4 H.P.
- Page 27 Para su propia seguridad, no conecte la maquina a la fuente de energia hasta que la maquina haya sido ensamblada por completo y usted haya leido y entendido completamente el manual del propietario. HERRAMIENTAS DE ENSAMBLAJE REQUERIDAS ESTIMACIÓN DEL TIEMPO DE ENSAMBLAJE La asamblea para esta máquina toma menos de 1/2 hora.
- Page 28 INSTALACIÓN DEL TAMBOR DE LIJADO, EL MANGUITO ABRASIVO Y EL INSERTO DE MESA FIG. 7 Coloque la arandela del diámetro (A) en el eje. Seleccione el manguito abrasivo adecuado para su pieza de trabajo. Deslice ese manguito abrasivo (C) Figs. 5 y 6 sobre el tambor de lijado correspondiente (D) Figs. 5 y 6. Coloque este ensamble sobre el adaptador del eje.
- Page 29 CONTROLES Y AJUSTES OPERACIONALES ARRANCANDO Y DETENIENDO LA MAQUINA El en/lejos cambia (A) Fig. 12 son localizados en la base. Para prender la lijadora, mueva el interruptor hasta el "EN" la posición. Para apagar la lijadora, mueve el interruptor hacia abajo al "DE" la posición. FIJANDO EL INTERRUPTOR EN LA POSICION DE APAGADO IMPORTANTE: Cuándo la herramienta no es adentro uso, el...
- Page 30 Para obtener asistencia para su máquina, visite nuestro sitio Web en www.deltamachinery.com para tener acceso a una lista de centros de servicio o llame a la línea de ayuda de Delta Machinery al 1-800-223-7278. (En Canadá, llame al 1-800-463-3582.) MANTENGA LA MÁQUINA LIMPIA Periódicamente sople por todas las entradas de aire con aire comprimido seco.
- Page 31 Una línea completa de accesorios está disponible de su surtidor de Porter-Cable • Delta, centros de servicio de la fábrica de Porter- Cable • Delta, y estaciones autorizadas delta. Visite por favor nuestro Web site www.deltamachinery.com para un catálogo o para el nombre de su surtidor más cercano.
- Page 32 CONTRACTOR SUPERDUTY ® , Contractor's Saw ® , Delta ® , DELTA ® , Delta Industrial ® , DELTA MACHINERY & DESIGN ™ , Delta Shopmaster and Design ® , Delta X5 ® , Deltacraft ® , DELTAGRAM ® , Do It. Feel It. ® , DUAL LASERLOC AND DESIGN ® , EASY AIR ® , EASY AIR TO GO ™ , ENDURADIAMOND ®...
Need help?
Do you have a question about the SA350K and is the answer not in the manual?
Questions and answers