Table of Contents
Advertisement
Quick Links
Advertisement
Table of Contents

Related Manuals for Ripley Miller UPM100


Summary of Contents for Ripley Miller UPM100
- Page 1 UPM100 Optical Power Meter User Guide UPM100 User Guide Page 1...
-
Page 2: Table Of Contents
Contents Introduction Device Overview Important Safety Information Setting a Reference Basic Testing Maintenance Integration with Windows InSpec Integration with Android InSpec Certifications and Contact Information UPM100 User Guide Page 2... -
Page 3: Introduction
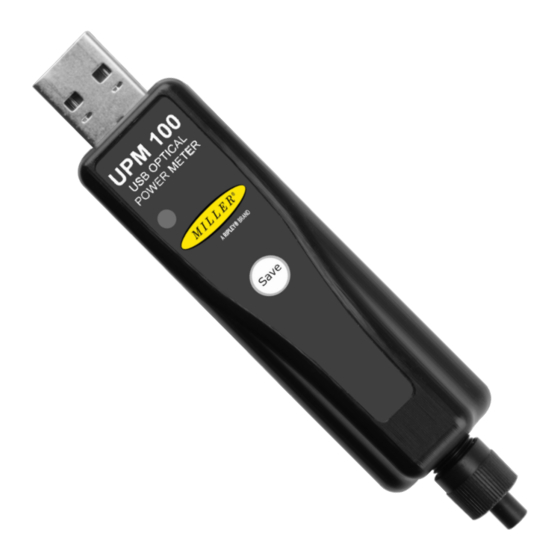
Introduction The UPM100 Optical Power Meter is an ultra low cost, and compact power meter used for verifying both absolute and relative power across any given fiber. This document will serve as an overview of the major features and functions of the device and will offer tips for trouble shooting common issues in optical networks. -
Page 4: Important Safety Information
Important Safety Information Read and understand all of the instructions and safety information in this manual before operating this tool. Laser/LED Hazard Avoid eye exposure to open fiber connectors and interfaces when working with fiber systems. They may be connected to a live laser source. -
Page 5: Setting A Reference
To set a reference first connect the UPM100 and companion light source as shown below. Ensure the unit is in dBm and you are reading the correct output power for the laser/LED you are using (Ripley Lasers are calibrated at -5 (or -8 with tone on) and LEDs are calibrated at -22 (or 25 with tone on)). -
Page 6: Maintenance
Care must be taken to avoid objects that may damage the glass surface of the detector mount. if scratches or breaks occur on the surface, please contact Ripley for proper repair and re-calibration. Integration with Windows InSpec... - Page 7 the live information from the UPM100 Main screen is displayed on the right side of the window. you can use the buttons on the bottom of the screen t oset reference, and save/delete readings. if you click where “dB” is clicked you can select a different mode. the wavelength is changed the same way. Mode Click to Change the selected Mode...
- Page 8 The saved data that is saved can be edited for final reporting in the Reports tab. Delete Delete selected reading(s). Edit Edit multiple readings. UPM100 User Guide Page 8...
- Page 9 Double-click on any one reading to edit the “ID” column for that reading. Or select the reading and click “Edit Selected”. The ID column changes are shown immediately. Use the CTRL key on the computer keyboard and click multiple readings to select multiple readings for editing.
- Page 10 To choose or create color codes, click Settings>Color Codes. Click the dropdown box to select from preset color codes, or click “New” to create your own color codes which can be used in the future. When using a Custom option, enter the color codes in the white space on the left side of the window. Each line represents an indexed location.
- Page 11 To change the Pass/Fail column, click Settings>Min/Max. Loss minimum is usually set to 0. A maximum of 3 is standard for most fiber tests. Set Min and Max to any values as needed, then click “Apply”. Any readings which fall within the Min/Max range provided will be given a PASS designation. Readings that do not fall within the range will be given a FAIL designation.
- Page 12 “Reset to Defaults” to return to this arrangement of information. Enter all info as needed and click Save to have the information appear on reports. The Ripley Miller logo will appear on reports. Click Browse to choose a different logo to place on the report, if desired.
-
Page 13: Integration With Android Inspec
Integration with Android InSpec Plug the UPM100 into an android based device using an adapter while running the InSpec app will allow you to use the device with that device. Open the InSpec app on your Android device. Touch the “OPM Page” button to access the OPM page of the app. - Page 14 The diagram below shows the features of the main screen of the InSpec app. All data is saved to the App not the UPM100. Reading Display All info from the UPM100 is dB/dBm displayed in this area. Touch this button to switch between supported modes Wavelength Selector Touch this button to choose...
- Page 15 Touch a saved reading to select it from the list; it will be highlighted. Touch Edit Selected to edit that reading. Use the onscreen keyboard to enter a new name, then select OK. The new name will appear in the “Name ID” column. Any reading in the list can be deleted by selecting it and touching Delete Selected.
- Page 16 To make and send a report from the InSpec app, touch the icon in the top left of the screen and select Reports from the flyout menu. NOTE: the UPM100 data stream will disconnect automatically when the Reports screen is accessed. To restart the data stream and continue testing, follow the connection instructions on page 19.
- Page 17 Certifications,Accessories, and Contact Info Calibration Certificates The UPM100 comes calibrated and should be recalibrated every 2 years. Included with the UPM100 is a calibration certificate, and free recalibration within 2 years of the date of purchase. To start the calibration process simply call or email technical support! Warranty The UPM100 comes with a 2 year warranty for any manufacturer defects or damage due to reasonable use.
-
Page 18: Certifications And Contact Information
• Consult the dealer or an experienced radio/TV technician for help. Contact Support ontact us with any questions pertaining to this or any other Ripley product. Call Us: Email Us: (603) 524-8350 tech.support@odm.ripley-tools.com Visit Us Online: www.ripley-tools.com...
Need help?
Do you have a question about the Miller UPM100 and is the answer not in the manual?
Questions and answers