D-Link DES-1228 User Manual
24-port 10/100mbps web-smart switch with 4-port 10/100/1000base-t and 2-port combo sfp
Hide thumbs
Also See for DES-1228:
- Reference manual (306 pages) ,
- Manual (69 pages) ,
- Quick installation manual (10 pages)

Related Manuals for D-Link DES-1228


Summary of Contents for D-Link DES-1228
- Page 1 DES-1228 24-Port 10/100Mbps Web-Smart Switch with 4-Port 10/100/1000Base-T and 2-Port Combo SFP User Manual V1.00...
-
Page 2: Table Of Contents
TABLE OF CONTENTS About This Guide... 1 Purpose ... 1 Terms/Usage ... 1 Introduction... 2 Gigabit Ethernet Technology ... 2 Fast Ethernet Technology ... 3 Switching Technology ... 3 Features... 4 Technical Specifications ... 5 Unpacking and Installation ... 9 Unpacking... - Page 3 SmartConsole Utility Features ... 20 Menu Toolbar... 20 Discovery List... 22 Monitor List ... 23 Device Setting... 25 Web-based Utility ... 27 Login... 27 Tool Menu... 29 Setup Menu ... 30 System > System Setting ... 31 System > Trap Setting... 32 System >...
- Page 4 Monitoring > Statistics... 54...
-
Page 6: About This Guide
ABOUT THIS GUIDE Thank you and congratulations on your purchase of the DES-1228 24- Port 10/100Mbps Fast Ethernet with 4-Port 10/100/1000Base-T and 2- Port Combo SFP Web-Smart Switch. This device integrates 1000Mbps Gigabit Ethernet, 100Mbps Fast Ethernet and 10Mbps Ethernet network capabilities in a highly flexible package. -
Page 7: Introduction
INTRODUCTION This chapter will describe the features of the DES-1228 and provide some background information about Ethernet/Fast Ethernet/Gigabit Ethernet switching technology. Gigabit Ethernet Technology Gigabit Ethernet is an extension of IEEE 802.3 Ethernet utilizing the same packet structure, format, and support for CSMA/CD protocol,... -
Page 8: Fast Ethernet Technology
Switching Technology Another approach to push beyond the limits of Ethernet technology is the development of switching technology. A switch bridges Ethernet Among them, 100BASE-T (Fast... -
Page 9: Features
Ethernet or Fast Ethernet LAN segments. Switching is a cost-effective way of increasing the total network capacity available to users on a local area network. A switch increases capacity and decreases network loading by dividing a local area network into different segments, which won’t compete with each other... -
Page 10: Technical Specifications
♦ Supports Static MAC setting ♦ D-Link Safeguard Engine support ♦ Supports Simple Network Management Protocol(SNMP) ♦ MIB support for: RFC1213 MIB II, Private MIB ♦ Supports DHCP client ♦ Supports Port setting for Speed, Duplex Mode ♦ Easy configuration via Web Browser ♦... - Page 11 SDRAM for CPU Flash Memory Port Functions Combo ports in the front panel 8M Bytes Prom 2M Bytes - 24 x 10/100BaseT ports Compliant with the following standards: 1. IEEE 802.3 compliance 2. IEEE 802.3u compliance 3. Support Full and Half Duplex operations - 2 Combo 1000Base-T/SFP ports -1000Base-T/SFP ports compliant to the following standards:...
- Page 12 1000Mbps Copper ports in the front panel Chassis Dimensions Reset button on the front panel Physical & Environment 6. DEM-211 (100BASE-FX), up to 2km, Multi-Mode 7. DEM-210 (100BASE-FX), up to 15km, Single-Mode -WDM Transceivers Supported: 1. DEM-330T (TX-1550/RX-1310nm), up to 10km, Single-Mode 2.
- Page 13 AC input Operation Temperature Storage Temperature Humidity Power consumption 18.35(watts) Heat Dissipation MTBF Emission (EMI) and Safety Certifications EMI-EMC Compliance: FCC class A, CE Class A, VCCI Class A Safety Compliance: cUL, UL 100~240 VAC, 50/60Hz Internal universal power supply 0~40°C -10~70°C Operation: 10%~90% RH...
-
Page 14: Unpacking And Installation
Installation The site chosen for installation greatly affects the Web-Smart Switch’s performance. When installing, consider the following points: Install the Switch in a fairly cool and dry place. See Technical Specifications for the acceptable temperature and humidity operating ranges. -
Page 15: Rack Mounting
Install the Switch in a site free from strong electromagnetic field generators (such as motors), vibration, dust, and direct exposure to sunlight. Leave at least 10cm of space to the front and rear of the Switch for ventilation. Install the Switch on a sturdy, level surface that can support its weight, or in an EIA standard-size equipment rack. -
Page 16: Connecting Network Cable
Figure 3 – Mount the Switch in the rack or chassis Connecting Network Cable The DES-1228 has 24 ports that support 10/100Mbps Fast Ethernet; it also has 4 10/100/1000Base-T Ports and 2 Combo SFPs. Each port on the DES-1228 supports Auto-MDI/MDI-X. Auto- MDI/MDI-X is a feature that eliminates the need for worrying about using either a standard or crossover cable—you can use... -
Page 17: Ac Power
AC Power The DES-1228 can be used with AC power supply 100~240V AC, 50~60Hz. The power switch is located at the rear of the unit adjacent to the AC power connector and the system fan. The switch’s power supply will adjust to the local power source automatically and may be turned on without having any or all LAN segment cables connected. -
Page 18: Identifying External Components
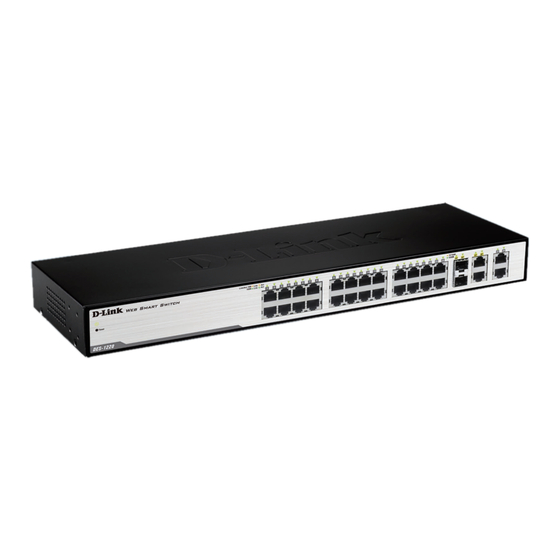
Comprehensive LED indicators display the status of the switch and the network (see the Understanding LED Indicators section). 10/100 BASE-TX Twisted Pair Ports (Port 1~24) The DES-1228 is equipped with 24 Fast Ethernet twisted pair ports that are auto negotiable 10/100Mbps and also support auto... -
Page 19: Rear Panel
10/100/1000 BASE-T / Mini GBIC Combo Ports (Option Port 25~26) The Switch is also equipped with two combo 10/100/1000 Base-T / Mini GBIC ports, which supports 1000BASE-SX/LX and 100Base- FX Mini GBIC module for fiber uplinks. -
Page 20: Understanding Led Indicators
Figure 6 – LED indicators of the Switch Power and System LEDs Power LEDs When the Power LED light is on, the Switch is receiving power. When the Power LED light is off, the power cord is not improperly connected. - Page 21 Ports 1 ~ 24 Status LEDs Link/Act When the Link/Act LED light is on, the respective port is successfully connected to an Ethernet network. Blinking When the Link/Act LED is blinking, the port is transmitting or receiving data on the Ethernet network. No link.
- Page 22 Link/Act When the respective combo port is connected to a network, the Link/Act LED light is on. Blinking When the LED is blinking, the respective combo port is transmitting or receiving data on a network. No link. 1000Mbps When the 1000Mbps LED light’s on, the respective port is connected to a 1000Mbps Gigabit Ethernet network.
- Page 23 Blinking When the Link/Act LED is blinking, the port is transmitting or receiving data on the Ethernet network. No link. 1000Mbps When the 1000Mbps LED light is on, the respective port is connected to a 1000Mbps Gigabit Ethernet network. When the respective port is connected to a 10Mbps Ethernet or 100Mbps Fast Ethernet network, or no link.
-
Page 24: Configuration
CONFIGURATION Through a web browser, the features and functions of the DES-1228 Switch can be configured for optimum use. Supported web browsers The embedded Web-based Utility currently supports the following web browsers: • Microsoft Internet Explorer ver. 6.0, 5.5 •... -
Page 25: Smartconsole Utility Features
SmartConsole Utility Features The SmartConsole Utility is divided into four parts, a Menu Toolbar of functions at the top, Discovery List, Monitor List, and Device Setting. Menu Toolbar The Menu Toolbar in the SmartConsole Utility has four main tabs, File, View, Option, and Help. File includes: Monitor save, Monitor save as, Monitor load and Exit. - Page 26 Group Interval establishes the intervals (in seconds) that the Web-Smart Switch will be discovered in the SmartConsole Utility Discovery List. NOTE: If the Group Interval is set to 0, IGMP snooping must be disabled or else the Web-Smart Switch will not be discovered.
-
Page 27: Discovery List
Help includes: information About the SmartConsole Utility, such as the software version. Discovery List This is the list where all Web-Smart devices on the network are discovered. By pressing the Discovery button, all the Web-Smart devices are listed in the discovery list. Double click or press the Add to monitor list button to select a device from the Discovery List and add it to the Monitor List. -
Page 28: Monitor List
DHCP: uses a client/server model to obtain lease of an IP address from a DHCP server as part of the network boot process. Location: Shows the appointed description for the device location. Trap IP: Shows the IP where the Trap information will be sent. Subnet Mask: Shows the Subnet Mask set of the device. - Page 29 The symbol “ ” represents a new trap signal, and will disappear after the event record is reviewed (clicked). Note: To receive Trap information, the switch must be configured with Trap IP and Trap Events, available from the Trap Setting menu.
-
Page 30: Device Setting
Delete Item: Deletes the device from the Monitor List. Device Setting Function buttons of the Device Setting section provide several options. Configuration Setting: In the Configuration Setting, the following settings are available: Product Name, MAC Address, IP Address, Subnet Mask, Gateway, Set Trap to (Trapping IP Address), System name, Location, Password and DHCP ON/OFF (OFF is default).(?) After selecting the device from the Discovery List or Monitor List and pressing Configuration Setting, modify the information necessary and... - Page 31 Utility supports, see Supported web browsers on page 19. DHCP Refresh: select a device in the Monitor List and press the “DHCP Refresh”, and enter the password (if applicable) to trigger the Web-Smart Switch to request an IP address from a DHCP Server. Figure 13 – DHCP Refresh...
-
Page 32: Web-Based Utility
Web-based Management The DES-1228 Web-Smart Switch has a web browser GUI interface for configuring the Switch through a web browser. To see the list of web browsers the Web-based Utility supports, see Supported web browsers on page 19. A network administrator can manage, control and monitor the switch from the local LAN. - Page 33 Once you have successfully logged in, the device status page will appear. In the top right corner the user name (default ‘admin’) is displayed with the IP address of the Switch. Below this is a Logout option for use when the session is complete.
-
Page 34: Tool Menu
Configuring Backup & Restoration, Firmware Backup and Upload, and System Reboot. Figure 17 – Tool Menu Reset: Provides a safe reset option for the Switch. All configurations will be reset to default. Figure 18 – Tool Menu > Reset Configure Backup and Restore: Allows the current configuration settings to be saved to a file (not including the password), and if necessary, to be restored from a backup. -
Page 35: Setup Menu
Firmware Backup and Upload: Allows for the firmware to be saved, or for an existing firmware file to be uploaded to the Switch. Figure 20 – Tool Menu > Firmware Backup and Upload System Reboot: Provides a safe way to reboot the system. Ensure the configuration has been saved, or all the changes you just made may be lost after system reboot. -
Page 36: System > System Setting
System > System Setting The System Setting includes IP Information and System information. There are two ways for the switch to attain IP: Static and DHCP When using static mode, the IP Address, Subnet Mask and Gateway can be manually configured. When using DHCP mode, the Switch... -
Page 37: System > Trap Setting
System > Trap Setting By configuring the Trap Setting, it allows SmartConsole Utility to monitor specified events on this Web-Smart Switch. By default, Trap Setting is Disabled. When the Trap Setting is Enabled, enter the Destination IP address of the managing PC that will receive trap... -
Page 38: System > Port Setting
System Event: Monitors the system’s trapping information. Device Bootup: Traps system boot-up information. Illegal Login: Traps events of incorrect password logins, recording the IP of the originating PC. Fiber Port Events: Monitors the fiber port status. Link Up/Link Down: Traps fiber connection information. Twisted pair Port Events: Monitors the copper cable port status. - Page 39 (“From Port” and “To Port”), the Speed can be set for all such ports, by clicking Apply. To refresh the information table to view the latest Link Status and Priority, press the Refresh button. Speed: Gigabit Fiber connections can operate in Forced Mode settings (1000M Full), Auto, or Disable.
-
Page 40: System > Snmp Setting
Community Setting: In support of SNMP version 1, the Web-Smart Switch accomplishes user authentication by using Community Settings that function as passwords. The remote user SNMP application and the Switch SNMP must use the same community string. SNMP packets from a station that are not authenticated are ignored (dropped). - Page 41 MIB objects. Trap Setting: Traps are messages that alert network personnel of events that occur on the Switch. Such events can be as serious as a Figure 26 – System > SNMP Setting...
-
Page 42: System > Password Access Control
(someone accidentally turned the Switch OFF), or less serious events such as a port status change. The Switch can generate traps and send them to the trap recipient (i.e. network administrator). Setting up a Trap: Select Enable, enter a Trap Name (i.e. Trap Name must be selected from a Community Name), add the IP of the device to be monitored, and choose the event(s) to trap. - Page 43 (multimedia applications such as video conferencing), and therefore help to simplify network management by allowing users to move devices to a new VLAN without having to change any physical connections. The IEEE 802.1Q VLAN Configuration page provides powerful VID management functions. The original settings have the VID as 01, named “default”, and all 28 ports as “Untagged”...
- Page 44 Figure 29 – Configuration > 802.1Q VLAN > Add VID Figure 280 – Configuration > 802.1Q VLAN > Example VIDs Figure 291 – Configuration > 802.1Q VLAN > VID Assignments...
-
Page 45: Configuration > Trunking
Figure 302 – Configuration > Trunking NOTE: Each combined trunk port must be connected to devices within the same VLAN group. Configuration > IGMP Snooping With Internet Group Management Protocol (IGMP) snooping, the Web-Smart Switch can make intelligent multicast forwarding... - Page 46 Layer 2 MAC header. IGMP snooping can help reduce cluttered traffic on the LAN. With IGMP snooping enabled globally, the Web-Smart Switch will forward multicast traffic only to connections that have group members attached.
- Page 47 Max Response Time (10-25 sec): The Max Response Time specifies the maximum allowed time before sending a responding report. Adjusting this setting effects the "leave latency", or the time between the moment the last host leaves a group and when the routing protocol is notified that there are no more members.
- Page 48 'RouterPortPurgeInterval' time, the learnt router port entry will be purged. Default is 125 seconds. Leave Timer (0-25 sec): This is the interval after which a Leave message is forwarded on a port. When a leave message from a host for a group is received, a group-specific query is sent to the port on which the leave message is received.
- Page 49 Figure 324 – Configuration > IGMP Router port Settings To view the Multicast Entry Table for a given VLAN, press the View button. Figure 335 – Configuration > IGMP Multicast Entry Table...
-
Page 50: Configuration > 802.1D Spanning Tree
Figure 346 – Configuration > Spanning Tree By default, Spanning Tree is Disabled. If Enabled, the Switch will listen for BPDU packets and its accompanying Hello packet. BPDU packets are sent even if a BPDU packet was not received. Therefore, each link between bridges is sensitive to the status of the link. - Page 51 Root Bridge, the Switch will start sending its own BPDU to all other switches for permission to become the Root Bridge. If it turns out that the Switch has the lowest Bridge Identifier, it will become the Root Bridge. A time interval may be chosen between 6 and 40 seconds.
-
Page 52: Configuration > Port Mirroring
Port Mirroring is a method of monitoring network traffic that forwards a copy of each incoming and/or outgoing packet from one port of the Switch to another port where the packet can be studied. This enables network managers to better monitor network performances. -
Page 53: Qos > 802.1P Default Priority
QoS > 802.1p Default Priority This feature displays the status Quality of Service priority levels of each port, and for packets that are untagged, the switch will assign the priority in the tag depending on your configuration. Figure 368 – QoS > 802.1p Default Priority... -
Page 54: Security > Safeguard Engine
Security > Safeguard Engine D-Link’s Safeguard Engine is a robust and innovative technology that automatically throttles the impact of packet flooding into the switch's CPU. This function helps protect the Web-Smart Switch from being interrupted by malicious viruses or worm attacks. By default this is Enabled. - Page 55 IEEE-802.1X provides a security standard for network access control, especially in Wi-Fi wireless networks. 802.1X holds a network port disconnected until authentication is completed. The switch uses Extensible Authentication Protocol over LANs (EAPOL) to exchange authentication protocol client identity (such as a user name) with the client, and forward it to another remote RADIUS authentication server to verify access rights.
- Page 56 Key: Masked password matching the Radius Server Key. Confirm Key: Enter the Key a second time for confirmation. TxPeriod: Sets the number of seconds that the switch waits for a response to an EAP-request/identity frame from the client before retransmitting the request. Default is 24 seconds.
-
Page 57: Security > Mac Address Table > Static Mac
This page provides two distinct features. The top table provides the ability to turn off auto learning Mac address if a port isn't connected to an uplink Switch (i.e. DHCP Server). By default, this feature is OFF (disabled). The Macs listed on this table may only connect from corresponding ports and VIDs, in order to protect the network from illegal Macs. -
Page 58: Security > Mac Address Table > Dynamic Forwarding Table
Security > Mac Address Table > Dynamic Forwarding Table For each port, this table displays the Mac address of each packet passing through the Switch. To add a Mac address to the Static Mac Address List, click the Add checkbox associated with the identified packet. - Page 59 Monitoring > Statistics The Statistics screen displays the status of each port packet count. Figure 414 – Monitoring > Statistics Refresh: To renew the details collected and displayed. Clear Counter: To reset the details displayed. TxOK: Number of packets transmitted successfully. RxOK: Number of packets received successfully.
- Page 60 Figure 425 – Monitoring > Port Statistics...
Need help?
Do you have a question about the DES-1228 and is the answer not in the manual?
Questions and answers