Table of Contents
Advertisement
Advertisement
Table of Contents

Related Manuals for Ultrawave Hygea 6427


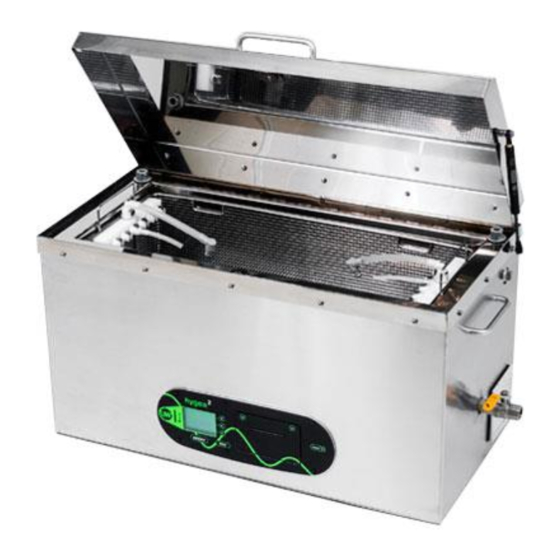
Summary of Contents for Ultrawave Hygea 6427
- Page 1 Hygea 6427 Operator Instruction Manual...
-
Page 5: Table Of Contents
Periodic testing and validation ........................22 Validation Testing Reminder ........................23 Hygea 6427 Cycle validation ........................24 Using the Ultrawave Cycle Validation Software ................... 25 Hygea 6427 good practice ..........................30 Detergent ................................31 Cleaning the Hygea 6427 ..........................31 Compliance with the Control of Noise at Work regulations ............ -
Page 6: Safety Instructions
General use Ensure that the bath contains liquid before you switch it on. Always fill with cold water. This will ensure that the Hygea 6427 always runs its automatic de-gas cycle (see pg 29 for the importance of degassing). Do not place fingers or other parts of the body in the bath. -
Page 7: Installation
1 x Hygea 6427 Operator instruction manual How to install? The Hygea 6427 should be installed on a benchtop (or stand if provided) located close to a drain or sink. Screw the hose connector into the drain valve located on the rear of the unit. -
Page 8: Quick Guide
Switch on the machine via the switch at the rear of the unit, on the left hand side, above the electrical mains lead. If the water is below the minimum temperature, the Hygea 6427 will automatically start degassing and heating the liquid. -
Page 9: Connecting Hollow Instruments
Connecting Hollow Instruments The Hygea 6427 is supplied with an accessory kit, which allows hollow lumen instruments to be connected to the manifold to allow the internal surfaces of the instruments to be cleaned. All tubing connections are made via small stainless steel clips. - Page 10 5. The instrument and hose can then be connected to the manifold. Important: The tubes must be connected whenever the Hygea 6427 is in use; not doing so may cause the pump to burn out. This may invalidate your warranty.
-
Page 11: Operator Instructions
Once plugged in, switch on your Hygea 6427 via the power on/off at the rear of the unit. When the Hygea 6427 is first switched on, the following screen will appear for approximately 5 seconds. While this screen is displayed, the buttons are inoperative. This is normal as the Hygea 6427 is running through its start-up routine and checking all internal systems are working correctly. - Page 12 The Hygea 6427 will automatically start heating and degassing the liquid. When the liquid reaches the required temperature, the following screen will be displayed and the Hygea 6427 will be ready to use. (The actual min. and max. temperatures may be different from those indicated below.)
- Page 13 Step 1 – Selecting the operator The following screen will be displayed: Press the “Up” and “Down” buttons to scroll through the list of operators. The “<” symbol will move up and down the list, indicating which name is selected. Press the “Next”...
- Page 14 Press the “Start” button to confirm that the liquid contains detergent. (See page 30 for information about detergents). The Hygea 6427 will then begin the cleaning cycle. During the cycle, the lid will lock and cannot be opened until the cycle is completed or aborted.
-
Page 15: Starting A Cycle
Starting a cycle The Hygea 6427 is factory pre-set with a total cycle time of 15 minutes. This consists of 3 consecutive cycle stages of 5 minutes and the countdown will display from 5 minutes. During this cycle, the irrigation pump will operate three times, once at the beginning of each cycle stage. - Page 16 On successful completion of the cycle, the following message will be displayed and the data recorded. If the print option is chosen, then at the end of each cycle, the integral printer in the Hygea 6427 will print a ticket showing the details of that cycle: Ultrawave Version: V3-00.
- Page 17 This information can then be transferred to a PC and an electronic copy saved, using the Ultrawave Cycle Validation software supplied on the MC Card. It is recommended that the MC Card is removed and the information transferred to the PC at the end of each clinical session (twice a day).
-
Page 18: The Cleaning Cycle Does Not Start
The cleaning cycle does not start If the screen displays a “Low Fluid” warning as below, the bath will not operate until the unit is filled to the correct level and the detergent dose added. If the screen shows a “Lid Open” warning, the cycle will not start until the lid has been closed. -
Page 19: Cycle Abort Messages
Cycle abort messages If the cycle aborts, the reason will be displayed. The print-out will record a process fail and give the reason, and an audible warning will sound to signal a process fail. To turn off the audible warning, press and hold the “ENTER” button at the bottom of the screen until the warning stops. - Page 20 If the lid is opened during operation, the cleaning cycle will stop and the following screen will be displayed: It is important that you do not turn off the main electricity supply to your Hygea 6427 when it is running a cycle.
- Page 21 If the liquid temperature rises above the pre-set maximum during operation, the cleaning cycle will stop and the following screen will be displayed: If the liquid temperature drops below the pre-set minimum temperature during operations, the cleaning cycle will stop and the following screen will display: If the ultrasonic power drops below a certain point during a cycle, the cycle will stop and the following screen will be displayed: If the cycle aborts, the reason will be displayed and an audible alarm will sound to signal...
-
Page 22: Draining The Tank
Draining the tank The tank is drained via the tap on the right hand side of the unit. DRAIN TAP SHOWN CLOSED Step 1 – Ensure that the drain is either directly over a sink or is connected to a tube, which is placed into a sink. -
Page 23: Changing Printer Paper
Changing printer paper When the paper roll is coming to an end, a red stripe will appear on the paper indicating that new paper rolls need to be ordered. Use the paper feed button to feed through the last few centimetres of paper and fit a new roll. - Page 24 Step 7 – Feed a small amount of paper through the printer by pressing the paper advance button on the right hand side of the printer or the paper button on the panel. The Hygea 6427 is now ready to use.
-
Page 25: Maintenance & Cleaning
• The liquid level sensor located inside the cleaning chamber should be wiped clean every day. If contamination is allowed to build up, the Hygea 6427 may give a false alarm. • All internal surfaces of the Hygea 6427 should be manually cleaned and disinfected daily. -
Page 26: Periodic Testing And Validation
2. Weekly tests (carried out by the operator) Ultrasonic activity test using the Hygea Ultrasonic Activity Meter (available from Ultrawave). If there is no access to the Activity Meter, this test should be replaced by the aluminium foil ablation test. -
Page 27: Validation Testing Reminder
Validation Testing Reminder The Hygea 6427 ultrasonic bath is installed with software which provides a reminder when the annual Validation Testing is due. This Validation Testing should occur at least once every 12 months. Therefore after, 11 months in operation, a reminder will appear on the LCD display warning that the annual validation testing is due. -
Page 28: Hygea 6427 Cycle Validation
Validation is required (see pg. 4 of the Administrator Instruction Manual for more information). If the hard copy print out is chosen, then at the end of each cycle, the integral printer in the Hygea 6427, will print a ticket showing the details of that cycle: Ultrawave Version: V3-00. -
Page 29: Using The Ultrawave Cycle Validation Software
2. Inserting the MC Card In order for data to save to the MC card, the card must be inserted into the port located on the left hand side of the control panel before your Hygea 6427 is switched on. Insert MC... - Page 30 3. Installing the Ultrawave Cycle Validation Software Ultrawave recommend that the cycle data saved on the MC Card is transferred to a PC at the end of every clinical session (twice a day). The supplied MC Card is already installed with the Ultrawave Cycle Validation Software.
- Page 31 USB port on your PC. When the button is pressed, a pop up will display asking if you wish to delete the cycle data off the MC card. Ultrawave recommend that this data is deleted to prevent duplication.
- Page 32 Then press the View Single Cycle Result button to see a ticket showing the data associated with this cycle. If required, this can then be printed by pressing the print button. It is also possible to print data from multiple cycles. This can be done by clicking on multiple cycles in the left hand column.
- Page 33 The Ultrawave Cycle Validation Software allows the operator to search for individual cycle data. In order to use the Search function, simply type the search field in the applicable search box located in the top right of the screen. Search fields...
-
Page 34: Hygea 6427 Good Practice
The time needed to degas the liquid varies depending on the amount of gas present in the liquid and the quantity of water in the tank. Ultrawave recommends a degas period of at least 10 minutes. -
Page 35: Detergent
Packaged in a 1 litre bottle, between 640ml and 1600ml of Ultraclean M2 should be added to the Hygea 6427 every time the bath is refilled. It is recommended that this occurs twice daily. The Safety Data Sheets for these detergents are available on the Ultrawave website www.ultrawave.co.uk. -
Page 36: Compliance With The Control Of Noise At Work Regulations
To help you calculate your workers’ exposure, Ultrawave Ltd publish the noise generated by your ultrasonic cleaner on the Certificate of Test. The figure is that experienced by a worker standing in the operating position. -
Page 37: Temperatures Of Touchable Hot Surfaces
BS EN 13202:2000 gives the recommended maximum surface temperatures for different materials at various exposure times (see below) Your Hygea 6427 ultrasonic bath can be set so that the cleaning fluid is up to 60°C. This means that parts of your ultrasonic cleaner will be above the recommended maximum temperature. -
Page 38: Warranty
Ultrawave will not be responsible for damage or injury caused by incorrect use. To confirm the warranty of your Hygea 6427, complete the enclosed warranty card and return to Ultrawave or send an e-mail with the details of the machine including the serial number to admin@ultrawave.co.uk. Statutory rights are not affected. -
Page 39: Troubleshooting
Troubleshooting Ultrawave have a dedicated Service team who are able to resolve any problems that occur with your Hygea 6427. However, on many occasions, it is possible that the problem can be rectified by the operator. The unit fails to turn... -
Page 40: Returning Equipment To Ultrawave
If you require further information, please call the Ultrawave Service Department on: +44 (0) 845 330 4238. Hygea 6427 Accessories The following items are available from Ultrawave or its agents for use with the Hygea 6427. Ultraclean M2 detergent A non-enzymatic detergent packaged in boxes of 6 x 1 Litre bottles. - Page 41 Hygea 6427, to ensure the machine is performing optimum level testing requirements stipulated guidelines recommendations are met. For information on any of these products or services, contact Ultrawave on: Tel: +44 (0) 845 330 4236 Email: admin@ultrawave.co.uk...
-
Page 42: Notes
Notes __________________________________________________________ __________________________________________________________ __________________________________________________________ __________________________________________________________ __________________________________________________________ __________________________________________________________ __________________________________________________________ __________________________________________________________ __________________________________________________________ __________________________________________________________ __________________________________________________________ __________________________________________________________ __________________________________________________________ __________________________________________________________ __________________________________________________________ __________________________________________________________ __________________________________________________________ __________________________________________________________ __________________________________________________________ __________________________________________________________ __________________________________________________________ __________________________________________________________ __________________________________________________________ __________________________________________________________ __________________________________________________________ __________________________________________________________ __________________________________________________________ __________________________________________________________ __________________________________________________________ __________________________________________________________ __________________________________________________________ __________________________________________________________ __________________________________________________________ __________________________________________________________ __________________________________________________________ __________________________________________________________ __________________________________________________________ __________________________________________________________ __________________________________________________________ __________________________________________________________ __________________________________________________________ __________________________________________________________... - Page 46 Service Tel: +44 (0) 845 330 4238 Fax: +44 (0) 845 330 4231 www.ultrawave.co.uk admin@ultrawave.co.uk service@ultrawave.co.uk Ultrawave baths are manufactured in the United Kingdom. Ultrawave baths are manufactured to exacting standards and conform to international standards. Part number: C60-089-08-02 Date of issue: Feb 2019...
Need help?
Do you have a question about the Hygea 6427 and is the answer not in the manual?
Questions and answers