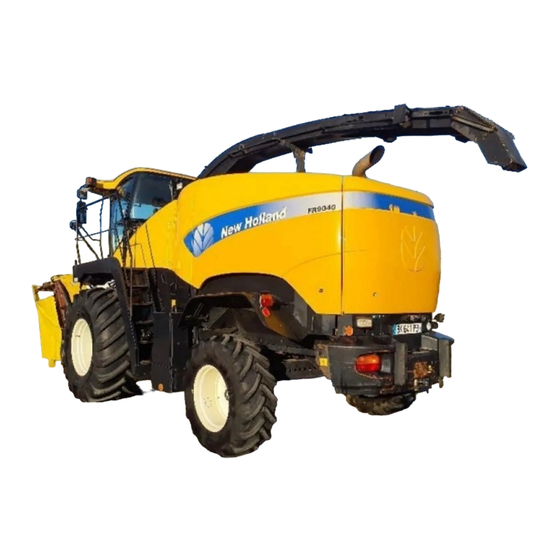
New Holland FR9040 Service Manual
Forage harvester
Hide thumbs
Also See for FR9040:
- Specifications (1 page) ,
- Brochure & specs (28 pages) ,
- Service manual (6 pages)
Advertisement
Table of Contents
- 1 Table of Contents
- 2 Basic Instructions - How to Use and Navigate through this Manual
- 3 Advice
- 4 Foreword
- 5 Note to the Owner
- 6 Safety Rules
- 7 Safety Rules
- 8 Personal Safety
- 9 Basic Instructions
- 10 Torque
- 11 Basic Instructions - Chain Wear Tables - Roller Chains
- 12 Conversion Factors
- 13 General Specification System Protection Data
- 14 Product Identification
- Download this manual
Advertisement
Table of Contents

Subscribe to Our Youtube Channel
Related Manuals for New Holland FR9040


Summary of Contents for New Holland FR9040
- Page 1 SERVICE MANUAL FR9040 / FR9050 / FR9060 / FR9080 / FR9090 Forage Harvester Part number 47500830 English February 2013 Replaces part number 84339558...
- Page 2 Contents INTRODUCTION Engine..................10 [10.001] Engine and crankcase ............. 10.1 [10.218] Fuel injection system .
- Page 3 [29.100] Transmission and steering hydrostatic control ........29.1 [29.218] Pump and motor components.
- Page 4 [55.100] Harnesses and connectors............55.2 [55.640] Electronic modules .
- Page 5 [90.150] Cab ................. 90.1 47500830 06/02/2013 Find manuals at https://best-manuals.com...
- Page 6 INTRODUCTION 47500830 06/02/2013 Find manuals at https://best-manuals.com...
-
Page 7: Table Of Contents
Contents INTRODUCTION Basic instructions - How to use and navigate through this Manual ......3 Advice . -
Page 8: Basic Instructions - How To Use And Navigate Through This Manual
INTRODUCTION Basic instructions - How to use and navigate through this Manual Technical information This manual has been produced by a new technical information system. This new system is designed to deliver technical information electronically through Web delivery (eTim), DVD and in paper manuals. A coding system called SAP has been developed to link the technical information to other Product Support functions, e.g., Warranty. - Page 9 INTRODUCTION How to use this manual This manual is divided into Sections. Each Section is then divided into Chapters. Contents pages are included at the beginning of the manual, then inside every Section and inside every Chapter. An alphabetical Index is included at the end of a Chapter.
- Page 10 INTRODUCTION 63 - Chemical applicators 64 - Chopping 66 - Threshing 68 - Tying/Wrapping/Twisting 69 - Bale wagons 70 - Ejection 71 - Lubrication system 72 - Separation 73 - Residue handling 74 - Cleaning 75 - Soil preparation/Finishing 76 - Secondary cleaning / Destemmer 77 - Seeding 78 - Spraying 79 - Planting...
- Page 11 INTRODUCTION Section contents Section Number Description Maintenance Machine completion and equipment Engine Main gearbox and drive Clutch Transmission Four wheel drive system Front axle system Rear axle system Hydrostatic drive Implement power take-off Brakes and controls This Section covers the central parts of the hydraulic system.
- Page 12 INTRODUCTION Number Description Section Telescopic single arm Booms, dippers and buckets Dozer blade and arm Accessories Tools This Section covers all the main functions and systems related to the body of the machine, including the Platform, cab, bodywork and decals operators cab and the platform.
- Page 13 INTRODUCTION Chapters Each Chapter is identified by a number e.g. Hydraulic Systems - Main check valve- 35.359. The first number is identical to the Section number i.e. Chapter 35.359 is inside Section 35, Hydraulic Systems. The second number is representative of the Chapter contained within the Section. CONTENTS The Chapter Contents lists all the technical data (specifications), functional data (how it works), service data (remove, install adjust, etc..) and diagnostic data (fault codes and troubleshooting) that have been written in that Chapter for...
- Page 14 INTRODUCTION Information units and information search Each chapter is composed of information units. Each information unit has a page reference within that Chapter. The information units provide a quick and easy way to find just the right piece of technical information you are looking for. Example information unit Main control valve - Sectional View (35.359) Information Unit SAP code...
-
Page 15: Advice
INTRODUCTION Advice All repair and maintenance works listed in this manual must be carried out only by qualified dealership personnel, strictly complying with the instructions given; and using, whenever appropriate, the special tools. Anyone who carries out the above operations without complying with the instructions shall be responsible for the subsequent damages. -
Page 16: Foreword
• Do not open the air-conditioning system yourself. It contains gases that should not be released into the atmosphere. Your NEW HOLLAND AGRICULTURE dealer or air conditioning specialist has a special extractor for this purpose and will have to recharge the system properly. -
Page 17: Note To The Owner
INTRODUCTION Note to the Owner Engine repair information: The engine repair information is not contained within this manual. For engine repair information, please refer to the respective Service Manual for the engine type used in your vehicle. Fault Code Resolution (FCR) information: The FCR information is not contained within the paper version of the manual. -
Page 18: Safety Rules
INTRODUCTION Safety rules PRECAUTIONARY STATEMENTS Personal Safety This is the safety alert symbol. It is used to alert you to potential personal injury hazards. Obey all safety messages that follow this symbol to avoid possible injury or death. Throughout this manual and on machine decals, you will find precautionary statements ("DANGER", "WARNING", and "CAUTION") followed by specific instructions. - Page 19 INTRODUCTION Accidents may occur with all types of machine, regardless of how well the machine in question was designed and built. DANGER Shut down the machine, remove key, be sure all moving parts have stopped and all pressure in the systems is relieved before cleaning, adjusting or lubricating the equipment.
- Page 20 INTRODUCTION • Always use suitable hoisting or lifting devices when raising or moving heavy parts. • Keep bystanders away. • Never use gasoline, diesel oil or other inflammable liquids as cleaning agents. Use non-inflammable, non toxic commercially available solvents. • Wear safety goggles with side guards when cleaning parts with compressed air. •...
- Page 21 INTRODUCTION Machine start-up. • Never run the engine in confined spaces that are not equipped with adequate ventilation for exhaust gas extraction. • Never place the head, body, limbs, feet, hands or fingers near rotating and moving parts. Hydraulic systems and fuel injection systems •...
-
Page 22: Safety Rules
INTRODUCTION Safety rules Standard safety precautions Be informed and notify personnel of the laws in force regulating safety, and provide documentation available for consultation. • Keep working areas as clean as possible. • Ensure that working areas are provided with emergency boxes. They must be clearly visible and always contain adequate sanitary equipment. - Page 23 INTRODUCTION • Disconnect the batteries to place a load on them with a load tester. • After any work is performed, verify that the battery clamp polarity is correct and that the clamps are tight and safe from accidental short circuit and oxidation. •...
-
Page 24: Personal Safety
INTRODUCTION Personal safety WARNING Heavy object! ALWAYS use a hoist or get assistance to lift the component. Failure to comply could result in death or serious injury. W0086A WARNING Pressurized system! Only use the bleed screw to bleed air from the fuel system. DO NOT loosen the fuel or injector lines to bleed air. -
Page 25: Basic Instructions
INTRODUCTION Basic instructions SHIMMING For each adjustment operation, select adjusting shims and measure individually using a micrometer, then add up the recorded values. Do not rely on measuring the entire shimming set, which may be incorrect, or the rated value indicated on each shim. - Page 26 INTRODUCTION PROTECTING THE ELECTRONIC/ ELECTRICAL SYSTEMS DURING CHARGING OR WELD- To avoid damage to the electronic/electrical systems, always observe the following: 1. Never make or break any of the charging circuit connections, including the battery connections, when the engine is running. 2.
- Page 27 Only genuine spare parts guarantee the same quality, duration and safety as original parts, as they are the same parts that are assembled during standard production. Only "CNH Original Parts" or " NEW HOLLAND AGRICULTURE Parts" can offer this guarantee.
-
Page 28: Torque
INTRODUCTION Torque Minimum hardware tightening torques (in N m or lb in /lb ft) for normal assembly applica- tions unless otherwise stated NOTICE: Shown below is the suggested initial torque tightening sequences for general applications, tighten in se- quence from item 1 through to the last item of the hardware. The minimum hardware tightening torque on drawings, in specifications etc. - Page 29 INTRODUCTION ZEIL06CS0136F0A ZEIL06CS0135F0A 47500830 06/02/2013...
-
Page 30: Basic Instructions - Chain Wear Tables - Roller Chains
INTRODUCTION Basic instructions - Chain Wear Tables - Roller Chains Chain Wear The individual joints in a roller chain articulate as they enter and leave the sprockets. This articulation results in wear on the pins and bushings. A material is worn away from these surfaces the chain will gradually elongate. ZEIL10GH0003A0B Chains do not "stretch"... - Page 31 INTRODUCTION For example, if 40 pitches (40 pins) of a #40 chain were measured and the result was 523 mm (20.6 in) or greater (using 3 % as the maximum allowable wear), the chain should be replaced. Anything less than 523 mm (20.6 in) would still be acceptable by most industrial standards.
-
Page 32: Conversion Factors
INTRODUCTION Conversion factors Length 1 mm 0.0393 in 1 in 25.4 mm 1 km 0.621 miles 1 miles 1.609 km 3.281 ft 1 ft 0.3048 m Area 1 ha 2.471 ac 1 ac 0.404 US fl oz 1 m² 10.76 ft² 1 ft²... -
Page 33: General Specification System Protection Data
INTRODUCTION General specification System protection data In case of an emergency, in order to prevent the engine or the hydrostatic system damage, or to protect your personal safety, the engine will automatically be shut off, if the elements mentioned in the table below occur: ATTENTION: If it is necessary to move the forage harvester for safety reasons, the engine can be (re-) started after an automatic engine shut off. - Page 34 INTRODUCTION 47500830 06/02/2013...
- Page 35 INTRODUCTION 47500830 06/02/2013...
-
Page 36: Product Identification
INTRODUCTION Product identification EXPLANATION OF MACHINE SERIAL NUMBERS Example : n° 555550001 555550001: The first two digits identify the model within a product line: FR9040 = 51 FR9050 = 52 FR9060 = 53 FR9080 = 54 FR9090 = 55 555550001: The third digit indicates the product line. - Page 37 INTRODUCTION 47500830 06/02/2013...
- Page 38 SERVICE MANUAL Engine FR9040 FR9050 FR9060 FR9080 FR9090 47500830 06/02/2013...
- Page 39 [10.001] Engine and crankcase ............. . . 10.1 FR9040 , FR9050 , FR9060 , FR9080 , FR9090 [10.218] Fuel injection system .
- Page 40 Engine - 10 Engine and crankcase - 001 FR9040 FR9050 FR9060 FR9080 FR9090 47500830 06/02/2013 10.1 [10.001] / 1...
- Page 41 Contents Engine - 10 Engine and crankcase - 001 SERVICE Engine Remove ................. . 3 Install .
- Page 42 Engine - Engine and crankcase Engine - Remove WARNING Fall hazard! Use a sturdy platform when working above ground level. Failure to comply could result in death or serious injury. W0926A WARNING Jack stands can slip or fall over. Dropping, tipping, or slipping of machine or its components is pos- sible.
- Page 43 Engine - Engine and crankcase Remove the rear shielding (3) as explained below: Support the rear shielding (3) using a lifting de- vice of adequate capacity. Disconnect the gas strut (4) from the rear shielding (3). Remove the shielding (6). Remove the hardware (7).
- Page 44 Engine - Engine and crankcase From inside the service area, loosen the lock nut (13) and the nut (12) until the worm (14) is completely free of the worm wheel (15). Manually move the spout to its extreme left or right position.
- Page 45 Engine - Engine and crankcase Drain the coolant from the cooling system. Refer to the Operator's Manual. Disconnect the hoses (20), (21) and (22) from the coolant tank (19). Disconnect the connectors from the coolant tank (19). Remove the coolant tank (19). ZEIL11FR0031A0B For better access to the components, remove the rear wheels as follows:...
- Page 46 Engine - Engine and crankcase Disconnect the connector (26). Remove the wiring harness (25) attached at the top and at the rear frame. ZEIL11FR0033B0B Disconnect the connector (28). Remove the wiring harness (27) attached at the top and the rear frame. ZEIL11FR0034B0B 47500830 06/02/2013 10.1 [10.001] / 7...
- Page 47 Engine - Engine and crankcase Remove the top frame (29) using a suitable lifting device. ZEIL11FR0036A0B Remove the rear frame (30) using a suitable lifting device. Retain the shims for future use. ZEIL11FR0037A0B On the left-hand side, remove the rotating coupler (33) and install a suitable blank plug.
- Page 48 Engine - Engine and crankcase On the left-hand side, remove the air intake ducts (35) and (36). ZEIL11FR0038A0B On the right-hand side, remove the intercooler tube (37). Disconnect the tube (38) from the water tube (39). NOTE: The view of figure 20 is taken from the top. ZEIL11FR0039A0B On the right-hand side, disconnect the connectors (40), (41) and (42) from the hydrostatic traction...
- Page 49 Engine - Engine and crankcase On the right-hand side, remove the hoses (45), (46) and (47). ZEIL11FR0042A0B On the right-hand side, disconnect the connector (49) from the hydrostatic pump feed rolls / attach- ment charge pressure switch (48). ZEIL11FR0043A0B On the right-hand side, remove the hoses (50) and (51) from the reservoir (18).
- Page 50 Engine - Engine and crankcase Protect the filter assembly (55) from damages using appropriate protective covers. Remove the filter assembly (55) from the reservoir (18) and secure it firmly on the engine assembly us- ing straps. ZEIL11FR0046A0B On the right-hand side, remove the hose (56) from the reservoir (18) and the T-fitting (57) from the ther- mostat.
- Page 51 Engine - Engine and crankcase Remove the ejector tube (43) and the intercooler tube (44). ZEIL11FR0049A0Z ZEIL11FR0041A0B Remove the hose (106) from the tube (107). ZEIL11FR0052A0B 47500830 06/02/2013 10.1 [10.001] / 12...
- Page 52 Engine - Engine and crankcase On the left-hand side, remove the hose (108) from the tube (109). ZEIL11FR0053B0Z On the left-hand side, remove the hose (110) from the tube (111). Detach the tube (111) from the engine assembly. ZEIL11FR0054A0B Disconnect the hoses (62) and (63) from the tubes (64) and (65).
- Page 53 Engine - Engine and crankcase Remove the hoses (66) and (67). ZEIL11FR0056A0B On the left-hand side, disconnect the connectors from the air conditioning compressor (68). Disconnect the connector (69) from the ECU (70). ZEIL11FR0057A0B On the left-hand side, disconnect the connectors (71) and (72) from the alternator (73).
- Page 54 Engine - Engine and crankcase On the left-hand side, disconnect the engine central ground connections (77). ZEIL11FR0060A0B On the right-hand side, disconnect the main gearbox lubrication valve hoses (78) and (79) from the tubes (80) and (81). ZEIL11FR0061A0B On the right-hand side, disconnect the hoses (82) and (83) from the oil filter (84).
- Page 55 Engine - Engine and crankcase On the right-hand side, disconnect the hoses (90) and (91) from the T-fitting (92). Remove the T-fitting (92) from the fitting (93) on the CCLS pump. ZEIL11FR0064A0B On the right-hand side, remove the hose (94) from the T-fitting (95).
- Page 56 Engine - Engine and crankcase Remove the reservoir (18) using a suitable lifting de- vice. ZEIL11FR0068B0B 47500830 06/02/2013 10.1 [10.001] / 17...
- Page 57 Engine - Engine and crankcase Make sure that there are no connections between the engine assembly and the frame of the machine. Remove the bolts (113), (114) and (115). ZEIL11FR0075F0B 47500830 06/02/2013 10.1 [10.001] / 18...
- Page 58 Engine - Engine and crankcase Once the engine supports (112) (see fig. 50) are free from the main frame, remove the engine (102) with a suitable lifting device. NOTICE: The valves and the air intake filter are not re- moved. Make sure that the tubes connected to the valves and the air intake filter are not damaged while removing the engine.
- Page 59 Engine - Engine and crankcase Engine - Install WARNING Fall hazard! Use a sturdy platform when working above ground level. Failure to comply could result in death or serious injury. W0926A WARNING Jack stands can slip or fall over. Dropping, tipping, or slipping of machine or its components is pos- sible.
- Page 60 Engine - Engine and crankcase Install and hand tighten the bolts (113), (114) and (115). First tighten the bolts (113). NOTE: Tightening the bolts (113) defines the position of the engine sidewards. Tighten the bolts (114) and (115). ZEIL11FR0075F0B 47500830 06/02/2013 10.1 [10.001] / 21...
- Page 61 This as a preview PDF file from best-manuals.com Download full PDF manual at best-manuals.com...
Need help?
Do you have a question about the FR9040 and is the answer not in the manual?
Questions and answers