Shure MXCW Manual
Tanpa kabel lengkap mikrofleks
Hide thumbs
Also See for MXCW:
- Getting started (2 pages) ,
- Quick setup manual (8 pages) ,
- Manual (93 pages)

Related Manuals for Shure MXCW


Summary of Contents for Shure MXCW
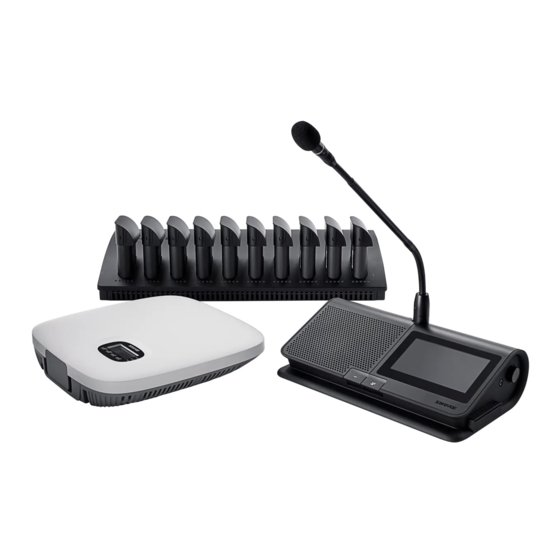
- Page 1 MXCW ® Tanpa Kabel Lengkap Mikrofleks Complete user guide for the MXCW system. Includes installation instructions, specifications, best practices, and troubleshooting. Version: 10.5 (2022-A)
-
Page 2: Table Of Contents
Shure Incorporated Table of Contents Access Point Installation MXCW Tanpa Kabel Lengkap Mikrofleks® Best Practices When Selecting a Location for the Access Point General Description Requirements Checklist Features External Cover for Painting Mounting Options Memulai Mengatur Titik Akses Sistem (MXCWAPT) - Page 3 Setting the Number of Active Speakers Export Log Files Prevent Speak Button Conflicts Firmware Audio Setup and Channel Routing Pemutakhiran Firmware Deskripsi Perutean MXCW Update Firmware untuk Unit Konferensi MXCW Wireless Audio Versi Firmware Gabungan Suara Ruang Sambungan Analog Menggunakan Sistem Kontrol Pihak Ketiga...
- Page 4 Shure Incorporated Sertifikasi Trademarks 4/93...
-
Page 5: Mxcw Tanpa Kabel Lengkap Mikrofleks
The Shure Microflex Complete Wireless (MXCW) system is a conferencing solution that provides a steady, reliable audio experience for up to 125 conference units. MXCW overcomes cable limitations for off-site meetings, flexible meeting rooms, or historic buildings where drilling holes in furniture is impractical. The system features automatic RF interference detection and ®... -
Page 6: Memulai
Shure Incorporated Memulai Mengatur Titik Akses Sistem (MXCWAPT) Sambungkan titik akses ke Daya melalui sumber Ethernet (PoE) untuk menghidupkan perangkat. Jika diminta, pilih wilayah operasi pada menu untuk koordinasi RF (beberapa variasi model). Buka aplikasi web di peramban dan tetapkan kalimat sandi Admin. -
Page 7: Mengatur Unit Konferensi Nirkabel (Mxcw640)
Setelah saluran dipilih, jaringan nirkabel default (00) siap untuk mikrofon MXCW. Mengatur Unit Konferensi Nirkabel (MXCW640) Masukkan baterai isi ulang Shure SB930 yang terisi penuh dan sambungkan mikrofon seri MXC400. Tekan dan tahan tombol daya pada bagian bawah perangkat hingga layar menyala. -
Page 8: Perform A Soundcheck
Shure Incorporated Perangkat siap saat LED langsung berkedip berwarna hijau dan layar sentuh menampilkan layar beranda. Perform a Soundcheck Press the speak button on one of the devices to activate the microphone. Speak into the microphone to check the audio. -
Page 9: Access Point Transceiver (Mxcwapt)
Shure Incorporated Listen to the sound check on the loudspeakers or headphone output. Access Point Transceiver (MXCWAPT) The access point transceiver is the hub of the audio signal flow and manages the RF stability of each microphone in the group. - Page 10 Shure Incorporated ① Display Shows menu screens and settings. ② Enter Button Enter a menu or save settings. ③ Exit Button Return to previous menu screens or cancel setting changes. ④ Arrow Buttons Scroll to a menu item or make a change to a setting.
- Page 11 Shure Incorporated Icon LED Color Description Amber (flashing) A network reset is in progress Green (flashing) + RF LED green Simultaneous LEDs: Device identify from the software is in progress Alternating LEDs: Firmware update is in progress (flashing) + Network Audio LED green (flashing) ⑥...
-
Page 12: Access Point Menu
⑪ Reset Button (recessed) Press and hold the reset button for 10 seconds to reset the MXCW system to factory default settings. ⑫ Access Point Cover Paint to match the surrounding decor and snap onto the front plate of the device. - Page 13 Shure Incorporated SSID Select an access point network ID for easy recognition and control of connected conference units. The default SSID is 00. Meeting Ctrls Speak Mode Select a mode to determine how microphones are activated for participants. Change the maximum number of delegates and the total speakers. Total speakers includes Max Speakers the number of chairpersons.
-
Page 14: Conference Unit (Mxcw640)
For advanced meeting tasks, MXCW conference units include features for voting, managing speakers, and more. -
Page 15: Gooseneck Microphone (Mxc416, Mxc420, Mxc425, Mxc406/Ms)
Shure Incorporated ① Loudspeaker Provides a clear audio signal of the floor mix. ② Microphone Connector Lockable 10-pin microphone connector for MXC gooseneck microphones. ③ Headphone Output Two TRRS 3.5 mm ports on each side of the unit allow participants to listen to an interpretation channel or the floor audio over headphones. -
Page 16: Using The Conference Units
Shure Incorporated • Available in 16 inch (40 cm), 20 inch (50 cm), and 25 in (63 cm) lengths, as well as the MXC406/MS mini-shotgun microphone Securing the Microphone to the Conference Unit Insert the microphone into the microphone connector. -
Page 17: Lock Conference Unit Power Button
Power off the device Conference Unit Startup Mode Set the startup mode to determine how MXCW conference units connect to the access point after powering on. Access the technician menu and choose one of the following startup modes: Automatically selects the network it was last connected to before powering down. New or Last Connected (default) factory default devices use this setting to access the SSID 00 by default. -
Page 18: Customize Welcome Screen
Shure Incorporated Customize Welcome Screen You can upload a custom start-up image to connected MXCW640 devices. Go to Meeting Controls > Custom welcome screen and upload your image. The image must be 480 by 272 pixels in .png format. How to Lock the Welcome Screen You can lock conference units to stay on the welcome screen for units set to the delegate, dual-delegate, or listener roles. -
Page 19: Baterai Isi Ulang (Sb930)
Shure Incorporated Flashing green: The request to speak has been denied. Press and hold to mute the microphone without Mute Solid blue removing the right to speak. Mute all Press and hold to mute all active speakers (chairperson Solid blue without removing the right to speak. -
Page 20: Battery Life
Tips Penting untuk Perawatan dan Penyimpanan Baterai Isi Ulang Shure Perawatan dan penyimpanan baterai Shure yang benar menghasilkan kinerja andal dan memastikan masa pakai lama. • Selalu simpan baterai dan pemancar pada suhu ruang •... - Page 21 > 25% > 50% > 75% > 95% Detail kesalahan pengisian tersedia dalam aplikasi web dan panduan sistem online yang lengkap di pubs.shure.com ④ Tombol Daya Balik sakelar untuk menghidupkan atau mematikan unit. ⑤ Input Daya Menghubungkan ke catu daya yang disertakan.
-
Page 22: Menyalakan Perangkat
Sambungkan perangkat ke sumber daya menggunakan kabel daya yang disertakan. Balik sakelar daya untuk menghidupkan perangkat. Memantau Pengisian Daya Baterai Sistem manajemen daya MXCW menggabungkan teknologi cerdas yang dapat diisi ulang dengan berbagai opsi pemantauan untuk baterai SB930. • Lihat sisa waktu baterai pada mikrofon yang digunakan dari layar sentuh atau di bawah tab Perangkat-Perangkatdalam aplikasi web sistem MXCW. -
Page 23: Waktu Pengisian Daya Rata-Rata
Shure Incorporated Segmen LED Status LED Deskripsi Hijau (berkedip) <10% daya baterai Hijau >10% daya baterai Baterai tidak valid Pemulihan Gagal Pengisian daya gagal Merah (berkedip) Cek baterai Cek pengisi daya Kesalahan pembacaan baterai Baterai Dingin Merah Baterai Panas Hijau + Kuning (berkedip bergantian) -
Page 24: Battery Statistics
Shure Incorporated Waktu Rata-Rata Pengisian Daya Menggunakan USB Status Daya MXCW640 Pengisian Daya Waktu Kemampuan Nyala 8 jam 100% Mati 6 jam : 30 menit 100% Persyaratan Kabel USB Gunakan kabel mikro USB yang dapat memasok setidaknya 2 amp daya ke unit konferensi. -
Page 25: Menyimpan Baterai
Displays battery temperature. Menyimpan Baterai Gunakan stasiun pengisian daya MXCW untuk menyimpan baterai untuk periode waktu yang lama (mingguan atau bulanan). Mode penyimpanan melindungi baterai dengan menyimpannya pada tingkat pengisian daya aman yang memelihara kesehatan baterai dari waktu ke waktu. Ketika Anda siap untuk menggunakan baterai kembali, cukup matikan mode penyimpanan dan tunggu hingga baterai terisi penuh. -
Page 26: Requirements Checklist
Recommended: A managed switch to provide detailed information about the operation of each network link (port speed, error counters, bandwidth used, etc.) • Limiting cable runs to ≤100 meters between devices. • Use same firmware version for all devices in your system. • Ensure MXCW components and the computer are on the same network and set to the same subnet. 26/93... -
Page 27: External Cover For Painting
Shure Incorporated External Cover for Painting The access point is supplied with an external cover that can be painted to match the decor around the installation. Snap onto the front plate of the device after it has been painted. Mounting Options Wall or Ceiling: Mark and drill pilot holes using the mounting bracket as a template. -
Page 28: Networked Charging Station Installation
Shure Incorporated Networked Charging Station Installation The screws for attaching the mounting brackets to the charger are provided. Screws for securing the charger to another surface are not included. Important: The top of the screw must extend exactly 9/64 (0.149) inches (3.78 mm) above the surface (about 4 ½ threads). -
Page 29: Best Practices For Rack Installation
Keep fan inlet and air vents clear from obstruction and provide adequate space for airflow within the rack. Penyetelan Sistem Ukuran Sistem Maksimum Hubungkan hingga 125 unit konferensi nirkabel MXCW ke satu titik akses. Perangkat yang terhubung berfungsi sebagai sistem audio terenkripsi mandiri untuk berbicara, mendengarkan, dan berkontribusi pada pertemuan. Jaringan Perangkat Nirkabel Menyiapkan perangkat MXCW nirkabel mirip dengan menghubungkan komputer Anda ke jaringan nirkabel. -
Page 30: Penyambungan Perangkat Untuk Yang Pertama Kali
Agar terhubung ke jaringan titik akses: Nyalakan titik akses. Tunggu hingga secara otomatis memilih saluran nirkabel terbaik yang tersedia untuk pengoperasian. Ketika saluran aman, titik akses akan menyiarkan jaringannya (SSID 00) ke perangkat MXCW nirkabel. Nyalakan unit konferensi MXCW. Perangkat secara otomatis memindai jaringan default. -
Page 31: Restricting New Device Connections
Shure Incorporated Restricting New Device Connections The devices tab in the web application shows which conference units are connected to the SSID network by separating them into 3 groups: online, offline, or unregistered. By default, conference units automatically register once they are connected. -
Page 32: Separating Networks For Multiple Systems
Shure Incorporated Resolving Identical Label Conflicts If multiple access points share the same SSID and are in range of the devices, the system resolves the conflict by choosing one of the following: • Last connected access point based on its unique MAC address •... - Page 33 First, set an access point to a different SSID: Open the MXCW web application and go to Settings > SSIDs. (Optional) Rename one of the SSIDs network for easy identification, for example: Room C Select that network and press Set to confirm the setting.
- Page 34 Shure Incorporated All connected microphones automatically update to the new network. To update any other devices: Open the technician menu on the MXCW640 by tapping the gear icon. While at the top of the page, hold down the volume control knobs and tap the right side of the screen.
-
Page 35: Aplikasi Web Untuk Pemantauan Dan Kontrol
Stasiun Pengisian Daya Mengisi Daya Baterai Pantau daya baterai dan statistik. (MXCWNCS) Membuka Aplikasi Web Perangkat Menghubungkan komputer ke jaringan perangkat. Buka aplikasi Shure Web Device Discovery. Aplikasi ini mencantumkan perangkat Shure di jaringan yang menyediakan kontrol komputer. 35/93... -
Page 36: Persyaratan Peramban Web
Shure Incorporated Cari perangkat yang ingin Anda buka: Aplikasi Host perangkat: Pengaturan, kontrol, dan pemantauan sistem MXCW MXCWAPT Baterai saat ini sedang MXCWNCS Klik dua kali pada baris atau klik kanan untuk menyalin alamat IP atau nama DNS yang akan ditempelkan pada peramban. -
Page 37: Menggunakan Dns Untuk Membuka Aplikasi Web
Shure Incorporated Menggunakan DNS untuk Membuka Aplikasi Web Anda dapat mengabaikan aplikasi Web Device Discovery dengan memasukkan nama DNS perangkat ke peramban internet. Nama DNS berasal dari model unit (MXCWAPT atau MXCWNCS), dalam kombinasi dengan tiga byte terakhir (enam digit) dari alamat MAC, dan diakhiri dengan .local. -
Page 38: Menggunakan Kalimat Sandi
Shure Incorporated • Mac: ctrl + cmd + f Menggunakan Kalimat Sandi Aplikasi web titik akses harus mempunyai kalimat sandi Admin yang dibuat ketika titik akses diaktifkan untuk pertama kali, atau sesudah atur ualng pabrik. Kalimat sandi dapat diubah atau dihapus sesudah konfigurasi sistem selesai. - Page 39 Shure Incorporated Mengatur Daya FR Pilih daya RF dari aplikasi web dengan cara masuk ke Tanpa Kabel > Daya FR. Liputan RF dari Titik Akses Daya Jarak Pengaturan pemancar Jangkauan Penggunaan Umum (mW) dari APT 150 ft (45, Maksimum (awal) Ballroom dan auditorium 7 m)
-
Page 40: Reliable Bandwidth Allocation
Naikkan tingkat daya RF untuk mencakup ruangan terkombinasi yang lebih besar. Reliable Bandwidth Allocation MXCW easily scales from 2 to 125 conference units without any change in the audio performance. The bandwidth is strategically divided, allocating the uplink channels only for active speakers, while preserving traffic for continuous downlink monitoring channels. -
Page 41: Tips To Improve Wireless System Performance
5 GHz sources. ◦ Turn on typical wireless devices prior to the event so the MXCW system has time to select a clean channel. ◦ Avoid heavy wireless traffic activities on nearby networks such as downloading large files or viewing a movie. -
Page 42: Menyiapkan Peserta
Shure Incorporated Menyiapkan Peserta Participant Roles The system facilitates meetings in part by adjusting features and permissions based on the role assigned to each participant device. Participant roles affect: • Speaker limitations: The chairperson can speak at any time, while delegates may need to wait their turn. -
Page 43: Configuring Conference Units For Remote Callers
Saat ada sebuah slot mikrofon, pemanggil jarak jauh dapat ditambahkan ke daftar bicara dengan cara melepas kabel dari unit konferensi dan mencolokkannya lagi. Mengubah Peran Peserta Dari MXCW aplikasi web: Buka tab Perangkat-Perangkat. Cari dan pilih peserta (atau kursi) dalam daftar. -
Page 44: Mengenali Peranti Dari Perangkat Lunak
Shure Incorporated Mengenali Peranti dari Perangkat Lunak Sebelum membuat perubahan dalam perangkat lunak, pastikan bahwa Anda berinteraksi dengan perangkat keras yang benar. Buka tab Perangkat-Perangkat. Klik ikon peranti yang dikehendaki. Peranti berbunyi atau berkedip untuk mengonfirmasi pilihan Anda. Catatan: Klik ikon kunci inggris untuk mengubah indikator identifikasi peranti. - Page 45 Shure Incorporated Determine which columns display in the devices table: • Seat number • Seat name • Role • Battery • RF strength • Speak priority Visible columns • Audio groups • Left-button functionality • Firmware version • Serial number •...
-
Page 46: Assigning Names And Seat Numbers
> Retain to start saving seat information again. Fungsi Kartu NFC Gunakan aplikasi Pemrograman Kartu NFC Shure gratis (tersedia di www.shure.com) untuk memrogram kartu identifikasi NFC dengan nama peserta pertemuan. Aplikasi Pemrograman Kartu NFC ini dirancang untuk bekerja dengan antarmuka ganda ACOS3 atau kartu tanpa kontak, seperti MXCDualCard. -
Page 47: Interupsi Pembicara Aktif
Shure Incorporated Example speak priority settings: • Set the highest-ranking chairperson to 5 Multiple Chairpersons • Set the rest of the chairpersons to 4 • Leave the normal delegates at 1 (default) High-Ranking Delegates • Set the high-ranking delegates to 2... -
Page 48: Setting The Number Of Active Speakers
Setting the Number of Active Speakers The MXCW system allows up to 8 active speakers. Once the speaker list is full, participants must wait until their turn to speak. If they attempt to speak before their turn, their microphone LED ring flashes momentarily and then turns off as a reminder. -
Page 49: Prevent Speak Button Conflicts
Shure Incorporated To set the number of speakers: Go to Meeting Controls > Basic. Use the plus sign (+) and minus sign (−) to change the number of speakers. ◦ Total: Total number of active delegate and chairperson devices. This is the absolute maximum number of people that can address the floor at the same time. -
Page 50: Audio Setup And Channel Routing
Go to Meeting Controls > Advanced > Microphone off permissions. Select Only admin/chairperson can turn off participant microphones. Audio Setup and Channel Routing The MXCW system supports wireless, analog, and Dante network channels for a wide range of applications and installations. Use the web application to customize the audio system for your meeting. 50/93... -
Page 51: Deskripsi Perutean Mxcw
10 input channels • 10 output channels Once the audio signal is added to the MXCW system, an internal matrix mixer routes audio signals between inputs and outputs, for simple and flexible routing: • Send the floor mix to multiple outputs for recording, broadcasting, and a spillover listening room. -
Page 52: Mxcw Wireless Audio
10 Output Dante Slot mikrofon Saluran input MXCW Wireless Audio Encrypted wireless audio between the access point and conference units: 8 uplink channels are provided for active speakers. As participants turn on their microphones, they are added Speaking to these channels.Depending on your event, you may want to lower the limit of speakers or add a chairperson Channels role to certain participants. - Page 53 Shure Incorporated Up to 8 Speakers Listening • 1 fixed Floor channel on speaker and headphones Channels • 8 assignable interpretation channels on headphone (Downlink) 53/93...
-
Page 54: Gabungan Suara Ruang
Shure Incorporated Floor and Interpretation Gabungan Suara Ruang Setiap kali mikrofon dihidupkan, audio diarahkan ke gabungan suara ruangan secara default. Gabungan suara ruangan ini menggabungkan semua pembicara aktif dan mengirimkan sinyal tersebut ke unit peserta lain agar dapat terdengar. Dengarkan gabungan suara ruang pada pengeras suara unit atau saluran headphone. -
Page 55: Sambungan Analog
Headphones: Gabungan suara ruang juga tersedia pada saluran headphone (Ch. 0) Memonitor Mikrofon Aktif Gunakan sistem MXCW aplikasi web untuk memantau dan menyesuaikan slot mikrofon bagi audio yang berkontribusi pada gabungan suara ruangan. Buka Audio > Mikrofon aktif. Sambungan Analog Menyambungkan dengan mudah peralatan tambahan menggunakan konektor analog XLR pada titik akses MXCW. -
Page 56: Menghubungkan Perangkat Analog
◦ Output XLR ke sistem rekaman, pengeras suara, atau konferensi jarak jauh (sumber default adalah gabungan suara) Lakukan pemeriksaan suara menggunakan level bicara normal dengan mikrofon MXCW lainnya. Untuk mendapatkan hasil terbaik: ◦ Selalu aktifkan AGC untuk memastikan sinyal terpadu secara alami dengan sumber MXCW lainnya ◦... -
Page 57: Menambahkan Sumber Lain Ke Gabungan Suara Ruang
Tips: Balik sakelar pengangkatan ground jika suara berdengung atau menggumam terjadi karena loop ground. ◦ Audio digital: Arahkan audio ke salah satu saluran Dante MXCW menggunakan perangkat lunak Pengendali Dante. Pastikan sumber dipilih pada kelompok suara ruang. Jika perlu, sesuaikan level volume atau EQ agar sesuai dengan level input lainnya Audio > Input. - Page 58 Shure Incorporated Route the audio from that seat to another group. Open the desired group and select the seat. Select that group as the source for the output channel. 4a. Press Select source 4b. Choose the group mix that the seat is routed to.
- Page 59 Shure Incorporated This group (with the seat that was removed from the floor mix) is now routed to the output channel and ready for recording, broadcasting, or another application. Mengisolasi Peserta di Saluran Output Terpisah 8 Pembicara Aktif atau Kurang Masukkan setiap peserta ke kelompok campuran mereka sendiri untuk merekamnya secara individual pada saluran yang telah ditentukan.
- Page 60 Shure Incorporated Ulangi untuk sisa output. Lebih dari 8 Pembicara Aktif Untuk merekam lebih dari 8 pembicara aktif sekaligus, arahkan 8 slot mikrofon (bukan kursi yang dirutekan ke campuran) ke saluran output. Perlu diingat bahwa saluran tidak akan diberikan secara permanen kepada peserta tertentu. ‘Pengisian’ slot 8 mikrofon nirkabel dimulai dengan slot 1 dan meningkat dengan semakin banyaknya mikrofon yang aktif. (Slot 1 selalu diisi setiap kali mikrofon aktif.) Oleh karena itu metode ini memungkinkan perekaman yang bersih, tetapi pelabelan tidak akan mengikuti...
-
Page 61: Language Interpretation
Shure Incorporated Emergency Audio Signal To prepare for an emergency, connect an Emergency Evacuation Message (EEM) audio signal to the analog XLR input or one of the 10 Dante input channels. The system will detect when the EEM signal is present and distribute it to the loudspeakers and all output connections. -
Page 62: Digital Audio Networking
Dante audio can coexist safely on the same network as IT and control data, or can be configured to use a dedicated network. Dante Network Audio Connect your Dante audio network to the MXCW system. Connect a network of devices 10 input channels, useful for: ®... -
Page 63: Rekomendasi Sakelar Untuk Jaringan Dante
Routing Dante Channels ® Use the free Dante Controller software by Audinate to route Dante channels in and out of the MXCW system. Rekomendasi Sakelar untuk Jaringan Dante Selain persyaratan jaringan dasar, jaringan audio Dante harus menggunakan sakelar jaringan Gigabit atau router dengan fitur sebagai berikut: •... -
Page 64: Enkripsi Audio Jaringan Dante
Selalu gunakan topologi jaringan “star” dengan menyambungkan tiap komponen langsung ke sakelar atau router. • Sambungkan semua perangkat jaringan Shure ke jaringan yang sama dan atur ke subnet yang sama. Ini berlaku untuk semua perangkat yang sinyal audionya harus dirutekan di antaranya (dikelola melalui Dante Controller). Ini juga diperlukan untuk membuka aplikasi webuntuk perangkat. -
Page 65: Menetapkan Alamat Ip Statis Secara Manual
Shure Incorporated Untuk mengonfigurasi properti IP pada aplikasi web: Buka aplikasi web. Masuk ke Pengaturan dan pilih Jaringan. Pilih Otomatis atau Manual. Jika Otomatis digunakan, alamat akan ditetapkan secara otomatis. Lihat Menetapkan Alamat IP Statis Secara Manual untuk pengaturan Manual. -
Page 66: Porta Dan Protokol Ip
Shure Incorporated Important: Untuk kinerja terbaik, gunakan router Wi-Fi yang tidak membatasi kecepatan multicast hingga 1–2 Mbps. Shure merekomendasikan merek router nirkabel berikut: • Cisco • Linksys • Apple Porta dan Protokol IP Shure Control Default Porta TCP/UDP Protokol Deskripsi Pabrik Diperlukan untuk pembaruan perangkat tegar (jika tidak Tertutup tertutup) Antarmuka Shell yang Aman... -
Page 67: Aes67
AES67 AES67 is a networked audio standard that enables communication between hardware components which use different IP audio technologies. This Shure device supports AES67 for increased compatibility within networked systems for live sound, integrated installations, and broadcast applications. The following information is critical when transmitting or receiving AES67 signals: •... -
Page 68: Voting
Otherwise, to receive an AES67 flow, the AES67 session ID and IP address are required. Shure devices: The transmitting device must support SAP. In Dante Controller, a transmit device (appears as an IP address) can be routed like any other Dante device. -
Page 69: Voting Results
Shure Incorporated Voting Configuration Conference Unit Screen 3-Button (Open) 3-Button (Secret) A 3-Button vote adds the option to select “Abstain”, which is to formally decline to vote. 5-Button (Open) 5-Button (Secret) A 5-Button vote allows the user to answer on a scale from “- -"... -
Page 70: Mengatur Ulang Perangkat
Mengatur Ulang Perangkat Perangkat Shure dirancang untuk bekerja sama langsung dari kotak. Sebelum instalasi baru, atau selama pemecahan masalah, mengatur ulang perangkat dapat bermanfaat untuk memastikan kompatibilitas sistem. Sistem ini menyediakan 2 level pengaturan ulang yang dapat dipilih: •... -
Page 71: Export Log Files
Shure Update Utility. Unduh Shure Update Utility di shure.com. Update Firmware untuk Unit Konferensi Unggah update firmware MXCWAPT dan MXCW640 ke MXCWAPT mengggunakan alat Shure Update Utility. Settings > Firmware. Buka aplikasi web > Pilih unit konferensi yang diinginkan. -
Page 72: Versi Firmware
Ethernet. Perangkat ini menerima perintah logika melalui jaringan. Banyak parameter yang dikontrol melalui aplikasi web dapat dikontrol melalui sistem kontrol pihak ketiga, menggunakan string perintah yang sesuai. Gunakan hanya satu pengontrol per sistem untuk menghindari konflik perpesanan. Untuk daftar lengkap string perintah, kunjungipubs.shure.com. •... -
Page 73: Mxcwapt
Shure Incorporated Polaritas Audio Tekanan positif pada diafragma mikrofon MXCW640 menghasilkan tegangan positif pada pin 2 dari output MXCWAPT XLR Jarak Kerja 8 m (Rendah),15 m (Sedang),30 m (High),45 m (Maksimum ) Garis pandang ke MXCWAPT. Jarak aktual bergantung pada serapan sinyal RF, pantulan dan gangguan. - Page 74 Shure Incorporated Input Impedance Line 10 kΩ 12 kΩ Configuration Balanced Type Pin Assignments Standard XLR Pinout 1=ground, 2=audio +, 3=audio − GND Lift Left Pin 1=GND Connected Right Pin 1=GND Disconnected Analog Output Maximum Output Level 4.3 dBV 1%THD+N Frequency Response 1 Hz- 20 kHz (+0.5 dB/-3 dB Audio Injected at Dante Input Total Harmonic Distortion 0.01%, typical...
- Page 75 Shure Incorporated GND Lift Left Pin 1=GND Connected Right Pin 1=GND Disconnected WLAN Standard IEEE 802.11 a, g Frequency Bands 2.4 GHz ISM, 5 GHz UNII Sensitivity -80 dBm at 10% PER Output Power 1 mW (Low), 5 mW (Medium), 13 mW (High), 25 mW (Maximum ) Antenna Type Proprietary Internal Bi-level Dual-band (PIFA), patent pending...
-
Page 76: Mxcw640
Shure Incorporated Cable Type Cat 5e or higher Connector Type RJ45 Display Type Monochrome FFSTN LCD Display Size 1.84 x .074 in. (46.7 x 18.8 mm) Display Resolution 152 x 78 (78 ppi) Mechanical Dimensions 47.8 x 242.5 x 241.8 mm (1.88 x 9.55 x 9.52 in.) Weight 1.15 kg Housing Molded Plastic, Die-casted Aluminum Mounting Type Ceiling bracket or wall... - Page 77 Preamplifier Equivalent Input Noise (EIN) -117 dBV A-weighted, typical Input Impedance 26 kΩ Configuration Unbalanced Type Multipin Female Gooseneck Socket Pin Assignments Proprietary Shure Pinout Remote Caller Input Maximum Input Level 1.6 dBV Measured at Dante Output Frequency Response 30 Hz- 20 kHz (+0.5 dB/-3 dB Measured at Dante Output Total Harmonic Distortion 0.07%, typical...
- Page 78 Shure Incorporated Dynamic Range 95 dB A-weighted , 93 dB Unweighted, typical Measured at Dante Output Preamplifier Equivalent Input Noise (EIN) -106 dBVA-weighted, typical Input Impedance 3.5 Ω Configuration Unbalanced Type TRRS 3.5 mm female socket Pin Assignments CTIA/AHJ Standard Pinout Tip= Left side earpiece, Ring 1= Right side earpiece, Ring2= Ground, Sleeve= Microphone...
- Page 79 Shure Incorporated Type TRRS 3.5 mm female socket Pin Assignments CTIA/AHJ Standard Pinout Tip= Left side earpiece, Ring 1= Right side earpiece, Ring2= Ground, Sleeve= Microphone Speaker Output Nominal Output Level 72 dB SPL at 0.5 m Measured with an SPL meter using A-weighting and fast averaging Maximum Output Level 89 dB SPL at 0.5 m...
- Page 80 Shure Incorporated Audio Injected at Dante Input Load Impedance >8 Ω, typical Headphone outputs are protected against short circuits Configuration Dual mono Will drive stereo and mono headphones Type TRRS 3.5 mm female socket Pin Assignments CTIA/AHJ Standard Pinout Tip= Left side earpiece, Ring 1= Right side earpiece, Ring2= Ground, Sleeve= Microphone...
- Page 81 Shure Incorporated WLAN Standard IEEE 802.11 a, g Frequency Bands 2.4 GHz ISM, 5 GHz UNII Sensitivity -75 dBm at 10% PER Output Power 1 mW (Low), 3 mW (Medium), 6 mW (High), 10 mW (Maximum ) Antenna Type Proprietary Internal Bi-level Dual-band (PIFA), patent pending Carrier Frequency Range 13.56 MHz Transmission Protocols ISO/IEC 14443 Antenna Type...
- Page 82 Shure Incorporated Operating Time > 11 hours, typical Charge Time 6 hours : 30 minutes typical when powered off 8 hours typical when powered on When charged from USB port Input Voltage Range 4.5 - 5.25 V Power Consumption 10 W maximum Recommended Cable 28 AWG/1 P + 22 AWG/2 C, <1.5 m...
-
Page 83: Mxcwncs
Shure Incorporated Temperature Range Operating Temperature Range 0 °C (−32 °F) to 35 °C (95 °F) Charging Temperature Range 0 °C (32 °F) to 33 °C (91.4 °F) Storage Temperature Range −20 °C (4 °F) to 50 °C (122 °F) Relative Humidity >95% MXCWNCS Battery Type Shure Rechargeable Li-Ion Battery Connector Proprietary blade Charge Time 50% = 1.5 hours; 100% = 4 hours Charge Current 3.6 A Power Requirements Input 100 to 240 V AC, 50/60 Hz, 2 A maximum Output 4.2 V DCmaximum, 160W maximum... -
Page 84: Sb930
Shure Incorporated Cable Requirements Cat 5e or higher Housing Molded Plastic, steel Mounting Type Tabletop, rack, or wall Dimensions 72.4 mm x 438.9 mm x 193.5 mm ( 2.9 in. x 17.3 in. x 7.6 in.) Weight 2825 g Operating Temperature Range −20 °C (−4 °F) to 35 °C (95 °F) Discharging Temperature Range −20 °C (−4 °F) to 35 °C (95 °F) Discharging may occur when storage mode is enabled. Charging Temperature Range 0 °C (32 °F) to 35 °C (95 °F) - Page 85 Shure Incorporated x 65 x 101 (1 2 x 2 56 x 4 ) , (140 85/93...
-
Page 86: Aksesoris
Mini-shotgun gooseneck microphone for MXC and MXCW MXC406/MS Cardioid gooseneck microphone for MXC and MXCW MXC416/C Dualflex, cardioid gooseneck microphone for MXC and MXCW MXC416DF/C Cardioid gooseneck microphone for MXC and MXCW MXC420/C Dualflex, cardioid gooseneck microphone for MXC and MXCW... -
Page 87: Access Point Model Variations
Shure Incorporated Access Point Model Variations Region Model United States MXCWAPT-A Canada and Mexico MXCWAPT-B Japan MXCWAPT-JP Israel MXCWAPT-IL Worldwide MXCWAPT-W The MXCWAPT-W access point can be set to the following countries and regions: MXCWAPT-W Regions Countries Australia, China, Hong Kong, India, Indonesia, Malaysia,... -
Page 88: Informasi Penting Produk
Shure Incorporated Wilayah Model Brasil MXCWNCS-BR Eropa MXCWNCS-E Inggris MXCWNCS-UK Jepang MXCWNCS-J Cina MXCWNCS-CHN Korea MXCWNCS-K Taiwan MXCWNCS-TW Australia MXCWNCS-AZ India MXCWNCS-IN Informasi Penting Produk Informasi Keselamatan PETUNJUK PENTING KESELAMATAN BACA petunjuk ini. SIMPAN petunjuk ini. PATUHI semua peringatan. IKUTI semua petunjuk. - Page 89 Shure Incorporated CABUT perangkat ini selama petir atau bila tidak digunakan untuk waktu yang lama. SERAHKAN semua servis ke petugas ahli. Servis diperlukan apabila perangkat tersebut sudah rusak dalam cara apa pun, seperti kabel catu daya atau steker rusak, cairan tertumpah atau ada benda yang jatuh ke dalam perangkat, perangkat sudah terpapar hujan atau lembap, tidak bekerja normal, atau perangkat pernah jatuh.
-
Page 90: Information To The User
140°F (60°C), atau membakar. • Ikuti petunjuk dari pabrik • Hanya gunakan pengisi daya Shure untuk mengisi ulang daya baterai isi ulang Shure • PERINGATAN: Bisa terjadi ledakan jika baterai diganti secara tidak tepat. Ganti hanya dengan tipe yang sama atau setara. - Page 91 Consult the dealer or an experienced radio/TV technician for help. Peralatan ini ditujukan untuk digunakan dalam aplikasi audio profesional. Perubahan atau modifikasi yang tidak disetujui oleh Perusahaan Shure dapat membatalkan hak Anda untuk mengoperasikan peralatan ini. Catatan: Perangkat ini tidak dimaksudkan untuk disambungkan langsung ke jaringan internet umum.
- Page 92 万一、この機器から移動体識別用の構内無線局に対して有害な電波干渉の事例が発生した場合には、 速やかに使用周波 数を変更するか又は電波の発射を停止した上、下記連絡先にご連絡頂き、混 信回避のための処置等(例えば、パーティ ションの設置など)についてご相談して下さい。 その他、この機器から移動体識別用の特定小電力無線局あるいはアマチュア無線局に対して有害な電波干渉の事例が発生 した場合など何かお困りのことが起きたときは、保証書に記載の販売代 理店または購入店へお問い合わせください。代 でもご覧いただけます。 理店および販売店情報は Shure 日本語ウェブサイト http://www.shure.co.jp 現品表示記号について 現品表示記号は、以下のことを表しています。 この無線機器は 2.4GHz 帯の電波を使用し、変調方式は「 DS-SS 」方式および 「 FH-SS 」方式、想定与干渉距離は 40m です。 2,400MHz ~ 2,483.5MHz の全帯域を使用し、移動体識別装置の帯域を回避する ことはできません。 Klarifikasi EAC: Produk ini memenuhi peraturan kepatuhan Rusia serta persyaratan penandaan EAC.
- Page 93 Pemberitahuan CE: Dengan ini, Shure Incorporated menyatakan bahwa produk dengan Tanda CE ini telah dinilai memenuhi persyaratan Uni Eropa. Teks lengkap dari pernyataan kesesuaian Uni Eropa tersedia pada situs berikut: https:// www.shure.com/en-EU/support/declarations-of-conformity.
Need help?
Do you have a question about the MXCW and is the answer not in the manual?
Questions and answers