Table of Contents
Advertisement
Quick Links
©2020 GrowSpan
All Rights Reserved. Reproduction
is prohibited without permission.
Revision date: 04.17.20
GrowSpan
2-Layer Film Roof Installation —
Roll-Up Sides
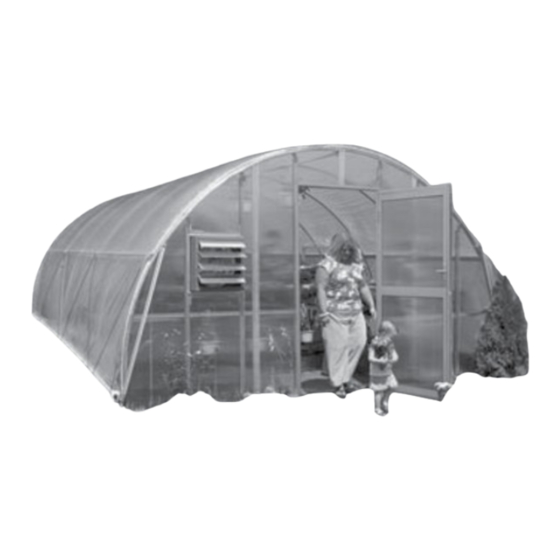
Photo may show a different but similar model. Greenhouse with single door and roll-up
sides is shown in the example.
Greenhouse
™
2
• Flashing
• Ribbon Board
• Baseboard
• 102197 U-Channel
• Install Film: Layer 1
• Air Inflation System
• Install Film: Layer 2
1
Advertisement
Table of Contents

Related Manuals for GrowSpan PGFLSAXXFCW0063


Summary of Contents for GrowSpan PGFLSAXXFCW0063
- Page 1 • Air Inflation System • Install Film: Layer 2 Photo may show a different but similar model. Greenhouse with single door and roll-up sides is shown in the example. ©2020 GrowSpan All Rights Reserved. Reproduction is prohibited without permission. Revision date: 04.17.20...
-
Page 2: Table Of Contents
If you have any questions during the assembly, contact Customer Recommended — Customer-Supplied —Baseboards ........5 Service at 1-800-245-9881 for assistance. End Panel Installation Details & Foil Tape Install ........... 6 Flashing (PGFLSAXXFCW0063) Installation ..........7 WEAR EYE SAFETY PRECAUTIONS Mark Ribbon Board Location ................9 PROTECTION Baseboards and Ribbon Boards.............. - Page 3 Important Information REQUIRED TOOLS PARTS The following list identifies the main tools needed. Additional tools and supports may be needed depending on structure and location. • Tape measure and marker; hammers and gloves. • Clutched drill driver to drive Tek screws. (Cordless with extra batteries works best.) Do not use an impact driver to install Tek screws.
-
Page 4: Required Lumber - Customer-Supplied - Ribbon Boards
Required Lumber — Customer-Supplied — Ribbon Boards RIBBON BOARDS — CUSTOMER SUPPLIED (REQUIRED) — FOR ROLL-UP SIDE RIBBON BOARD HEIGHT: Consult main frame technical document to determine ribbon board height Greenhouses equipped with roll-up side panels require a ribbon board. Materials for ribbon boards are not included and are supplied by customer. -
Page 5: Recommended - Customer-Supplied -Baseboards
Recommended — Customer-Supplied —Baseboards BASEBOARDS — CUSTOMER SUPPLIED (RECOMMENDED) — FOR ROLL-UP SIDES Baseboards are optional, but recommended, for greenhouses with roll-up sides. Materials for baseboard are not included and are supplied by customer. Examples below show baseboard as attached to frame for a building with roll-up sides. ATTENTION: Baseboards run the frame length along both sides at ground level. -
Page 6: End Panel Installation Details & Foil Tape Install
End Panel Installation Details & Foil Tape Install End panels are rounded and follow contour of end rafter. (See diagram below.) If needed, cut end panels so top of end panels are flush with top of end rafter. Apply foil tape (DH8007) to cover all open cells after cutting and before flashing (if this has not been completed yet). U-channel flashing overlaps end panels to cover open cells at top. -
Page 7: Flashing (Pgflsaxxfcw0063) Installation
Flashing (PGFLSAXXFCW0063) Installation Complete these steps: Gather Parts and Tools: 1. Take one section of PGFLSAXXFCW0063 flashing and place it in place on end • PGFLSAXXFCW0063 Flashing (8' long) rafter. • 108553 Wafer Head Screws 108553 Wafer 2. Mark flashing where rafter begins to bend. Place flashing on ground or work bench. - Page 8 Install Flashing (PGFLSAXXFCW0063) INSTALL FLASHING — CONTINUED 6. Place prepared flashing against top of end rafter with cut surface against end panels. 7. Using 108553 wafer head screws spaced at 16" on-center intervals, secure flashing to top of end rafter.
-
Page 9: Mark Ribbon Board Location
Mark Ribbon Board Location Ribbon board runs along each frame side and serves as a mounting surface for side u-channel. Ribbon board is required for greenhouses that include roll-up sides. Read through the information on this page and continue as instructed. Customer is responsible for supplying materials to construct a ribbon board (and baseboard if used) as described. -
Page 10: Baseboards And Ribbon Boards
Baseboards and Ribbon Boards ATTENTION: Materials for baseboards and ribbon boards are supplied by customer. INSTALL RIBBON BOARDS INSTALL BASEBOARDS ATTENTION: If you want to install a baseboard and the curtain stabilizer bar 1. After flashing is installed, attach ribbon boards to assembled frame. Use kit was purchased, consult instructions included with that kit for details. -
Page 11: U-Channel (102197) - End Rafters
U-Channel (102197) — End Rafters After attaching ribbon boards and baseboards (if used), attach u-channel to top of each end rafter using FA4482B Tek screws spaced at 12" on-center. Complete these steps: 1. Beginning at top of ribbon board along one side, attach the first section of 102197 FA4482B Tek Screw... -
Page 12: Side U-Channel Installation - Roll-Up Sides
Side U-Channel Installation — Roll-Up Sides Gather parts: INSTALL U-CHANNEL (102197) ALONG EACH SIDE — ROLL-UP SIDES • Aluminum U-channel (#102197) Complete these steps: • Wood screws (FA4650) 1. Attach u-channel to ribbon board using FA4650 wood screws spaced every 12". -
Page 13: Inspect Frame Before Film Installation
Inspect Frame Before Film Installation TAPE SHARP EDGES AND CONNECTORS Inspect frame for sharp edges that could damage cover film. File smooth or tape over them using the supplied duct tape. Tape over connector Return to rafters and apply tape over connectors to better protect cover film and prolong film life once installed. -
Page 14: 2-Layer Film Roof - Layer 1 (Ir/Ac)
2-Layer Film Roof — Layer 1 (IR/AC) INSTALL IR/AC FILM COVER Continue with the following procedure. Greenhouse includes two film types. Install the IR/AC WEAR EYE WARNING: To prevent damage film first! Gather parts: PROTECTION to the cover and to prevent WHEN serious personal injury, DO •... - Page 15 2-Layer Film Roof — Layer 1 (IR/AC) INSTALL COVER FILM (continued) 2. Along film edge to pull over frame, tie rope (or strap) around a tennis ball, for example, and toss free end of rope over frame. See photo. Not required for small greenhouses; pull cover over by hand when possible. NOTE: Evenly space ropes along side.
- Page 16 2-Layer Film Roof — Layer 1 (IR/AC) INSTALL COVER FILM (continued) WEAR EYE PROTECTION 8. Move to the other end rafter, pull film tight, and repeat steps to secure film to u-channel flashing attached to that end rafter . WHEN 9.
-
Page 17: Inflation Fan Kit Installation
Inflation Fan Kit Installation The air inflation system assembly is quick and easy. Consult instructions included with kit for installation details. You will need a socket wrench set, utility knife, marker, and repair tape or heavy-duty duct tape to complete the steps. Actual frame may differ from what is shown in the example. -
Page 18: 2-Layer Film Roof - Layer 2
2-Layer Film Roof — Layer 2 Once air inflation kit (or kits) are installed, install remaining film for greenhouse. After installing second film layer, continue with installation of roll-up side components and panels (Guide #3). Complete these steps to install remaining film: WEAR EYE 1. -
Page 19: Seal Greenhouse
Seal Greenhouse Anytime after roof film installation, apply sealant to these areas: • Around all doors • Around accessory framing and accessories • At joint where u-channel meets flashing for both end rafters • All flashing joints • Around intake for air inflation fan Revision date: 04.17.20 2-Layer Film Install...
Need help?
Do you have a question about the PGFLSAXXFCW0063 and is the answer not in the manual?
Questions and answers