Advertisement
Table of Contents
SO N D ER
L I V I N G
Thank you for choosing this quality product. Be sure to check all packaging materials carefully for small parts that may have
become loose during shipment and place all parts on a non-abrasive surface.
IMPORTANT :These parts can be cumbersome and heavy to some people, therefore the assistance of two or more people is
recommended in order to prevent personal injury and ensure the furniture is not damaged during the assembly Process.
PART LIST
A [ 1] TABLE TOP
B [ 2] BASE
C [ 2] STRETCHER
INSTRUCTIONS
1. Lay the back of the base (B) down into on a soft flat surface.
2. Align and insert the Stretcher (C) to between 2 base. KEEP
HOLDING THE STRETCHER WHILE ASSEMBLY THE BASE
INTO THE STRETCHER.
3. Attach the base to the stretcher by using Allen bolt (1), lock
washer (2) and flat washer (3). DO NOT OVER TIGHTEN.
See FIGURE 1.
B
YES
B
C
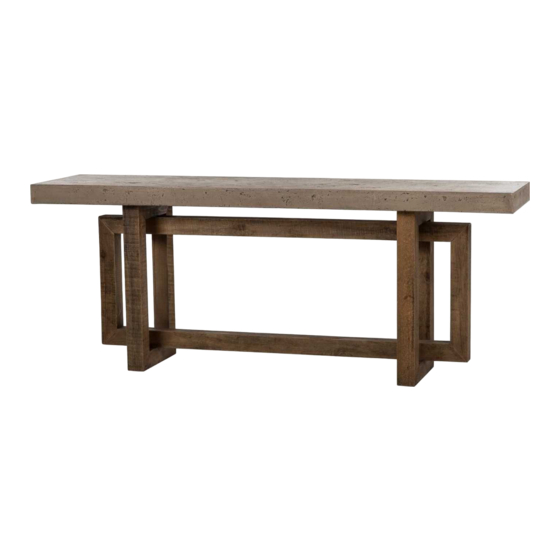
CUBE CONSOLE TABLE - SM ALL
HARDWARE LIST
NO
D ESC RI PT I O N
1
2
3
4
QTY
ALLEN HEAD BOLT
LOCK WASHER
PLAIN WASHER
ALLEN WRENCH
FIGURE 1
3
2
1
8
8
8
1
4
1 2 /
Advertisement
Table of Contents

Related Manuals for Sonder FG0701398


Summary of Contents for Sonder FG0701398
- Page 1 SO N D ER CUBE CONSOLE TABLE - SM ALL L I V I N G Thank you for choosing this quality product. Be sure to check all packaging materials carefully for small parts that may have become loose during shipment and place all parts on a non-abrasive surface. IMPORTANT :These parts can be cumbersome and heavy to some people, therefore the assistance of two or more people is recommended in order to prevent personal injury and ensure the furniture is not damaged during the assembly Process.
- Page 2 Lay the a long edge of the Top (A) into on a soft flat surface. Align the holes on the table base to the fixed nuts on the table top. Insert the Allen bolts (1 ) together with Lock washers (2) and Flat washers (3). DO NOT OVER TIGHTEN. See FIGURE 2.
Need help?
Do you have a question about the FG0701398 and is the answer not in the manual?
Questions and answers