Table of Contents
Advertisement
Quick Links
Advertisement
Table of Contents

Related Manuals for Feelworld L2 PLUS

Summary of Contents for Feelworld L2 PLUS
- Page 1 L2 PLUS Multi-camera Video Switcher User Manual...
-
Page 2: Table Of Contents
2.3 Connect HDMI Output........................8 2.4 Connect Microphone and External Monitoring Devices.............. 8 2.5 Connect USB as a Network Signal Source..................8 2.6 Connect Computer and L2 PLUS....................9 2.7 Turn on Your L2 PLUS........................9 Chapter 3 Use Your Product.........................10 3.1 Touch Screen..........................10... - Page 3 5.1.3 Connect Wirelessly with Your Router...................25 5.2 Using Feelworld Live........................25 5.2.1 Input Info..........................27 5.2.2 HDMI............................ 27 5.2.3 USB 3.0..........................27 5.2.4 Live Streaming........................28 5.2.5 Audio............................ 28 5.2.6 Test Pattern...........................28 5.2.7 HDMI Out Setting......................... 29 5.2.8 Password Protection......................29 5.2.9 Lan Port Set.......................... 29 5.2.10 Language..........................
- Page 4 Thank you for choosing our product! This User Manual is designed to show you how to use this video switcher quickly and make use of all the features. Please read all directions and instructions carefully before using this product. Safety Instruction The general safety information in this summary is for operating personnel.
-
Page 5: Chapter 1 Your Product
VISCA protocol, Chroma key, LOGO overlay and other functions. L2 PLUS is able to control 8 PTZ cameras at the same time and do operations of Zoom In/Out. Meanwhile, L2 PLUS also supports not only Window and MAC operating systems,but also iOS and Android mobile phones for a wide range of fast operation. -
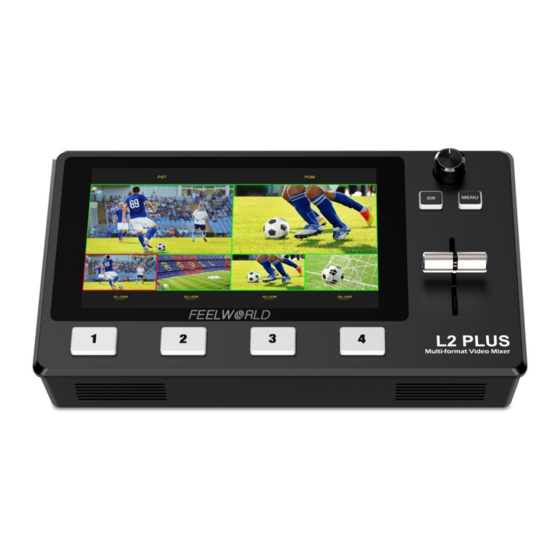
Page 6: Front Panel
1.3 Front Panel Description Connectors 5.5-inch touch screen for menu operation LCD screen The lights on the signal source buttons will appear in four states: 1. red: is on air (PGM), Signal button 2. static green: signal is standing by, 3. -
Page 7: Interface Panel
1.4 Interface Panel Connectors Description 4 HDMI Inputs, connect to input source from HD camera or PC HDMI IN 1 HDMI Output, connect to display to show Preview (6 pictures) HDMI OUT or PGM. 1 DC Jack for power input, connect to 12V/2A power adapter. DC 12V Communication port to link dedicated software for control USB3.0 output, capture signal via third party streaming software... -
Page 8: Chapter 2 Install Your Product
2.2 Connect HDMI Input You can use any camera, computer or other HDMI device as the input source of the L2 PLUS. It supports up to 1080P standard and 4 sources of different formats and resolutions at the same time. -
Page 9: Connect Hdmi Output
2.5 Connect USB as a Network Signal Source You can use the L2 PLUS's USB port to use the L2 PLUS as a webcam source, and you can recognize the webcam signal from the L2 PLUS on live streaming platforms like Zoom, YouTube, Facebook,... -
Page 10: Connect Computer And L2 Plus
Minimum System Requirements for Windows ● Microsoft Windows 10 64-bit Note:The IP address of the L2 PLUS must be in the same WLAN segment as the computer. 2.7 Turn on Your L2 PLUS The device will enter to the boot interface after turning on . -
Page 11: Chapter 3 Use Your Product
Chapter 3 Use Your Product 3.1 Touch Screen On the front panel of L2 PLUS, you can see a 5.5-inch touch screen as shown in the picture below: The LCD screen presents 4 input sources, PST preview picture and PGM output picture. -
Page 12: Main Menu
3.2 Main Menu After L2 PLUS is powered on, press 【MENU】 button to enter the main menu which includes: Input, HDMI, USB 3.0, Audio, IP Setting and setting. exit main menu 3.2.1 Input Gently touch【INPUT】icon to enter the sub menu The input menu displays the information of the input signal source. -
Page 13: Audio
Set IP Address Automatically Use this setting if your network/router has a DHCP server Turn ON DHCP manual setting is disabled, and the IP Address for L2 PLUS is set from the network. 3.2.6 Settings Gently touch【SETTING】icon to enter the sub menu. -
Page 14: Function Menu
3.3 Function Menu Press【SW】button to enter the function menu which includes: MIX, MODE, PIP, PTZ, LOGO and CHROMA KEY. 3.3.1 MIX On<MIX> menu, there are 15 kinds of effects to choose. Note : In actual use, the hard cut is only available in Quick Cut mode, if you use T-Bar mode, it will automatically change to FADE. -
Page 15: Pip
There are 2 transition modes: FAST or T-BAR Switching time: 0.5s ~ 5.0s Note: In T-Bar mode, you can directly control the progress of the T-Bar manually and customize the switching. 3.3.3 PIP Push 【SW】 button to enter <PIP> menu and select PIP mode(9 PIP modes). The steps are as follows: 1. -
Page 16: Ptz
Meanwhile, it also saves camera position and zoom information for quick retrieval the next time you use it. (L2 PLUS can control up to 8 cameras) 1. Enable the PTZ camera and set the IP of the camera you want to control to the corresponding IP address. -
Page 17: Switch Source
Note: When using chroma key, make sure that the layer you want to edit is on the top layer, which is the B layer in the PIP setting, otherwise you may not see the chromakey effect. 3.4 Switch Source When you access the four source buttons, the lights on the source buttons will appear in four states: green constant: the signal is recognized, no action is being taken;... -
Page 18: Chapter 4 Streaming
Chapter 4 Streaming 4.1 OBS Streaming Video Capture L2 PLUS is compatible with many third party steaming software, we recommend OBS, which is available to download on https://obsproject.com/download. Download the software and update to the latest version. 1. Click”+”icon 2. Choose video capture device 3. - Page 19 Audio Setting When there is no audio playing first check the video source see if the it is set in default value and then check the audio setting on OBS. 1. Set Default for the audio source. 2. Audio setting on OBS. Choose Audio, click Setting and choose audio device (Mic/Auxiliary Audio Device) Synchronize Video with External Audio...
- Page 20 2.Right click the Video Capture Device in Source and choose Filter 3. Click “+”under Audio/Video Filters and choose Video Delay (Async) .You can custom the filter name in the pop-up window. Click OK to confirm the filter name. Input delay value in ms, the value need to adjusted until the video and audio is synchronous.
- Page 21 Streaming Setting 1. Find the RTMP URL and Stream Key provided by streaming broadcast website. 2. Copy URL and Stream Key 3. Back to OBS, click Setting in the lower right corner and click “Stream”. Choose Stream Type as “Streaming Service” or “Custom Streaming Server” . If choose “Streaming Service”, there is a list of streaming service name available in the drop down list of Service.
-
Page 22: Vmix Streaming
4.2 vMix Streaming L2 PLUS streaming via vMix steps are as follow: 1. Click a new blank, then click the “Add Input” button. 2. Select Camera-Camera-FEELWORLD USB3.0 Capture. 3. Select the same resolution as the L2 PLUS output. Then click “OK”. - Page 23 5. Complete the URL and Key information. Click “Start 1”, vMix will begin streaming. Note: vMix does not support automatic recognition of the output resolution of L2 PLUS. Every time the output resolution of L2 PLUS is modified, the picture on vMix will pause. The user needs to re-select FEELWORLD...
-
Page 24: Chapter 5 Feelworld Live Software Operation
Minimum System Requirements for Windows ● Microsoft Windows 10 64-bit Note: The IP address of the L2 PLUS must be in the same WLAN segment as the computer or the mobile control device you choose. 5.1 Connect L2 PLUS and computer 5.1.1 Direct Link via a Network Cable... -
Page 25: Static Direct Connection
7. Click OK. 5.1.2 Static Direct Connection To ensure that Feelworld Live can connect in different classes of subnet masks, if you find that you cannot connect to the L2 PLUS series by searching, please try to use the direct connection method. -
Page 26: Connect Wirelessly With Your Router
5.1.3 Connect Wirelessly with Your Router The L2 PLUS provides wireless control, so you can control it from a greater distance when the L2 PLUS is not in your immediate vicinity. A wireless router is required to use this feature. The computer receives the wi-fi signal from the wireless router you connect the L2 PLUS to. - Page 27 Select the desired device by SN and IP and enter the management interface. The software interface is a simulation of operation panel on real L2 PLUS device. For example, clicking Button MENU open up menu as on the device. If it is the first time for you to use Feelworld Live, we suggest you watch our User Guide video.
-
Page 28: Input Info
5.2.1 Input Info In the【Input Info】you can check the input resolution 5.2.2 HDMI Output: PVW/PGM Format: 1920×1080@60(max) Click<Set>after confirm 5.2.3 USB 3.0 Output: PVW/PGM Format: 1920×1080@60(max) Click<Set>after confirm... -
Page 29: Live Streaming
Audio Source: AFV/Line in/input1,2,3,4 Audio Bar: ON/OFF 5.2.6 Test Pattern To facilitate troubleshooting, Feelworld Live provides a test signal output, which can be used to troubleshoot the USB or HDMI output interface when there is no output signal from USB or HDMI. -
Page 30: Hdmi Out Setting
Feelworld Live, and when you control the interface again, you need to enter the password to control it. Note: If you have forgotten your password, please restore the factory settings on the L2 PLUS 5.2.9 Lan Port Set In 【Lan Port Set】 , you can check current IP, mask... -
Page 31: Language
The steps are as follow: 1. Turn on the T-Bar Calibration switch. 2. Push the T-Bar to the bottom side on the L2 PLUS. 3. Turn on the "On" switch 4. Push the T-Bar to the top side on the L2 PLUS. -
Page 32: Mix
5.2.13 MIX Mode: Fast/T-Bar Time: 0.5s~5.0s Layout: 15 kinds 5.2.14 PIP There are 9 kinds of PIP layout 5.2.15 Chroma Key 1. Select the base color you want to remove, there are 6 kinds of colors you can select: orange, yellow, green, cyan, blue and purple. -
Page 33: Ptz Camera Setting
5.2.16 PTZ Camera Setting When controlling the PTZ camera, the computer, L2 PLUS and PTZ camera should be in the same network segment. 1. Set the corresponding communication port on the PTZ camera, such as VISCA or UDP port 1259. -
Page 34: Logo Overlay
LOGO picture. 4. Click “Logo Generated”, “upgrading”will be seen in the TFT screen of L2 PLUS, and the Logo picture will be imported in. Note: The format of the LOGO image should be BMP 24 bits, and the image size should be within 256*128 pixels. -
Page 35: Chapter 6 Product Parameters
Chapter 6 Product Parameters Screen 5.5-inch (touch) Input HDMI In 4×HMDI-A HDMI Out 1×HMDI-A USB3.0 1×USB TypeA 1×3.5mm (MIC) Connections Audio 1×3.5mm (LINE) Communication LAN 1×RJ45 1×DC Jack Power HDMI SMPTE:720p@50/60|1080i@50/60|1080p@23/2 4/30/50/60 Input VESA:1024X768@60|1280X720@60|1280X768 Resolutions @60|1280X1024@60|1360X768@60|1366X768 @60|1440X900@60|1600X1200@60|1680X1050 @60|1920X1080@60|1920X 1200@60 Performance HDMI Output SMPTE:720p@50/60|1080p@24/25/30/50/60...
Need help?
Do you have a question about the L2 PLUS and is the answer not in the manual?
Questions and answers
I cant display to L2 Plus screen the picture of smartphone. why? do I have to instal any software? my smartphone is Samsung Note 10+
The Feelworld L2 Plus may not support the resolution or aspect ratio of the Samsung Note 10+ screen, causing display issues. Additionally, if the screen appears squeezed, it may require de-squeezing in post-processing, making it unsuitable for live streaming. You do not necessarily need additional software, but checking input resolution compatibility in the Feelworld Live software and adjusting settings may help.
This answer is automatically generated