Table of Contents
Advertisement
Advertisement
Table of Contents

Related Manuals for Washtech 3 Series


Summary of Contents for Washtech 3 Series
- Page 1 Series PASSTHROUGH DISHWASHER Service Manual...
- Page 2 WARNING Before installation and commissioning, you must read the safety instructions and warnings carefully and all the warning labels attached to the equipment. IMPORTANT Failure to comply (even partially) with the instructions given in this manual will invalidate the product warranty and relieves the manufacturer of any responsibility. IMPORTANT The alteration of machine operation, design or the replacement of parts not approved by the manufacturer may void warranties and approvals.
-
Page 3: Table Of Contents
Contents Safety Instructions ...................................4 Installation......................................5 Installation Diagram ......................6 Bench Work Details ......................7 Operating Instructions..................................8 Dishwashing Procedures ................................9 Troubleshooting Chart................................11 Components ....................................13 Location and Access......................13 Timer............................14 Rinse Thermostat.......................15 Wash Thermostat.......................16 Solenoid Valve........................17 Pressure Switch ........................18 Wash Pump.........................19 Rinse Aid Injector (Optional) ..................20 Electrical Diagrams .................................. -
Page 4: Safety Instructions
Safety Instructions WARNING Equipment contains dangerous voltages and can be hazardous if installed or operated incorrectly. Non-compliance with Warnings or failure to follow the instructions contained in this manual can result in loss of life, severe personal injury or serious damage to property. Installation ♦... -
Page 5: Installation
Installation WARNING Installation personnel must be suitably qualified and ensure compliance with all codes and standards. IMPORTANT Failure to comply (even partially) with the instructions given in this manual will invalidate the product warranty and relieves the manufacturer of any responsibility. Install machine on sound waterproof self-draining floor and use adjustable feet to level machine. -
Page 6: Installation Diagram
Service Manual M1-3 (W) Revision 1B... -
Page 7: Bench Work Details
Service Manual M1-3 (W) Revision 1B... -
Page 8: Operating Instructions
Operating Instructions Start up Fit drain upstand, wash pump filter, scrap tray and shut door. Turn wall and machine power switches on. Power light glows red and machine fills automatically. Wash Ready light glows amber when wash tank is ready. Rinse Ready light glows amber when the machine is up to required temperature and ready to run. -
Page 9: Dishwashing Procedures
Dishwashing Procedures for best results Installation Read Operator manual. Correct installation, including an adequate supply of water at the correct temperature and pressure is essential for effective operation of your machine. Refer installation instructions for details. Water softening is recommended in hard water areas - especially for glasswashing. Pre-rinsing Pre-scraping of dishes is required by Food Hygiene Regulations. - Page 10 Dishwashing Procedures for best results Drying Single tank commercial dishwashers do not have a drying cycle. However, the machines do rinse at high temperatures which promote fast drying particularly when drying agents are used. We recommend prompt removal of the rack from the machine - leave the rack on the bench for 2 to 3 minutes before emptying.
-
Page 11: Troubleshooting Chart
Troubleshooting Chart PROBLEM POSSIBLE CAUSES REMEDY (Check/Adjust/Replace) Heating Rinse not heating Over-temp thermostat tripped Over-temp thermostat Rinse thermostat settings or fault Rinse thermostat Rinse element failed Rinse element Overheating Thermostat adjustment Thermostat Thermostat probe out of pocket Insert & secure probe Wash water cold Wash thermostat setting Wash thermostat... - Page 12 Troubleshooting Chart PROBLEM POSSIBLE CAUSES REMEDY (Check/Adjust/Replace) Rinse Arms Not rotating Rinse jets not clean Rinse jets Arm bushes worn Bushes Water supply pressure low Water supply Rinse pump not working (if fitted) Rinse pump (if fitted) Cycle start Does not start Not up to temperature Give machine reasonable time initially Rinse thermostat faulty...
-
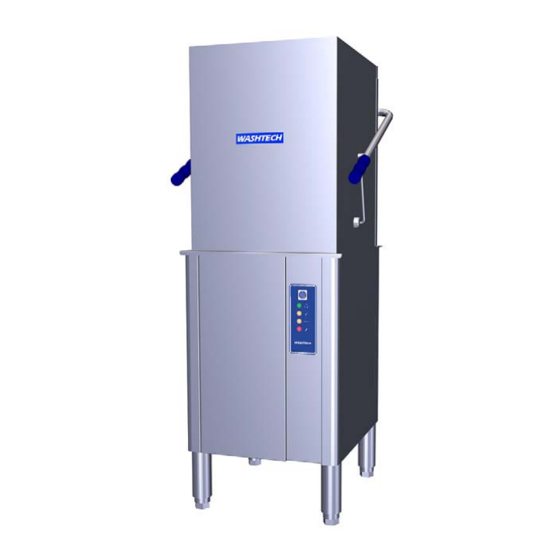
Page 13: Components
Components WARNING All service/repair work must be carried out by qualified personnel only. Location and Access 1. Wiring Tray 11. Wash Pump 2. Power/Chemical Terminal 12. Wash Element 3. Timer 13. Door Switch 4. Rinse Thermostat 14. Pressure Switch 5. Door Switch Relay 15. -
Page 14: Timer
Timer Part Number 32661 001 Function Provides an automatic timing sequence of the wash, rinse, detergent and rinse aid injection stages in a dishwashing cycle. Description The electro-mechanical timer has five cams and a drive motor. The timer cams, rotated by the motor, operate individual changeover switches in a set timing sequence. -
Page 15: Rinse Thermostat
Rinse Thermostat Part Number 3020 Function Controls the rinse heating elements and prevents operation of machine if the rinse temperature is below that required. Description The rinse thermostat is a specially calibrated 3 pole capillary type temperature operated device. The thermostat does not have a control knob and it is factory set to the temperatures required by Hygiene Regulations. -
Page 16: Wash Thermostat
Wash Thermostat Part Number 30201 Function Controls the wash element Description The wash thermostat is a single pole capillary type device. It has a single changeover contact and a rotating shaft for a manual temperature adjustment. Factory default setting is 65°C. Contact switching capacity: 16(4) A 380 V. -
Page 17: Solenoid Valve
Solenoid Valve Part Number 3342 Function Controls flow of water into machine during filling of wash tank and final rinsing. Description Electromagnetically operating water valve for use with cold and hot water. Diagram Replacement Disconnect the wires from the solenoid connectors. Remove hot water supply hose. -
Page 18: Pressure Switch
Pressure Switch Part Number 600 30252 Function Controls filling of wash tank and protects wash elements. Description The pressure switch is attached to the pressure bell. As the water level in the wash tank rises air is trapped in the bell and increasing pressure is transmitted to the pressure switch. When the tank is full the pressure switch shuts off the fill solenoid valve and switches on the wash element. -
Page 19: Wash Pump
Wash Pump Part Number 3888 Function Pumps water from the wash tank to the wash arms providing a recirculating wash cycle. Description Electric Pump FIR Power: HP 0.5 Kw 0.37 Speed: 2800 rpm Voltage: 220 V Amperes: 2.6 A Frequency: 50 Hz Capacitor: 12.5 uF/400 V... -
Page 20: Rinse Aid Injector (Optional)
Rinse Aid Injector (Optional) Part Number C620120 Function Adjustable flow rate hydraulic rinse pump for rinse-aid chemical dosing Description The injector works by using the water pressure in the rinse line. The pressure in the input line causes the suction of a determined amount of chemical for each cycle. -
Page 21: Electrical Diagrams
Service Manual M1-3 (W) Revision 1B... -
Page 22: Wiring Diagram
Service Manual M1-3 (W) Revision 1B... -
Page 23: Assembly Diagrams
Assembly Diagrams M1 (3) WASHTECH WIRING TRAY ASSY 301 10221 23/08/2006 PLAN PERSPECTIVE VIEW Parts List ITEM PART NUMBER DESCRIPTION 3035 SWITCH SINGLE POLE BIASED BLACK 8816 MS RH BRASS 3/16 X 3/4 8151 NUT HX BRASS 3/16" PRESSED 32285... -
Page 24: Control Panel Assembly
M1(W) CONTROL PANEL ASSEMBLY 301 10017 7/08/2006 Parts List ITEM PART NUMBER DESCRIPTION 600 30161 LENS & NEON ASSY (RED) 12mm 600 30163 LENS & NEON ASSY (GREEN) 12mm 600 30162 LENS & NEON ASSY (AMBER) 12mm 301 10008 M1(3) CONTROL PANEL SUB-ASSY 600 30214 SWITCH POWER 2P NO/NO LATCHED 327 70001... -
Page 25: Wash Assembly
Service Manual M1-3 (W) Revision 1B... -
Page 26: Rinse Assembly
Service Manual M1-3 (W) Revision 1B... - Page 27 Service Manual M1-3 (W) Revision 1B...
-
Page 28: Door Link Assembly
M1 (3) DOOR LINK ASSY 301 10010 7/08/2006 INSIDE DOOR EXPLODED PERSPECTIVE VIEW EXPLODED PERSPECTIVE VIEW Parts List ITEM PART NUMBER DESCRIPTION 600 80017 M5 x 12 SS TRUSS HEAD SCREW 301 10037 ASSY M1(3) DOOR HANDLE 301 10007 M1(3) PASSTHRU DOOR ASSY 400 90120 PASSTHROUGH DOOR MOUNT GASKET 600 80026... -
Page 29: Rinse Tank Assembly
Spare Parts DESCRIPTION PART NO Cabinet & Door Control Panel Sub-Assembly 301 10008 Control Panel Label 327 70001 Door Switch Magnet 600 30182 Controls & Indicators Contactor 600 30229 Door Reed Switch 600 30183 Door Switch Relay 600 30223 Power Cord Set 15A 600 30255 Power Light 600 30161... - Page 30 Spare Parts DESCRIPTION PART NO Pumps & Solenoids Dual Check Valve 600 60108 Solenoid Valve 3342 Wash Pump 3888 Wash Pump Capacitor 12.5 mF 3892 Wash Tank Components Drain Upstand 400 90119 Nut M2 Wash Spindle 400 30074 Pressure Bell 400 90093 Rinse Arm Assembly 400 10092...
-
Page 31: Accessories
Service Manual M1-3 (W) Revision 1B... -
Page 32: Appendices
Service Manual M1-3 (W) Revision 1B... -
Page 33: Rinse Pump Retrofit
Service Manual M1-3 (W) Revision 1B... -
Page 34: Detergent Pump Retrofit
3035 SWITCH SINGLE POLE BIASED BLACK SEKO DETERGENT TUBE SEKO SS DETERGENT INLET KIT FOOT STRAINER STAINLESS STEEL WEIGHT 301 10221 M1 (3) WASHTECH WIRING TRAY ASSY SS WEIGHT WASHERS FOOT STRAINER GASKETS BULKHEAD FITTING Service Manual M1-3 (W) Revision 1B... -
Page 35: Revisions
Revisions Manual Revisions REVISION REVISION REVISED FROM CHANGE STATUS DATE PAGES SERIAL NO: DESCRIPTION 24/08/06 016675 (except 016974 - 016978) 30/10/06 26, 27, 29, Change Rinse Tank Assy part, 32, 33, 34 change Retrofit kits. Service Manual M1-3 (W) Revision 1B...
Need help?
Do you have a question about the 3 Series and is the answer not in the manual?
Questions and answers