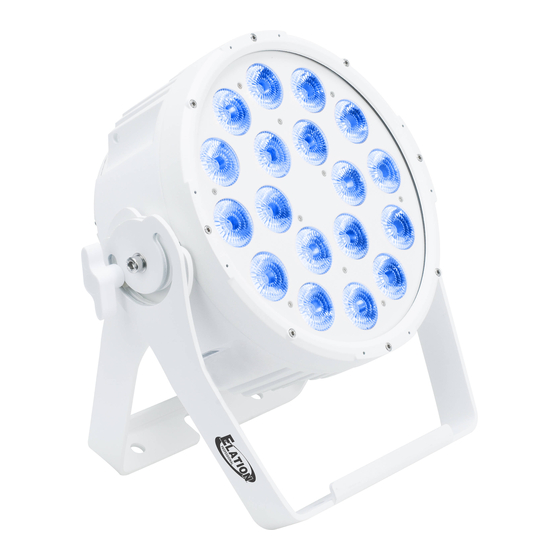
Elation SIXPAR 300IP User Manual
Hide thumbs
Also See for SIXPAR 300IP:
- User manual (26 pages) ,
- User manual (26 pages) ,
- User manual (26 pages)
Table of Contents
Advertisement
Quick Links
Advertisement
Table of Contents

Related Manuals for Elation SIXPAR 300IP


Summary of Contents for Elation SIXPAR 300IP
- Page 1 SIXPAR 300IP User Manual...
- Page 2 Elation Professional B.V. | Junostraat 2 | 6468 EW Kerkrade, The Netherlands +31 45 546 85 66 | +31 45 546 85 96 fax | www.elationlighting.eu | info@elationlighting.eu Elation Professional Mexico | AV Santa Ana 30 | Parque Industrial Lerma, Lerma, Mexico 52000 +52 (728) 282-7070 DOCUMENT VERSION Due to additional product features and/or enhancements, an updated version of this document may be available online.
-
Page 3: Table Of Contents
CONTENTS General Information Warranty Registration Limited Warranty Safety Guidelines Fixture Overview DMX Setup Remote Device Management (RDM) System Menu Dimming Curves DMX Traits Cleaning and Maintenance Technical Specifications Photometric Data Dimensional Drawings Optional Accessories... -
Page 4: General Information
Congratulations, you have just purchased one of the most innovative and reliable lighting fixtures on the market today! The SIXPAR 300IP™ has been designed to perform reliably for years when the guidelines in this booklet are followed. Please read and understand the instructions in this manual carefully and thoroughly before attempting to operate this unit. - Page 5 GENERAL INFORMATION UNPACKING Thank you for purchasing the SIXPAR 300IP ™ by Elation Professional®. Every SIXPAR 300IP™ has been thoroughly tested and has been shipped in perfect operating condition. Carefully check the ship- ping carton for damage that may have occurred during shipping. If the carton appears to have been damaged, carefully inspect your unit for damage and be sure all accessories necessary to operate the unit have arrived intact.
-
Page 6: Warranty Registration
WARRANTY REGISTRATION Please fill out the enclosed warranty card to validate your purchase. All returned service items, whether under warranty or not, must be freight pre-paid and accompanied by a return authorization (R.A.) number. The R.A. number must be clearly written on the outside of the return package. A brief description of the problem as well as the R.A. -
Page 7: Limited Warranty
The sole responsibility of Elation Professional under this warranty shall be limited to the repair of the product, or replacement thereof, including parts, at the sole discretion of Elation Professional. All products covered by this warranty were manufactured after January 1, 1990, and bare identifying marks to that effect. -
Page 8: Safety Guidelines
SAFETY GUIDELINES The SIXPAR 300IP™ is an extremely sophisticated piece of electronic equipment. To guarantee smooth operation, it is important to follow the guidelines shown in this man- ual. The manufacturer of this device will not accept responsibility for damages result- ing from the misuse of this fixture due to the disregard of the information printed in this manual. - Page 9 SAFETY GUIDELINES • NEVER OPEN THIS FIXTURE WHILE IN USE! • Ensure all connections and end caps are properly sealed with a dielectric grease (available at most electrical suppliers) to prevent water intrusion, corrosion, and/or an electrical short circuit. • During the initial operation of this fixture, a light smoke or smell may emit from the interior of the fixture.
-
Page 10: Fixture Overview
FIXTURE OVERVIEW 1. Mode Button 2. Up Button 3. Down Button 4. Enter Button 5. Power In 6. DMX In 7. DMX Out 8. Power Out... - Page 11 M10 screw fitted through the center hole of the Dual Yoke / Floor Stand. SECURING Regardless of the rigging option that you choose for your SIXPAR 300IP™ always be sure to secure your fixture with a safety cable.
- Page 12 FIXTURE INSTALLATION MOUNTING POINTS • Overhead mounting requires extensive experience, including calculating working load limits, installation material being used, and periodic safety inspection of all installation material and the device, among other skills. If you lack these qualifications, do not attempt the installation your- self.
-
Page 13: Dmx Setup
Connect one end of the provided XLR cable to the female XLR output of your controller, and the oth- er end to the male XLR input of the SIXPAR 300IP™. The diagram below illustrates a typical DMX- 512 connection when the fixture is in the 12 Channel Mode. You can chain multiple panels together through serial linking. - Page 14 In the case of the SIXPAR 300IP™, when in the 6 Channel Mode, you should set the starting DMX address of the first unit to 1, the second unit to 7 (1 + 6), the third unit to 13 (1 + 6 + 6), and so on.
-
Page 15: Remote Device Management (Rdm)
REMOTE DEVICE MANAGEMENT (RDM) NOTE: In order for RDM to work properly, RDM enabled equipment must be used throughout the entire system, including DMX data splitters and wireless systems. Remote Device Management (RDM) is a protocol that sits on top of the DMX512 data standard for lighting, and allows the DMX systems of the fixtures to be modified and monitored remotely. -
Page 16: System Menu
SYSTEM MENU ON-BOARD SYSTEM MENU The SIXPAR 300IP™ comes with an easy to navigate system menu. This section covers how to access each menu function. LCD CONTROL PANEL DISPLAY The (4) button control panel (see image below) located on back of the fixture allows you to access the main menu and make all necessary adjustments to the SIXPAR 300IP™. - Page 17 SYSTEM MENU LCD CONTROL PANEL LOCKOUT When the Display ON menu is set to OFF1, the LCD display will turn OFF after 30 seconds and the (4) button Control Panel will be LOCKED. To unlock the (4) button LCD control panel follow these steps: 1.
- Page 18 SYSTEM MENU MENU OPTIONS / VALUES DESCRIPTION CH06 CH07 Channel DMX Channel Mode CH08 CH12 DMX Mode Addr: 001 - 512 DMX Address Setting Secondry Secondry Mode Set fixture as secondary unit. Mode Display always on Display On Display off after 30 sec of inactivity OFF1 Display off and locked after 30 sec of inactivity R00 - R99...
-
Page 19: Dimming Curves
DIMMING CURVES The DimCurve menu allows you to select one of the following preset dimming curves: Standard, Stage, TV, Architec, or Theatre. (See diagram below for more details) -
Page 20: Dmx Traits
DMX TRAITS CHANNEL DMX VALUES FUNCTION 6CH 7CH 8CH 12CH Red, 0% to 100% 000 - 255 Green, 0% to 100% 000 - 255 Blue, 0% to 100% 000 - 255 White, 0% to 100% 000 - 255 Amber, 0% to 100% 000 - 255 UV, 0% to 100% 000 - 255... - Page 21 DMX TRAITS CHANNEL DMX VALUES FUNCTION 6CH 7CH 8CH 12CH Color Macros (continued) 064 - 067 Blue + White 068 - 071 Blue + Amber 072 - 075 Blue + UV 076 - 079 White + Amber 080 - 083 White + UV 084 - 087 Amber + UV...
- Page 22 DMX TRAITS CHANNEL DMX VALUES FUNCTIONS 6CH 7CH 8CH 12CH Color Macros (continued) 188 - 191 Red + Green + Amber + UV 192 - 195 Red + Blue + White + Amber 196 - 199 Red + Blue + White + UV 200 - 203 Red + Blue + Amber + UV 204 - 207...
-
Page 23: Cleaning And Maintenance
Regular inspections are recommended to ensure proper function and extended life. There are no user serviceable parts inside this fixture. Please refer all other service issues to an authorized Elation service technician. Should you need any spare parts, please order genuine parts from your local Elation dealer. -
Page 24: Technical Specifications
APPROVALS / RATINGS CE | cETLus | IP65 **Optional Corrosion-Resistant Coating may be available for this fixture. Please consult an Elation sales representative for details Specifications and improvements in the design of this unit and this manual are subject to change without any... -
Page 25: Photometric Data
PHOTOMETRIC DATA... -
Page 26: Dimensional Drawings
DIMENSIONAL DRAWINGS Dimensions may not be drawn to scale. -
Page 27: Optional Accessories
OPTIONAL ACCESSORIES ORDER CODE ITEM TRIGGER CLAMP Heavy Duty Wrap Around Hook Style Clamp SIXPAR300/GFH Gel Frame and Holder Kit SIXPAR/BD300 Barn Door (Gel Frame Holder Kit Require - Not Included) EWD001 EWDMXIP Wireless IP65 Transmitter SIXPAR/2MDLC 6.6 ft (2m) IP Data Link Cable SIXPAR/2MPLC 6.6 ft (2m) IP Power Link Cable SIXPAR/3MDLC...
Need help?
Do you have a question about the SIXPAR 300IP and is the answer not in the manual?
Questions and answers