
Related Manuals for Clarion CZ500


Summary of Contents for Clarion CZ500
- Page 1 Owner’s manual & Installation manual Mode d’emploi et manuel d’installation Manual de instrucciones y de instalación Bluetooth CD/USB/MP3/WMA RECEIVER ® LECTEUR CD/USB/MP3/WMA Bluetooth ® RECEPTOR Bluetooth CD/USB/MP3/WMA ®...
-
Page 3: Table Of Contents
Contents Thank you for purchasing this Clarion product. • Please fully read this owner’s manual before operating this equipment. • Check the contents of the enclosed warranty card and store it in a safe place with this manual. 1. FEATURES ... 4 Expanding Systems ... 4 2. PRECAUTIONS ... 5 Front Panel ... 6 USB Port ... 6 Remove the DCP ... 7 Re-attach the DCP ... 7 Storing the DCP in the DCP Case ... -
Page 4: Features
1. FEATURES • HD Radio and XM Radio Ready ™ • Compatible with iPod ® • 6ch/4V RCA Output with Subwoofer Control and BEAT-EQ with 3 Band Parametric Equalizer • MP3/WMA compatible with ID3-TAG display • Built in Bluetooth handsfree (HFP) and audio streaming (A2DP & AVRCP) • Rear USB • IR remote controller included • OEM Steering Wheel Remote Ready Expanding Systems iPod/iPhone Bluetooth ® cellular phone Note: Items outside of the frames are commercially available. -
Page 5: Precautions
CET APPAREIL NUM ÉRIQUE DE LA CLASSE B EST CONFORME LA NORME NMB-003 DU CANADA CLARION CO.,LTD. 7-2,SHINTOSHIN,CHUO-KU,SAITAMA-SHI,SAITAMA-KEN,JAPAN The HD Radio Ready logo is proprietarily trademark of iBiquity Digital Corp. MANUFACTURED: 87.9-107.9MHz À IC 419C-CZ500 Bluetooth ID: B014652 FCC ID:AXRCZ500 Clarion Co., Ltd. MADE IN CHINA PN.: 12707000XXXX... -
Page 6: Front Panel
USB Port • When a USB memory stick is used, it may stick out presenting the possibility of injury. Use a USB extension cable to prevent this hazard. • The USB memory sticks must be recognized as “USB mass storage class” to work properly. Some models may not operate correctly. Clarion will not be held liable in the unlikely event of loss of or damage to memorized data. When using an USB memory stick, we recommend that you backup your data on a personal computer. • Data files may be lost or become corrupted when using USB memory sticks in the following situations: When the USB memory stick is disconnected or the power is turned off during data read or write. When affected by static electricity or electric noise. When the USB memory stick is connected or disconnected while the contents are being accessed. -
Page 7: Remove The Dcp
Remove the DCP The control panel can be detached to prevent theft. When detaching the control panel, store it in the DCP (DETACHABLE CONTROL PANEL) case to prevent scratches. We recommend taking the DCP with you when leaving the car. 1. Press the [ ] button (2 sec.) to turn off the power. 2. Depress the [OPEN] button to unlock the DCP. 3. Grab the edge that pops out and remove the DCP. Re-attach the DCP 1. Hold the DCP and ensure that the panel faces towards you. Set the right side of the DCP into the DCP bracket. -
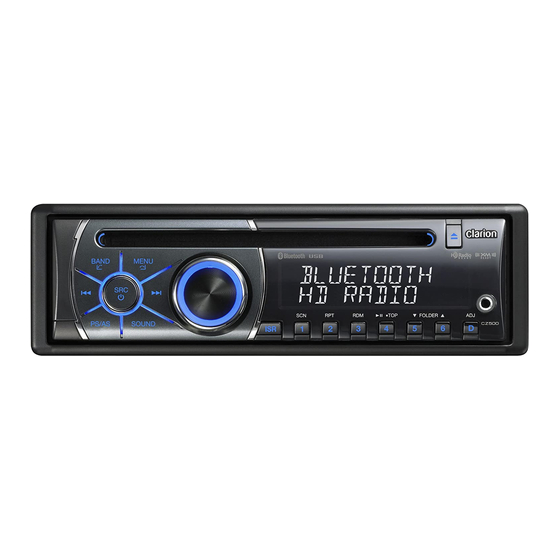
Page 8: Controls
3. CONTROLS Operational Panel [BAND/ ] [MENU/ [PS/AS] [SOUND] [OPEN] [POWER/SRC] Names of Buttons [ / SRC] button • Power/Toggle the audio source [BAND / ] button • Select tuner band/Dial/Answer [MENU / ] button • System menu/Terminate call ] button • Eject the disc in the unit. ] button • Previous (Next)/Search [OPEN] button • Unlock the front panel. -
Page 9: Remote Control
Remote Control [POWER/SRC] button • Power/Toggle the audio source ] button • Previous (Next)/Search [MUTE] button • Mute audio output [SCN/PS/AS] button • Scan play/Preset scan/Auto memory store [BND/TOP] button • Select tuner band/Top play ] button • Volume up/down ] button • Play/Pause [ISR] button • Recall ISR station stored in memory (short press) and store current station in ISR memory (long press) • iTunes Tagging (when connected with HD Radio module) [DISP] button • Display switch... -
Page 10: Cautions On Handling
4. CAUTIONS ON HANDLING Handling Discs Handling • New discs may have some roughness around the edges. If such discs are used, the player may not work or the sound may skip. Use a pen or similar tool to remove any roughness from the edge of the disc. Roughness • Never stick labels on the surface of the disc or mark the surface with a pencil or pen. • Never play a disc with any cellophane tape or other glue on it or with peeling off marks. If you try to play such a disc, you may not be able to get it back out of the player or it may damage the player. • Do not use discs that have large scratches, are misshapen, cracked, etc. -
Page 11: Operations
5. OPERATIONS Basic Operations Note: Be sure to read this chapter referring to the chapter “3. CONTROLS.” CAUTION Before turning off the unit, return the volume to a lower level. Restarting playback with the volume at maximum increases the possibility of damage to the speakers or your hearing. -
Page 12: Radio Operations
Note: 1. After auto store, the previous stored stations will be overwritten. 2. The unit has four bands: FM1, FM2, FM3 and AM. FM3 and AM can store by AS function. Each bands can store six stations, CZ500 can store 24 stations in total. Manual store While tuned into a desired radio station, press and hold number button 1–6 to store it in the memory. Recall the stored stations Press one numeric button among 1 to 6 on the panel or the remote control to select the corresponding stored station. -
Page 13: Satellite Radio Mode
Satellite Radio Mode Listeners can subscribe to XM ® the Web by visiting www.xmradio.com, or by calling (800) 967-2346. Customers should have their Radio ID ready (see “Displaying the Identification (ID) Code”). Customers can receive a limited number of free-to-air channels without activation. Listeners can subscribe to Sirius the Web by visiting www.sirius.com, or by calling (888) 539-SIRIUS. Customers should have their Sirius ID ready (Sirius ID is located on the Satellite Radio Tuner, sold separately). Customers can listen to music samples by tuning to channel 184. Accessing satellite radio mode Press the [SRC] button on the front panel or the remote control to switch to the SAT source. Displaying the Identification (ID) Code Before you listen to satellite radio, you must subscribe to the service using your radio’s identification number. To display the radio ID, use the [... -
Page 14: Hd Radio Operations
HD Radio Operations About HD Radio technology ™ HD Radio technology allows CD-quality digital broadcasting of your local AM and FM radio stations. HD Radio broadcasts can include multiple channels on the same frequency, which is called multicasting. With multicasting, you can receive up to eight additional multicast channels: HD1–HD8. With an HD Radio tuner connected, you will receive HD Radio digital broadcasts automatically when tuned to a station that offers HD Radio technology. NOTE: Not all FM or AM stations offer HD Radio (digital) broadcasting. You can receive both analog and digital stations with the unit. -
Page 15: Itunes ® Tagging
Tagging ® The CZ500 offers iTunes Tagging, which ® allows the user to “Tag” songs playing on HD Radio stations for purchase later through ™ iTunes. When you press the [ISR] button, the unit stores the title and artist song information that can then be transferred to your iPod when connected to the unit. A list titled "Tagged" will appear in iTunes, allowing you the option to purchase your tagged songs. Note: “iTunes Tagging” function works by ® connecting THD300 (sold separately). -
Page 16: Cd/Mp3/Wma Operations
CD/MP3/WMA Operations This unit can play back MP3/ WMA files Note: If you play a file with DRM (Digital Rights Management) for WMA remaining ON, no audio is output (The WMA indicator blinks). To disable DRM (Digital Rights Management) W hen using Windows Media Player 9/10/11, click on Tool → Options → Copy Music tab, then under Rip settings, uncheck the Copy Protect Music box. Then recreate the files. When you disable DRM, you do so at your own responsibility. Precautions when creating MP3/ WMA file Usable sampling rates and bit rates 1. MP3: Sampling rate 8 kHz-48 kHz, Bit rate 8 kbps-320 kbps/VBR 2. WMA: Bit rate 8 kbps-320 kbps... -
Page 17: Pausing Play
CD/MP3/WMA Operations • Some CDs recorded in CD-R/CD-RW mode may not be usable. Pausing play 1. Press the [ 4 / ] button to pause play. “PAUSE” appears in the display. 2. To resume CD play, press the [ 4 / button again. Displaying CD titles You can press the [D] button to change the title display ON or OFF. When the SCROLL function is ON, the unit can display title data for MP3/WMA disc. -
Page 18: Usb Operations
USB Operations 1. Insert a USB device into the USB connector. When connecting a USB device, the unit will read the files automatically. 2. To remove the USB device, you should first select another source, in order to avoid damaging the USB device. Then remove the USB device. iPod & iPhone Operations Connect Connect an iPod or iPhone to the USB using a USB cable. -
Page 19: Bluetooth Operations
Handsfree Operations Pairing 1. Turn on Bluetooth function of your mobile phone. 2. Enter the mobile phone’s Bluetooth setup menu. 3. Search for new Buetooth devices. 4. Select CZ500 from the pairing list on the mobile phone. 5. Enter “0000” as the password. 6. After pairing successfully, the unit will enter Bluetooth mode automatically, and “BLUETOOTH CONNECTED” will appear on the LCD. Make a call... -
Page 20: Selecting A Track
Audio streaming is a technique for transferring audio data such that it can be processed as a steady and continuous stream. Users can stream music from their external audio player to their car stereo wirelessly and listen to the tracks through the car’s speakers. Please consult your nearest Clarion dealer for more information on wireless audio streaming transmitter products offered. CAUTION Please avoid operating your connected mobile phone while audio streaming as this may cause noise or sound choppy during the song playback. -
Page 21: Audio Setup
Audio Setup Press the [SOUND] button to enter sound effect setting mode. First press shows current EQ. Rotate the [VOLUME] knob to change the options in the following order: OFF → B-BOOST → IMPACT → EXCITE → CUSTOM Press the [SOUND] button, then press [ ] to select USER preset including: BALANCE → FADER → M-B EX → LPF(low pass filter) → SUBW VOL, rotate the [VOLUME] knob to select a value. System Setup Press and hold the [D] button to enter system MENU. Press [ ] to select options, rotate the [VOLUME] knob to adjust. CLOCK Press the knob to enter clock setting mode. Rotate the knob to set clock, press [ ] to select hour or minute, press and hold the knob to confirm. -
Page 22: Troubleshooting
6. TROUBLESHOOTING General Problem Unit does not turn Unit fuse blown. Car battery fuse blown. Unit does not turn Illegal operation. Nothing happens when buttons are pressed. Display is not accurate. Remote control Battery depleted. does not work. Battery installed incorrectly. Improper audio output connection. Volume set too low. No/low audio Speakers damaged. output. Heavily biased volume balance. Speaker wiring is in contact with metal part of car. Non-standard disc used. -
Page 23: Error Display
USB devices Problem The USB device has been inserted USB device cannot be with wrong direction. inserted. The USB connector is broken. The USB device is damaged. USB device is not recognized. Connectors are loose. No sound heard with No MP3/WMA file is stored in the the display “No File” USB device. shown. Sound skips or is MP3/WMA files are not encoded noisy. properly. Bluetooth Problem The device does not support the Cannot pair the profiles required for the system. -
Page 24: Specifications
8. SPECIFICATIONS FM tuner Frequency range: 87.9-107.9 MHz Usable sensitivity: 8 dBμ Frequency response: 30 Hz-15 kHz Stereo separation: 30 dB (1 kHz) Signal/noise ratio: >55 dB AM tuner Frequency range: 530-1710 kHz Usable sensitivity (S/N=20 dB): 30 dBμ System: D isc digital audio system Frequency response: 20 Hz-20 kHz Signal/noise ratio: >80 dB Total harmonic distortion: Less than 0.1% (1 kHz) Channel separation: >60 dB MP3/WMA mode MP3 sampling rate: 8 kHz to 48 kHz MP3 bit rate: 8 kbps to 320 kbps / VBR WMA bit rate: 8 kbps to 320 kbps Logical format: I SO 9660 level 1, 2 Joliet or Romeo file system Specification: USB 1.0/2.0 Playable audio format: MP3 (.mp3): MPEG 1/2/Audio Layer-3 WMA (.wma): Ver 7/8/9.1/9.2 Bluetooth Specification: B luetooth Ver. 2.0 Profile: HSP (Headset Profile) OPP (Object Push Profile) A2DP (Advanced Audio Distribution Profile) AVRCP (AV Remote Control Profile) Send/Receive Sensitivity: Class 2 Audio amplifier... -
Page 25: Installation/Wire Connection Guide
3) General Cautions 1. Do not open the case. There are no user- serviceable parts inside. If you drop anything into the unit during installation, consult your dealer or an authorized Clarion service center. Figure 1 Wire connector ... 1 Remote control unit (with battery) ... 1 Owner’s manual ... 1 Warranty card ... 1 Microphone ... -
Page 26: Cautions On Installation
5) Installing the Source Unit 1. Place the mounting bracket into the instrument panel, use a screwdriver to bend each stopper of the universal mounting bracket inward, then secure the stopper. 2. Wire as shown in Section 7. 3. Insert the source unit into the mounting bracket until it locks. 4. Carefully adjust all mounting tabs on the mounting bracket and confirm that the mounting tabs are securely attached. Notes: 1. Some car models require special mounting kits for proper installation. Consult your Clarion dealer for details. 2. Fasten the front stopper securely to prevent the source unit from coming loose. • Console opening dimensions 7 3/16″ (182 mm) Hole 4. Use the enclosed screws for installation. Using other screws can cause damage. (Figure 3) -
Page 27: Notes On Installation
Notes on installation 1. Before installation, please make sure that all connections have been properly made and the unit operates normally. Improper connection may result in damage to the unit. 2. Use only accessories designed and manufactured for this unit. The use of other unauthorized accessories may result in damage to the unit. 3. Before installation, please fasten all power cables. -
Page 28: Removing The Source Unit
Method B M5×6 Mounting frame 1. Insert this unit directly to the opening of the dashboard. 2. Place M5×6 cylindrical screw through the holes of the mounting frame located inside the opening to holes of the unit and fasten the screws to left & right. Trim ring installation Attach the trim ring around the front panel. 6) Removing the Source Unit Disassemble trim ring 1. Push the trim ring upward and pull out the upper part. -
Page 29: Wiring And Connections
7) Wiring and Connections White Rear audio Left output terminal Right White Front audio Left output terminal Right 4-channel amplifier (Black) (Black) (Black) Purple Subwoofer output 1 Purple Black Subwoofer output 2 Black Black Steering wheel Gray control terminal Black Black Microphone Black USB connector SAT BUS SAT L (White) SAT R (Red) RADIO... -
Page 30: Connecting The Accessories
Gray Front right Gray/Black White Front left White/Black Purple Front right Purple/Black Green Front left Green/Black 4-speaker system 2-speaker system Gray Front right Gray/Black White Front left White/Black Purple Purple/Black Green Not used. Green/Black Insulate each wire 8) Connecting the Accessories • Connecting to the external amplifier External amplifiers can be connected to the 4 channel RCA output connections. - Page 31 Clarion Co., Ltd. All Rights Reserved. Copyright © 2010: Clarion Co., Ltd. Printed in China / Imprimé en Chine / Impreso en China PN:127075002415...
Need help?
Do you have a question about the CZ500 and is the answer not in the manual?
Questions and answers