
Subscribe to Our Youtube Channel
Related Manuals for Kohler K-77780T-0


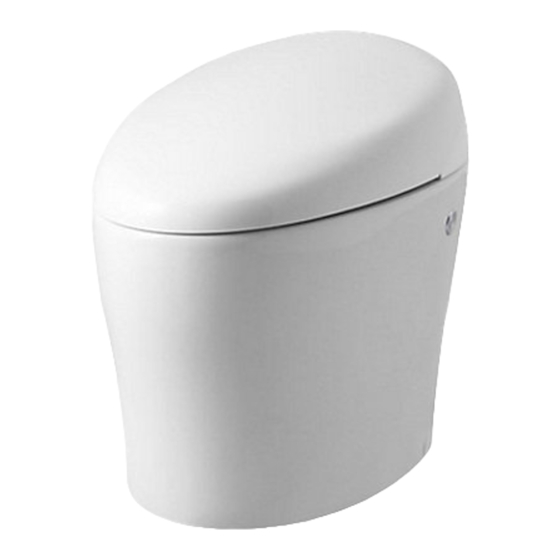
Summary of Contents for Kohler K-77780T-0
- Page 1 Installation Guide 安装说明 KARING 2.0 INTELLIGENT TOILET 新悦 2.0 智能座便器 K-77780T-0 KARING 2.0 INTELLIGENT TOILET 新悦 2.0 智能座便器 云智能版 K-77780T-XP-0 科勒(中国)投资有限公司 静安 制造商: 中国上海市宝山区丰翔路1955号 邮编: 200444 2-19 English page 20-37 中 文 页 码 1303729-T01-G...
-
Page 2: Before You Begin
These instructions contain important care, cleaning, and warranty information - please leave instructions for the consume. We appreciate your commitment to Kohler quality. Please take a few minutes to review this manual before you start installation. If you encounter any installation or performance problems, please don t hesitate to contact us. Thanks again for choosing Kohler Company. - Page 3 Screw: Recommend using M6 screw to match the plastic anchor. ROUGHING-IN Reference Value Unit: mm Finished Wall Front of Bowl Bottom View of Outlet Finished Floor Fig.#1 Kohler reserves the right to change marked dimensions without prior notice. Kohler Co. 1303729-T01-G...
-
Page 4: Specifications
* Antibacterial: the seat and cover contains long term inorganic anti-bacteria material which will inhibit bacteria growth on surface, this does not represent the mildew and other incidental effects. The antibacterial rate is more than 90%. (Perform test in accordance with GB21551.2-2010 requirements. Testing lab: China household electrical appliances testing institute; electromechanical products testing technology center of Shanghai Entry-Exit inspection and quarantine bureau.) 1303729-T01-G Kohler Co. -
Page 5: Preparations Before Installation
As the toilet is heavy, please seek for help if necessary. Toilet Fig.#3 B.When taking out the toilet from the carton box, please pay special attention to the bottom of the toilet to avoid the tank assembly to drop out. Tank Assy Fig.#4 Kohler Co. 1303729-T01-G... - Page 6 Take out the tank assembly from the vitreous shell and put it on the floor. Actuation Switch Fig.#5a Remove the EPE foam from the tank. EPE Foam Fig.#5b Remove the gasket and the collar. Collar Gasket Fig.#5c D. Place every part on the floor and ready for installation. Fig.#6 1303729-T01-G Kohler Co.
-
Page 7: Installation
If the socket is wall-mounted , a GFCI or ELCB protected and water proof receptacle is required. Follow the dimensional information exactly when installing a hardwire electrical supply. Supply Stop The wall location of the electrical supply and water supply are interchangeable. GFCI-Protected 10A Receptacle(water proof) Floor Flange T-Bolts Fig.#8 Kohler Co. 1303729-T01-G... - Page 8 Do not use white cement or high lime content cements to install this toilet. The expansion of cement due to a rise in temperature may make the toilet crack or cause damage. Kohler is not responsible for any damage caused by installation with the use of cement. Fig.#9 1303729-T01-G Kohler Co.
- Page 9 CAUTION: Risk of product damage.Do not rock or lift the tank after placement. The seal created by the wax ring may be broken, resulting in leaking. Position the loose end of the refill tube out the outlet ring. Tank Refill Tube Press here on cylinder. Outlet Ring Floor Flange Centerlines T-Bolts fig.#11 Kohler Co. 1303729-T01-G...
- Page 10 Return the manual switch into the locked position by using a flathead screwdriver to turn it clockwise. Stop the shut-off value. IMPORTANT! The water tank must be emptied after the shut-off valve is locked. Waterline Adjust waterline Unlock Lock Fig.#14 1303729-T01-G Kohler Co.
- Page 11 Fix the gasket to the tank and press tight Wiring Harness Plug (Connected to Bidet Seat) Discharge pipe Gasket Tape (red) Level Switch Wire Collar Water replenishment pipe (blue) Spray Shield Electrical Plug Tank Wiring Harness Plug (Connected to Pump) Fig.#16 Kohler Co. 1303729-T01-G...
- Page 12 WARNING: After complete wire (pump)/wire (Bidet) installation, snap connector in by plastic clamp near the wire terminal; fasten by attaching screw. Level Switch Water replenishment pipe (blue) Discharge pipe Wiring Harness (Pump) Flexible Hose of Bidet Seat Wiring Harness (Bidet Seat) Tee Connector Fig.#18 1303729-T01-G Kohler Co.
- Page 13 Fig.#20 3.Slightly press down and unscrew as shown direction, tighten new filter cartridge. Fig.#21 4. Close toilet cover again Snap toilet cover downward manually, no loose snap-fit on both sides and rear end to complete installation. Fig.#22 Kohler Co. 1303729-T01-G...
-
Page 14: Complete The Installation
Place the access cover over the opening in the back of the toilet. Caulk around the base of toilet and caulk the access cover to the vitreous shell by silica gel. Access Opening Caulk Base Toilet Back Of Toilet. Access Cover Fig.#25 1303729-T01-G Kohler Co. - Page 15 Installing the screw covers on the screws. Placing the remote controller on the holder. Fig.#26 Installation Steps: Public anti-loss installation Screw Expansion Hook board Expansion Screw Tube Remove rubber plug Remove rubber plug Hook Remote Controller Docking station Gasket Fig.#27 Kohler Co. 1303729-T01-G...
- Page 16 Function of Auto Lid-Turning: On Rear Wash: Function of Auto Flushing: On Water Temperature: mid Auto UV function: ON Pressure: mid Auto sterilization function: ON Position: mid Standby mode: OFF Long time seated on indication function: OFF 1303729-T01-G Kohler Co.
-
Page 17: Troubleshooting
TROUBLESHOOTING This troubleshooting guide is for general aid only. A Kohler Authorized Service Representative or qualified electri- cian shouldcorrect all electrical problems. For warranty service, contact your dealer or wholesale Distributor. SYMPTOMS PROBABLE CAUSES RECORRECTIVE ACTION 1、The toilet does not A.Power is OFF. - Page 18 You can press the "stop" button to temporarily turn off the deodorant function; Or press and hold the "Air-clean" button on the remote control for at least 2 seconds to disable / enable this function (see homeowners guide "L" on page 8); 1303729-T01-G Kohler Co.
-
Page 19: Important Consumer Information
Do not use any hard setting material (cement mortar) while installing the toilet. Thermal expansion of hard setting material (cement mortar) will damage or crash the feet of toilet. Kohler will not be responsible for any damage because of using hard setting material (cement mortar) for toilet installation. - Page 20 INSTALLATION INSTRUCTIONS KARING 2.0 INTELLIGENT TOILET 新悦 2.0 智能座便器 K-77780T-0 KARING 2.0 INTELLIGENT TOILET(IOT) 新悦 2.0 智能座便器(云智能版) K-77780T-XP-0 在安装本产品的同一房间中,需要在触手可及的位置安装一个止水阀,用于紧急情况下,无需借助工具即可切断本产 品的进水水路;否则本产品的意外故障可能会导致用户损失。 305mm, 坑距需满足292-350mm 。如未满足,可能会影响安装。 确认出水接头距离完工墙面凸出不超过3mm 。沉入完工墙壁 不超过5mm 。如未满足,可能会影响安装。 推荐使用内径DN15mm以上的主水管,以确保下述供水条件要求。 GFCI ELCB 警告:触电、火灾或人生伤害的危险。本产品必须安全接地。只能连接到专用的 220V~,50 H z,10A 带接地故障断路器或接地漏电保护器的电路中。 1303729-T01-G Kohler Co.
- Page 21 · · · · · · · · · · · 10mm Kohler Co. 1303729-T01-G...
- Page 22 约1600W 约1.1m 约705mm x 451mm x 526mm 约46kg 进水温度 机械冲水 * 智能座便器加施的水效标识的说明:水效标识表示智能座便器水效等级等性能的一种符合性标志。 * 功率值测试条件:动压0.2MPa,进水温度15℃。 缓冲垫×2 盖板(抗菌*) 按下暖风键,启动暖风功能 光感应区 辅助键盘 座圈(抗菌*) 冲水开关 落座感应区 按下按键进入臀部冲洗, 按下按键进入女性冲洗, 喷嘴 1.待机模式 长按(按住2秒以上)“ “键,进入待机模 式。详见用户手册第38页的“待机模式”项。 2.停止功能 按一下“ ”键,停止正在进行的冲洗功 能、暖风功能、空气净化功能、一键除菌功能、 手动喷嘴清洁功能和UV功能。 * 抗菌:含无机系抗菌材料的座圈、盖板长期抗细菌,抑制产品表面的细菌生长,这一加工处理不代表防霉等附带效果。抗菌率大于90%(依据GB21551.2-2010进行试验。测试机构:中国家用 电器检测所、上海出入境检验检疫局机电产品检测技术中心) 1303729-T01-G Kohler Co.
- Page 23 Kohler Co. 1303729-T01-G...
- Page 24 800mm x 600mm 1303729-T01-G Kohler Co.
- Page 25 墙面插座 (GFCI) (ELCB) 警告:安装马桶前,确认法兰与地面采用膨胀螺栓连接。 (GFCI) (ELCB) 墙面插座 墙面插座 Kohler Co. 1303729-T01-G...
- Page 26 (GFCI) 墙面插座 220V~, 10A, 50Hz 墙面插座 70mm 8mm (5/16") 1303729-T01-G Kohler Co.
- Page 27 Kohler Co. 1303729-T01-G...
- Page 28 重要提示: 必须使用随器具附带的新软管组件,旧软管组件不能重复使用。 1303729-T01-G Kohler Co.
- Page 29 进 排水管(红色) (蓝色) Kohler Co. 1303729-T01-G...
- Page 30 连接补水管和排水管。 在完成线束(泵)/线束(电子盖板)安装后,请务必用线束接头旁的塑料抱箍卡住接插件,并用附带的螺丝锁紧。 (蓝色) 排水管 (红色) 1303729-T01-G Kohler Co.
- Page 31 N. 安装净化水滤芯 1、打开整机外壳 借助工具 (提供) 轻轻向外打开整机外壳后向上取下外壳。 2、按图示方向旋出旧滤芯。 3、按图示方向略向下施加压力,旋紧新的滤芯。 4.重新合上整机外壳 直接用手将整机外壳向下按下,两 侧及后方的卡扣到位后,没有松动, 即完成安装。 Kohler Co. 1303729-T01-G...
- Page 32 用硅胶 1303729-T01-G Kohler Co.
- Page 33 45mm 图 26 公共场所防遗失安装方式 取下硅胶塞 取下硅胶塞 遥控器 充电座 图27 Kohler Co. 1303729-T01-G...
- Page 34 确认进水阀是否已打开。 自检进行中,停止闪烁,自检结束。 女性冲洗: 圈温:中档 水温:中档 夜灯:开 水流强度:中档 节能模式: 关 冲洗位置:中档 自动翻盖功能:开 臀部冲洗: 自动冲水功能:开 水温:中档 自动UV功能:开 水流强度:中档 自动除菌功能:开 冲洗位置:中档 待机模式:关 长时如厕提醒功能:关 1303729-T01-G Kohler Co.
- Page 35 Kohler Co. 1303729-T01-G...
- Page 36 16. 6. IoT功能不工作 A.停电 A.等到电力恢复 (针对K-77780T-XP-0 B.插头未插或者插座无电 B.插上插头或者检测电源插座 机型) C.电源线插头上漏电保护开关未复位 C.按下插头上的复位按钮 D.产品处于待机状态 D.按一下侧面“ ”按键 17. 7. 座便器使用时有 A.除臭装置落座后自动开启 A.这是除臭功能运行的正常声音; “嗡嗡”声 可以通过按“停止”键,临时关闭除臭功能; 或长按遥控器上的“空气净化”键2秒以上,禁止/开 启此功能(参见用户手册第31页的“L”条款说明) 1303729-T01-G Kohler Co.
- Page 37 在安装本座便器时切勿使用任何凝胶材料(水泥砂浆)。因为凝胶材料(水泥砂浆)的热膨胀可能使 座便器的脚部挤破或损坏。科勒对所有因为凝胶材料(水泥砂浆)安装而引起的座便器破裂恕不负责。 Kohler Co. 1303729-T01-G...
Need help?
Do you have a question about the K-77780T-0 and is the answer not in the manual?
Questions and answers