Table of Contents
Advertisement
Quick Links
Advertisement
Table of Contents

Related Manuals for CIS CRS326-24G


Summary of Contents for CIS CRS326-24G
- Page 1 CIS-CRS326-24G User Manual...
-
Page 2: Table Of Contents
Changing the Default Password ..........................10 Setting the Time Zone ............................10 IP Addressing ................................11 View the Switch’s IP Addresses ...........................11 CIS Support ................................11 Renewing the IP Address .............................12 Setting a Static IP address ...........................13 Interfaces ...................................15 Power Cycling an Ethernet Port ..........................15... - Page 3 VLANs ...................................16 Purchase VLAN configuration ..........................16 Changing the VLAN on a Port on a Preconfigured System ................16 Manually Configuring the Switch for VLANs ......................17 Step 1 – Enable VLAN Filtering on the Bridge ....................17 Step 2 – Assign the Trunk Port(s) ........................18 Step 3 –...
-
Page 4: Welcome To Custom Integration Solutions
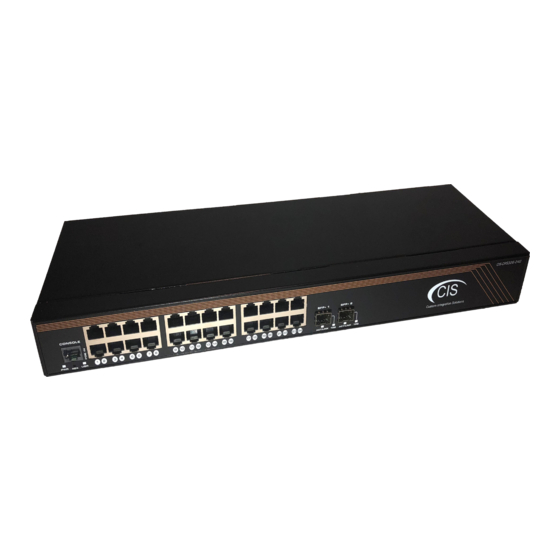
Overview The CIS-CRS326-24G network switch is equipped with an ARM CPU and 512 MB of RAM, giving it plenty of switching capacity for most commercial applications and large home networks. It is equipped with twenty-four Gigabit Ethernet ports and two SFP+ ports compatible with 1.25G SFP and 10G SFP+ modules. -
Page 5: Device Details
You can use this procedure if you have forgotten the password to access the device, or simply wish to return the unit to its default configuration state. Input Power Requirements The CIS-CRS326-24G is powered via the included 24V adapter or via PoE input on port 1 (10-30V DC). -
Page 6: Quick Setup
Quick Setup 1. Connect the included 24V DC adapter to the jack on the rear of the switch, or power via PoE on port 1. 2. Connect the switch to the router with an Ethernet cable or SFP cable. Do not connect both cables at the same time. -
Page 7: Setup And Accessing The Web Interface
1. Connect the switch to your router using either an Ethernet or SFP cable. Do not connect both to the router. 2. Connect your laptop or PC to any remaining Ethernet port on the front of the CIS switch (excluding the console port). You can also access the web interface plugged directly into the router. -
Page 8: The Status Page
The Status Page The status page provides basic diagnostic information. There is a CIS Support Address should you require assistance. The switch’s Identity will show you which device you are accessing on your network. You can view uptime, memory usage and load on the CPU. -
Page 9: Undo / Redo
Undo / Redo Undo and Redo buttons are located in the left toolbar. You may use them to quickly undo/redo any changes made to configuration. Show / Hide Passwords Selecting the Hide Passwords button in the left toolbar will toggle the displaying of passwords related to Wi-Fi, Hotspot, and more. -
Page 10: Changing The Default Password
Changing the Default Password After you log in for the first time, please create a new a password to increase the security of the device. Enter the old password in the top field and a secure password in the new and confirm password fields. Setting the Time Zone You can find the Clock settings under the System tab in the left toolbar. -
Page 11: Ip Addressing
IP address (if the support tunnel is enabled), and an entry for the IP address received via DHCP. CIS Support With the CIS Support tunnel activated, the CIS team can make configuration changes, push updates, and troubleshoot your network. Press the button to the left of the entry. “D” stands for disable, while “E”... -
Page 12: Renewing The Ip Address
Renewing the IP Address To renew the IP address, select the DHCP Client section under the IP tab. Click on the entry to bring up the options. Click the Renew button to obtain a new lease. -
Page 13: Setting A Static Ip Address
To set a static IP, select Addresses from the IP tab. Click on the field containing the disabled IP address. If your network falls in one of the ranges below, you can set the static IP address yourself. If it is outside of these ranges, you must call CIS to have a route created! Available address ranges: 172.16.1.0/24... - Page 14 Once you have set the static IP address, disable the DHCP client. Go to the DHCP Client tab located under IP in the toolbar. Click the “D” to disable the DHCP client.
-
Page 15: Interfaces
Interfaces To view the interface status, select Interfaces, then the Ethernet tab. The Ethernet tab provides an overview of the activity on all ports. You can view the traffic sent and received and other diagnostic information. Power Cycling an Ethernet Port Click the Power Cycle button in the Interfaces >... -
Page 16: Vlans
VLANs for VoIP applications and systems that handle sensitive data. Purchase VLAN configuration For a complete VLAN model, the router, access points and switching all require additional configuration. VLANs and additional networks are available on the CIS Store. https://www.custom-integration-solutions.com/store/cis-vlan-interface/ https://www.custom-integration-solutions.com/store/cis-additional-network/ Changing the VLAN on a Port on a Preconfigured System Select Bridge from the left toolbar, then click on the Ports tab. -
Page 17: Manually Configuring The Switch For Vlans
Manually Configuring the Switch for VLANs When you purchase a VLAN configuration from CIS, these configuration changes will already be implemented. If you wish to implement these changes yourself, follow the instructions below. Step 1 – Enable VLAN Filtering on the Bridge Select Bridge from the left toolbar. -
Page 18: Step 2 - Assign The Trunk Port(S)
Step 2 – Assign the Trunk Port(s) Trunk ports carry traffic from all VLANs between your switches and routers. You must configure a trunk port between the router and the switch. With Bridge selected in the left toolbar, select the VLANs tab. Click Add New. Enter the VLAN IDs the trunk will carry. -
Page 19: Step 3 - Assign Ports To Vlans
Step 3 – Assign Ports to VLANs The ports that connect to your devices will be “untagged” ports or access ports. The final step is to set which VLAN they will be a member of. With the Bridge section selected in the left toolbar, select the Ports tab. -
Page 20: Multicast Filtering - Prior To 6.48
Multicast Filtering – Prior to 6.48 Multicast traffic conserves network resources. If one device were to send a single stream of data to multiple other devices on the network, it would take many times the amount of bandwidth. Multicast traffic reduces the load on the transmitting device by duplicating the traffic instead. However, the switches in the system must be configured to handle multicast traffic or the network can become flooded with this traffic. -
Page 21: Multicast Filtering - 6.48 And Newer
Multicast Filtering – 6.48 and Newer Switches 6.48 and newer only - By enabling IGMP Snooping, multicast traffic will be automatically forwarded to only the devices that request it. Select the Bridge option from the left toolbar. Click on the bridge entry. -
Page 22: Tools
Tools UPnP Universal Plug and Play enables your switch to easily discover other devices located on the network and vice-versa. If you require UPnP, select it under the IP tab in the toolbar, then enable it. UPnP has implications on the security of the device, and it is recommended you leave it disabled unless required. Ping Ping uses Internet Control Message Protocol (ICMP) echo messages to determine if a remote device is active. -
Page 23: Ip Scan
IP Scan The IP scan tool locates devices on the network. It can also locate devices that have a static IP set internally if they are on the same network as the switch. To use the IP scan tool, select the network you wish to scan on (bridge-operations is default), then enter the network address and subnet mask using CIDR notation. -
Page 24: Troubleshooting
• Ensure the trunk ports are tagged correctly. • Contact CIS for assistance. I can’t get a connection when using the SFP port. • CIS recommends DAC SFP cables such as the CIS-SFP-001 and 003, though other SFP modules are compatible. -
Page 25: Warranty Information
Solutions™ or a designated service center with prior notification and an assigned return authorization (RA) number. Contact Information Web: www.custom-integration-solutions.com Phone: Technical Support - (888) 976-3651 Email: activations@custom-integration-solutions.com The CIS-CRS326-24G is in compliance with the essential requirements and other relevant provisions of Directive 2014/53/EC.
Need help?
Do you have a question about the CRS326-24G and is the answer not in the manual?
Questions and answers