Quantum DXi6700 Installation And Configuration Manual
Hide thumbs
Also See for DXi6700:
- Planning manual (22 pages) ,
- Command manual (344 pages) ,
- Manual (322 pages)
Table of Contents
Advertisement
Quick Links
DXi6700 Installation and
Configuration Guide
This guide provides basic installation and configuration instructions for the
DXi6700 system (see
Figure
DXi6700 User's Guide (PN 6-67199) on the documentation CD provided
with your DXi6700 system.
Note: Make sure to take the online training for the DXi6700 in order to
make the best use of your product. The online training is available
at
www.quantum.com/ServiceandSupport/StorageCareLearning/
Index.aspx
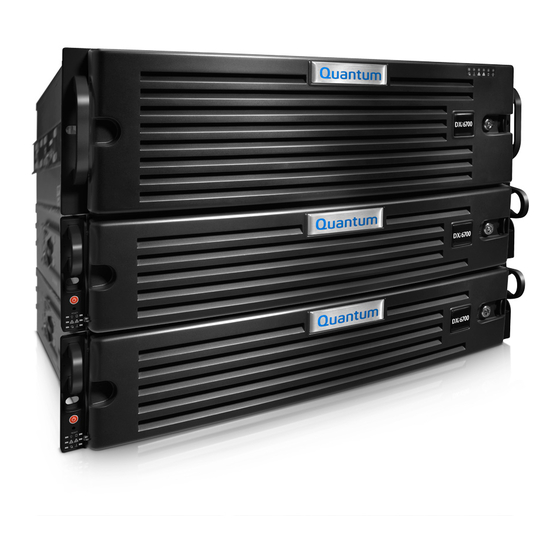
Figure 1 DXi6700 Components
DXi6700 Expansion Module
Note: This Installation and Configuration Guide is for DXi6700 with DXi
2.0.1 Software.
1). For more information, see the Quantum
DXi6700 Node
DXi6700
Contents
DXi6700 Configurations......................... 2
Choosing a Location .............................. 2
Installation Requirements.................. 2
Rack Space Requirements .................. 3
Environmental Conditions ................. 3
Preparing for the Installation ................ 3
Necessary Tools .................................. 3
Taking ESD Precautions ...................... 4
Unpacking the DXi6700 ......................... 4
DXi6700 Node Packaging................... 5
DXi6700 Expansion Packaging........... 7
Installing the DXi6700 System............... 9
Locating the Mounting Position ........ 9
Installing the DXi6700 Node............ 10
Module ............................................. 14
Cabling the DXi6700 ........................ 17
Initial Configuration............................. 20
Management Console...................... 20
Wizard .............................................. 23
Connecting the Ethernet Cables ...... 28
Configuration................................... 29
www.quantum.com
Advertisement
Table of Contents

Related Manuals for Quantum DXi6700


Summary of Contents for Quantum DXi6700
-
Page 1: Table Of Contents
DXi6700 system. Cabling the DXi6700 ......17 Initial Configuration......20 Note: Make sure to take the online training for the DXi6700 in order to Accessing the DXi6700 Remote make the best use of your product. The online training is available Management Console...... -
Page 2: Dxi6700 Configurations
3 • Environmental Conditions on page 3 Installation Review the DXi6700 Site Planning Guide (PN 6-67200), which is available on the Requirements Documentation CD, to ensure that your site meets the installation requirements for the DXi6700. DXi6700 Configurations... -
Page 3: Rack Space Requirements
• Altitude: –100 to 10,000 ft. (–30 to 3048 m) These environmental conditions apply when the DXi6700 system is in operation. Note: For additional specifications, refer to the Quantum DXi6700 User’s Guide (PN 6- 67199) located on the documentation CD. -
Page 4: Taking Esd Precautions
Caution: Do NOT discard the packing materials after the system is unpacked. The packaging materials must be used if the system is relocated. WARNING: The DXi6700 node and expansion module weighs 72 lbs. (32.7 kg) and 52 lbs. (23.6 kg) respectively. A minimum of two people are required to lift either chassis. -
Page 5: Dxi6700 Node Packaging
DXi6700 DXi6700 Node The box containing the DXi6700 node contains the following items: Packaging • DXi6700 node • Rack mount rails • Bezel shipping bag (contains the front bezel) • Accessory kit, which includes the following: • Doc Kit — All models: •... - Page 6 DXi6700 Installation and Configuration Guide Figure 2 Unpacking the DXi6700 Node Bezel shipping bag Front bezel Rack mount rails Foam Accessory kit DXi6700 Node Foam Unpacking the DXi6700...
-
Page 7: Dxi6700 Expansion Packaging
DXi6700 DXi6700 Expansion The box containing the DXi6700 expansion module contains the following items: Packaging • DXi6700 expansion module • Rack mount rails • Bezel shipping bag (contains the front bezel) • Accessory kit, which includes the following: • Base JBOD Kit – All Models: •... - Page 8 DXi6700 Installation and Configuration Guide Figure 3 Unpacking the DXi6700 Expansion Module Bezel shipping bag Front bezel Rack mount rails Foam Accessory kit Expansion module Foam Unpacking the DXi6700...
-
Page 9: Installing The Dxi6700 System
You must allow 3U (5.2 in. / 13.2 cm) of vertical space for the DXi6700 node and 2U (3.5in. / 8.9 cm) of vertical space for each expansion module installed in the rack. Rack cabinets that meet EIA-310 standards have an alternating pattern of three holes per rack unit with center- to-center hole spacing (beginning at the top hole of a 1U space) of 15.9 mm, 15.9 mm,... -
Page 10: Installing The Dxi6700 Node
15.9 mm (0.625 inch) 12.7 mm (0.5 inch) WARNING: If the rack is empty at the time of installation, do NOT install the DXi6700 chassis too high in the rack. The weight of the chassis may cause the rack to become “top heavy” and unstable if installed in the top of an empty rack. - Page 11 If the rack rails have round holes, use the adapter bracket provided in the accessory kit (see Figure Note: The rack mounting rails extend to support rack depths from 26.5 to 36.4 inches (67.3 to 92.5 cm). Installing the DXi6700 System...
- Page 12 DXi6700 Installation and Configuration Guide Figure 7 Installing the Rack Mounting Rails Rack rail hole pattern (square holes) Rack mounting rail tabs Rack mounting rail tabs Slide release latch Rack mounting rails Adapter bracket Phillips screws Rack rail hole pattern...
- Page 13 DXi6700 Installing the DXi6700 Node 1 Install the DXi6700 node chassis onto the extended inner rack mounting rails. Secure the chassis to the front of the rack with one Phillips screw (included on the rack rails) on each side of the chassis (see...
-
Page 14: Installing The Dxi6700 Expansion Module
DXi6700 Installation and Configuration Guide Installing the DXi6700 Installing the DXi6700 expansion module consists of the following steps: Expansion Module Installing the Expansion Module Rack Mounting Rails on page 14 Installing the Expansion Module Chassis on page 16 Installing the Expansion Module Rack Mounting Rails... - Page 15 Figure 10 Installing the Rack Mounting Rails Rack rail hole pattern (square holes) Rack mounting rail tabs Rack mounting rail tabs Slide release latch Adapter bracket Rack mounting rails Phillips screws Rack rail hole pattern (round holes) Installing the DXi6700 System...
- Page 16 Figure 11). Caution: Quantum recommends that you do not remove the hard drives from the chassis. If they have been removed for any reason during or after the installation, you MUST install the hard drives in the same position in which they were removed.
-
Page 17: Cabling The Dxi6700
Connect the SAS and Ethernet cables to open ports only, not to ports with plugs. Ports with plugs are only used for Fibre Channel ports. a SAS connector 1 on the DXi6700 node is connected to SAS connector 0 on expansion module 1. - Page 18 DXi6700 Installation and Configuration Guide Note: FC ports 1 and 3 are used for VTL host connections, and FC ports 0 and 2 are used for Path to Tape (PTT) connections. Installing the DXi6700 System...
- Page 19 DXi6700 Figure 12 Cabling the Base Service ports DXi6700 + Expansion Modules (not for DXi6700 Node customer use) Not used Ethernet ports Fibre Fibre Channel ports Channel 0 and 2 for PTT port 1 and 3 for VTL Expansion Module 1...
-
Page 20: Initial Configuration
Accessing the DXi6700 To access the DXi6700 remote management console: Remote Management 1 Turn on the DXi6700 system by pressing the power buttons located on the front of Console each chassis (see Figure 13) in the following order: a Turn on the expansion module(s). - Page 21 Power button 2 Using an Ethernet cable, connect the Ethernet port on the computer to Ethernet port 0 on the back of the DXi6700 (see Figure 12). Ethernet port 0 is in the upper, right-hand portion of the motherboard as you face the back of the system.
- Page 22 The Login window displays (see Figure 15). Note: For Web browsers, the DXi6700 supports Internet Explorer 7 or higher, or Firefox 3 or higher. Note: If the Login window does not display, verify that you entered the correct IP address (10.1.1.1) and that the network settings on the computer are correct.
-
Page 23: Completing The Getting Started Wizard
DXi6700 Figure 15 Login Window Completing the Getting To complete the DXi6700 Getting Started wizard: Started Wizard 1 On the Login window, select Administrator, type password for the password, and click Login. The Welcome page displays (see Figure 16). Note: If a message on the page indicates the DXi is in Limited Mode, wait ten minutes, and then log on again. - Page 24 Wizard: License Agreement 3 Select the I have read and accept this License Agreement check box, and then click Next to continue. Note: If you do not accept the license agreement, the DXi6700 will not function. The Network page displays (see Figure 18).
- Page 25 Figure 18 Getting Started Wizard: Network 4 Under Configure Network Settings, select the Basic option. Note: Refer to the Quantum DXi6700 User’s Guide (6-67199) located on the documentation CD for information about the Custom or Segmented network options. 5 Under General, enter the following information: Note: Your network administrator will provide you with the IP address information.
- Page 26 For more information, see the Quantum DXi6700 User’s Guide (6-67199) located on the documentation CD. 10 In the Timezone drop-down box, select the time zone where the DXi6700 is located. 11 Next to Time Format, select the format to use when displaying times (24 hours or 12 hours).
- Page 27 A message appears stating that completing the setup will restart the system. 15 Click Yes to restart the system. 16 Disconnect the computer from the DXi6700. Reset the computer network settings back to its default values. 17 Wait 30 minutes for the system to fully restart.
-
Page 28: Connecting The Ethernet Cables
Motherboard ports 2 Install a bezel on the front of the DXi6700 node and expansion module(s). The bezel snaps into place on the front of the DXi6700 node to prevent the removal of the system from the rack (see Figure 22). -
Page 29: Creating A Typical Backup Configuration
DXi6700 node bezel Expansion module bezel Expansion module bezel Creating a Typical Before you can begin using the DXi6700 for backups, you must configure the system. Backup Configuration To configure the DXi for VTL (virtual tape library), see the following sections: •... - Page 30 • Storage Capacity License (24 to 56 TB) • License Certificate for OST Note: To verify the licenses that are installed on the DXi6700 system, in the remote management console, navigate to the Utilities > License Keys page. Default VTL Partition A VTL partition is a data storage virtualization technology used for backup and recovery purposes.
- Page 31 To add a host: 1 Log on to the DXi6700 remote management console: a On a computer on the same subnet as the DXi6700, enter the IP address of the system in the Address box of a supported Web browser.
- Page 32 3 Click Discover Hosts to list all hosts that are known to the DXi6700 in the table. A host is made known to the DXi6700 if you enter the host ID on this page, or if the host logs on to one or more Fibre Channel target ports.
- Page 33 It can also be used if hosts that are not assigned to any host access group exist in the SAN. The CCL is accessible to hosts only through LUN 0. Caution: If you are not sure if you should use CCL, contact Quantum Customer Support before you enable this option.
- Page 34 DXi6700 Installation and Configuration Guide 7 The DXi6700 is now ready to use for backup operation. The installation is successful when you are able to backup data to the system. Here are the next steps you can take: • Use the other Configuration Wizards on the Wizards menu to configure additional features of the DXi: •...
Need help?
Do you have a question about the DXi6700 and is the answer not in the manual?
Questions and answers