INDRA Smart PRO Installation Manual
Hide thumbs
Also See for Smart PRO:
- Installation manual (38 pages) ,
- User manual (16 pages) ,
- User manual (11 pages)
Table of Contents
Advertisement
Quick Links
Advertisement
Table of Contents

Related Manuals for INDRA Smart PRO


Summary of Contents for INDRA Smart PRO
- Page 1 INDRA Smart PRO Installation Guide...
-
Page 2: Table Of Contents
Contents General Description Overview and Intended use environment Protective Earth, Simultaneous Touch (PESTs) Protection General Installation Notes Installation Procedure Commissioning the Unit - Smart Charging Control Load Curtailment and Calibration Technical Specifications and Ratings Certification: Safety Markings and Labels Troubleshooting Servicing and Maintenance Support and Contact Information Models:... -
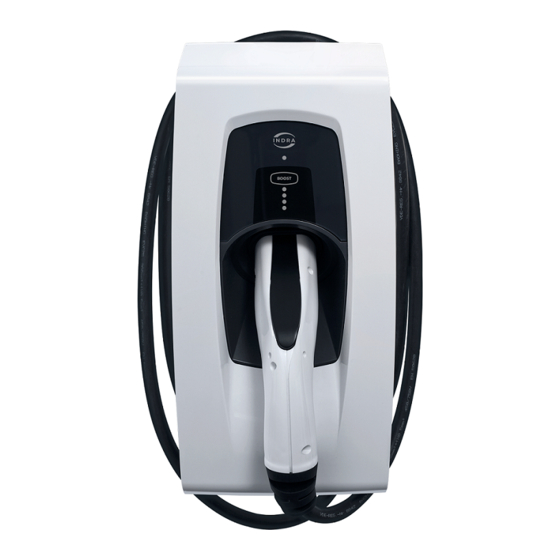
Page 3: General Description
‘Boost’ functionality overrides any smart grid criteria and provides instantaneous charging capability. Charging using the Smart PRO can take place at up to 7kW, but due to modulation capability (measured by the external CT clamp) this power output level can also be reduced. -
Page 4: Protective Earth, Simultaneous Touch (Pests) Protection
Protective Earth, Simultaneous Touch (PESTs) Protection The Smart PRO’s PEST solution can operate under four of the indents of BS 7671:2018+A1:2020 Amendment 1; section 722.411.4.1, for the purposes of design/installation we have two modes of operation which INDRA call A & B. - Page 5 • Mode B - PME as CPC with trip on L-N voltage measurement. No reference electrode. For installations where an Earth Rod is not possible and/or there are no simultaneous contact or touch voltage risks present. Consideration should be given to nuisance trips where the line to neutral voltage may regularly exceed 253v, especially where local renewables are present, Mode A is less sensitive to nuisance tripping.
- Page 6 Full protection Full protection Full protection DC 6mA Protection Full protection Full protection Full protection Protection for installs Manual management Manual management Manual management with three independent of risk of risk of risk earthing systems (rare) INDRA’s unique PEST safety features...
- Page 8 (protective) earth. In this case, the user touching the EV (and outside tap or lamp post etc) completes the circuit back to source earth. INDRA PESTS mode A INDRA PESTS mode B...
- Page 9 Protection against electric shock is provided b a device which The main earthing terminal of the installation is connected to an installation earth electrode by electrically disconnects the vehicle from the live conductors a protective conductor complying with Regulation of the supply and from protective earth in accordance with Regulations 543.3.3.101(ii) within 5 s in the event of the 544.1.1.
-
Page 10: General Installation Notes
A) Read these instructions fully before installing or using the Smart PRO and keep these instructions for future reference B) The Smart PRO is designed for permanent installation and is suitable for operation on an AC electricity supply having the same voltage and current rating as shown on the product label. -
Page 11: Installation Procedure
Installation Procedure Installation Kit and Tools The Smart PRO is supplied with the general screws and wall fixings that are required to permanently fix it in position. However, it remains the responsibility of the installer to evaluate the suitability of the installation surface and use the appropriate fixings when appropriate. - Page 12 Smart PRO. NOTE: ANY DAMAGED OR UNSUITABLE CABLES MUST BE REPLACED Inspect the Smart PRO to ensure the charger has not been damaged in transit, not compromised and is safe to connect. Ensure there is an Earth Connection to the Smart PRO.
- Page 13 • Make sure that all ventilation channels on the Smart PRO are free from obstruction and that the install location will not allow any flammable material to come within 100 mm of the unit.
- Page 14 Drilling hole for mains cable gland ONLY DRILL ON THE TOP LEFT DIMPLE After assessing what size of cable is needed to connect to the property’s electrical supply, using an appropriate diameter Armeg Holesaw, drill a hole carefully into the unit using the TOP LEFT dimple as a guide ONLY.
- Page 15 This electrode is not providing a fault path, instead it is to provide a stable voltage measurement NOTE: EACH Smart PRO DEVICE IS FACTORY SET TO MODE A VIA THE PEST TOGGLE SWITCH. WHEN OPERATING AWAY FROM MODE A, ENSURE THIS TOGGLE SWITCH IS FLICKED ACROSS.
- Page 16 Example reference electrode including 4-foot rod, mechanical protection and EN5061 cable clipped direct to the wall. Connecting the Mains cable • Feed the mains power cable (L, N & CPC) through the left-hand mains power gland. • It is advised to crimp the ends of these three wires using bootlace ferrules and connect the Live, Neutral and CPC wires to their respective Push-Down Terminal Block.
- Page 17 The far-right push-down connector is for CPC Ground The second from right push-down connector is for the TT Reference Electrode The second from left push-down connector is for Neutral The far-left push-down connector is for Live (These are also denoted on the motherboard itself) Type 1 &...
- Page 18 Images of ‘pig-tailed’ mains cables into the charger unit.
- Page 19 Image showing location and orientation of the two cores of the External CT clamp, as wired into the IDC terminal on the Smart PRO To connect the external CT clamp, you must push a length of CAT5e cable through the gland and then separate the cores.
- Page 20 The External CT clamp should be placed so that the Yellow label of the clamp is facing towards the house’s Mains Supply. This ensures correct polarity of any house load readings. The External CT clamp location shall be left to the installer’s discretion, depending on installation.
- Page 21 Hardwired Ethernet Link If the customer hasn’t opted for the cellular wireless option, the below section relates to hardwiring a CAT5e connection back to the properties’ router. • Push a length of the ethernet (CAT5e) cable through the left-hand gland and then attach an RJ45 connector to its end.
- Page 22 If it doesn’t pass the test, then re-crimp. If it does pass, plug one end of the cable into the female RJ45 connector on the Beaglebone within the Smart PRO and the other end into the house’s router port.
- Page 23 The result of a network loss is that the Smart PRO will default to a constant charging state, preventing the customer from utilising off-peak tariff periods automatically.
- Page 24 CRITICAL CARE POINT Avoid knocking any components on the PCB as serious damage may occur Peel off the 3M backing from the adhesive mount and firmly push the cellular dongle into the top left-hand corner of the rear enclosure. Ensure the USB extension cable is neatly and tightly routed down the right-hand side CRITICAL CARE POINT Ensure the USB cable is routed tight to...
- Page 25 Replace the Front of the Unit Screw in the six M4x10 Torx on the front body, these should be tightened to a torque of 2.0N/m, no tighter.
- Page 26 Attach the Fascia • Clip the top two tabs of the fascia into their recess of the grey front body. • Screw in the two M4x8 Security torx in the bottom of the unit. Tightening to a torque of 1.0N/m DO NOT over-tighten as damage to the plastic tabs will occur...
- Page 27 Turning on the unit MAKE SURE ALL COVERS AND FIXINGS ARE IN PLACE; ALSO, THE Smart PRO IS SECURED PRIOR TO ENERGIZING THE CIRCUIT Turn the power on at the consumer unit /breaker to the Smart PRO. Note: If internet connectivity is not able to be established, then after 10 mins the device will go into ‘home alone’...
-
Page 28: Commissioning The Unit - Smart Charging Control
Commissioning the Unit - Smart Charging Control Accessing Smart Control Installer Application To enable smart control of the Smart PRO EV charging unit, it is necessary to confirm the commissioning of the device using the Installer Application. Installers should have received login credentials to access the following: https://platform.kaluza.com/install. - Page 29 Find your Customer In the Installer App, “Find a Customer” homepage, click on the appropriate box and enter the customer’s Last Name and the Address Postcode; then click ‘Search’. If previously populated, the customer information should show under “Search Results”. •...
- Page 30 Next you will be asked to associate a device with the customer account. Add a Charger Check the side of the unit for the serial number label. On this label there will be the QR code and corresponding MAC address printed. To associate the installed device to the customer account, a unique MAC Address needs to be added.
- Page 31 • If your camera is not working, select “Enter the Hardware ID Manually”, in which case the 12-digit alpha-numerical MAC address must be typed into the box. This action will perform a few checks: • That the format you have entered is correct •...
- Page 32 Set Max House Load • The next stage is to input the “Property Max Draw” based on the DNO fuse rating at the property. Select either 60, 80 or 100A and click “Continue”. If the DNO fuse rating is not clear, select 60A to prevent any inadvertent damage to/ failure of the fuse.
- Page 33 Enter Vehicle Information • To ensure ready-by times/ scheduling are met, the associated battery capacity of the EV must be added. We ask that installers capture the customer’s vehicle make and model information so that smart charging algorithms consider the correct dimensions.
- Page 34 Telemetry The Smart Control Installer Application will present information about the telemetry being read from the device, specifically Cable State, Charging Mode, Device CT clamp and House CT clamp information: A representation of the platform receiving telemetry, along with a potential issue where no telemetry is being read from the Charger.
- Page 35 Commission Summary Installers are presented with a final summary before commissioning a device to a customer account. Here you can validate that the information you have input is correct. • Where there are changes that need to be made, you can ‘EDIT’ each section. •...
- Page 36 1. Received a welcome email from support@indra.co.uk with onboarding links (check any Junk/ Spam folders if necessary) 2. The ability to login to https://app.indra.co.uk and set a password. Please check this has been received and help with the set-up of this if necessary.
-
Page 37: Load Curtailment And Calibration
Load Curtailment and Calibration The Smart PRO supports curtailment in line with BS7671 18th edition A1 section 722.311.201. a minimum of 6A is required on a maximum demand calculation even when implementing curtailment. 32A is required if curtailment is not configured or calibration is not possible. - Page 38 There are 3 possible routes for calibration to occur. This manual documents the options by order of preference: Dynamic load calibration (where an EV is present), Fixed load calibration (where the EV is not present) and Calibration post commissioning (where readings from a handheld clamp meter/ multimeter show that readings in the Smart Control Installer Application are within 50% of the truth)
- Page 39 1. An EV is present 2. Smart PRO is connected to the customer’s (or your own) electric vehicle (for socketed variants the customer’s intermediate charging cable will be required) 3. EV Battery State of Charge is less than 90%...
- Page 40 Dynamic Calibration can be triggered by clicking “Start Calibration” within Smart Control Installer App. This Calibration cycle can take up to 5 minutes to complete Once completed, you will be prompted to enter a new reading from the handheld clamp meter/ multimeter. Note: The in-app telemetry power readings may take up to 30 seconds to refresh, to ensure you are comparing updated readings This action should have reduced the difference between the power readings to be...
- Page 41 3. You have an EV Charging Station Test Adapter with a 3-pin plug output 4. You have a minimum 2kW fixed load such as a Fan Heater or Kettle 5. Smart PRO is plugged into the EV Test Adapter (either via the tethered cable or the customer’s own intermediate charging cable) To initiate Fixed Load Calibration: 1.
- Page 42 This action should have reduced the difference between the readings to be within 5% of the truth. Where successful, the install summary page will reflect an audit of actions related to Fixed load calibration and relevant telemetry information: Getting less than 50% difference in readings for fixed load calibration will mean that calibration can happen post commissioning.
- Page 44 All devices have an automated calibration that will happen at a time when a customer is typically not using their Smart PRO and will not notice. If calibration does happen at a time when a customer is in their Smart Charging Customer App,...
- Page 45 Where readings from a handheld clamp meter/ multimeter show that readings in the Smart Control Installer App are within 50% of the truth, it is possible for calibration to happen automatically post commissioning. Getting a difference in readings that is lower than 50% is ideal but is not always possible.
- Page 46 Skip Calibration At any stage of the commissioning and calibration flow, where all best endeavours have been made, there is an option to skip calibration. This will be reflected in the Summary of the installation.
- Page 47 Smart PRO, several times, leaving a very short tail (only applicable for tethered type 1 & type 2 variants, 190105A101 & 190105A102) • Push the male charging connector into the blank holster recess of the Smart PRO unit, so that it clips/ latches into position and is held •...
-
Page 48: Technical Specifications And Ratings
Technical Specifications and Ratings General Specification Model Name Smart PRO Mode 3: Type 2 socket, Type 1 Mode or Type 2 tethered cable Overall Dimensions 200mm x 130mm x 420mm Weight 3.5kg (excluding cable) Operating temperature -20°C to 50°C Charging Cable Length... -
Page 49: Certification
CE Marking OLEV Accreditation under Electric Vehicle Home Scheme Compliance: • Smart PRO permits installations to meet BS 7671:2018+A1:2020 Requirements for Electrical Installations • BS EN 61851-1:2019 Electric vehicle charging system – general requirements • BS EN 61851-21:2017 Electric vehicle charging system – electric vehicle off-board charger EMC requirements for connection to an AC/DC supply •... -
Page 50: Safety Markings And Labels
(LA). Such facilities include civic amenity and waste collection sites. IT IS THE SUB-CONTRACTED INSTALLER’S OBLIGATION TO ENSURE THAT ALL PACKAGING AND PACKAGING WASTE IS RECYCLED AND DISPOSED OF PROPERLY during initial installation of the Smart PRO products. -
Page 52: Troubleshooting
The charger cannot communicate with the Control Platform. The repeating flashing pattern gives an indication of the fault: 1 flash, repeating - Connected to the internet but unable to connect to INDRA. Contact Customer Support. 2 flashes, repeating - There is a problem with the connection to your router. -
Page 53: Servicing And Maintenance
Troubleshooting continued Charging Status LED Off EV Disconnected Connect the EV to the Smart PRO to enable scheduled or Boost charging. Where an untethered cable is being used, ensure the device end is plugged in first, before plugging the opposite end into the EV. -
Page 54: Support And Contact Information
Support and Contact Information For technical support, product queries and information please contact: Email support@indra.co.uk Telephone 01684 770631 www.indra.co.uk...
Need help?
Do you have a question about the Smart PRO and is the answer not in the manual?
Questions and answers