
Related Manuals for Star Lake SCH-406


Summary of Contents for Star Lake SCH-406
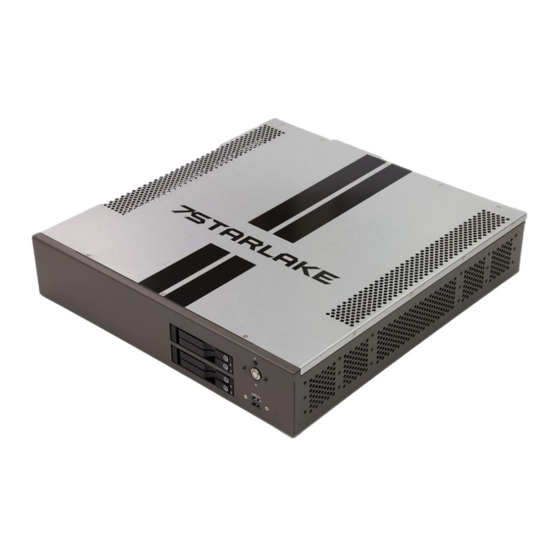
- Page 1 SCH-406 IEC-61850-3, IEEE-1613 1U Computer User’s Manual Revision Date: June.11.2021...
- Page 2 SCH-406 User’s Manual Revision Date: June.11.2021 Safety Information Electrical safety To prevent electrical shock hazard, disconnect the power cable from the electrical outlet before relocating the system. When adding or removing devices to or from the system, ensure that the power cables for the devices are unplugged before the signal cables are connected.
- Page 3 Packing List Item Description Q’ty SCH-406 IEC-61850-3, IEEE-1613 1U Computer Driver CD Ordering information 2U 19” Power Automation Fanless Server Computer with Intel. 10th Gen. Core i7 Processor, 2 × RJ45 GbE, 2 x 10GbE, 100V~240V AC-in, 2 x 200W AC/DC Redundant Power Supply, Operating Temperature -20~+60°...
- Page 4 SCH-406 User’s Manual Revision Date: June.11.2021 RoHS Compliance Perfectron RoHS Environmental Policy and Status Update Perfectron is a global citizen for building the digital infrastructure. We are committed to providing green products and services, which are compliant with European Union RoHS (Restriction on Use of Hazardous Substance in Electronic Equipment) directive 2011/65/EU, to be your trusted green partner and to protect our environment.
-
Page 5: Table Of Contents
SCH-406 User’s Manual Revision Date: June.11.2021 Chapter 1 : Production Introduction ................... 5 1.1 Specification ..........................5 1.2 Front Panel I/O Placement ....................... 7 1.3 Rear Panel I/O Placement ......................8 1.4 Mechanical Dimensions ......................9 Chapter 2 : Rear I/O Ports ...................... -
Page 6: Chapter 1 : Production Introduction
SCH-406 User’s Manual Revision Date: June.11.2021 8.3 Recovering the BIOS Block with a USB Device ............... 78 Chapter 1 : Production Introduction 1.1 Specification System 10th Generation Intel® Core™ i9/i7/i5 Processors Intel® Core™ i9-10900TE(20M Cache, up to 4.60 GHz) Intel® Core™ i7-10700TE(16M Cache, up to 4.50 GHz) Intel®... - Page 7 SCH-406 User’s Manual Revision Date: June.11.2021 Linux Ubuntu, Red Hat Mechanical and Evvironmental Dimension 430 x 396 x 88 mm ( W x D x H ) Operating Temp. -20 to 60° C Storage Temp. -40° C to 85° C...
-
Page 8: Front Panel I/O Placement
SCH-406 User’s Manual Revision Date: June.11.2021 1.2 Front Panel I/O Placement 4 x HDD Tray 2 x USB2.0 Power Button... -
Page 9: Rear Panel I/O Placement
SCH-406 User’s Manual Revision Date: June.11.2021 1.3 Rear Panel I/O Placement IPMI 4 x USB3.2 2 x GbE 2 x 10GbE DVI-D 2 x DP 4 x PCIe expansion 2 x AC-IN... -
Page 10: Mechanical Dimensions
SCH-406 User’s Manual Revision Date: June.11.2021 1.4 Mechanical Dimensions... -
Page 11: Chapter 2 : Rear I/O Ports
SCH-406 User’s Manual Revision Date: June.11.2021 Chapter 2 : Rear I/O Ports 2.1 LAN/IPMI port 2.2 VGA/DVI-D port A VGA port and a DVI-D port are located next to DisplayPorts 1/2 on the I/O back panel. Use these connections for VGA and DVI displays. The VGA connector is on top and the DVI-D is on the bottom. -
Page 12: Chapter 3 : System Setup
SCH-406 User’s Manual Revision Date: June.11.2021 Chapter 3 : System Setup 3.1 Removing the Top Cover from the Chassis The sixteen screws on the top and side are used to secure the cover to the chassis. Remove these screws and put them in a safe place for later use 3.2 Installing PCIe Card... -
Page 13: Install The Screws On The Upper Cover
3.3 Install the screws on the upper cover Attach the screws at sixten locations to complete the installation 3.4 2.5” Easy Swap SSD installation SCH-406 support four 2.5” Easy Swap SSD Use Tri-angle security key to open keylock and pull out the 2.5”SSD tray. ... -
Page 14: Chapter 4: Ami Bios Utility
SCH-406 User’s Manual Revision Date: June.11.2021 Chapter 4: AMI BIOS UTILITY This chapter provides users with detailed descriptions on how to set up a basic system configuration through the AMI BIOS setup utility. 4.1 Starting To enter the setup screens, perform the following steps: •... -
Page 15: Navigation Keys
SCH-406 User’s Manual Revision Date: June.11.2021 4.2 Navigation Keys The BIOS setup/utility uses a key-based navigation system called hot keys. Most of the BIOS setup utility hot keys can be used at any time during the setup navigation process. Some of the hot keys are <F1>, <F10>, <Enter>, <ESC>, and <Arrow> keys. - Page 16 SCH-406 User’s Manual Revision Date: June.11.2021 The Main BIOS setup screen has two main frames. The left frame displays all the options that can be configured. Grayed-out options cannot be configured; options in blue can. The right frame displays the key legend. Above the key legend is an area reserved for a text message. When an option is selected in the left frame, it is highlighted in white.
- Page 17 SCH-406 User’s Manual Revision Date: June.11.2021 17:30:00. BIOS Version This item displays the version of the BIOS ROM used in the system. Build Date This item displays the date when the version of the BIOS ROM used in the system was built.
-
Page 18: Advanced Setup Configuations
SCH-406 User’s Manual Revision Date: June.11.2021 Advanced Setup Configuations... - Page 19 SCH-406 User’s Manual Revision Date: June.11.2021...
- Page 20 SCH-406 User’s Manual Revision Date: June.11.2021...
- Page 21 SCH-406 User’s Manual Revision Date: June.11.2021...
- Page 22 SCH-406 User’s Manual Revision Date: June.11.2021...
- Page 23 SCH-406 User’s Manual Revision Date: June.11.2021...
- Page 24 SCH-406 User’s Manual Revision Date: June.11.2021...
- Page 25 SCH-406 User’s Manual Revision Date: June.11.2021...
- Page 26 SCH-406 User’s Manual Revision Date: June.11.2021...
- Page 27 SCH-406 User’s Manual Revision Date: June.11.2021...
- Page 28 SCH-406 User’s Manual Revision Date: June.11.2021...
- Page 29 SCH-406 User’s Manual Revision Date: June.11.2021...
- Page 30 SCH-406 User’s Manual Revision Date: June.11.2021...
- Page 31 SCH-406 User’s Manual Revision Date: June.11.2021...
- Page 32 SCH-406 User’s Manual Revision Date: June.11.2021...
- Page 33 SCH-406 User’s Manual Revision Date: June.11.2021...
- Page 34 SCH-406 User’s Manual Revision Date: June.11.2021...
- Page 35 SCH-406 User’s Manual Revision Date: June.11.2021...
- Page 36 SCH-406 User’s Manual Revision Date: June.11.2021...
- Page 37 SCH-406 User’s Manual Revision Date: June.11.2021...
- Page 38 SCH-406 User’s Manual Revision Date: June.11.2021...
- Page 39 SCH-406 User’s Manual Revision Date: June.11.2021...
- Page 40 SCH-406 User’s Manual Revision Date: June.11.2021...
- Page 41 SCH-406 User’s Manual Revision Date: June.11.2021...
- Page 42 SCH-406 User’s Manual Revision Date: June.11.2021...
- Page 43 SCH-406 User’s Manual Revision Date: June.11.2021...
- Page 44 SCH-406 User’s Manual Revision Date: June.11.2021...
- Page 45 SCH-406 User’s Manual Revision Date: June.11.2021...
- Page 46 SCH-406 User’s Manual Revision Date: June.11.2021...
- Page 47 SCH-406 User’s Manual Revision Date: June.11.2021...
- Page 48 SCH-406 User’s Manual Revision Date: June.11.2021...
- Page 49 SCH-406 User’s Manual Revision Date: June.11.2021...
- Page 50 SCH-406 User’s Manual Revision Date: June.11.2021...
- Page 51 SCH-406 User’s Manual Revision Date: June.11.2021...
-
Page 52: Event Logs
SCH-406 User’s Manual Revision Date: June.11.2021 4.5 Event Logs... - Page 53 SCH-406 User’s Manual Revision Date: June.11.2021...
-
Page 54: Ipmi
SCH-406 User’s Manual Revision Date: June.11.2021 4.6 IPMI... - Page 55 SCH-406 User’s Manual Revision Date: June.11.2021...
- Page 56 SCH-406 User’s Manual Revision Date: June.11.2021...
-
Page 57: Security
SCH-406 User’s Manual Revision Date: June.11.2021 4.7 Security... - Page 58 SCH-406 User’s Manual Revision Date: June.11.2021...
- Page 59 SCH-406 User’s Manual Revision Date: June.11.2021...
- Page 60 SCH-406 User’s Manual Revision Date: June.11.2021...
- Page 61 SCH-406 User’s Manual Revision Date: June.11.2021...
- Page 62 SCH-406 User’s Manual Revision Date: June.11.2021...
- Page 63 SCH-406 User’s Manual Revision Date: June.11.2021...
-
Page 64: Boot
SCH-406 User’s Manual Revision Date: June.11.2021 4.8 Boot... - Page 65 SCH-406 User’s Manual Revision Date: June.11.2021...
- Page 66 SCH-406 User’s Manual Revision Date: June.11.2021...
-
Page 67: Save & Exit
SCH-406 User’s Manual Revision Date: June.11.2021 4.9 Save & Exit... - Page 68 SCH-406 User’s Manual Revision Date: June.11.2021...
-
Page 69: Chapter 5: Appendix A Bios Codes
SCH-406 User’s Manual Revision Date: June.11.2021 Chapter 5: Appendix A BIOS Codes 5.1 BIOS Error POST (Beep) Codes... -
Page 70: Additional Bios Post Codes
SCH-406 User’s Manual Revision Date: June.11.2021 5.2 Additional BIOS POST Codes The AMI BIOS supplies additional checkpoint codes, which are documented online at http:// www.supermicro.com/support/manuals/ ("AMI BIOS POST Codes User's Guide"). When BIOS performs the Power On Self Test, it writes checkpoint codes to I/O port 0080h. -
Page 71: Chapter 6 : Appendix B Software
SCH-406 User’s Manual Revision Date: June.11.2021 Chapter 6 : Appendix B Software After the hardware has been installed, you can install the Operating System (OS), configure RAID settings and install the drivers. 6.1 Microsoft Windows OS Installation If you will be using RAID, you must configure RAID settings before installing the Windows OS and the RAID driver. - Page 72 SCH-406 User’s Manual Revision Date: June.11.2021 6-2 Load Driver Link To load the driver, browse the USB flash drive for the proper driver files. • For RAID, choose the SATA/sSATA RAID driver indicated then choose the storage drive on which you want to install it.
-
Page 73: Driver Installation
SCH-406 User’s Manual Revision Date: June.11.2021 6.2 Driver Installation The Supermicro website contains drivers and utilities for your system at https://www. supermicro.com/wftp/driver. Some of these must be installed, such as the chipset driver. After accessing the website, go into the CDR_Images (in the parent directory of the above link) and locate the ISO file for your motherboard. -
Page 74: Superdoctor® 5
SCH-406 User’s Manual Revision Date: June.11.2021 6.3 SuperDoctor® 5 The Supermicro SuperDoctor 5 is a program that functions in a command-line or web-based interface for Windows and Linux operating systems. The program monitors such system health information as CPU temperature, system voltages, system power consumption, fan speed, and provides alerts via email or Simple Network Management Protocol (SNMP). -
Page 75: Ipmi
SCH-406 User’s Manual Revision Date: June.11.2021 6.4 IPMI The X12SCZ-TLN4F/QF/F supports the Intelligent Platform Management Interface (IPMI). IPMI is used to provide remote access, monitoring and management. There are several BIOS settings that are related to IPMI. Supermicro ships standard products with a unique password for the BMC... -
Page 76: Chapter 7: Appendix C Standardized Warning Statements
SCH-406 User’s Manual Revision Date: June.11.2021 Chapter 7: Appendix C Standardized Warning Statements The following statements are industry standard warnings, provided to warn the user of situations which have the potential for bodily injury. Should you have questions or experience difficulty, contact Supermicro's Technical Support department for assistance. - Page 77 SCH-406 User’s Manual Revision Date: June.11.2021...
- Page 78 SCH-406 User’s Manual Revision Date: June.11.2021...
-
Page 79: Chapter 8:Appendix D Uefi Bios Recovery
SCH-406 User’s Manual Revision Date: June.11.2021 Chapter 8:Appendix D UEFI BIOS Recovery Warning: Do not upgrade the BIOS unless your system has a BIOS-related issue. Flashing the wrong BIOS can cause irreparable damage to the system. In no event shall Supermicro be liable for direct, indirect, special, incidental, or consequential damages arising from a BIOS update. - Page 80 SCH-406 User’s Manual Revision Date: June.11.2021 The file system supported by the recovery block is FAT (including FAT12, FAT16, and FAT32), which is installed on a bootable or non-bootable USB-attached device. However, the BIOS might need several minutes to locate the SUPER.ROM file if the media size becomes too large due to the huge volumes of folders and files stored in the device.
- Page 81 SCH-406 User’s Manual Revision Date: June.11.2021...
- Page 82 SCH-406 User’s Manual Revision Date: June.11.2021...
- Page 83 SCH-406 User’s Manual Revision Date: June.11.2021...
Need help?
Do you have a question about the SCH-406 and is the answer not in the manual?
Questions and answers