Advertisement
Quick Links
www.insigniashowers.com
Last Modified: 12/01/2022
INSTALLATION MANUAL
MXOS2000
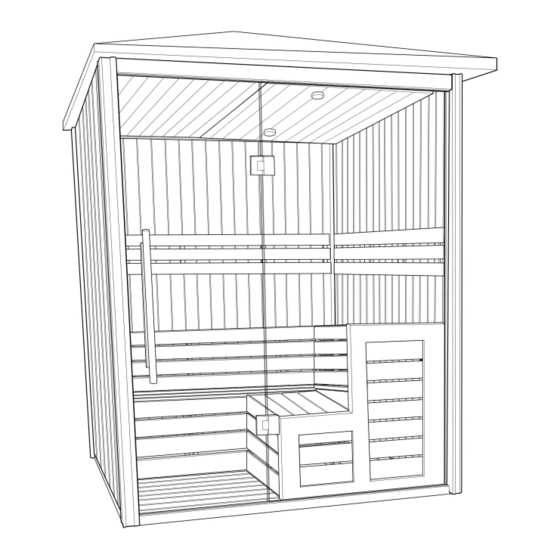
Outdoor Sauna Series
30 Day Technical Support:
Call 01908 317512 and request technical support for aiding
your installation.
Replacements Parts:
Inside of your warranty period visit:
https://www.insigniashowers.com, click support and make a
warranty claim.
Spares/Replacements Parts:
Outside of your warranty period
visit
ATTENTION INSTALLERS:
These instructions must be
left with the customer
CHECK ALL CONTENTS BEFORE BUILD COMMENCES. NO RETURNS CAN BE MADE
ONCE THE BUILD HAS STARTED AS IT IS DEEMED ACCEPTANCE OF PRODUCT!
Advertisement

Subscribe to Our Youtube Channel
Related Manuals for Insignia MXOS2000


Summary of Contents for Insignia MXOS2000
- Page 1 Last Modified: 12/01/2022 INSTALLATION MANUAL MXOS2000 Outdoor Sauna Series 30 Day Technical Support: Call 01908 317512 and request technical support for aiding your installation. Replacements Parts: Inside of your warranty period visit: https://www.insigniashowers.com, click support and make a warranty claim.
- Page 2 www.insigniashowers.com Last Modified: 12/01/2022 Contents Thank you for your purchase Installing the right upper bench support Electrical & Tool requirements Installing the back lower bench support Box contents Installing the right lower bench support Creating the base Installing under seat support frames Installing the back left upright Installing benches Installing the back panel...
- Page 3 Last Modified: 12/01/2022 Thank you for your recent purchase of an Insignia Sauna. Please read this booklet with great care to ensure you get the best out of your build and have a Sauna that will last for many years to come! Like everything, in order to obtain a first class product that will serve you well for many years, the effort and correctness put into the assembly will reflect in the quality of your finish.
- Page 4 www.insigniashowers.com Last Modified: 12/01/2022 Tools Required Electrics Voltage Rating 220-240AC • Scissors Frequency Rating 50Hz • Knife Power Rating 15.2 kW • Spirit Level • Tape Measure Always consult a qualified Electrician before connection as to suitability • Philips Screwdriver Your electrical contractor will understand ALL legal requirements of connection before •...
-
Page 5: Table Of Contents
Screw Pack Heater Stand Heater Guard VERY IMPORTANT Have you got everything? If not please contact the Insignia directly on 01908 317 512. Remember NEVER book your tradesman until everything has arrived, been checked and is present. No replacement/missing parts can be obtained free of charge during or after the build. - Page 6 www.insigniashowers.com Last Modified: 12/01/2022 Step 1 — Creating the base Create a square using the 4 bottom struts. Note: The front strut has a groove cut out for the front fixed glass panel. Make sure this strut is at the front of the square.
- Page 7 www.insigniashowers.com Last Modified: 12/01/2022 Step 2 — Installing rear left upright There will be 3 screw connections on two faces of the upright. They should face towards the back bottom strut and left bottom strut.
-
Page 8: Back Panel
www.insigniashowers.com Last Modified: 12/01/2022 Step 3 — Installing the back panel Lift the back panel and slide the brackets over the screw fixings and lock into position. Also ensure you push the panel down onto the back bottom strut and ensure they lock together. - Page 9 www.insigniashowers.com Last Modified: 12/01/2022 Step 4 — Installing the back right upright Tilt the back panel up in order to get the back right upright to slot into the brackets. Connect and push the right back upright down and secure into position. There will be 3 screw connections on two faces of the upright.
-
Page 10: Side Panel
www.insigniashowers.com Last Modified: 12/01/2022 Step 5 — Installing the right side panel Lift the side panel and slide the brackets over the screw fixings and lock into position. Also ensure you push the panel down onto the right bottom strut and ensure they lock together. - Page 11 www.insigniashowers.com Last Modified: 12/01/2022 Step 6 — Installing the backrest panels 16 x 40mm Screws Take the long backrest pieces and align with a spirit level inside and screw into the locater holes using the ST40 screws.
- Page 12 www.insigniashowers.com Last Modified: 12/01/2022 Step 7 — Installing the right front upright Slot the front right upright onto the side panel and push down to secure in position. Note: the front right upright will have a groove cut out along one face, for the front fixed glass to slide into.
- Page 13 www.insigniashowers.com Last Modified: 12/01/2022 Step 8 — Installing the left side panel Lift the left side panel and slot down onto the back left upright and locking in place on the bottom left strut.
- Page 14 www.insigniashowers.com Last Modified: 12/01/2022 Step 9 — Installing the front left upright Slot the front left upright onto the side panel and push down to secure in position.
- Page 15 www.insigniashowers.com Last Modified: 12/01/2022 Step 10 — Electric box The electrical box (below) should be housed in the sauna, underneath the back bench on the floor. Install electrical connections. Partner up all corresponding wires which are denoted by matching stickers from the box to the back/right panels.
- Page 16 www.insigniashowers.com Last Modified: 12/01/2022 Step 11 — Placing the floor in position Note: The diagrams on the following pages will show the left side panel & left front upright not in position for optimal visuals of the install diagrams. Please be advised it is crucial the left side panel is in position for the following pages.
- Page 17 www.insigniashowers.com Last Modified: 12/01/2022 Step 12 — Placing the bench side in position...
- Page 18 www.insigniashowers.com Last Modified: 12/01/2022 Step 13 — Placing the back upper bench support...
- Page 19 www.insigniashowers.com Last Modified: 12/01/2022 Step 14 — Placing the right upper bench support...
- Page 20 www.insigniashowers.com Last Modified: 12/01/2022 Step 15 — Placing the back lower bench support...
- Page 21 www.insigniashowers.com Last Modified: 12/01/2022 Step 16 — Placing the right lower bench support...
- Page 22 www.insigniashowers.com Last Modified: 12/01/2022 Step 17 — Placing under seat support frames ST40 x 26 • Using ST40 Screws locate the large frame support to the top side of the bench. • Using ST40 Screws locate the large frame support to the lower side of the bench.
- Page 23 www.insigniashowers.com Last Modified: 12/01/2022 Step 18 — Placing benches in position Locate the two upper and lower benches into positon.
- Page 24 www.insigniashowers.com Last Modified: 12/01/2022 Step 19 — Installing the top frame Locate the top framework into position. Do not tighten until the next step as you need to lift the framework slightly.
- Page 25 www.insigniashowers.com Last Modified: 12/01/2022 Step 20 — Installing the fixed glass panel Overhead view (right) With the framework in position tighten the nut and washer from above. Note: Be careful not to drop the hex nut and washer down the upright. Insert the fixed glass into the groove cut-outs in the framework, lift the top...
-
Page 26: Inner Roof (Halves)
www.insigniashowers.com Last Modified: 12/01/2022 Step 21 — Installing the inner roof Locate the two inner roof halves in position and push them together. Once in position, take all cabling from the back and side panel and connect on top of the inner roof. -
Page 27: Big Roof
www.insigniashowers.com Last Modified: 12/01/2022 Step 22 — Installing the big roof Lift the roof into position and position the square locaters into the top of all uprights. Caution: Roof is heavy, Minimum 3 person lift advised. - Page 28 www.insigniashowers.com Last Modified: 12/01/2022 Step 23 — Installing the door Unscrew bolts and separate Side View Lift the door into position and then fix the door into the hinges. To realign Front View the door, loosen the bolts slightly, reposition and then retighten. Repeat this process until alignment is perfect.
-
Page 29: Heater Guard
www.insigniashowers.com Last Modified: 12/01/2022 Step 24 — Heater Guard Place wooden heater guard into position around the heater and screw to the wall using ST40 screws. and install the rocks. The rocks should be installed between the heater elements and on top of the heater. - Page 30 www.insigniashowers.com Last Modified: 12/01/2022 Step 25 — Accessories 40mm Screws Connect the light from the wire fed through the pre drilled hole in the back panel. Screw into position. Place a screw into the back wall and Use two screws through the hang the backplate and position anywhere hygrometer.
- Page 31 www.insigniashowers.com Last Modified: 12/01/2022 Control Panel Instructions Button 1 (Lights) Turn the 12V light on or off. Button 2 (Return) Press to return to the menu after a change is made. Button 3 (Mode button/Scroll) Press and hold for 3 seconds to power the panel on or off. Press to change the control panel function, then scroll left or right to change settings.
- Page 32 www.insigniashowers.com Last Modified: 12/01/2022 Coloured Lights FM Radio Volume To operate the lights, press To operate the FM Scroll (Button 3) until you (Button 3) until you see the Radio, Scroll (Button see the interface (left). Once interface (left). Once here 3) until you see the here, press (Button 3) to press (Button 3) and scroll...
- Page 33 www.insigniashowers.com Last Modified: 12/01/2022 Settings Scroll (Button 3) until you see the interface (left). Once here, press (Button 3) to enter the settings mode. Here you can set the clock which operates on a 24 hour system. You can also change the temperature display to Celsius or Fahrenheit.
- Page 34 www.insigniashowers.com Last Modified: 12/01/2022 Sauna Usage & Safety Guide Never leave children unattended in the Sauna. Regulate the temperature of sauna before session - Pre-heat time 15-30 minutes (from room temperature 20c) Never touch the heater panels whilst in operation, possible burning may occur. Recommended time of use is a maximum of 15 mins.
- Page 35 (EEE) have to fulfil certain obligations. Under the WEEE directive Insignia is considered the producer of certain products we supply and in line with the demands of the legislation we are pleased to offer the op- portunity to return these products to us for treatment and recycling.
- Page 36 www.insigniashowers.com Last Modified: 12/01/2022...
Need help?
Do you have a question about the MXOS2000 and is the answer not in the manual?
Questions and answers