Table of Contents

Related Manuals for KERN CPE


Summary of Contents for KERN CPE
- Page 1 KERN & Sohn GmbH www.kern-sohn.com Ziegelei 1 +0049-[0]7433-9933-0 72336 Balingen-Frommern +0049-[0]7433-9933-149 Germany info@kern-sohn.com User manual Counting scales KERN CPE Type TPCE-A Version 1.0 2021-06 TCPE_A-BA-e-2110...
-
Page 2: Table Of Contents
KERN CPE Ver. 1.0 2021-06 User manual Counting scales Contents Technical specification ..................4 Declaration of Conformity ..................5 Device overview ....................6 Parts ......................6 Display ......................7 Keyboard ....................... 8 Basic instructions (general information) ............... 9 Intended use ....................9 Non-intended use .................. - Page 3 Setup menu ....................28 RS-232 interface ..................... 29 13.1 Technical specification ................29 13.2 Printer mode / protocol templates (KERN YKB-01N) ....... 30 13.3 Printout protocol (continuous data transmission) ........30 Maintenance, service and disposal ..............31 14.1 Cleaning ....................31 14.2...
-
Page 4: Technical Specification
1 Technical specification KERN CPE 6K-3 CPE 15K-3 CPE 30K-3 Product number / type TCPE 6K-3-A TCPE 15K-3-A TCPE 30K-3-A 0.2 g 0.0005 kg Interval (d) Weighing range (Max) 3000 g 6000 g 15 kg Reproducibility Linearity ±0,8 g ±3 g ±0,0015 kg... -
Page 5: Declaration Of Conformity
Dimensions: Declaration of Conformity The valid Declaration of Conformity EC/UE is available at: www.kern-sohn.com/ce TCPE_A-BA-e-2110... -
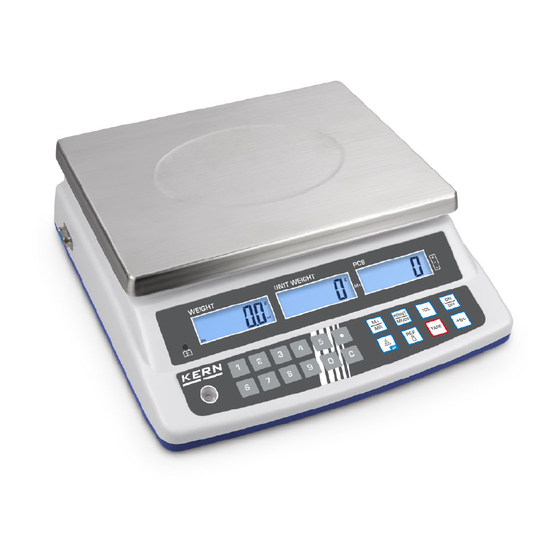
Page 6: Device Overview
3 Device overview 3.1 Parts Item Name Scale plate Display Keyboard RS-232 interface Battery charge indicator Leveler Leveling screw foot Power supply socket TCPE_A-BA-e-2110... -
Page 7: Display
3.2 Display Weight Weight of a single Number of pieces piece Battery charge indicator Symbol Description Battery charging indicator Discharged battery Tolerance symbols for check weighing, see chapter 10.1 Stabilization indicator ZERO Zero indicator Net weight value indicator Weight unit “gram” Weight unit “kilogram”... -
Page 8: Keyboard
3.3 Keyboard Button Name Function in the operating Menu function mode Numerical buttons – Deleting – Decimal point – Summing M Button – Displaying the “total” value Displaying the configura- PRINT Weight data transfer via tion menu button the interface (by pressing and holding the button) Activating/deactivating... -
Page 9: Basic Instructions (General Information)
The scale should always be operated in line with the provided guidelines. Other oper- ation ranges / areas require a written consent of KERN. 4.3 Guarantee The warranty expires: •... -
Page 10: Testing Equipment Supervision
The information on the supervision of the testing equipment, i.e. scales, and the required reference weights, can be found on the home page of KERN (www.kern-sohn.com). The reference weights and scales can be calibrated fast and for a low cost in the KERN calibration laboratory (against the national reference) ap- proved by DKD (Deutsche Kalibrierdienst). -
Page 11: Unpacking, Positioning And Start-Up
7 Unpacking, positioning and start-up 7.1 Installation place, operation place The scales are designed to ensure reliable weighing results in standard operating con- ditions. The choice of a correct scale location ensures its accurate and fast operation. This is why you should follow the following rules when selecting the installa- tion place: •... -
Page 12: Integration, Setting And Leveling
7.3 Integration, setting and leveling Remove transport protection. Install the scale plates as shown in the drawing. Place the scale on smooth surface. Level the scale using the leveling feet. The air bubble in the leveler must be pre- sent in the marked area. -
Page 13: Power Supply
Check if the scale voltage is set correctly. The scale can be connected to the mains only when the voltage specified on the scale (sticker) and the local voltage are identical. Always use the original power supply by KERN. Using any other products requires KERN consent. Important information: ... -
Page 14: Rechargeable Battery Operation
7.5 Rechargeable battery operation The rechargeable battery and the charger are compatible. Al- PLEASE NOTE! ways use the power supply delivered with the scale. Do not use the scale when charging. Always replace the battery with the one of the same type or of the type recommended by the manufacturer. -
Page 15: Battery Charging
Before you connect or disconnect any extra devices (printer, computer) to/from the data interface, the scale should always be disconnected from the mains. Use solely accessories and peripherals supplied by KERN with the scale, being per- fectly compatible with it. -
Page 16: Adjustment
[d] of the scale, though preferably it should be a bit higher. For information concerning reference weights, see online at: http://www.kern-sohn.com • Ensure stable environmental conditions. The heating time is required for the stabilization (see chapter 1). -
Page 17: Operation
8 Operation 8.1 Switching on/off Switching on: Press the ON/OFF button. Once the displays is lit, the scale autotest will be carried out. Wait until the weight is displayed, the scale is ready for use. Switching off: Press the ON/OFF button, the display will go off. 8.2 Zeroing Zeroing corrects the effect of small pollutants on the scale plate. -
Page 18: Weighing With Tare
8.4 Weighing with tare The empty weight of any container used for weighing can be tared, pressing the button which results in displaying the net weight of the weighed material during consecutive weighing processes. Place the scale container on the scale plate. ... -
Page 19: Determination Of A Single Piece Average Weight By Weighing
9.1 Determination of a single piece average weight by weighing Zero the scale or, whenever required, tare the empty scale container. Place the known number of individual pieces as a reference load. Use numerical buttons to enter the number of reference pieces and confirm by pressing . -
Page 20: Introducing The Average Weight Of A Single Piece As The Numerical Value
9.2 Introducing the average weight of a single piece as the numerical value Zero the scale or, whenever required, tare the empty scale container. Using numerical buttons, enter the known average weight of a single piece, e.g. 10 g, and confirm by pressing REF. ... -
Page 21: Test Weighing
10 Test weighing The function is available starting from weight values above 20 d. Activating the test weighing mode: In the weighing mode, press the TOL button, <CK OFF> will be displayed. Pressing the TOL button enables to switch between <CK OFF> and <CK ON >. - Page 22 Setting conditions of sending and limits: 1. When <LIMIT – HI-MODE> is displayed, use the TOL button to select the re- quired sending condition. You can choose: 1. If the weighed portion is in the present limit range, a sound is heard and a triangle is displayed at the [ ] symbol.
- Page 23 4. Confirm the selection by pressing . The window for value entry in the numerical form will be displayed where you can enter the upper limit value. 5. Using numerical buttons, enter the upper limit value, e.g. 2 kg in the displayed unit (e.g.
-
Page 24: Check Counting
Tolerance check start: Ensure the test weighing mode is active. To do it, press TOL and, whenever re- quired, use TOL to select <CK ON>. Place the weighed material (< 20 d) and, based on the tolerance symbols / audible signal, check if the weighed material belongs to the preset tolerance range. - Page 25 Setting conditions of sending and limits: Using the TOL button, select the required signaling condition. For selection op- tions see chapter 10.1 / step 1: Confirm the selection by pressing , <LIMIT – STABL-CHECK> will be dis- played. ...
- Page 26 Tolerance check start: Ensure the test weighing mode is active. To do it, press TOL and, whenever re- quired, use TOL to select <CK ON>. Ensure the average weight of a single piece is set (see chapter 9). ...
-
Page 27: Summing
11 Summing The function enables to add the number of pieces to the total memory by pressing the button. The function is available starting from weight values above 20 d. Summing the weighed material: Ensure the average weight of a single piece is determined (see chapter 9. ... -
Page 28: Setup Menu
12 Setup menu The setup menu enables to adapt the scale settings / scale behavior to your require- ments (e.g. ambient conditions, special weighing processes). Menu navigation: In the weighing mode, press and hold the PRINT Displaying the menu button first menu... -
Page 29: Rs-232 Interface
• Connect the scale with the printer interface using the appropriate cable. Trouble- free operation is ensured only when the appropriate interface cable by KERN is used. • Communication parameters (e.g. transmission speed) of the scale and the printer must be compliant. -
Page 30: Printer Mode / Protocol Templates (Kern Ykb-01N)
13.2 Printer mode / protocol templates (KERN YKB-01N) Weight Counting the ±1500,0g number of 10g/pcs Weight of a single pieces piece Number of pieces 150PCS Summing No possibility to connect with the printer 13.3 Printout protocol (continuous data transmission) Byte <20>... -
Page 31: Maintenance, Service And Disposal
Remove any scattered weighed material immediately. 14.2 Maintenance and service The device can be operated and maintained solely by the technicians trained and authorized by KERN. Disconnect from the mains before opening. 14.3 Disposal The packaging and the device should be disposed in accordance with the national or regional law in the location where the device is operated. -
Page 32: Help For Any Minor Failures
16 Help for any minor failures If there are any program execution problems, the scale should be switched off and disconnected from the mains for a while. Next, the weighing process should be started anew. Problem Possible cause • The scale is not on. The weight indicator is not lit.
Need help?
Do you have a question about the CPE and is the answer not in the manual?
Questions and answers