Table of Contents
Advertisement
Quick Links
DM-RMC-4K-100-C-1G
Wall Plate 4K DigitalMedia 8G+® Receiver and Room Controller 100
The Crestron®
DM-RMC-4K-100-C-1G
receiver and room controller that provides a simple, cost-effective
interface solution for a single display device as part of a complete
Crestron® DigitalMedia™ system.
In the Box
1
DM-RMC-4K-100-C-1G Wall Plate DigitalMedia 8G+®
Receiver and Room Controller 100
Additional Items
1
Bracket, Surface Mount (2016054)
2
Connector, 2-Pin (2003574)
1
Connector, 3-Pin (2003575)
2
Screw, 6-32 x 1/4 in., Pan Head, SEMS (2007218)
2
Screw, 6-32 x 3/4 in., Truss Head, Combo (2009211)
is a DigitalMedia 8G+® wall plate
Install the Receiver
Mount the device into an electrical box, onto a flat surface, or onto a rack
rail. Connect the rear of the receiver before mounting it into an electrical
box. If the receiver is to be mounted onto a flat surface or rack rail,
connect the rear of the unit after it is mounted.
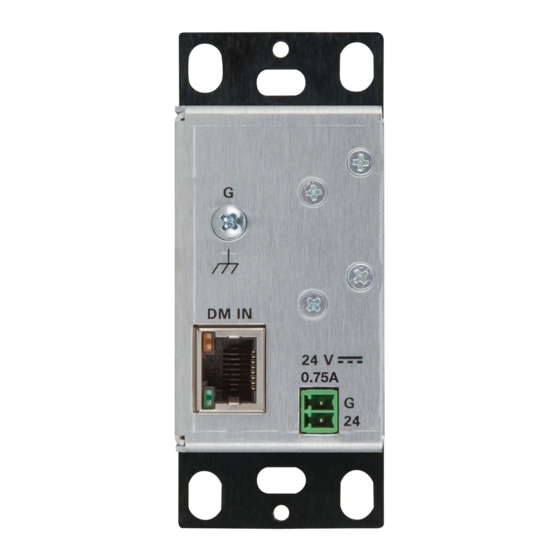
Connecting the Rear of the Receiver
NOTE:
The DM IN port is a PoDM (Power over DM) powered device
(PD) port and is also compatible with HDBaseT® PoE:
In order for the DM IN port to receive PoDM, the port must be
l
connected to a DigitalMedia switcher or other DigitalMedia
equipment that has a PoDM power sourcing equipment (PSE) port.
In order for the DM IN port to receive HDBaseT PoE, the port must
l
be connected to equipment that has an HDBaseT PoE PSE port.
Wiring that connects to a PoDM or HDBaseT PoE port is designed for
intrabuilding use only.
PoDM, HDBaseT PoE, or the optional
separately) can be used to power the receiver.
Quick Start
PW-2407WUL
power pack (sold
1
Advertisement
Table of Contents

Related Manuals for Crestron DM-RMC-4K-100-C-1G


Summary of Contents for Crestron DM-RMC-4K-100-C-1G
- Page 1 In the Box Connecting the Rear of the Receiver DM-RMC-4K-100-C-1G Wall Plate DigitalMedia 8G+® Receiver and Room Controller 100 NOTE: The DM IN port is a PoDM (Power over DM) powered device (PD) port and is also compatible with HDBaseT®...
- Page 2 2. Attach a decorator style faceplate (not included) to the receiver using two screws (not included). NOTE: The optional Crestron FP-G1 Series faceplate assembly is sold separately. Mounting into an Electrical Box Refer to the following table for DM IN wiring information.
- Page 3 Quick Start DM-RMC-4K-100-C-1G Wall Plate 4K DigitalMedia 8G+® Receiver and Room Controller 100 Mounting onto a Flat Surface Mounting onto a Rack Rail Mount the receiver onto a suitable flat surface such as the underside of a Mount the transmitter onto the front or rear rail of a rack.
- Page 4 The IR OUT and COM (RS-232) ports are enabled only when the DM-RMC-4K-100-C-1G-B receiver is connected to an Ethernet-enabled DigitalMedia switcher or transmitter that is addressable from a Crestron control system. Pass-through mode for CEC is supported when the DM-RMC-4K- 100-C-1G is connected directly to a DigitalMedia transmitter.
- Page 5 Crestron disclaims any proprietary interest in the marks and names of others. Crestron is not responsible for errors in typography or photography.
Need help?
Do you have a question about the DM-RMC-4K-100-C-1G and is the answer not in the manual?
Questions and answers