Table of Contents
Advertisement
Quick Links
Advertisement
Table of Contents

Related Manuals for ZERO-X ZX-20


Summary of Contents for ZERO-X ZX-20
- Page 1 ZX-20 USER MANUAL...
-
Page 3: Table Of Contents
5.1 BATTERY CHARGING ..............8 5.2 MICRO SD CARD COMPATIBILITY ..........9 5.3 POWERING YOUR ZX-20 ..............9 5.4 FORMAT YOUR SD CARD ..............9 6.0 ZX-20 CONTROLS AND FUNCTIONS .........11 6.1 POWER ON/OFF BUTTON ............11 6.2 SHOOT/RECORD BUTTON ............11 6.3 ACCESSING SYSTEM SETTINGS ..........11 6.4 SETTING THE DATE &... - Page 4 6.8 DVR MODE..................16 6.9 SCREEN SAVER ................17 6.10 LED INDICATOR ................18 6.11 ZOOMING IN & OUT ..............19 7.0 PICTURE SETTINGS ..............19 7.1 PHOTO MODE ................19 7.2 IMAGE RESOLUTION ..............20 7.3 TIMER MODE .................20 7.4 CONTINUOUS PICTURE MODE ..........21 7.5 BURST MODE ................22 8.0 VIDEO SETTINGS ................23 8.1 VIDEO MODE ................23 8.2 VIDEO RESOLUTION ..............23...
- Page 5 10.0 FIRMWARE VERSION ..............29 11.0 INSTALLING AND USING THE ZX-20 APP ........30 12.0 MANUAL STEPS FOR CONNECTING TO THE ZX-20 APP...30 12.1 ZX-20 APP ..................31 12.2 SAVING PHOTOS AND VIDEOS VIA THE APP ......32 12.3 REMOTE PHOTO/RECORD VIA THE APP........33 12.4 ADJUSTING SETTINGS VIA THE APP .........33...
-
Page 6: Introduction
INTRODUCTION Thank you for purchasing the ZX-20 action camera. Please read through the User Manual before attempting to use the ZX-20. FEATURES • 4K UHD Recording @ 30 FPS • 2” Screen • Waterproof Case ABOUT THE ZX-20 The ZX-G2 has been designed to turn your smartphone into a stable, smooth and lightweight 3 axis-camera. -
Page 7: Whats In The Box
WHATS IN THE BOX 1 x ZX-20 Action Camera 1 x 3 Way Mount 1 x USB Charging & Data Cable 1 x Frame Mount 1 x Waterproof Casing 4 x Straps 1 x Bike Mount 1 x Helmet Base... -
Page 8: Getting Started
• Always check the waterproof case seal is clean and free of debris prior to use in water. • Do not attempt to open the ZX-20 or modify it in any way. If the ZX-20 has been tampered with the warranty will be void. Maintenance and repairs should only be performed by Zero-X. -
Page 9: Battery Charging
• Do not attempt to expose the internal battery cell. • Only use a certified 5V 1A USB charger to charge the ZX-20. Using non certified chargers could potentially damage the ZX-20, or the ZX-20 battery. • Do not leave the battery charging overnight. -
Page 10: Micro Sd Card Compatibility
NOTE: There is only one correct way to insert the Micro SD Card into your ZX-20. Do not force the card into the slot if it does not easily go in. This may result in damage to both the unit and the card. - Page 11 3. Press the ON/OFF button four times, this will open up the settings menu. Press the shoot/record button to activate the settings page. 4. Press the ON/OFF button three times, this will open up the ZX-20 hardware settings menu. 5. Press the down button twice on the right side of the unit to navigate down the menu to ‘Format’.
-
Page 12: Controls And Functions
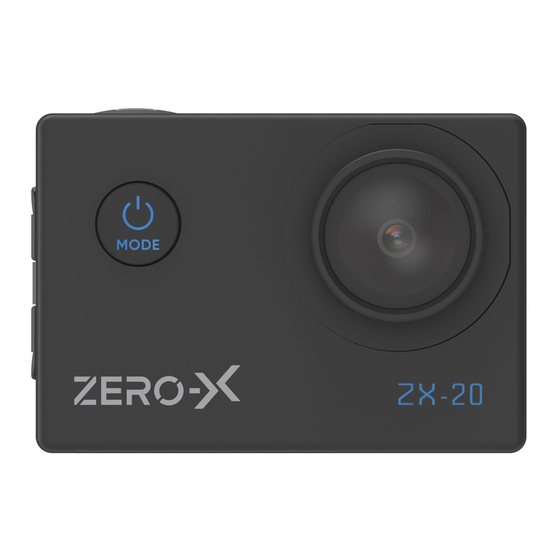
ZX-20 CONTROLS AND FUNCTIONS POWER ON/OFF BUTTON The ON/OFF button is located at the front of the ZX-20 in the top left corner. This is used to power ON/OFF the unit. The ON/OFF button is also used to change between the camera modes, settings and also serves as the back button when you are in the navigation settings. -
Page 13: Setting The Date & Time
SETTING THE DATE & TIME To set the correct date and time on your ZX-20, follow the below steps once your unit is turned ON: 1. Press the ON/OFF button four times, this will open up the settings menu. -
Page 14: Auto Power Off
The auto power OFF function is designed to help keep the battery charged longer during use. The ZX-20 will automatically power OFF after a selected period of inactivity (1, 3, 5 minutes). The ZX-20 is factory defaulted to 1 minute. To either activate or change this setting, follow the below steps: 1. -
Page 15: Wifi
1. Press the ON/OFF button four times, this will open up the settings menu. Press the shoot/record button to activate the settings page. 2. Press the ON/OFF button twice, this will open up the ZX-20 system settings menu. 3. As WiFi is the first menu option, you will see this highlighted. If this function is activated there will be a tick in the box. -
Page 16: Rotate Image
6. Go to your smartphones Wifi settings and search for the device name that is shown on the ZX-20 screen. Click on this and enter in the password (also on the screen). You can now access the ZX-20 through the App. When the Wifi is connected the LED indicator light at the top of the unit will continuously flash orange slowly. -
Page 17: Dvr Mode
DVR MODE When the DVR mode is activated, the ZX-20 will continue to record until the unit has run out of power. The ZX-20 default setting is OFF. To change this setting, follow the below steps: 1. Press the ON/OFF button four times, this will open up the settings menu. -
Page 18: Screen Saver
1. Press the ON/OFF button four times, this will open up the settings menu. Press the shoot/record button to activate the settings page. 2. Press the ON/OFF button twice, this will open up the ZX-20 system settings menu. 3. Press the down button... -
Page 19: Led Indicator
6.10 LED INDICATOR The ZX-20 has a LED indicator lights that allow you to see if a function is active. The LED indictor on the top of the unit notifies you when Wifi is connected by a orange light. There is also a two small LED indicator lights on the left side of the screen;... -
Page 20: Zooming In & Out
6.11 ZOOMING IN & OUT You are able to zoom in and out of both photos and videos by the same controls. The ZX-20 default is set the furtherest distance. ZOOMING IN To zoom in when in the photo or video mode, press the down button to incrementally zoom in. -
Page 21: Image Resolution
TIMER MODE You are able to change the timer mode on the ZX-20. You can change between: 3 seconds, 5 seconds, 10 seconds, 20 seconds and OFF. The ZX-20 default setting is set to OFF. To change follow the below steps: 1. -
Page 22: Continuous Picture Mode
2. Press the ON/OFF button once, this will open up the ZX-20 photo settings menu. 3. Press the down button once to navigate down to ‘Timer mode’, you will see this highlighted. Press the shoot/record button to open up this setting. -
Page 23: Burst Mode
2. Press the ON/OFF button once, this will open up the ZX-20 photo settings menu. 3. Press the down button two times to navigate down to ‘Continuous photo mode’, you will see this highlighted. Press the shoot/record button to open up this setting. -
Page 24: Video Settings
You can change the video resolution between: 4K @ 30 FPS, 2.7K @ 30 FPS, 1080P @ 60 FPS and 1080P @ 30 FPS. The ZX-20 default setting resolution is 4K Ultra Full High Definition at 30 Frames Per Second. To... -
Page 25: Loop Recording
If the loop recording is set to OFF, the ZX-20 will record continously for one hour, as a single file. The ZX-20 default setting is 5 minutes. To change either the loop recording interval or to turn OFF loop recording, follow the below steps: 1. -
Page 26: Time Lapse
TIME LAPSE When using the time lapse feature, the ZX-20 will take a sequence of photos over a period of time, merging them seamlessly into a sped up video. There are 8 options to choose from: 0.5 secs, 1 second, 2 seconds, 5 seconds, 10 seconds, 30 seconds and 60 seconds.The ZX-... -
Page 27: Slow Motion
SLOW MOTION Record videos in slow motion with the ZX-20. This is a great for fast action shots, to see everything that is happening clearly. You can choose to record in: 1080P @ 60 FPS or 720P @ 120 FPS.The ZX-20 default setting is 720P @ 120 FPS. -
Page 28: Microphone
PLAYBACK MODE To view all the photos and the videos you have taken with the ZX-20. To open playback mode, press the ON/OFF button 3 times. You will see the playback icon in the top left corner of the screen when you are in this mode. -
Page 29: Restore Default Settings
ON/OFF button once. DELETING FILES IN PLAYBACK MODE To delete any files that have been taken on the ZX-20 or are on the Micro SD Card, press and hold the shoot/record button and then follow the below steps. -
Page 30: Firmware Version
2. Press the ON/OFF button three times, this will open up the ZX-20 hardware settings menu. 3. Press the down button two times on the right side of the unit to navigate down the menu to ‘Factory Reset’. Press the shoot/record button once to open up, you will be prompted with confirm or cancel. -
Page 31: Installing And Using The Zx-20 App
INSTALLING AND USING THE ZX-20 APP Please scan the below QR code. Please search the App store or Google Play Store for ‘ZX-20’. NOTE: The ZX-20 App requires iOS 10.0 and above or Android 5.0 device to run. 12.0 MANUAL STEPS FOR CONNECTING TO THE ZX-20 APP Turn on your phone and scan the QR code or search the App store for ZX-20 and download the App. -
Page 32: App
ZX-20). Please see page 14 WIFI for further information about connecting through WIFI. 2. Once you have connected the ZX-20 to your smartphone a tick icon will appear next the to name. You can open the ZX-20 App on your smartphone. -
Page 33: Saving Photos And Videos Via The App
If your WIFI is turned off on your smartphone, turn it on and refresh the search. To see how to turn on the WIFI for the ZX-20, see page 14. Do not connect to any other WIFI when you are connecting the ZX-20 to its App. -
Page 34: Remote Photo/Record Via The App
12.4 ADJUSTING SETTINGS VIA THE APP If you prefer to change the settings of the ZX-20 via the App you can do this through the settings tab. Follow the below steps: 1. Press the ‘settings’ icon on the bottom right of the App screen. -
Page 35: Warranty
13.0 WARRANTY WARRANTY TERMS & CONDITIONS Our goods come with guarantees that cannot be excluded under the Australian Consumer Law. You are entitled to a replacement or refund for a major failure and for compensation for any other reasonably foreseeable loss or damage. - Page 36 WARRANTY AND WARRANTY DISCLAIMER Zero-X has a limited warranty, whereby Zero-X warrants to you and only to you that this Zero-X gimbal will be free from defects in materials and workmanship for one (1) year from the date of your purchase (unless a longer warranty period is required by law).
- Page 37 Zero-X also assumes no responsibility for and shall not be liable, for any damages caused by viruses that may infect your Zero-X. In the event of any loss, damage or injury, you will not look to Zero-X to compensate you or anyone else. You release and waive for yourself and your insurer all subrogation and other rights to recover against Zero-X arising as a result of the payment of any claim for loss, damage or injury.
- Page 38 Zero-X does not undertake any risk that you or property, or the person or property of others, may be subject to injury or loss if such an event occurs. The allocation of such risk remains with you, not Zero-X. Other than the above product warranty for the Zero-X, its suppliers...
- Page 39 The preceding preclusion and limitation of liability will also not apply to claims for damages arising out of loss of life, bodily injury or health impacts for which Zero-X may be liable, or for non-contractual liability.
-
Page 40: Notes
14.0 NOTES... - Page 44 Capture the action.™ ANOTHER DIRECTED BRAND All Images, Information and Content are Copyright © 2021 Directed Electronics www.zero-x.com.au | www.zero-x.co.nz Australia Pty Ltd. All Rights Reserved.
Need help?
Do you have a question about the ZX-20 and is the answer not in the manual?
Questions and answers