Advertisement
Quick Links
Advertisement

Related Manuals for Nautiraid GRAND RAID 540


Summary of Contents for Nautiraid GRAND RAID 540
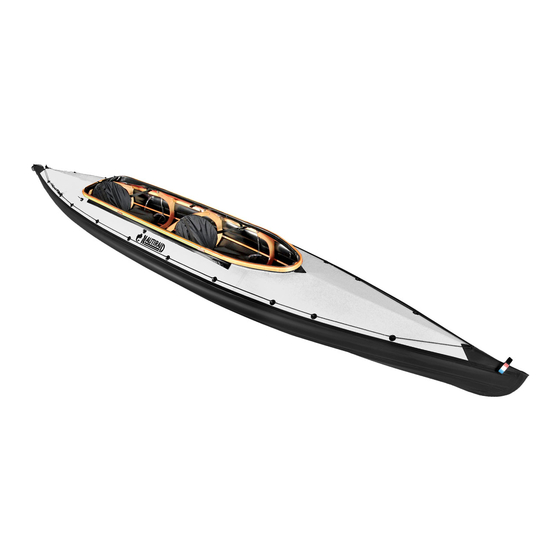
- Page 1 GRAND RAID 540 Instruction book...
- Page 2 • Get your parts out of the bags : check how they are stored in the bag and how the skin is plied. It will help you when you will get the disassembled parts back in the bags after your paddling session. •...
- Page 3 • Take the front half frame (red marks). Open it by turning the first crossrib 90°. • Secure its position with the little strap which eyelet goes in the crossrib screwhead. • Open the half frame around its hinges.
- Page 4 • Take the front keel extension • Secure it in place with the pin. bar (red marks) to connect it with the front frame. • Take the crossrib n°2 (left, red marks). Present it on the frame. Lift the locker to secure it on the bolt head - on the keel bar (right).
- Page 5 • Slide the front half frame into the skin. • The frame has to be carefully centered in the skin : the eyelet at the top has to be aligned with the frame top screw head. It’s not necessary to force the screwhead into the eyelet : once in tension (next step), the screw head will be below the eyelet.
- Page 6 • Put the keel into tension : • Push the lever towards the ground. insert the end of the keel bar Once in place, turn the latch to secure the lever. into the lever axle. • Take the two parts of the gunwale and bent them until you can connect...
- Page 7 FLOORBOARDS • Get the floorboards in place : the red marks go at the front and the blue marks at the rear under the crossribs. • Lift the two floorboards by the middle of the boat and lay them down. Be careful they are correctly aligned on the keel.
- Page 8 CENTRAL CROSSRIBS • Put in place the n°4 crossrib which goes at the centre of the boat. N°4 doesn’t have any marks, while n°3 has red marks ans n°5 has blue marks. Like the previous crossribs, secure the locker on the bolt head on the keel (red arrow and left).
- Page 9 COCKPIT RIM • Be sure that all eight bolt heads are passing through the eyelets. • Put in place the rear half hoop. The three metallic holes will go on the bolt heads. • Then connect the side bars (red marks towards the front). They also click on the bolt heads.
- Page 10 • To get the cockpit watertight, insert the sem into the slot of the cockpit rim. Always start from the rear. SEATS • Inflate the seats before putting them in the boat. • Attach the seats in place, tying the straps around the crossrib. LAST STEP •...
- Page 11 RUDDER INSTALLATION (OPTION) • Put in place the rudder by pulling • When in position with the the pin. bracket, put the pin again and secure it with the elastic. • On the rudder bar, unscrew the • Get out the movable ring. shackle on port.
- Page 12 • Put the rudder bar through the • Slide the ring back in place. hole. • The rudder leverage black cord has to be stretched along the starboard side. Connect it to • Put back the shackle. the plastic hook with elastic. •...
- Page 13 • Connect the rudder control lines to the lines of crossrib n°2 (below, at the end of the white elastics). The lines go through the holes on the pedals before being connected to the hook.
- Page 14 DISASSEMBLY OF THE KAYAK • Always start by deflating the • Be careful that all the screw stabilairs. Get the cockpit rim off. heads (8) are out of the eyelets. • Get the three central crossribs • Release the tension by lifting out, remove the floorboards.
- Page 15 • Deconnect the gunwales and the • Grab the boat by the front handle. four stringers. Slap the sides of the front end for the skin tends to stick to the frame. Shake it too, to help the frame slide a few inches.
- Page 16 FOLDING THE SKIN • Put crossrib n°2 on the skin, and • Ply again over rib n°3. make a first ply. • Do the same at the other end with rib n°5 and 6 to get a plied skin like on the picture below.
- Page 17 WOOD BAG ARRANGEMENT • Put on the ground a floorboard • On the floorboard, put the two over the two straps. cockpit bars and the rear keel extension. • Sling the front extension bar. • Put a folded half frame over it. •...
- Page 18 • The kayak has to be dry, if you have to fold it while still being humid, don’t delay to get it out of its bag to avoid moisture. • Bags composition : - Skin bag : skin, two half cockpit rims, all removable crossribs, seats, accessories.
- Page 20 Parc des Coëvrons ouest 53480 VAIGES Tél. : 02 43 90 20 26 info@nautiraid.com...
Need help?
Do you have a question about the GRAND RAID 540 and is the answer not in the manual?
Questions and answers