Table of Contents
Advertisement
Advertisement
Table of Contents

Related Manuals for Ninja DUALBREW CFP200 Series


Summary of Contents for Ninja DUALBREW CFP200 Series
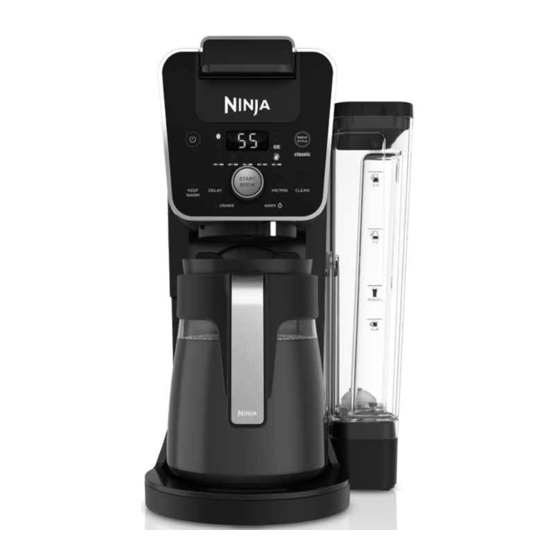
- Page 1 CFP200 Series GROUNDS & PODS DualBrew OWNER’S GUIDE COFFEE MAKER ninjakitchen.com...
-
Page 2: Table Of Contents
Cleaning the Carafe ......20 TECHNICAL SPECIFICATIONS Cleaning the Ninja Pod Adapter ..... 20 Voltage: 120V~, 60Hz Cleaning the Sliding Lid . -
Page 3: Important Safeguards
Ninja® Pod Adapter Care & Maintenance immediately upon unpacking. on or taking off parts, and before cleaning 27 DO NOT put fingers inside Ninja Pod 38 Allow the appliance to cool before the appliance. 2 This appliance can be used by persons Adapter. -
Page 4: Parts
Hinged Hood Water Reservoir Base Single-Serve Cup Platform Control Panel Brew Basket Hot Water Dial (Not available on all models) Ninja Pod Adapter Brew-Through Lid Ninja Glass Carafe O Ninja Smart Scoop™ Intelligent Warming Plate Q Drip Stop 1-877-646-5288 ninjakitchen.com... -
Page 5: Using The Control Panel
Grounds: The Sliding Lid is slid all the way forward over the brew basket until it is completely closed and the brewer is ready to brew grounds. Pods: The Ninja® Pod Adapter is inserted, locked, and shut, and the brewer is ready to brew pods. -
Page 6: Priming Your Ninja® Dualbrew Coffee Maker
When the cycle is complete, Size Classic Rich (filled discard the water and rinse the carafe. with ice) You are now ready to use your Ninja REMOVE 6 oz. 6 oz. 6 oz. 6 oz. DualBrew Coffee Maker. LOCK 8 oz. -
Page 7: Coffee Measurement Chart
MEASURING YOUR COFFEE GROUNDS COFFEE MEASUREMENT CHART GROUND COFFEE For best results, use the measurements on Ninja Smart the Ninja Smart Scoop™ or in the chart to Serving Size Tablespoons Scoop USING THE BREW BASKET AND determine how much ground coffee to use SLIDING LID for each brew size. -
Page 8: Brew Styles
To cancel the 3 Press the START BREW button on the closing the Ninja Pod Adapter handle 3 Slide the Ninja Pod Adapter handle into brew at any time, press the START to start a brew, Using your fingers, dial to start the brew. -
Page 9: Intelligent Warming Plate
Ninja inserting a pod in the Ninja Pod Adapter, Pod Adapter. While the Drip Stop is closed, close the sliding lid or adapter handle, the Drip Stop indicator will illuminate. -
Page 10: Dispensing Hot Water
If using pods, remove pod holder and hand-wash with warm, has a separate water line completely the Ninja Pod Adapter and brew basket. soapy water. Take care when cleaning dispensed into vessel. independent of the line used for brewing Wash the used parts thoroughly with around the needles. -
Page 11: Choosing Which Mode To Clean
Lid closed. If you primarily use pods, ensure NOTE: To cancel the clean cycle, press the Ninja Pod Adapter is installed, and run the Over Ice Brew is not cold. the Power button or CLEAN button once. -
Page 12: Replacement Parts
• Some splatter is normal. Use the cup tray when possible to reduce the distance between the cup and the coffee outlet. • Ensure the Ninja Pod adapter is installed over the brew basket when brewing pods. Water reservoir is unstable. -
Page 13: Warranty
Normal wear and tear of wearable parts (including brew basket, permanent filter, frother whisk, carafe and brew-through lid, water reservoir and lid, Ninja Smart Scoop, ™ Sliding Lid, and Ninja® Pod Adapter), which require regular maintenance and/or replacement to ensure the proper functioning of your unit, are not covered by this warranty. - Page 14 NOTES NOTES 24 1-877-646-5288 ninjakitchen.com...
- Page 15 NINJA is a registered trademark of SharkNinja Operating LLC. NINJA SMART SCOOP is a trademark of SharkNinja Operating LLC. All other marks, including KEURIG and K-CUP, are trademarks of their respective owners.
Need help?
Do you have a question about the DUALBREW CFP200 Series and is the answer not in the manual?
Questions and answers
How do we select a half carafe size?
To select a half carafe size on the Ninja DUALBREW CFP200 Series:
1. Make sure the carafe with the brew-through lid is centered below the brew basket.
2. Ensure everything is securely in place and the brewer is powered on.
3. Turn the dial to select the "1/2 Carafe" size.
4. Press the BREW STYLE button to select the desired brew style (e.g., Classic).
The half carafe size brews approximately 37 oz (may vary slightly).
This answer is automatically generated
I was cleaning my Ninja Dual brew coffee maker when this gasket fell onto the counter. I'm not sure where it came from. Can you help?