Advertisement
Quick Links
A L L
P U R P O S E
V I N Y L
G A R D E N
EN
OWNER'S MANUAL /
Instructions for Assembly '6 Ft StoreMate Plus'
Size 6Ft x 6Ft / 1.9 m x 1.9 m
Ver: 1.0
FR
MANUEL D'INSTRUCTION/
Instructions pour l'Assemblage '6 Pieds StoreMate Plus'
Dimension 6Pieds x 6Pieds / 1.9 Mètre x 1.9 Mètre
Ver: 1.0
DE
Benutzerhandbuch /
Montageanleitung'6 Ft StoreMate Plus'
Größe: 6Ft x 6Ft / 1.9 m x 1.9 m
Ver: 1.0
ES
MANUAL DEL PROPIETARIO /
Instrucciones de montaje '6 Pies StoreMate Plus'
Tamaño 6Pies x 6Pies / 1.9 Metros x 1.9 Metros
Ver: 1.0
PT
MANUAL DO PROPRIETARIO/
Intruções de montagem.'6 pés StoreMate Plus'
Tamanho 6pés x 6pés / 1.9 Metro x 1.9 Metro
Ver: 1.0
NL
Gebruiksaanwijzing voor eigenaar/
Instructies voor bouw '6Voet StoreMate Plus'
Maat 6voet x 6voet / 1.9 Meter x 1.9 Meter
Versie: 1.0
Příručka uživatele /
CS
Návod k montáži '6 Stopy StoreMate Plus'
Velikost 6 Stopy x 6 Stopy / 1.9 Metr x 1.9 Metr
Verze : 1.0
NÁVOD PRE UŽÍVATELA /
SK
Návod na zloženie '6 Stopa StoreMate Plus'
Velkosť 6 Stopa x 6 Stopa / 1.9 m x 1.9 m
Pozri: 1.0
PRIROČNIK ZA LASTNIKA /
SL
Navodila za montažo '6 Čevljev StoreMate Plus'
Velikost 6 Čevljev x 6 Čevljev / 1.9 Metrov x 1.9 Metrov
Razl: 1.0
Model # 30425
TM
A Product of
S H E D S
(Approx.)
(Approx.)
(Ca.)
(Aprox.)
(Aprox.)
(Ongeveer)
(Přibližně)
(približne)
(Približno)
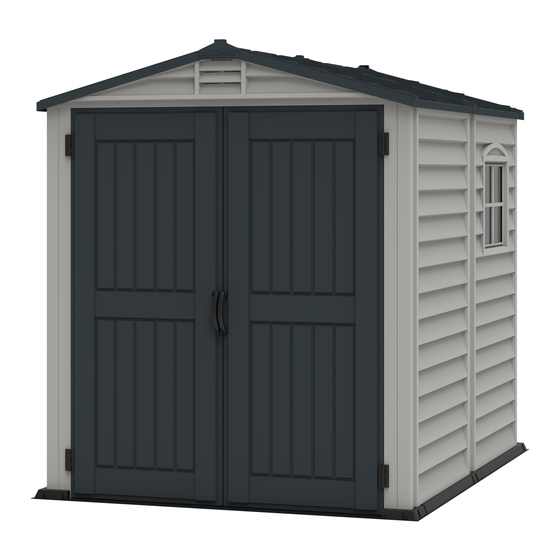
VINYL GARDEN SHED
Gazdinski Priručnik /
HR
Instrukcije za skupštine '6 Stopalo StoreMate Plus'
Veličina 6 Stopalo x 6 Stopalo/ 1.9 Metar x 1.9 Metar
Ver: 1.0
FELHASZNÁLÓI KÉZIKÖNYV /
HU
Útmutató az összeszereléshez '6 Láb StoreMate Plus'
6Láb x 6Láb / 1.9 Méter x 1.9 Méter
Verzió: 1.0
SV
ÄGARENS MANUAL/
Monteringsinstruktioner för '6 Fot StoreMate Plus'
Storlek 6 fot x 6 fot / 1.9 m x 1.9 m
Version: 1.0
IT
MANUALE DEL PROPRIETARIO /
Istruzioni per l'assemblaggio '6 Piedi StoreMate Plus'
Dimensione 6 Piedi x 6 Piedi / 1.9Metri x 1.9Metri
Versione 1.0
PODRĘCZNIK UŻYTKOWNIKA /
PL
Instrukcja montażu '6 Stopy StoreMate Plus'
Wymiary 6Stopy x 6Stopy / 1.9 Metr x 1.9 Metr
Wersja: 1.0
MANUAL DE UTILIZARE /
RO
Instrucţiuni de asamblare '6 Picioare StoreMate Plus'
Mărime 6Picioare x 6Picioare / 1.9 Metri x 1.9 Metri
Ver: 1.0
РЪКОВОДСТВО ЗА ПРИТЕЖАТЕЛЯ /
BG
Инструкции за сглобяване '6 Фута StoreMate Plus'
Размер 6 Фута x 6 Фута / 1.9 Метра x 1.9 Метра
Версия: 1.0
KULLANIM KILAVUZU /
TR
Montaj Talimatları '6 Fit StoreMate Plus'
(Yaklaşık olarak)
6Fit x 6Fit / 1.9 m x 1.9m
Sürüm: 1.0
(Približno)
(Hozzávetőlegesen)
(Ungefär)
(Circa)
(W przybliżeniu)
(Aprox.)
(приблизително)
Advertisement

Subscribe to Our Youtube Channel
Related Manuals for USP DURAMAX 30425


Summary of Contents for USP DURAMAX 30425
- Page 1 VINYL GARDEN SHED A Product of A L L P U R P O S E V I N Y L G A R D E N S H E D S Gazdinski Priručnik / OWNER’S MANUAL / Instructions for Assembly ‘6 Ft StoreMate Plus’ Instrukcije za skupštine ‘6 Stopalo StoreMate Plus’...
- Page 2 Building Dimensions : Storage Exterior Dimension Interior Dimension Approximate Door Opening Size Area Volume Base Dimension Roof Edge to Edge Wall to Wall inch inch inch inch 33 1/4 Sq. Ft 200 1/8 Cu.Ft 6 Ft x 6 Ft 73 1/2 69 1/4 60 5/8 Width...
- Page 3 Gebouw afmeting: Opslag Binnenkant afmeting Buitenkant afmeting Benadering Deur opening Maat Gebied Muur tot muur Volume Basis afmeting Dakrand tot rand inch inch inch inch 6 Voet x 6 Voet 33 1/4 200 1/8 Vierkante voet Wijdte Kubieke voet 73 1/2 69 1/4 60 5/8 186.8...
- Page 4 Zgrada dimenzija Približno određena Skladištenje Vanjski dimenzija Interijer dimenzija Vrata Open Područje Zidni to zidni Svezak Temeljiti dimenzija Krov rub to rub mjera 33 1/4 Četvornih inch inch inch inch 200 1/8 Kubni 6 Stopalo x 73 1/2 69 1/4 60 5/8 Stopalo Stopalo...
- Page 5 Wymiary budowlane: Wymiary wewnętrzne Wymiary zewnętrzne Magazynowa Przybliżone Otwieranie drzwi Wymiary fundamentów Dachu od krawędzi do krawędzi od ściany do ściany Kubatura Powierzchnia wymiary 200 1/8 Stopy 6 Stopy x 6 33 1/4 Stopy inch inch inch sześcienny Szerokość Stopy kwadratowy 73 1/2 69 1/4...
- Page 6 Tools You Will Need Alati, Trebat će Vam 1. Bežični Svrdlo – Philips Voditelj 1. Cordless Drill - Philips Head 6. Tape Measure 6. Traka Divizor 2. Screwdriver - Philips Head 2. Vijak Vozač - Philips Voditelj 7. Ručni Rukavice 7.
- Page 7 Parts List Seznam součásti Lista delle varie parti Liste des pièces Zoznam častí Lista części Teileliste Lista elementelor componente Seznam delov La Lista de Partes Dijelovi Lists Списък на частите Lista de Peças Alkatrészlista Parça Listesi Onderdelenlijst Komponentlista 1.Check all parts prior to installation. 2.Before starting installation, please refer to Safety &...
- Page 8 FDCL FCLR FDCR FCRR RS1R RS3R RS8R RS9R PPGL RS5R RS2LR PINL RS2RR RS14R CB1R DSHQ BP1R BCRR BP2R SPRW FPFR FPBR SGC1 R1LR R2LR R1RR R2RR...
- Page 9 R2LR R1LR R1RR R2RR FPBR RS14R RS2LR RS2RR RS3R RS9R RS8R RS2LR RS1R RS5R RS14R RS9R RS2LR RS1R RS14R RS9R RS14R RS8R RS3R FPFR DSHQ RS9R RS2RR RS2RR BCRR BCRR CB1R BCRR BCRR CB1R BCRR BCRR FCLR BP2R BCRR BP1R FCRR BCRR SPRW...
- Page 10 # 10-26 # 27-38 # 39-44 # 45-47...
- Page 11 Walls & Columns Zdi a kolumny Pareti & Colonne Steny a stĺpy Ściany I Kolumya Murs et colonnes Stene in stebri Pereţi şi stâlpi Wände und Säulen Стени & Колони Columnas y paredes Zidovi i Kolumne Paredes e Colunas Falak és oszlopok Duvarlar &...
- Page 12 1.Za omejitev vrtilnega momenta vijačnega vijaka nastavite #3 ali #4, da zagotovite, da vijaki ne ojačitijo kovinskih ojačitev. 2.Pomembno je, da sledite opisanim navodilom korak za korakom. 3.Montaže ne izvijajte, kadar piha močen veter. 4.Vsi deli so jasno označeni in pazite na pravilno uporabo. 5.Če se gradi skladišče proti steni, ga graditi 2,5 ft.
- Page 13 One shatter proof window panel (SPRW ) included. This can be used in any of the wall positions. Une panneau de fenêtre incassable (SPRW ) inclus.Ceci peut être utilisé dans toutes les positions de mur. Ein bruchsichere Fensterscheibe (SPRW ) enthalten.Dies kann in jeder der Wandpositionen verwendet werden. Una panel de la ventana irrompible (SPRW ) incluido.Esto se zpuede utilizar en culquiera de las posiciones de la pared.
- Page 14 Potřebné součástí Parts needed Parti occorrenti Potrebné časti Niezbędne elementy Pièces nécessaires Dele, ki jih boste potrebovali Benötigte Teile Elementele componente necesare Необходими части Piezas necesitadas Dijelovi potreban Peças Necessárias Szükséges részek Gerekli parçalar Onderdelen nodig Delar som behövs BP1R BCRR BP2R FCLR...
- Page 15 Metóda zhromažďovania stĺpcov a panelov. Metoda zbiranja stolpcev in plošč. Metoda montaže stupaca i panela. Az oszlop és a panel összeszerelési módszere. Kolonn- och panelmonteringsmetod. Metodo di assemblaggio di colonne e pannelli. Zablokuj panel w kolumnie od góry do dołu. Coloana &...
- Page 16 BP2R (x1) BP2R Apply Silicone on the floor overlapping area (Silicone not included). Appliquez du silicone sur la zone de recouvrement du sol (silicone non inclus). Tragen Sie Silikon auf den Bodenüberlappungsbereich auf (Silikon nicht im Lieferumfang enthalten). Tragen Sie Silikon auf den Bodenüberlappungsbereich auf (silicio no incluido). Aplique Silicone na área de sobreposição do piso (Silicone não incluído).
- Page 17 BP1R (x1) BP (x11) BP2R BP1R 1&2 BP2R BP1R BP1R BP2R Use Same color Plugs(BP). Utilisez les bouchons de même couleur (BP). Verwenden Sie die gleichen Farbstopfen (BP). Utilice tapones del mismo color (BP). Use os plugues da mesma cor (BP). Gebruik pluggen in dezelfde kleur (BP).
- Page 18 S5 (x4) S6 (x4) FCRR (x1) BFR (x1) BCRR (x1) BP1R BP1R BCRR BP1R BP1R FCRR FCRR FCRR BCRR FCRR 1,2,4&5 BP1R FCRR BP1R Place (BFR & BCRR) under the floor(BP1R). See fig. 1&2. Repeat the same for all column assembly. Placez (BFR et BCRR) sous le plancher (BP1R).
- Page 19 SPR (x1) 1&2 FCRR CLICK! FCRR S5 (x2) CMR (x1) BCRR (x1) S6 (x2) CLICK! 1&2 3&4 BP1R BCRR...
- Page 20 SPRW (x1) SPRW 1&2 SPRW SPRW S5 (x2) CCR (x1) BCRR (x2) S6 (x2) SPRW SPRW 1&2 SPRW BP2R 3,4&5 BP2R BCRR BP2R BCRR...
- Page 21 S2 (x1) S1 (x2) CCF (x1) CB1R (x1) FCRR 1,2&3 CB1R CB1R CB1R CB1R S2 (x1) S1 (x1) CCF (x1) CCF (x1) 1,2&3 CB1R CB1R...
- Page 22 SPR (x1) 1&2 CLICK! CLICK! CLICK! S5 (x2) CMR (x1) BCRR (x1) S6 (x2) CLICK! 1&2 BP2R BCRR 3&4 BP2R...
- Page 23 SPR (x1) 1&2 S5 (x2) CCR (x1) BCRR (x2) S6 (x2) 1&2 BP2R 3,4&5 BP2R BCRR BCRR BP2R...
- Page 24 CB1R (x1) S1 (x2) CB1R 1&2 CB1R CB1R CB1R S2 (x1) S1 (x1) CCF (x1) CB1R 1,2&3 CB1R...
- Page 25 SPR (x1) 1&2 CLICK! BP2R S5 (x2) CMR (x1) BCRR (x1) S6 (x2) 1&2 CLICK! BP1R BCRR 3&4 BP1R BP2R...
- Page 26 SPR (x1) 1&2 CLICK! S5 (x4) S6 (x4) FCLR (x1) BFR (x1) BCRR (x1) CLICK! 1&2 FCLR FCLR FCLR FCLR BP1R FCLR FCLR 3,4&5 BCRR BP1R...
- Page 27 CB1R (x1) S1 (x2) 1&2 CB1R CB1R CB1R S2 (x1) S1 (x1) CCF (x1) FCLR CB1R CB1R FCLR FCLR CB1R...
- Page 28 Střešni konstrukce Strutture di tetto Roof Structures Strešné konštrukcie Struktura dachu Structure Du Toit Dachkonstruktionen Strešne Konstrukcije Structuri de acoperiș Estructuras de techo Krovne konstrukcije Покривни конструкции Estrutura do Telhado Tetőszerkezetek Çatı yapıları Dakconstructies Takstrukturer Parts needed Potřebné součástí Parti occorrenti Pièces nécessaires Potrebné...
- Page 29 FCC (x4) S1 (x4) 3&4 FCRR FCRR 1&2 S1 (x2) FDCR (x1) FDCL (x1) FDCR FCLR 3&4 FDCR FCRR FCRR FDCL FCRR 1&2 FCLR FDCL FCLR...
- Page 30 Roof Strcture Assembly Sklop krovne konstrukcije Assemblage De La Structure Du Toit Tetőszerkezet szerelvény Dachkonstruktion Montage Takkonstruktion Estructura de Asamblea de techo Assemblea tetto della struttura ontaż konstrukcji dachu Armação da Estrutura do Telhado Dakconstructie montage kit Coinneamh Structar Deil Montážní...
- Page 31 Front Roof Strcture Assembly Prednja sklopa krovne konstrukcije Assemblage De La Structure Avant Du Toit Első tetőszerkezet szerelvény Vordere Dachkonstruktion Montage Frammonterad takkonstruktion Estructura de Asamblea de techo Frontal Assemblea anteriore tetto della struttura Monta˜ konstrukcji dachu przedniego Armação da Estrutura do Telhado Frontal Voorste dakconstructie montage kit Frontul șarpanta Adunarea Montážní...
- Page 32 S1 (x6) DSHQ (x1) RS9R RS8R RS1R RS8R RS9R DSHQ S1 (x2) RJ (x2) RS1R 1&2 RS1R RS1R...
- Page 33 Back Roof Strcture Assembly Sastavni dio krovne strukture Assemblage De La Structure Arriere Du Toit Vissza Tetőszerkezet szerelvény Hintere Dachkonstruktion Montage Bakre takkonstruktion Estructura de montaje de techo trasera Assemblea Struttura posteriore del tetto Armação da Estrutura do Telhado Traseiro Monta˜...
- Page 34 RJ (x2) S1 (x2) RS1R RS1R RS1R 1&2 S1 (x2) S2 (x2) RS1R RS1R RS1R RS9R RS8R RS9R FCLR FCLR 1,3&4 RS1R RS1R FCRR...
- Page 35 S1 (x1) S2 (x2) RS1R RS1R RS8R RS1R RS9R RS9R RS8R RS1R 1,2&4 RS3R (x2) S1 (x4) RS3R RS3R RS3R RS3R 1&2...
- Page 36 S1 (x2) RS3R RS5R (x1) S1 (x8) RS5R RS8R RS5R RS8R RS5R 1&2 RS8R RS8R RS8R RS5R...
- Page 37 RS2LR (x1) S1 (x10) RS2RR (x1) RS2LR RS2LR RS2RR RS2RR RS2RR RS8R RS8R RS2RR RS3R RS9R RS2LR (x1) S1 (x10) RS2RR (x1) RS2RR RS2RR RS2LR RS2LR RS8R RS8R RS2LR RS9R RS2LR RS3R...
- Page 38 RS2LR (x1) S1 (x2) S7 (x2) RS2RR (x1) Do not fix this hole. RS2LR Ne réparez pas ce trou. RS2RR Befestigen Sie dieses Loch nicht. No arregle este agujero. Não conserte este buraco. RS5R Maak dit gat niet vast. Tuto díru neopravujte. Neopravujte túto dieru.
- Page 39 RS14R (x4) S7 (x8) RS14R RS14R RS3R RS5R RS14R RS14R RS14R RS3R RS14R RS3R...
- Page 40 Střešní panely Roof Panels Pannelli del tetto Strešné panely Planches de Toiture Panele dachowe Strešni Paneli Panouri de acoperiș Dachplatten Krovne ploče Покривни панели Paneles de techo Painéis do Telhado Tetőpanelek Çatı Panelleri Dakpanelen Takpaneler Potřebné součástí Parts needed Parti occorrenti Pièces nécessaires Potrebné...
- Page 41 Use Same color Plugs(BP). Utilisez les bouchons de même couleur (BP). Verwenden Sie die gleichen Farbstopfen (BP). Utilice tapones del mismo color (BP). Use os plugues da mesma cor (BP). Gebruik pluggen in dezelfde kleur (BP). Použijte zástrčky stejné barvy (BP). Použite zástrčky rovnakej farby (BP).
- Page 42 BP (x12) FPBR (x1) FPBR Start from front left side roof panel going back. Apply silicone into the holes before inserting the pins (Silicone not included). Commencez par le panneau de toit avant gauche en remontant. Appliquez de la silicone dans les trous avant d'insérer les broches (silikon nicht enthalten). Beginnen Sie mit der Dachverkleidung vorne links und gehen Sie zurück.
- Page 43 PPG (x6) PPG (x4) PIN (x6) PIN (x4) R2LR (x1) R1LR (x1) R1LR R2LR PPG (x11) PPG (x8) PPGL (x1) PIN (x11) PIN (x8) R2RR (x1) R1RR (x1) PINL (x1) PINL PPGL R1RR R2RR...
- Page 44 EC2 (x2) FP (x4) Apply silicone around the roof plugs.(Silicone not included). Appliquez du silicone autour des bouchons de toit. (Silicone non inclus). Tragen Sie Silikon um die Dachstopfen auf (Silikon nicht im Lieferumfang enthalten). Aplique silicona alrededor de los tapones del techo (silicona no incluida). Aplique silicone ao redor das tampas do telhado (Silicone não incluído).
- Page 45 Apply silicon on the perimeter of transparent sheet from inside.(Silicone not included). Appliquer du silicium sur le périmètre de transparent feuille de l'intérieur. (Silicone non inclus). Tragen Sie Silizium auf den transparenten Umfang auf Blatt von innen (Silikon nicht enthalten). Aplicar silicona en el perímetro de transparente.
- Page 46 Dveře Door Porta Porte Dvere Drzwi Uşa Die Tür Vrata Врата La puerta Vrata Kapı Porta Ajtó De deur Dörr Potřebné součástí Parts needed Parti occorrenti Potrebné časti Niezbędne elementy Pièces nécessaires Dele, ki jih boste potrebovali Benötigte Teile Elementele componente necesare Необходими...
- Page 47 SGC1 (x4) LH (x2) PW (x4) DLR (x1) 1&2 Left Door Porte gauche Linke Tür Puerta izquierda Porta esquerda Linker deur Levé dveře Ľavé dvere Leva vrata Lijeva vrata SGC1 Bal ajtó Vänster dörr Porta Sinistra Lewe drzwi Usa stanga Лява...
- Page 48 SGC1 (x4) R (x1) L (x1) PW (x4) SGC1 SGC1 2&3...
- Page 49 Assembly on Concrete Platform Montáž na betonové plošině Montaggio su piattaforma in calcestruzzo Assemblage sur plate-forme en béton Montáž na betónovú plošinu Montaż na betonowej platformie Montage auf Betonplattform Montaža na betonsko ploščad Adunarea pe platforma de beton Montaje en plataforma de hormigón Montaža na betonskoj platformi Монтаж...
- Page 50 Om ervoor te zorgen dat uw schuur bestand is tegen hoge winden, raden wij u aan deze vloeroptie te gebruiken. Een concrete pad of een groot formaat concrete patio stenen pleinen wordt aanbevolen voor geschikt woord basis. Zorg ervoor dat het is stevig en niveau en drainage zal toestaan weg van de site.
- Page 51 Pentru a vă asigura că vaporul dvs. rezistă unor vânturi puternice, am recomandat să folosiți această opțiune pentru podea. Un tampon de beton sau o pătrată de piatră din beton de dimensiuni mari este recomandată pentru o bază adecvată pentru podea. Asigurați-vă...
- Page 52 High wind area installation instructions Visoke instalacije za instalaciju vjetra Instructions pour une installation dans des zones de vent violent Magas szélterületi szerelési útmutató Starke Windbereiche Installationsanweisungen Installationsanvisningar för hög vindområde Instrucciones de instalación de la zona con fuertes vientos Istruzioni per l'installazione dell'area vento forte nstruções de Instalação para Áreas de Ventos Fortes Instrukcja instalacji w obszarze wysokiego wiatru...
- Page 53 To ensure that your shed will withstand high winds,you need to anchor on the concrete foundation.Align the shed, mark the concrete at the holes in the Foundation Profiles and drill concrete with suitable concrete bit to accept Dia 6mm wall plug. (Follow the assembly step in page 48-50).
- Page 54 Attach each Side Panel (SPR ),(SPRW ) on top to the Roof Structure (RS1R,RS3R). Using a dia. 3mm (1/8”) drill with a power drill, make two equal distance holes on the Side Panel through the Roof Structure. Drive a self tapping screw (S4) through the Side Panel to the Roof Structure.
- Page 55 SPRW RS1R RS3R RS1R RS3R...
- Page 56 Važne informacije o jamstvu Important Warranty Information Fontos jótállási információk Informations Importantes Concernant La Garantie Wichtige Informationen zur Gewährleistung Viktig garantiinformation Informazioni importanti sulla garanzia Información importante sobre la garantía Ważne informacje gwarancyjne ImportantesInformações de Garantia Informații importante privind garanția Belangrijke Informatie over de garantie Важна...
- Page 57 Szopa "DURAMAX" została przetestowana i przeszła duże obciążenia wiatrem w kontrolowanym środowisku laboratoryjnym, gdy zainstalowano ją zgodnie z wytycznymi dotyczącymi instalacji wiatrowej. Naturalne obszary o dużym natężeniu wiatru wytwarzają wiatr o nieprzewidywalnych prędkościach, które są bardzo trudne do uchwycenia dokładnie według lokalizacji.
- Page 58 DODATNI PROGRAMI RASPOLOŽIV ADDITIONAL ACCESSORIES AVAILABLE (nije uključeno) (Not included) TOVÁBBI MEGVÁSÁROLHATÓ TARTOZÉKOK ACCESSOIRES ADDITIONNELS DISPONIBLES (nem tartozék) (non inclus) YTTERLIGARE TILLGÄNGLIGA ACCESSOARERV WEITERES ZUBEHöR (Nicht enthalten) (ingår ej) ACCESORIOS ADICIONALES DISPONIBLES ACCESSORI SUPPLEMENTARI DISPONIBILI (no incluida) (non incluso) DOSTĘPNE DODATKOWE AKCESORIA ACESSóRIOS ADICIONAIS DISPONíVEIS (não incluído) (nie wliczone)
- Page 59 ANCHOR KIT (Soil) SIDRO KOMPLET (tla) RÖGZÍTŐ FELSZERELÉS (Talaj) KIT D'ANCRE (Sol) FÖRANKRINGS-KIT (Jord) ANKER-KIT (Boden) KIT DE ANCLAJE (Suelo) KIT DI ANCORAGGIO (Suolo) KIT DE APOIO (Solo) ZESTAW DO MOCOWANIA (Grunt) ANKER GEREEDSCHAP (bodem) SET DE ANCORARE (ÎN SOL) KOTEVNÍ...
- Page 60 ANCHOR KIT (Concrete) SIDRO KOMPLET (beton) KIT D'ANCRE (Béton) RÖGZÍTŐ FELSZERELÉS (Beton) Verankerungsset (Beton) FÖRANKRINGS-KIT (Betong) KIT DE ANCLAJE (hormigón) KIT DI ANCORAGGIO (cemento) KIT DE APOIO (Concreto) ZESTAW DO MOCOWANIA (Beton) ANKER GEREEDSCHAP ( Beton) SET DE ACORARE (Beton) KOTEVNÍ...
- Page 61 U.S. Polymers, Inc. 1057 S. Vail Ave Montebello, CA 90640, w w w . d u r a m a x b p . c o m United States of America SKU# 30425 17 RD-1.0 27-08-2020...
Need help?
Do you have a question about the DURAMAX 30425 and is the answer not in the manual?
Questions and answers