Table of Contents
Advertisement
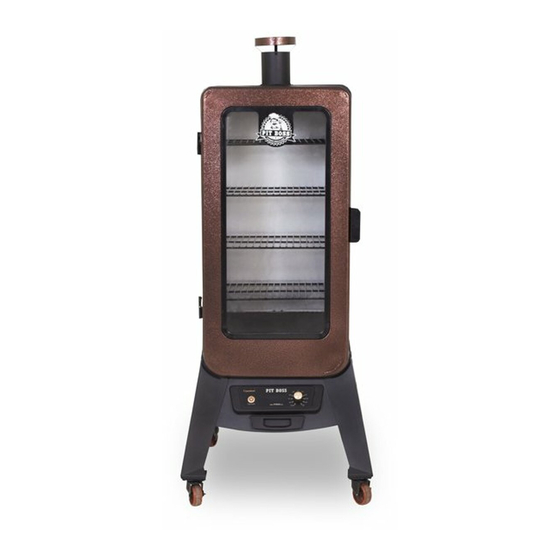
MODEL : PBV3PM1
PART : 77351
COPPERHEAD
WOOD PELLET VERTICAL
SMOKER (3-SERIES)
SAVE THESE INSTRUCTIONS! MANUAL MUST BE READ
BEFORE OPERATING!
ASSEMBLY AND OPERATION INSTRUCTIONS
WARNING: Please read the entire manual before installation and use of this electric, pellet fuel burning
appliance. Failure to follow these instructions could result in property damage, bodily injury or even death.
Contact local building or fire officials about restrictions and installation inspection requirements in your area.
Advertisement
Table of Contents

Related Manuals for Pit Boss COPPERHEAD 3 Series


Summary of Contents for Pit Boss COPPERHEAD 3 Series
- Page 1 MODEL : PBV3PM1 PART : 77351 COPPERHEAD WOOD PELLET VERTICAL SMOKER (3-SERIES) SAVE THESE INSTRUCTIONS! MANUAL MUST BE READ BEFORE OPERATING! ASSEMBLY AND OPERATION INSTRUCTIONS WARNING: Please read the entire manual before installation and use of this electric, pellet fuel burning appliance.
-
Page 2: Safety Information
SAFETY INFORMATION A MAJOR CAUSE OF FIRES ARE A RESULT OF POOR MAINTENANCE AND A FAILURE TO MAINTAIN REQUIRED CLEARANCES (AIR SPACES) TO COMBUSTIBLE MATERIALS. IT IS OF UTMOST IMPORTANCE THAT THIS PRODUCT BE INSTALLED ONLY IN ACCORDANCE WITH THESE INSTRUCTIONS. Please read and understand this entire manual before attempting to assemble, operate or install the product. - Page 3 ULC/ORD C272 and Canadian CSA C22.2 #3 "for electrical features of fuel burning equipment. " Pit Boss Grills pellet cooking appliances have been independently tested and listed by Intertek (an accredited testing laboratory) to ETL, UL, ULC and CSA standards.
- Page 4 COPYRIGHT NOTICE Copyright 2017. All right reserved. No part of this manual may be copied, transmitted, transcribed, stored in a retrieval system, in any form or by any means without expressed written permission of, Dansons Inc. 3411 North 5th Avenue, Suite 500, Phoenix, AZ, USA 85013 sales@pitboss-grills.com | service@pitboss-grills.com www.pitboss-grills.com Toll-Free: 1-877-303-3134, Fax: 1-877-303-3135...
-
Page 5: Table Of Contents
TABLE OF CONTENTS Safety Information ............3 Care & Maintenance ............18 Parts & Specs ..............7 Using Wood Pellet Fuel ...........19 Assembly Preparation ............8 Cooking Guidelines ............20 Assembly Instructions Tips & Techniques ............21 Mounting The Support Legs To Main Cabinet .......8 Troubleshooting ............. -
Page 6: Parts & Specs
PARTS & SPECS Part# Description Cooking Grids (x4) Cooking Grid Support Brackets (x10) Chimney Cap (x1) Chimney Stack (x1) Hopper Handle (x1) Lid Stopper (x1) Main Cabinet (x1) Cabinet Door Handle (x1) Cabinet Door Latch (x1) Power Cord Bracket (x1) Support Panel (x2) Support Bar (x1) Water Pan (x1) -
Page 7: Assembly Preparation
If any part is missing or damaged, do not attempt to assemble. Shipping damage is not covered under warranty. Contact your dealer or Pit Boss Customer Service for parts. IMPORTANT: To ease installation, using two people is helpful (but not necessary) when assembling this unit. -
Page 8: Mounting The Support Panels
3. MOUNTING THE SUPPORT PANELS Parts Required: Support Panel (#11) #10–24x½" Screw ( #D) Installation: • Install one support panel to the side of the unit between a front and back support leg. Secure using two screws on each side. Ensure the flat side of the support plate is facing outwards. -
Page 9: Mounting The Power Cord Bracket
7. MOUNTING THE POWER CORD BRACKET Parts Required: Power Cord Bracket (#10) #10–24x½" Screw ( #D) Installation: • Locate the two holes on the bottom of the (left side) support bracket. Mount the power cord bracket to the support bracket using two screws as shown in 7A. -
Page 10: Mounting The Back Handle
11. MOUNTING THE BACK HANDLE Parts Required: Hopper Handle (#5) ¼–20x⅝" Screw (#C) Installation: • Mount the hopper handle onto the back side of the hopper using four screws (#C) . Note correct position in illustration with handle on top. 12. -
Page 11: 15. Installing The Cooking Components
ON THE ROAD • Disconnect the igniter from the main wiring harness. Use the manual start-up procedure. A Pit Boss unit can operate using a 12 volt, 100 watt inverter plugged into your automobile outlet. To use the automatic igniter, it is... -
Page 12: Operating Instructions
With all outdoor appliances, outside weather conditions play a big part in the performance of your smoker and the cooking time needed to perfect your meals. The Pit Boss, because of its double wall construction, should be considered as a 3 season smoker, depending on where you live. -
Page 13: Smoker Temperature Ranges
SMOKER TEMPERATURE RANGES Temperature readouts on the control board may not exactly match the thermometer. All temperatures listed below are approximate and are affected by the following factors: outside ambient temperature, the amount and direction of wind, the quality of pellet fuel being used, the cabinet door being opened, and the quantity of food being cooked. •... -
Page 14: Understanding The Control Board
Includes one (1) meat probe. COOK “P” SET 200º 300º Compatible with Pit Boss branded meat probes only. Additional meat probe(s) sold separately. PROBE 1 175º 350º ACTUAL UNDERSTANDING THE PROBES PROBE 2 150º... -
Page 15: Hopper Priming Procedure
IMPORTANT: When placing the meat probe into your meat, ensure the meat probe and meat probe wires avoid direct contact with flame or excess heat. This can result in damage to your meat probe. Run the excess wire out the front main cabinet door, along the edge. -
Page 16: Manual Start-Up Procedure
4. Begin to preheat your smoker with the cabinet door closed. Turn the Temperature Control Dial to 177°C / 350°F, to allow the unit to preheat for approximately 15 to 20 minutes. 5. After preheating is complete, you are ready to enjoy your smoker at your desired temperature! IMPORTANT: When selecting a low or the SMOKE setting after preheating, the auger will continue to turn and feed pellets. -
Page 17: Care & Maintenance
CARE AND MAINTENANCE Any Pit Boss unit will give you many years of flavorful service with minimum cleaning. An important step is allowing the smoke cabinet and cooking grids to self-clean by running the smoker at a high temperature for 5 to 10 minutes after each use. Follow these cleaning and maintenance tips to service your smoker: 1. -
Page 18: Using Wood Pellet Fuel
Burn Pot After Each Smoke Session Scoop Out, Shop-Vac Excess Debris Cooking Grids After Each Smoke Session Burn Off Excess, Brass Wire Brush Water Pan After Each Smoke Session Scrub Pad & Soapy Water Grease Tray After Each Smoke Session Scrub Pad &... - Page 19 COOKING STYLE HOT SMOKING ROAST BAKING (Medium) GRILL (Medium/High) Temperature Range 93-135°C / 200-275°F 135-162°C / 275-325°F 162-190°C / 325-375°F 204-215°C / 400-420°F APPROXIMATE COOKING TIME BEEF Size Rare - 54°C / 130°F Medium - 60°C / 140°F Well Done - 65°C / 150°F Rib-eye Roast, 2.26 - 2.72 kg / 5 - 6 lbs.
-
Page 20: Tips & Techniques
TIPS & TECHNIQUES Follow these helpful tips and techniques, passed on from Pit Boss owners, our staff, and customers just like you, to become more familiar with your smoker: 1. FOOD SAFETY • Keep everything in the kitchen and cooking area clean. Use different platters and utensils for the cooked meat than the ones you used to prepare or transport the raw meat out to the smoker. -
Page 21: Troubleshooting
Boss smoker is operating poorly, or on a less frequent basis, the following troubleshooting tips may be helpful. For FAQ, please visit www.pitboss-grills.com and click SUPPORT. You may also contact your local Pit Boss authorized dealer or contact Customer Service for assistance. - Page 22 Access the electrical components on the base of the unit (see Electric Wire Diagram ) and "Er1" Error Code Temperature Probe Wire Not Making check for any damage to the Temperature Probe wires. Ensure Temperature Probe spade Connection connectors are firmly connected, and connected correctly, to the Control Board. "noP"...
-
Page 23: Electrical Wire Diagram
ELECTRICAL WIRE DIAGRAM The Control Board system is an intricate and valuable piece of technology. For protection from power surges and electrical shorts, consult the wire diagram below to ensure your power source is sufficient for the operation of the unit. PB –... -
Page 24: Replacement Parts
REPLACEMENT PARTS Part# Description Cooking Grids (x4) Cooking Grid Support Brackets (x10) Chimney Cap (x1) Chimney Stack (x1) Hopper Handle (x1) Lid Stopper (x1) Main Cabinet (x1) Cabinet Door Handle (x1) Cabinet Door Latch (x1) 10-A Power Cord Bracket (x1) 11-A Support Panel (x2) 12-A... -
Page 25: Hopper Replacement Parts
CONDITIONS All wood pellet smokers by Pit Boss, manufactured by Dansons Inc., carry a limited warranty from the date of sale by the original owner. The warranty coverage begins on the original date of purchase and proof of date of purchase, or copy of original bill of sale, is required to validate the warranty. -
Page 26: Exceptions
The serial and model number of your Pit Boss can be found on the back of the unit. Record numbers below as the label may become worn or illegible. -
Page 27: Accessories Sold Separately
ACCESSORIES SOLD SEPARATELY Available for purchase separately. Accessories not available and supplied by all authorized Pit Boss dealers. ITEM DESCRIPTION ITEM DESCRIPTION COVER Form-fitting, full length cover. Heavy-duty polyester with PVC backing for long-term GRILLING APRON use. Weatherproof. Includes draw-string lock for easy tightening. -
Page 28: Recipes
RECIPES CLASSIC BRISKET BEER CAN CHICKEN Makes 4 - 6 Servings Makes 2 - 6 Servings A whole beef brisket weighs 7.25-3.62 kg / 16-18 pounds and has three Ingredients: separate parts: the cap, the point, and the flat. Use the flat section, 1 whole Chicken as it is lean, compact, and creates nice slices when carved. - Page 29 BARBECUE RIBS CORNISH HENS WITH MANDARIN RICE Makes 4 - 6 Servings Makes 4 Servings Ingredients: Ingredients: 1.3-1.8 kg / 3-4 lbs Ribs 4 whole Cornish Game Hens Meaty pork spareribs / loin back ribs 750 ml/ 3 c. Mandarin Rice 45 ml / 3 tbsp 15 ml / 1 tbsp Olive Oil 5 ml / 1 tsp...
- Page 30 HALIBUT WITH CURRY BUTTER WHOLE SMOKED TURKEY Makes 4 Servings Feeds a small army - leftovers are great! Ingredients: Ingredients: 900g / 2 lbs Halibut Filets 1 whole Turkey (thawed) 9-11.3 kg / 20-25 lbs 125ml / ½ c. Curry Butter 60 ml /4 tbsp Seasoning Lime 5 ml / 1 tsp...
- Page 32 IMPORTANT DO NOT RETURN PRODUCT TO STORE Dansons Inc. stands behind our authorized dealers. Many dealers stock replacement parts and accessories. We strongly suggest that if you need to order parts, options, or require service that you first consult your local dealer. Many dealers do stock current accessories, fuel and service parts.
Need help?
Do you have a question about the COPPERHEAD 3 Series and is the answer not in the manual?
Questions and answers