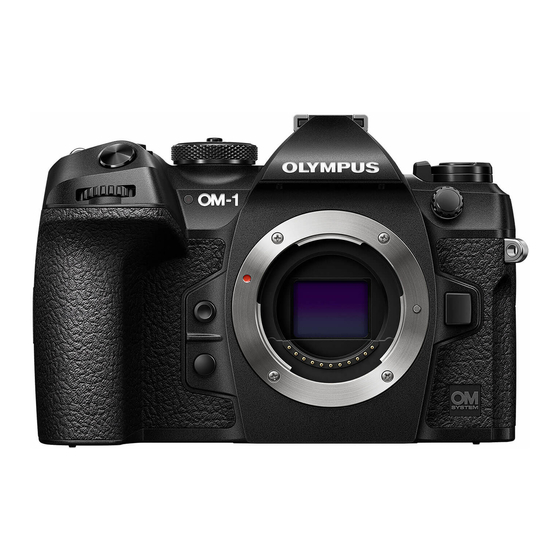
Do you have a question about the OM System OM-1 and is the answer not in the manual?
Questions and answers
Susan Kitchell
April 20, 2025
I want to see the first picture when taking the second one in multiple exposure. But when I set the overlay to ON, it only calls up Raw files in my memory card but does not allow me to see the first picture when I take the second How can I set the Multiple Exposure in my OM-1 to see the first picture while taking the second
1 comments:
Mr. Anderson
May 10, 2025
To view the first picture while taking the second using the Multiple Exposure feature on the Olympus OM System OM-1:
1. Set [Multiple Exposure] to [On] in the menu. 2. Set [Overlay] to [On] (this enables using an existing RAW image as an overlay). 3. Press the MENU button to exit the settings and return to the shooting screen. A "X" icon will appear. 4. Take the first picture. It will be shown superimposed in the viewfinder or screen as you compose the second shot. 5. Take the second picture. The "X" icon turns green while composing. 6. A multiple exposure image is created after the second shot.
You can press the D button to retake the first shot if needed.
This answer is automatically generated
Mary
May 30, 2025
AS far as i can tell my OM-1 is set to take RAW only, which is fine until I use focus stacking.
How can i stop OM-1 taking jpegs in addition to RAW when using focus stacking. For each focus stack i expect the one final jpeg, but number of shots is doubled (because it records not just RAW but duplicate jpegs)
Page 1
Table of Contents Preparation DIGITAL CAMERA Shooting Using the Menus Shooting Settings Instruction Manual Playback Customizing the Camera Setting Up the Camera Connecting the Camera to External Devices Cautions Information SAFETY PRECAUTIONS Model No. : IM027 Thank you for purchasing our digital camera. Before you start to use your new camera, please read these instructions carefully to enjoy optimum performance and a longer service life.
Before You Begin Read and Follow Safety Precautions To prevent incorrect operation resulting in fire or other damage to property or harm to yourself or to others, read “11. SAFETY PRECAUTIONS” (P. 332) in its entirety before using the camera. While using the camera, consult this manual to ensure safe and correct operation.
Product Manuals Instruction Manual (this pdf) A how-to guide to the camera and its features. The Instruction Manual can be downloaded from our website or directly using the “OM Image Share” smartphone app.
About This Manual How to find what you want to know You can use the following methods to find what you want to know in this manual. Search method Where to look Search based on what you want to do Table of Contents P.
Page 5
Symbols in this manual The following symbols are used throughout this manual. Symbols designating the buttons (respectively the up, down, left, FGHI and right arrow buttons) to press on the arrow pad. Represents operation of the front dial. Represents operation of the rear dial. Represents placing a finger lightly on the multi selector and pivoting it in the desired direction.
Table of Contents Initial setup .........31 Before You Begin What to Do If You Can’t Read the Display ........33 Product Manuals 2. Shooting About This Manual Information displays while How to find what you want to shooting ........34 know ..........4 Switching between displays ..37 How to read this manual....4 Switching the information...
Page 7
Recording movies in photo Changing the settings of Starry shooting modes ......61 Sky AF (Starry Sky AF Setting) ..85 Touch Controls (Silent Controls) ...62 Functions for customizing AF operation to fit the subject ..86 3. Using the Menus C-AF Center Target Priority (KC-AF Center Priority) .....86 What you can do with menus ..63 C-AF Tracking Sensitivity...
Page 8
Other functions that are useful EV Steps for ISO Sensitivity when focusing ......102 Control (ISO Step) ...... 114 Manual Focus Assist Setting the range of ISO (MF Assist) .........102 sensitivity values selected in [Auto] mode Focus Peaking Options (KISO-A Upper/Default / (Peaking Settings) ......103 bISO-A Upper/Default)...
Page 9
Configuring the sequential Choosing which options are shooting functions displayed when selecting a (Sequential Shooting Settings) ...128 picture mode (KPicture Mode Settings) ..149 Configuring the self-timer functions (Self-timer Settings) ..130 Adjusting color (WB (white balance)) ....150 Shooting without the vibration caused by shutter button Locking the white balance in operations...
Page 10
Configuring BULB/TIME/COMP Viewing photographs and Settings movies ........188 (BULB/TIME/COMP Settings) ..173 Viewing photographs ....188 Recording a series of shots with Watching movies ......189 varied exposure (AE BKT) ..174 Finding Pictures Quickly Recording pictures with varied (Index and Calendar Playback) ..189 white balance (WB BKT) ....175 Zooming In (Playback Zoom) ..190 Recording pictures with varied...
Page 11
Combining Pictures Power Zoom Lenses (Image Overlay) ......203 (Electronic Zoom Settings) ..222 Locking the v Button (vLock) ..223 Trimming movies (Movie Trimming) ......204 Choosing What Happens When Creating Movie Stills the Shutter Button Is Pressed (In-Movie Image Capture) ..204 During Live View Zoom (LV Close Up Mode) ....223 Changing the role of the R (H) button during playback...
Page 12
Viewfinder Framing Grid Options Disabling Touch Controls (VKGrid Settings) ....235 (Touchscreen Settings) ....249 Choosing the Settings Available Monitor Brightness and Hue via Multi-Fn (Monitor Adjust) ......249 (Multi Function Settings) .....236 Viewfinder Brightness and Hue Histogram Exposure Warning (EVF Adjust) .......250 (Histogram Settings) ....236 Configuring the eye sensor (Eye Sensor Settings) ....250...
Page 13
Viewing Certificates Uploading Pictures as They Are (Certification) ......258 Taken ..........276 Ending the Connection ....278 8. Connecting the Camera Using the Remote Control ..279 to External Devices Names of parts ......279 Precautions for Using Wi-Fi Connection .........279 ® and Bluetooth ......259 Shooting from the remote Disabling the camera’s wireless...
Page 14
Using the charger (BCX-1) ..294 HLD-10 Power Battery Holder ..295 Notes on using this product ..296 Designated External Flash Units ...........297 Wireless remote control flash photography .......298 Other external flash units ...300 Principal Accessories ....301 System chart ......302 Cleaning and storing the camera ........304 Cleaning the camera ....304 Storage ........304...
Preparation Unpacking the box contents At purchase, the package contains the camera and the following accessories. If anything is missing or damaged, contact the dealer from whom you purchased the camera. Camera Body cap * EP-18 eyecup * Hot shoe cover * Strap CB-USB13 USB cable BLX-1 rechargeable...
Attaching the Strap Before attaching the strap, remove the end from the keeper loop and loosen the strap as shown. Keeper loop Pass the end of the strap through the strap eyelet and back through the keeper loop. Pass the end of the strap through the buckle and tighten as shown. •...
Attaching Cable Protectors Attach the supplied cable protectors when connecting the supplied USB and HDMI cables. This prevents accidental disconnection and damage to the connectors. Mount the cable protector on the camera. Tighten the screw. Clip the cable clip to the cable and attach the clip to the strap. •...
Inserting and removing the battery Inserting the battery Confirm that the ON/OFF lever is in the OFF position. Open the battery compartment cover. Battery compartment cover Battery compartment lock Loading the battery. Direction indicating mark # Use only BLX-1 batteries (P.
Close the battery compartment cover. # Be sure the battery compartment cover is closed before using the camera. %It is recommended to set aside a backup battery for prolonged shooting in case the battery in use drains. %Also read “Battery and charger” (P. 290). Removing the battery Turn off the camera before opening or closing the battery compartment cover.
Charging the Battery using the supplied USB-AC adapter # The battery will not be fully charged at the time of purchase. Charge the battery before use. Check that the battery is in the camera, and connect the USB cable and USB-AC adapter.
Charging the Battery using a USB Device The battery inserted in the camera will charge when the camera is connected via a USB cable to a USB PD-compliant USB device. Charging via USB Confirm that the ON/OFF lever is in the OFF position.
Inserting and removing the card Inserting the card In this manual, all storage devices are referred to as “cards.” The camera uses third-party SD, SDHC, or SDXC memory cards conforming to the SD (Secure Digital) standard. Cards must be formatted with this camera before first use or after being used with other cameras or computers.
Removing the card Press the card in to eject it. Pull out the card. # Never remove batteries or memory cards while the memory card access indicator (P. 34) is displayed. Using Two Memory Cards When two memory cards are inserted, you can choose how each card is used according to your goals.
Attaching and removing lenses Attaching a lens to the camera • See page 291 for information on compatible lenses. Confirm that the ON/OFF lever is in the OFF position. Rear cap Remove the rear cap of the lens and the body cap of the camera. Align the lens attachment mark (red) on the camera with the alignment mark (red) on the lens, then insert the lens into the...
Removing Lenses Confirm that the ON/OFF lever is in the OFF position. Hold the lens release button and rotate the lens as Lens release button shown. 28 EN...
Using the monitor Rotate the monitor for ease of viewing. The angle of the monitor can be adjusted according to conditions at the time of shooting. Up to 90° Up to 180° Up to 270° • Gently rotate the monitor within its range of motion. Attempting to rotate the monitor beyond the limits shown below could damage the connectors.
Turning the camera on Set the ON/OFF lever to the ON position. • When the camera is turned on, the monitor will turn on and display the super control panel (P. 69). The viewfinder turns on when you put your eye to the viewfinder. When the viewfinder is lit up, the monitor turns off.
Initial setup After turning the camera on for the first time, perform the initial setup by choosing a language and setting the camera clock. # The file name is also included with the date and time information. Be sure to set the correct date and time before using the camera.
Page 32
Set the date, time, and date format. • Use the HI buttons to highlight items. • Use the FG buttons to change the highlighted item. Time – – – – . – – . – – – – : – – : – – Y/M/D •...
What to Do If You Can’t Read the Display If you see unfamiliar characters or words in other languages, you may not have selected the language you intended. Follow the steps below to choose another language. Press the MENU button to view the การตั...
Shooting Information displays while shooting %For information on the super control panel, which appears on the monitor by default, see P. 71. Monitor display during still photography 5678 USB USB [ 99 ] [ 99 ] PC PC FOCUSBKT FOCUSBKT AF Limit AF Limit s<...
Page 35
1 Battery level ........P. 30 F Exposure compensation ....P. 106 G AE BKT .........P. 174 2 USB PD ........P. 287 3 Card write indicator ....P. 21, 25 H Focus Indicator ......P. 102 4 Maximum number of continuous shots I Preview .........P. 224 ............P.
Page 36
+ Audio recording level ......P. 62 - Headphone volume ......P. 62 _ Electronic Zoom ......P. 62 . Time code ........P. 181 *1 Displayed when the camera is connected to OM Capture in [0RAW/Control] mode and the computer is the sole save location of images (P. 284). 36 EN...
Switching between displays The camera uses an eye sensor to automatically switch between the viewfinder and monitor displays. The viewfinder and monitor display (super control panel/live view) also show information on camera settings. Options are available for controlling display switching and choosing the information shown. The camera monitor displays the super control panel (P.
Switching the information display P A S M B You can switch the information displayed in the monitor during shooting using the INFO button. INFO button 1023 1023 60p L - 8 L - 8 [1:02:03] [1:02:03] 100 % 100 % S - AF S - AF INFO...
Shooting still pictures P A S M B Use the mode dial to select the shooting mode, and then shoot Mode icon the image. Indicator Types of shooting modes For how to use the various shooting modes, see the following. Program AE (P.
Page 40
Adjust the focus. • Lightly press the shutter button down to the first position (press the shutter button halfway). The AF confirmation mark (() will be displayed, and a green frame (AF target) will be displayed in the focus location. %You can also focus by pressing the AF-ON button.
Shooting with touch screen operations P A S M B You can tap the subject to focus and take a 1023 1023 [ 1 : 02 : 03 ] [ 1 : 02 : 03 ] 60p L - 8 L - 8 photograph.
Photo Review (Image Review) P A S M B Pictures are displayed immediately after shooting. This gives you a chance to quickly review the shot. You can choose how long pictures are displayed or disable photo review altogether. To end photo review and resume shooting at any time, press the shutter button halfway.
Taking Pictures Using the Shooting Modes Letting the camera choose aperture and shutter speed (P: Program AE) A S M B The camera chooses the optimal aperture and shutter speed according to subject brightness. Rotate the mode dial to P. 60p L - 8 L - 8 1023 1023...
Page 44
Subject Too Dark or Too Bright If the camera is unable to achieve optimal exposure, the shutter-speed and aperture displays will flash as shown. Display Problem/solution Large aperture (low f/-number)/ slow shutter speed The subject is too dark. • Use a flash. 60"...
Choosing aperture (A: Aperture-Priority AE) S M B In this mode, you choose the aperture (f/-number) and the camera automatically sets the shutter speed for optimal exposure according to subject brightness. Lower aperture values (larger apertures) reduce the depth of the area that appears to be in focus (depth of field), blurring the background.
Page 46
Subject Too Dark or Too Bright If the camera is unable to achieve optimal exposure, the shutter-speed display will flash as shown. Display Problem/solution Slow shutter speed Underexposure. 60" 60" F5.6 F5.6 • Choose a lower aperture value. Overexposure. • Choose a higher aperture value. •...
Choosing shutter speed (S: Shutter-Priority AE) In this mode, you choose the shutter speed and the camera automatically sets aperture for optimal exposure according to subject brightness. Faster shutter speeds appear to “freeze” fast-moving subjects. Slower shutter speeds add blur to moving objects, lending them a sense of motion for a dynamic effect.
Page 48
Subject Too Dark or Too Bright If the camera is unable to achieve optimal exposure, the aperture display will flash as shown. Display Problem/solution Low aperture value Underexposure. 2000 2000 F2.8 F2.8 • Choose a slower shutter speed. Overexposure. • Choose a faster shutter speed. Shutter speeds as fast as High aperture value 1/32000 s are available in silent mode.
Choosing aperture and shutter speed (M: Manual Exposure) P A S In this mode, you choose the aperture and shutter speed. You can adjust settings according to your goals, for example by combining fast shutter speeds with small apertures (high f/-numbers) for increased depth of field. Rotate the mode dial to M.
Page 50
Subject Too Dark or Too Bright If the camera is unable to achieve optimal exposure with [Auto] selected for [K ISO], the ISO sensitivity display will flash as shown. Display Problem/solution Overexposure. • Choose a higher aperture value or faster shutter speed. Auto Auto Underexposure.
Long Exposures : Bulb/Time) P A S M Select this mode to leave the shutter open for a long exposure. You can preview the photo in live view and end the exposure when the desired results have been achieved. Use when long exposures are required, for example when photographing night scenes or fireworks.
Page 52
Press the MENU button. Live Bulb • You will be prompted to choose the interval at which the preview is updated. Display Counts of each ISO sensitivity L80~ 400~ 800~ 1600~ times MENU Highlight an interval using FG. Press the Q button to select the highlighted option. •...
Page 53
%Display brightness can be adjusted during bulb/time photography. g “Configuring BULB/TIME/COMP Settings (BULB/TIME/COMP Settings)” (P. 173) %In mode (bulb), you can adjust focus manually while the exposure is in progress. This allows you to defocus during the exposure or focus at the end of the exposure. g “Configuring BULB/TIME/COMP Settings (BULB/TIME/COMP Settings)”...
Lighten Blending : Live Composite Photography) P A S M Leave the shutter open for a long exposure. You can view the light trails left by fireworks or stars and photograph them without changing the exposure of the background. The camera combines multiple shots and records them as a single photograph.
Page 55
1023 1023 [ 1 : 02 : 03 ] [ 1 : 02 : 03 ] 60p L - 8 L - 8 100 % 100 % Press the shutter button all the way down to ready S - AF S - AF the camera.
Saving Custom Settings to the Mode Dial (C1/C2/C3/C4 Custom Modes) Frequently-used settings and shooting modes can be saved as custom modes and recalled as needed simply by rotating the mode dial. Saved settings can also be recalled from the menus. •...
Highlight [Set] using the FG buttons and press Set current shooting the Q button. mode and settings. • Any existing settings will be overwritten. • To restore default settings for the selected custom mode, highlight [Reset] and press the Q button. Reset MENU Press the MENU button to exit the menus.
Page 58
Recalling Saved Settings In modes other than n, you can recall the settings stored in custom modes [C1] through [C4]. Press the MENU button to display the menus. Highlight the _ tab using the front dial. Basic Settings/Image Quality Custom Mode KK Detailed Settings Image Aspect...
Recording Movies # When recording movies, use an SD card that supports an SD speed class of 10 or higher. # A UHS-II or UHS-I card with a UHS speed class of 3 or better is required when: a movie resolution of [4K] or [C4K] is selected in the [nK] menu or a Motion Compensation of [A-I] (All-Intra) is selected in the [nK] menu Recording movies in movie mode (n) P A S M B...
Page 60
Choosing an Exposure Mode (n Mode (Movie Exposure Modes)) P A S M B You can create movies that take advantage of the effects available in P, A, S, and M modes. Press the MENU button to display the menus. Highlight the n tab using the front dial.
Recording movies in photo shooting modes Movies can be recorded in program AE mode even when the mode dial is not in the n position. # [RREC] must be assigned to a button using [KButton Function] (P. 208). # The AF target takes on the shape selected for movie mode (P. 59). Rotate the mode dial to n (movie mode) and choose target shape in the AF target selection display (P.
Touch Controls (Silent Controls) P A S M B You can prevent the camera from recording operating [1:02:03] [1:02:03] 60p L - 8 L - 8 REC 00:12 00:12 TC00:00:01 TC00:00:01 DF DF C - AF C - AF sounds that occur due to camera operations while shooting.
Using the Menus What you can do with menus In addition to shooting and playback options, the menus contain options that let you customize the operation and display of the camera, and set up the camera. There are several tabs which represent function categories, and related functions are contained in each page.
Page 64
Use HI or the rear dial to select Computational Modes the desired page. High Res Shot Live ND Shooting • [AE BKT] is on the 3rd page: [3. Focus Stacking Bracketing]. Operate the HI Multiple Exposure buttons or the rear dial until the [3. Bracketing] page is highlighted.
Page 65
Displaying the description of a menu item When you press the INFO button while Computational Modes a menu item is selected, the description High Res Shot High Res Shot of the menu is displayed. Takes and combines multiple Live ND Shooting pictures to create a super high Focus Stacking resolution image.
Shooting Settings How to change the shooting settings (Direct buttons/ Super Control Panel) The camera offers many photography-related functions. Depending on how often you use them, you can access settings via buttons or icons in the display. Direct Buttons Frequently-used photographic functions are assigned to buttons. These are referred to as “direct buttons”.
Page 67
Direct buttons during photo shooting Direct button Assigned function 1 Y button One-touch white balance P. 152 2 Z button Preview P. 224 Display (monitor/viewfinder) selection 3 u (LV) button P. 37 4 AEL button P. 109 P. 83, 5 AF-ON button AF-ON 6 ISO button...
Page 68
For information on how each direct button function works, see the explanation page of each function. This section explains how to operate when a selection menu is displayed, using [AF Mode] as an example. Press the button of the function you want to use. C Hi C Sh C Hi C Sh •...
The Super Control Panel/LV Super Control Panel The super control panel/LV super control panel lists shooting settings and their current values. Use the super control panel when framing shots in the viewfinder, the LV super control panel when framing shots in the monitor (“live view”). •...
Page 70
Highlight an item using FGHI. Face & Eye Detection • The selected setting will be highlighted. Auto ± • You can also highlight items by tapping them in the Small WB Auto display. S-AF ± 4 : 3 S-IS Auto 60p L - 8 1023 1:02:03...
Page 71
Settings Available in the Super Control/LV Super Control Panel Photo shooting mode LV super control panel Super control panel Natural Natural Auto Auto ± ± Small Small 5400K 5400K S-AF S-AF ± ± 4 : 3 S-IS Auto 4 : 3 S-IS Auto 60p L - 8 60p L - 8...
Basic functions for focusing (KAF Mode / nAF Mode) Choosing a focus mode P A S M B You can select a focusing method (focus mode). AF m button n HIj Button Q n KAF Mode / nAF Mode Super Control Panel MENU n AF n1.
Page 73
Press the shutter button halfway or press the AF-ON button to focus; the camera then tracks and maintains focus on the current subject while the button is held in position. In movie recording mode, the camera keeps continues AF tracking even if you release the button before you start recording.
Page 74
# Manual focus is selected when a Four Thirds lens is attached. # Starry sky AF is available with Micro Four Thirds lenses made by OM Digital Solutions or OLYMPUS. It cannot, however, be used with lenses with a maximum aperture over f/5.6. For more information, visit our website.
Page 75
Setting a focus position for Preb Select [Preb] with the AFm button, and press INFO button. Press the shutter button halfway to focus. • Focus can be adjusted by rotating the focus ring. Press the Q button. %The distance for the preset focus point can be set with [Preset MF distance] (P. 104). %The camera also focuses at the preset distance: - when turned on and - when you exit the menus to the shooting display.
Choosing a Focus Target (AF Target Point) P A S M B The frame showing the location of the focus point is referred to as the “AF target”. You can position the target over your subject. At default settings, the multi selector is used to position the AF target.
Choosing an AF Target Mode (AF Target Mode) S (kept pressed) and k Button Q n AF Target Mode Super Control Panel Keep the multi selector pressed while rotating the front or rear dial. Multi selector • The camera cycles through AF target modes as shown. All All Small Small...
Page 78
y Small Small Small Select a small-sized group of targets. The camera chooses the target used for focus from within the selected group. z Cross Cross Cross Select a group of targets arranged in a cross. The camera chooses the target used for focus from within the selected group.
Setting the options for AF target modes (KAF Target Mode Settings) P A S M B Specify which options are displayed when setting the KAF Target Mode. MENU n AF n5. AF Target Settings & Operations n KAF Target Menu Mode Settings AF Target Mode Settings Select the AF target modes that you want to have...
Zoom frame AF/Zoom AF (Super Spot AF) P A S M B You can zoom in on the display during shooting. For greater precision during focusing, zoom in on the focus area. At higher zoom ratios, you can focus on areas smaller than the standard focus target.
Page 81
Press the button to which [a] is assigned once 100 % 100 % more. • The camera will zoom the selected area in to fill the display. • Use the front or rear dial to zoom in or out. • Use the multi selector to scroll the display. •...
Functions for configuring how to focus Combined Auto and Manual Focus (K AF+MF) P A S M B After focusing using autofocus, you can adjust focus manually by keeping the shutter button pressed halfway and rotating the focus ring. Switch from auto to manual focus at will or fine-tune focus manually after focusing with autofocus.
Configuring the AF operation when the shutter button is pressed (KAF by half-pressing a) P A S M B You can choose whether the camera focuses when the shutter button is pressed halfway. MENU n AF n1. AF n KAF by half-pressing a Menu Set the AF operation for when the AF mode is [S-AF].
Using Autofocus in Manual Focus Mode (e in MF mode) P A S M B You can configure the camera so that it focuses with autofocus when you press the AF-ON button, even if the AF mode is [MF] or [Preb]. MENU n AF n1.
Changing the settings of Starry Sky AF (Starry Sky AF Setting) P A S M B You can configure the operation of the Starry Sky AF function. MENU n AF n1. AF n Starry Sky AF Setting Menu [Accuracy]: Prioritize focus accuracy over speed. Use a tripod. AF Priority [Speed]: Prioritize focus speed over accuracy.
Functions for customizing AF operation to fit the subject C-AF Center Target Priority (KC-AF Center Priority) P A S M B When focusing using group-target AF in [C-AF] and [C-AFb] modes, the camera always assigns priority to the center target in the selected group for a repeated series of focus operations.
(KC-AF Sensitivity / nC-AF Sensitivity) C-AF Tracking Sensitivity P A S M B Choose how rapidly the camera responds to changes in the distance to the subject while focusing with [C-AF], [C-AFb], [C-AF+TR] or [C-AF+TRb] selected for [KAF Mode], or with [C-AF] or [C-AF+TR] selected for [nAF Mode]. This can help autofocus track a quickly-moving subject or prevent the camera refocusing when an object passes between the subject and the camera.
Face priority AF/Eye priority AF (Face & Eye Detection) The camera automatically detects and focuses on the faces or eyes of portrait subjects. Q n Face & Eye Detection Super Control Panel MENU n AF n2. AF n Face & Eye Detection Menu Face Detection On The camera detects and focuses on faces.
Page 89
Press the shutter button the rest of the way down to shoot. • When set to [p] (Digital ESP metering) (P. 109), metering is performed with priority given to faces. # You may be unable to use [Face & Eye Detection] depending on the setting of [Subject Detection] (P.
Tracking Focus on Selected Subjects (Subject Detection) P A S M B The camera can detect subjects of specific types when focusing. You may find it hard to focus on the driver or cockpit of a fast-moving subject such as a race car or airplane. This feature detects and focuses on specific elements of such subjects.
Taking Pictures Using [Subject Detection] Select the [KAF Mode] or the [nAF Mode]. • For photo shooting, select a setting other than [FAF] or [FAFb]. • For movie recording, select [C-AF+TR]. 1023 1023 60p L - 8 L - 8 [ 1 : 02 : 03 ] [ 1 : 02 : 03 ] 100 %...
Functions for changing camera operation regarding focus Lens Focus Range (KAF Limiter) P A S M B Choose the range in which the camera will focus using autofocus. This is effective in situations in which an obstacle presents itself between the subject and the camera during the focus operation, causing drastic changes in focus.
Page 93
Configuring [AF Limiter] Configure options. AF Limiter AF Limiter • Select an option using FG and press the Q button to Distance for On1 5.0~999.9m display the setting menu. Distance for On2 10.0~999.9m • Press the Q button again to return to the KAF Limiter Distance for On3 50.0~999.9m Release Priority...
C-AF Lens Scanning (KAF Scanner) P A S M B Choose whether the camera performs a focus scan. If the camera is unable to focus, it will scan for the focus position by cycling the lens from the minimum focus distance to infinity.
(KAF Focus Adjustment) Fine-Tuning Autofocus P A S M B Fine-tune phase-detection autofocus. Focus can be fine-tuned by up to ±20 steps. MENU n AF n3. AF n KAF Focus Adjustment Menu # Normally there is no need to fine-tune autofocus using this item. Fine-tuning focus may prevent the camera focusing normally.
AF Illuminator Autofocus Assist (AF Illuminator) P A S M B The AF illuminator lights to assist the focus operation when lighting is poor. MENU n AF n2. AF n AF Illuminator Menu The illuminator lights during autofocus if the subject is poorly lit. The illuminator does not light even if the subject is poorly lit.
Functions for setting the focusing position Matching AF Target Selection to Camera Orientation (KOrientation Linked N) P A S M B The camera can be configured to change the AF target position and AF target mode automatically when it detects that it has been rotated between landscape (wide) or portrait (tall) orientations.
Choosing the AF Home Position (KN Set Home) P A S M B Choose the home position for the [NHome] feature. The [NHome] feature lets you recall a previously-saved “home position” for AF target at the touch of a button. This item is used to choose the home position.
AF Target Selection (NSelect Screen Settings) P A S M B Choose the roles played by the front and rear dials or arrow pad during AF target selection. The controls used can be selected according to how the camera is used or personal taste.
Enabling AF Target Selection Wrap (N Loop Settings) P A S M B You can choose whether AF target selection “wraps around” the edges of the display. You can also choose whether you have the option of selecting oAll (all targets) before AF target selection “wraps around”...
Touch AF Target Selection for Viewfinder Photography (AF Targeting Pad) P A S M B Use touch controls in the monitor to select the AF target during viewfinder photography. Glide a finger over the monitor to position the focus target while viewing your subject in the viewfinder.
Other functions that are useful when focusing Manual Focus Assist (MF Assist) P A S M B This is a focus assist function for MF. When the focus ring is rotated, the edge of the subject is enhanced or a portion of the screen display is magnified. When you stop operating the focus ring, the screen returns to the original display.
Focus Peaking Options (Peaking Settings) P A S M B Highlight objects using color outlines. This makes objects that are in focus easier to see during manual focus and the like. A button to which [Peaking] has been assigned n INFO button Button MENU n AF n6.
Choosing a Focus Distance for Preset MF (Preset MF distance) P A S M B Set the focusing position for Preset MF. Specify the number and unit (m or ft). MENU n AF n6. MF n Preset MF distance Menu # If the lens is equipped with a focus limiter, disable it before proceeding.
Resetting the Lens Position at Shutdown (Reset Lens) P A S M B You have the option of not restoring the lens to the reset focus position when the camera is turned off. This lets you turn the camera off without changing the focus position.
Metering and Exposure Controlling exposure (Exposure Compensation) P A S M The exposure selected automatically by the camera can be altered to suit your artistic intent. Choose positive values to make pictures brighter, negative values to make them darker. F (Exposure compensation) button n HIkj Button* Q n Exposure Comp.
Adjusting Exposure Compensation Modes P, A, and S In movie mode, exposure compensation can be adjusted when [P], [A], or [S] is selected for [nMode] (movie exposure mode) (P. 60). Rotate the front dial to adjust exposure compensation. • You can also choose a value by pressing the F button and using HI. Take pictures.
Reducing Flicker Under LED Lighting (KFlicker Scan / nFlicker Scan) Banding may occur in photographs taken under LED lighting. Use [KFlicker Scan] / [nFlicker Scan] to optimize shutter speed while viewing banding in the display. # K : This item can be used in S, M, and silent mode and with Pro Capture shooting. n : This item can be used when [nMode] (movie exposure mode) is [S] or [M].
Choosing how the camera measures brightness (Metering) P A S M B You can choose how the camera meters subject brightness. AF m button n FGk Button Q n Metering Super Control Panel MENU n _ n5. Metering n Metering Menu Suited to most scenes, including back-lit subjects.
(Metering during B) AE Lock Exposure Metering P A S M B Choose the metering method used to meter exposure when exposure is locked using the AEL button. MENU n _ n5. Metering n Metering during B Menu • For more information on AE lock, see P. 109. Exposure is metered using the method selected for Auto [Metering] (P.
Locking exposure when the shutter button is pressed halfway (AEL by half-pressing a) P A S M B Configure the camera so that it locks exposure when the shutter button is pressed halfway. MENU n _ n5. Metering n AEL by half-pressing a Menu Exposure is not locked when the shutter button is pressed halfway.
Setting metering options for sequential shooting (Metering during j) P A S M MENU n _ n5. Metering n Metering during j Menu The camera meters exposure when capturing the first frame and exposure is locked during sequential shooting. The camera meters brightness and determines exposure for each frame.
Changing ISO sensitivity (ISO) P A S M B Select a value according to subject brightness. Higher values let you photograph darker scenes but also increase image “noise” (mottling). Select [Auto] to let the camera adjust sensitivity according to lighting conditions. ISO button n HIj Button Q n ISO...
# The following restrictions apply when [M] is selected for [n Mode] (movie exposure mode) depending on the picture mode: • [a2 OM-Log400] / [a3 HLG]: - If the frame rate selected for [nK] is 23.98p, 24.00p, 25.00p, or 29.97p, [Auto] is restricted to sensitivities of ISO 400–6400.
Setting the shutter speed at which the camera automatically raises ISO sensitivity (KISO-A Lowest S/S) S M B Choose the shutter speed at which the camera starts raising the ISO sensitivity when [Auto] is selected for [KISO]. MENU n _ n3. ISO/Noise Reduction n KISO-A Lowest S/S Menu Auto The camera sets it automatically.
High ISO Noise Reduction Options (KNoise Filter / nNoise Filter) P A S M B Reduce image artifacts (“noise”) in footage filmed at high ISO sensitivities. This can help reduce “graininess” in footage filmed under low light. You can choose the amount of noise reduction performed.
Long Exposure Noise Reduction Options (Noise Reduction) P A S M B Choose whether to process photos taken at slow shutter speeds to reduce image artifacts (“noise”). At slow shutter speeds, noise is caused by the heat generated from the camera itself. After each photo is taken, the camera captures a second image for noise reduction, causing a delay equal to the selected shutter speed before the next photo can be taken.
Flash photography Using a flash (Flash photography) When using a flash unit designed for use with the camera, you can choose from various shooting modes to meet your needs. Flash units designed for use with the camera Choose a flash unit to suit your needs, taking into consideration such factors as the output required and whether the unit supports macro photography.
Page 119
Attaching Compatible Flash Units The methods used to attach and operate external flash units vary with the unit. See the documentation provided with the unit for details. The instructions here apply to the FL-LM3. # Confirm that both the camera and flash unit are off. Attaching or removing a flash unit while either the camera or flash unit is on could damage the equipment.
Removing Flash Units Keeping the UNLOCK button pressed, slide the flash unit from the hot shoe. UNLOCK button Choosing a Flash Mode (Flash Mode) jY # button n FGk Button Q n Flash Mode Super Control Panel Flash Modes Flash modes that are displayed vary depending on the configuration of [Flash Mode Settings] (P.
Page 121
Flash Mode and Shutter Speed The range of shutter speeds available varies with the flash mode. The range of available speeds can be further restricted using the options in the menu. g [# X-Sync.] ( ), [# Slow Limit] ( P.
• The flash sync speed for silent modes (P. 132), High Res Shot (P. 156), and focus bracketing (P. 178) is 1/100 s. Setting [K ISO] to a value over ISO 16000 when using an option that requires the electronic shutter (for example, silent mode or focus bracketing) sets the flash sync speed to 1/50 s.
Wireless Remote Flash Control (# RC Mode) P A S M B Adjust settings for wireless remote flash control. Remote control is available with optional flash units that support wireless remote control (“wireless RC flash”). For information on using wireless remote flash control, see P. 298. MENU n _ n6.
Setting the exposure balance for TTL metering (Balanced Flash Metering) P A S M B Set the exposure balance to be used when using an external flash in TTL metering mode. MENU n _ n6. Flash n Balanced Flash Metering Menu Gives priority to the subject during metering.
Sequential Shooting/Self-Timer Performing the sequential/self-timer shooting P A S M Adjust settings for burst or self-timer photography. Choose an option according to your subject. Other options, including anti-shock and silent modes, are also available. # Fix the camera securely on a tripod for self-timer shooting. jY # button n HIj Button Q n Drive j/Y...
Page 127
The shutter is released 12 seconds after the shutter button is pressed all the way down. The Y12s / tY12s self-timer lamp will light for about 10 seconds and Self-timer 12 sec ♥Y12s then start to flash about 2 seconds before the shutter is released.
# Shooting speed may be lower when shooting in a dark place. You may be able to increase shooting speed by setting [KNight Vision] to [Off]. g “Making the display easier to see in dark places (KNight Vision)” (P. 225) ...
Page 129
Pre-shutter Frames (ProCap/ProCap Set the number of frames to be captured before the shutter button is SH1/ProCap SH2 pressed fully from between 0 and 70. only) Set the total number of frames from 2 to 99 (including the pre- shutter frames) to be captured. You can limit the number of frames that are captured after you press the shutter button fully.
Configuring the self-timer functions (Self-timer Settings) P A S M You can choose which types of self-timer modes are displayed when you press the j Y # button, and change the self-timer settings such as the time the camera waits before taking a picture, and the number of frames it captures.
Shooting without the vibration caused by shutter button operations (Anti-Shockr Settings) P A S M B Anti-shock shooting modes can be used to reduce the slight blur caused by shutter motion. Use this option when even slight camera motion can cause blur, for example during macro or telephoto photography.
Shooting without shutter sound (Silents Settings) P A S M In situations where the shutter sound is a problem, you can use the silent shooting modes to shoot without making a sound. An electronic shutter is used to reduce the minuscule camera shake caused by the motion of the mechanical shutter, much as is the case for anti-shock photography.
Shooting without a release time lag (Pro Capture shooting) P A S M B Capture starts when the shutter button is pressed halfway; the moment the button is pressed the rest of the way down, the camera will start saving the last n captured pictures to the memory card, where n is a number selected before shooting begins.
Page 134
jY # button n HIj Button Q n Drive j/Y Super Control Panel MENU n _ n 7. Drive Mode n Drive j/Y Menu Select ProCap, ProCap SH1, or ProCap SH2 and press the Q button. Press the shutter button halfway to start capturing. •...
Reducing Flicker in Photographs (Anti-Flicker Shooting) P A S M You may notice uneven exposure in photos taken under flickering light. When this option is enabled, the camera will detect the flicker frequency and adjust the timing of the shutter release accordingly. MENU n _ n7.
Image Stabilization (KImage Stabilizer / nImage Stabilizer) Reducing camera shake P A S M B You can reduce the amount of camera shake that can occur when shooting in low light situations or shooting with high magnification. Q n KImage Stabilizer / nImage Stabilizer Super Control Panel MENU n _ n8.
Setting the detailed option of image stabilizer When using lenses other than Micro Four Thirds or Four Thirds system lenses, input the focal length of the lens. Press the INFO button while configuring [KImage KImage Stabilizer Stabilizer] or [nImage Stabilizer]. Input the focal Focal Length length using FGHI and then press the Q button.
Half-press image stabilization (aImage Stabilizer) P A S M B Choose whether image stabilization applies while the shutter button is pressed halfway. An example of a situation in which you might want to suspend image stabilization would be when using the level gauge to keep the camera level while framing photographs.
Displaying camera motion on the monitor (Handheld Assist) P A S M B You can configure the camera to 1023 1023 [ 1 : 02 : 03 ] [ 1 : 02 : 03 ] 60p L - 8 L - 8 100 % 100 % S - AF...
Color and Quality (KK / nK) Setting the Quality of Photos and Movies You can set the image quality modes for photos and movies. Select a quality suitable for the application (such as for processing on PC, use on website etc.). Q n KK / n K Super Control Panel MENU n _ n1.
Page 141
Setting n K • To change the settings of each image quality mode, press I while an image quality mode is selected. The Movie Quality Icon Changes to settings are reflected in the [nK] icon as shown below. Up to three combinations can be saved.
Page 142
# Depending on the card used, recording may end before the maximum length is reached. # Motion Compensation selection may be unavailable at some settings. # Movies are recorded at an aspect ratio of 16:9. C4K movies are recorded at an aspect ratio of 17:9.
# When an SD/SDHC card is used, the size of one file is limited to 4 GB. When an SDXC card is used, recording stops before the playback time reaches 3 hours. # Focus, exposure, and white balance lock during recording. # Sound is not recorded.
Choosing the codec for recording movies (nVideo Codec) P A S M B Choose the codec to be used when recording movies. MENU n n n1. Basic Settings/Image Quality n nVideo Codec Menu Records 8-bit movies using H.264, which is a versatile codec. Use H.264 this setting for general use.
(KPicture Mode / nPicture Mode) Processing options P A S M B Choose how pictures are processed during shooting to enhance color, tone, and other properties. Choose from preset picture modes according to your subject or artistic intent. Contrast, sharpness, and other settings can be adjusted separately for each mode.
Page 146
Setting KPicture Mode Option Picture Mode Select a picture mode using the rear dial or HI. ± ± ± Norm Natural Natural Picture Mode setting screen The camera adjusts colors and contrast for optimal 1 i-Enhance results according to the type of subject. 2 Vivid Choose for vivid colors.
Page 147
Setting detailed options of a KPicture Mode Press FG on the Picture Mode setting screen (P. 146) to select the option you want to set. ± ± • Available settings vary depending on the selected ± ± picture mode. Norm Sharpness Sharpness...
Add a tint to pictures when using monochrome picture modes. [N:Normal]: Creates a normal black and white image. [S:Sepia]: Shoot in sepia-tinted monochrome. Monochrome Color [B:Blue]: Shoot in blue-tinted monochrome. Color [P:Purple]: Shoot in purple-tinted monochrome. [G:Green]: Shoot in green-tinted monochrome. Choose a picture mode you want to adjust when using [Custom].
Setting nPicture Mode Same as K Select [nPicture Mode] from the menu. Select an option using FGHI. Records videos using the same settings as in K Picture Mode. MENU Movies are recorded using the same setting as configured in K Same as K [KPicture Mode].
Adjusting color (WB (white balance)) P A S M B White balance (WB) ensures that white objects in images recorded by the camera appear white. [Auto] is suitable in most circumstances, but other values can be selected according to the light source when [Auto] fails to produce the desired results or you wish to introduce a deliberate color cast into your images.
Page 151
Situations in which you can identify the appropriate color Custom WB temperature • Choose a color temperature. Making fine adjustments to white balance of each WB mode You can fine-tune the white balance settings. Adjustments can be made separately. Configure options.
Page 152
One-touch white balance Measure white balance by framing a piece of paper or other white object under the lighting that will be used in the final photograph. Use this option to fine-tune white balance when you find it hard to obtain the desired results with white balance compensation or preset white balance options such as 5 (sunlight) or O (overcast).
Locking the white balance in movie mode (nButton Function: WLock) P A S M B When the camera is in movie mode and the white balance is set to [WB Auto], you can lock the white balance to prevent it from changing even if the subject or the lighting changes.
Preserving the warm tones of incandescent lighting when in WB Auto mode (KW Keep Warm Color/nW Keep Warm Color) P A S M B Choose how the camera adjusts white balance for pictures taken using auto white balance under incandescent lighting. MENU n _ n2.
Setting the color reproduction format (Color Space) P A S M B You can select a format to ensure that colors are correctly reproduced when shot images are regenerated on a monitor or using a printer. MENU n _ n2. Picture Mode/WB n Color Space Menu The color space standardized by an international standards organization.
Special shooting modes (Computational Modes) The camera combines images or processes them digitally to create special effects that cannot be achieved in normal shooting modes. Shooting still pictures in a higher resolution (High Res Shot) P A S M Shoot at resolutions higher than that of the image sensor. The camera takes a series of shots while moving the image sensor and combines them to create a single high- resolution photo.
Page 157
Configuring High Res Shot Configure options. High Res Shot High Res Shot On m • Press FG to select an item and press the Q button to F+RAW display the setting menu. Waiting Time 0sec • After configuring options, press the Q button to return #Charge Time 0sec to High Res Shot setting screen.
# When High Res Shot is enabled, [Drive j/Y] is set to [♥o]. [♥Y12s] (Silent self-timer 12s), [♥Y2s] (Silent self-timer 2s) and [♥YC] (Silent custom self-timer) can be set. # Pictures taken with an art filter selected for picture mode will be recorded in [Natural] mode.
Page 159
Configuring Live ND Shooting Configure options. Live ND Shooting Live ND Shooting • Press FG to select an item and press the Q button to ND8(3EV) ND Number display the setting menu. LV Simulation • After configuring options, press the Q button to return to Live ND Shooting setting screen.
Take pictures. # [Frame Rate] will be [Normal] during live ND photography. # The upper limit for [K ISO] during live ND photography is ISO 800. This also applies when [Auto] is selected for [K ISO]. # The following cannot be used: HDR, High Res Shot, multiple exposure, keystone compensation, bracketing, focus stacking, interval-timer photography, K flicker scan, flickerless photography, and fisheye correction.
Page 161
The display returns to the Focus Stacking setting screen. Configuring Focus Stacking Configure options. Focus Stacking Focus Stacking • Press FG to select an item and press the Q button to Set number of shots display the setting menu. Set focus differential •...
Taking HDR (High Dynamic Range) images (HDR) P A S M The camera varies exposure over a series of shots, selects from each tone range with the highest level of detail, and combines them to create a single picture with a wide dynamic range.
Take pictures. • Each time you press the shutter button, the camera will take the selected number of shots. • In [HDR1] and [HDR2] modes, the camera will automatically combine the shots into a single picture. • Exposure compensation is available in modes P, A, and S. # The image displayed in the monitor or viewfinder during shooting differs from the final HDR picture.
Page 164
Configuring Multiple Exposure Configure options. Multiple Exposure Multiple Exposure • Press FG to select an item and press the Q button to Auto Gain display the setting menu. Overlay • After configuring options, press the Q button to return to Multiple Exposure setting screen.
Page 165
When [Overlay] is set When [On] is selected for [Overlay], a list of pictures is displayed. Highlight a picture using FGHI and press the Q button. • Only RAW images can be selected. Press the MENU button to close the menu. •...
(KDigital Tele-converter / nDigital Tele-converter) Digital Zoom P A S M B This option takes a crop at the center of the frame the same dimensions as the size option currently selected for image quality and zooms it in to fill the display. This allows you to zoom in past the lens’...
Shooting automatically with a fixed interval (Interval Shooting) P A S M You can set the camera to shoot automatically with a set time lapse. The shot frames can also be recorded as into a single movie. MENU n ‘ n2. Other Shooting Functions n Interval Shooting Menu ...
Page 168
Choose whether to smooth the exposure settings for all frames. The Exposure change of exposure will be smooth in the time lapse movie. Smoothing [Off] / [On] Choose whether to record a time-lapse movie. [Off]: The camera saves the individual shots but does not use them Time Lapse Movie to create a time-lapse movie.
Page 169
# The flash will not work if the flash charging time is longer than the interval between shots. # When 1000 or a larger number is selected for [Number of Frames], [Time Lapse Movie] will be set to [Off]. # When [High Res Shot] is set to [Onm] (tripod), [Time Lapse Movie] becomes [Off]. # If any of still pictures are not recorded correctly, the time lapse movie will not be generated.
Keystone correction and perspective control (Keystone Comp.) P A S M Keystone distortion due to the influence of lens focal length and proximity to the subject can be corrected, or enhanced to exaggerate the effects of perspective. Keystone compensation can be previewed in the monitor during shooting. The corrected image is created from a smaller crop, slightly increasing the effective zoom ratio.
# Pictures taken with [RAW] for image quality are recorded in RAW + JPEG format. # The following cannot be used: live composite photography, burst photography, bracketing, focus stacking, HDR, multiple exposure, the live ND filer, fish-eye correction, the digital teleconverter, movie recording, [C-AF], [C-AFb], [C-AF+TR], and [C-AF+TRb] AF modes, art filter picture modes, the custom self-timer, and High Res Shot.
Page 172
Configuring Fisheye Compensation Configure options. Fisheye Compensation Fisheye Compensation • Press FG to select an item and press the Q button to Angle display the setting menu. j/iCorrection • After configuring options, press the Q button to return to Fisheye Compensation setting screen. MENU MENU When fisheye correction is performed, the picture is cropped to...
Configuring BULB/TIME/COMP Settings (BULB/TIME/COMP Settings) P A S M Set items related to bulb/time/composite photography. MENU n ‘ n2. Other Shooting Functions n BULB/TIME/COMP Menu Settings Configure options. BULB/TIME/COMP Settings Bulb/Time Focusing • Press FG to select an item and press the Q button to 8min Bulb/Time Timer Live Composite Timer...
Recording a series of shots with varied exposure (AE BKT) P A S M Vary exposure over a series of shots. You choose the amount of variation and the number of shots. The camera takes a series of shots with different exposure settings. The camera will take pictures while the shutter button is pressed all the way down, ending when the selected number of shots has been taken.
Recording pictures with varied white balance (WB BKT) P A S M B The camera varies white balance to record a series of pictures. You choose the color axis and the bracketing amount. Shooting ends after a single shot. The camera takes one picture when the shutter button is pressed all the way down and automatically processes it to record the pictures.
Recording pictures with varied ISO sensitivity (ISO BKT) P A S M B The camera varies ISO sensitivity to record a series of pictures. You choose the bracketing amount. Shooting ends after a single shot. The camera takes one picture when the shutter button is pressed all the way down and automatically processes it to record the required number of shots.
Recording copies of one picture with different art filters applied (ART BKT) P A S M B Create multiple pictures of each picture, each with a different art filter applied. Enabling art filter bracketing MENU n ‘ n3. Bracketing n ART BKT Menu Use FG to select [ART BKT] and press the Q ART BKT...
Recording pictures with different focus positions (Focus BKT) P A S M The camera varies focus over a series of pictures. You choose the amount and the number of shots. The entire series is shot with a single press of the shutter button. Each time the shutter button is pressed all the way down, the camera takes the selected number of shots, varying focus with each shot.
Page 179
Shooting Press the MENU button to close the Focus BKT setting screen and return to shooting screen. Press the shutter button is all the way down. • Shooting will continue until the selected number of shots has been taken. •...
Functions that are only available in movie mode Sound Recording Options (Sound Recording Settings) P A S M B Adjust settings for recording sound during filming. You can also access settings for use when an external microphone or recorder is connected. MENU n n n5.
Adjusting the headphone volume (Headphone Volume) P A S M B MENU n n n5. Sound Recording/Connection n Headphone Menu Volume Headphone Volume Adjust the volume of audio output to the headphones. Time Codes (Time Code Settings) P A S M B Adjust time code settings.
HDMI Output (nHDMI Output) P A S M B Adjust settings for output to HDMI devices. Options are available for controlling HDMI recorders from the camera or adding time codes for use during movie editing. MENU n n n5. Sound Recording/Connection n nHDMI Output Menu [Monitor]: The HDMI device functions as an external monitor.
Displaying a + mark in the center of the screen while recording movies (Center Marker) P A S M B During movie recording, you can display a “+” mark which 60p L - 8 L - 8 [ 1 : 02 : 03 ] [ 1 : 02 : 03 ] TC00:00:01 TC00:00:01 DF DF...
Displaying zebra patterns over high luminance areas while recording movies (Zebra Pattern Settings) P A S M B During movie recording, you can display zebra patterns [ 1 : 02 : 03 ] [ 1 : 02 : 03 ] 60p L - 8 L - 8 TC00:00:01 TC00:00:01 DF DF...
Configuring Zebra Pattern Settings Configure options. Zebra Pattern Settings Zebra Pattern Settings • Press FG to select an item and press the Q button to b Level 1 display the setting menu. c Level 2 • After configuring options, press the Q button to return to Interval Shooting setting screen.
1 Battery level ........P. 30 o Composite shooting Number of combined shots .....P. 54 2 Active Bluetooth ® connection p Date and time .......P. 257 ..........P. 260, 280 3 Remote control ......P. 280 q Shutter speed ......P. 43, 47 4 Wireless LAN connection..P. 261, 267 r Aperture value ......P.
Viewing photographs and movies Viewing photographs Press the q button. • Your most recent photograph or movie will be displayed. • Select the desired photograph or movie using the front dial or arrow pad. • Press the shutter button halfway to return to shooting mode. Displays Displays the previous frame...
Watching movies Press the q button. Movie Play from Beginning • The most recent picture will be displayed. Play Movie Movie Edit Select a movie and press the Q button. Share Order • The playback menu will be displayed. Copy Select [Play Movie] and press the Q button.
Playback Using Touch Controls Use touch controls to zoom pictures in and out, scroll pictures, or choose the picture displayed. # Do not tap the display with your fingernails or other sharp objects. # Gloves or monitor covers may interfere with touch screen operation. Full-frame playback ...
Other functions Lightly tap the screen during single-frame playback or tap during index playback to display the touch menu. You can then perform the desired operation by tapping the icons in the touch menu. Select an image. You can select multiple images and delete them collectively. g “Selecting Multiple Pictures (Share Order Selected, Rating Selected, 0, Copy Select, Erase Selected)”...
Setting playback functions Rotating Pictures (Rotate) Choose whether to rotate photographs. Play the photograph back and press the Q button. Select [Rotate] and press the Q button. Press F to rotate the image counterclockwise, G to rotate it clockwise; the image rotates each time the button is pressed.
Highlight [Yes] and press the Q button. • The picture will be copied to the other card. %You can also copy all images on a card to the other card at a time. g [Copy All ] (P. 194) Copying all images on a card (Copy All) All images can be copied between the cards inserted in the camera (card slot 1 and 2).
Disabling Deletion Confirmation (Quick Erase) If this option is enabled when the D button is pressed to delete photos or movies, the camera will not display a confirmation dialog but will instead delete the images immediately. MENU n q n 2. Operations n Quick Erase Menu A confirmation dialog is displayed when the D button is pressed.
(RAW+JPEG h) Selecting RAW+JPEG Pictures for Sharing In the case of pictures recorded with [RAW+JPEG] for image quality, you can choose to share only the JPEG copies, only the RAW copies, or both the JPEG and RAW copies. MENU n q n 2. Operations n RAW+JPEG h Menu JPEG Only the JPEG copies will be marked for sharing.
Selecting the numbers of stars to be used for rating (Rating Settings) You can select the numbers of stars that will be displayed as options for rating. MENU n q n 3. Displays n Rating Settings Menu Select the number of stars that you want to display as an option when rating pictures, and put a check (v) next to it.
Print order (DPOF) You can save digital “print orders” to the memory card listing the pictures to be printed and the number of copies of each print. You can then have the pictures printed at a print shop that supports DPOF. A memory card is required when creating a print order. ...
Adding Audio to Pictures You can record audio using the built-in stereo microphone or an optional external microphone and add it to pictures. The recorded audio provides a simple replacement for written notes about the pictures. Audio recordings can be up to 30 s long. Display the image to which you want to add audio and press the Q button.
Retouching Pictures (Edit) Create retouched copies of pictures. In the case of RAW pictures, you can adjust the settings in effect at the time the picture was taken, such as white balance and picture mode (art filters included). With JPEG pictures, you can make simple edits such as cropping and resizing.
Page 201
Highlight items using FG. • To apply current camera settings, highlight [Current] and press the Q button. Current settings will be applied. - Use FG to select [Yes] and press the Q button to record the developed image. • For [Custom1] or [Custom2], highlight the desired option Preview Update Preview Update 100 %...
Page 202
# [P] (trimming) and [Aspect] can only be used to edit images with an aspect ratio of 4:3 (standard). Display an image you want to edit and press the Q 100 % 100 % button. F+RAW F+RAW ± ± 2022/02/01 16:30:43 2022/02/01 16:30:43 100-0015 100-0015...
Combining Pictures (Image Overlay) Overlay existing RAW photos and to create a new picture. Up to 3 pictures can be included in the overlay. The results can be modified by adjusting brightness (gain) separately for each picture. • The overlay is saved in the format currently selected for image quality. Overlays created with [RAW] selected for image quality are saved in RAW format and in JPEG format using the image quality option selected for [K2] (P.
Trimming movies (Movie Trimming) Cut selected footage from movies. Movies can be trimmed repeatedly to create files containing only footage you want to preserve. %This option is available only with movies recorded with the camera. Display a movie you want to edit and press the Q button. Select [Movie Edit] and press the Q button.
Changing the role of the R (H) button during playback (qRFunction) Choose the role played by the R (H) button during playback. MENU n q n 2. Operations n qRFunction Menu [h]: Create or modify a “share order” by marking qRFunction pictures for upload to a smartphone.
Choosing the information displayed during playback (qInfo Settings) Choose the information displayed during playback. Pressing the INFO button during playback will switch the display between the selected displays. MENU n q n 3. Displays n qInfo Settings Menu Select the display type, and put a check (v) next to it. •...
Configuring the index display (G Settings) You can change the number of frames to be displayed on the index display and whether to use the calendar display. MENU n q n 3. Displays n G Settings Menu Select the display type, and put a check (v) next to it. •...
Customizing the Camera Functions for Configuring Camera Controls Changing the roles of buttons (Button Settings) P A S M B Other roles can be assigned to buttons in place of their existing functions. The functions assigned using [KButton Function] take effect only during still photography.
Page 209
Q n KButton Function / nButton Function Super Control Panel MENU n G n1. Operations nButton Settings n KButton Menu Function MENU n G n1. Operations nButton Settings n nButton Function Highlight the desired control using FG and press the Q button. Highlight a function using FGHI and press the Q button to assign it to the selected control.
Page 210
Role Function If you press the button when [KK] is set to JPEG, it changes RAW K to RAW+JPEG. When [KK] is set to RAW or RAW+JPEG, the (RAW quality) setting does not change. You can also choose an image quality (K only) setting by holding the button and rotating a dial.
Page 211
Role Function Enable HDR (P. 162). Press once to enable HDR. Press again to disable. Hold the button and rotate the front or rear dial to adjust HDR (K only) settings, including HDR bracketing. Adjust [ISO] settings (P. 113). Hold the control and rotate the front or rear dial.
Page 212
Role Function Enable the live ND filter (P. 158). Press once to enable [Live ND Live ND Shooting (ND) Shooting]. Press again to disable. Hold the button and rotate the front (K only) or rear dial to adjust [Live ND Shooting] settings. The control is not used.
Page 213
Role Function Pressing the button when [Off] is selected for [KNight Vision] Night Vision (Night LV) (P. 225) selects [On]. If [On] is selected, pressing the button selects [Off]. (K only) AEL (AE lock) Press the button to lock exposure. Press again to release it. The camera focuses with autofocus while the button is pressed AF-ON (P.
Page 214
Role Function nView Assist Toggle [nView Assist] on or off. (BT.709) You can change the setting even when you are recording a movie. (n only) Zebra Pattern Toggle [Zebra Pattern Settings] on or off. Settings (bZebra) You can change the setting even when you are recording a movie. (n only) 214 EN...
Page 215
Using multi function options (Multi Function) Assign multiple roles to a single button. %To use the multi function feature, you must first assign [Multi Function] to a camera control using [Button Settings] (P. 208). Choosing a function Hold the button to which [Multi Function] is assigned and rotate the front or rear dial.
Recording a movie by pressing the shutter button (nShutter Function) P A S M B Configure the shutter button as a R (movie record) button. An optional remote control can then be used to start or stop recording when the mode dial is rotated to n (movie).
Page 217
The functions that can be assigned in [nDial Function] are listed below. n mode (movie exposure mode) Role Function Shutter Choose the shutter speed. — — FNo. Adjust aperture. — — Adjust exposure compensation. Adjust ISO sensitivity. — — — Adjust white balance.
Changing the Dial Direction (Dial Direction) P A S M B Choose the direction in which the dials are rotated to set exposure. MENU n G n1. Operations n Dial Settings n Dial Direction Menu Choose the direction the dials are rotated to set aperture and shutter Exposure speed in A, S, M, and B modes.
Customizing the Fn Lever (Fn Lever Settings) P A S M B MENU n G n1. Operations n Fn Lever Settings Menu How to configure the Fn lever Choose the role played by the Fn lever in still photography modes. The Fn lever can be used to choose the roles of the front and rear dials or to recall focus settings.
Page 220
Configuring [KFn Lever Function] KFn Lever Function Select [KFn Lever Function] on the [Fn Lever mode1 Settings] screen and press the Q button. mode2 mode3 Switches AF mode/AF target mode/ AF target point according to Fn lever position. Target can be selected. MENU INFO K Fn Lever Function screen...
Page 221
# This function cannot be used in the following cases. - [mode3] is selected for [KFn Lever Function] (P. 220). - [Fn Lever/Power Lever] (P. 222) is set to [ON/OFF] or [OFF/ON]. Using [mode2] of [KFn Lever Function] / [ nFn Lever Function] When [mode2] is selected for [KFn Lever Function] / [nFn Lever Function], the camera will store separate focus settings for Positions 1 and 2.
Configuring [Fn Lever/Power Lever] Fn Lever/Power Lever Select [Fn Lever/Power Lever] on the [Fn Lever Settings] screen and press the Q button. ON/OFF OFF/ON Use Fn Lever for designated functions. Use power switch to control power. MENU The lever functions according to the options selected for [KFn Lever Function] and [nFn Lever Function] (P.
Locking the v Button (vLock) P A S M B You can disable the v button. v button MENU n G n1. Operations n vLock Menu The v button can be used. The v button cannot be used. Choosing What Happens When the Shutter Button Is Pressed During Live View Zoom (LV Close Up Mode) P A S M B...
Choosing the Behavior of the Control Used for Depth-of-Field Preview (zLock) P A S M B Choose the behavior of the control used for depth-of-field preview. MENU n G n2. Operations n zLock Menu Choose the behavior of the control used for depth-of-field preview. [Off]: Aperture stops down while the control is pressed.
Functions for adjusting the live view display Changing the look of the display (KLV Mode) P A S M B Increase dynamic range of the viewfinder display, increasing the amount of detail visible in highlights and shadows in a manner similar to optical viewfinders. This setting takes effect on the viewfinder, the monitor and HDMI output.
Art Filter Preview (Art LV Mode) P A S M B You can preview the effects of art filters in the monitor or viewfinder during shooting. Some filters may cause subject movement to appear jerky, but this can be minimized so as to not influence photography.
Selfie Assist (Selfie Assist) P A S M B Choose the display used when the monitor is reversed for self-portraits. MENU n H n3. Live View n Selfie Assist Menu The display does not change when the monitor is reversed. When reversed for self-portraits, the monitor shows a mirror image of the view through the lens.
Functions for Configuring Information Display Selecting the display style of the viewfinder (EVF Style) P A S M B MENU n G n 4. Information n EVF Style Menu VStyle 1 / Similar to film camera viewfinder displays. VStyle 2 [1:02:03] [1:02:03] 1023...
Page 229
Viewfinder display when shooting using the viewfinder (Style 1/Style 2) [ 99 ] [ 99 ] S - OVF S - OVF [ 1 : 02 : 03 ] [ 1 : 02 : 03 ] Night LV Night LV Lock Lock (REC 00:59...
(KInfo Settings / nInfo Settings) Shooting Indicators P A S M B Choose the indicators listed in the live view display. You can display or hide shooting setting indicators. Use this option to choose the icons that appear in the display. You can configure three sets of display settings for still photography mode and two sets for movie recording mode.
Configuring nInfo Settings nInfo Settings Select an indicator you wish to display when the Image Only INFO button is pressed, and put a check (v) next Information 1 Information 2 to it. • Select an option using FG and press the Q button to put a check (v) next to it.
Viewfinder Info Display Options (VKInfo Settings) P A S M B Choose the information that can be viewed by pressing the INFO button in the viewfinder display. Just as you can with the monitor, you can display a histogram or level gauge in the viewfinder by pressing the INFO button.
Displaying the Level Gauge when the shutter button is pressed halfway (Va Level Gauge) P A S M B Choose whether the level gauge can be displayed in the viewfinder by pressing the shutter button halfway when [VStyle 1] or [VStyle 2] is selected for [EVF Style] (P.
(KGrid Settings / nGrid Settings) Framing Guide Options P A S M B MENU n G n 5. Grid/Other Displays n KGrid Settings Menu MENU n G n 5. Grid/Other Displays n nGrid Settings Choose the displayed color. [Preset 1]: The settings of [Color of Preset 1] are used. Display Color [Preset 2]: The settings of [Color of Preset 2] are used.
Viewfinder Framing Grid Options (VKGrid Settings) P A S M B Choose whether to display a framing grid in the viewfinder. You can also choose guide color and type. It takes effect when the camera is in still photography mode and [VStyle 1] or [VStyle 2] is selected for [EVF Style] (P.
Choosing the Settings Available via Multi-Fn (Multi Function Settings) P A S M B Choose the settings that can be accessed via multi-function buttons. MENU n G n 5. Grid/Other Displays n Multi Function Settings Menu Select an indicator you wish to display when the INFO button is pressed, and put a check (v) next to it.
Settings related to operation and display of menus Configuring the cursor on the menu screen (Menu Cursor Settings) P A S M B Choose where the cursor will be displayed when you open the menu or move to a different page. MENU n G n 2.
Choosing how to move between pages with the rear dial (g Loop in Menu Tab) P A S M B Choose whether to switch the pages only within the same menu tab when the rear dial is turned. MENU n G n 1. Operations n Dial Settings n g Loop in Menu Tab Menu When you move to the last page by turning the rear dial and turn it further, the first page of the next tab is displayed.
“My Menu” Settings Using “My Menu” You can use “My Menu” to create a personalized menu tab containing only items you select. “My Menu” can contain up to 5 pages of 7 items each. You can delete items or change the page or item order. At purchase, “My Menu”...
Page 240
Press the Q button to add the item to the selected Bulb/Time Focusing page. Bulb/Time Timer 8min Live Composite Timer • The camera will display a message stating that the item Bulb/Time Monitor Added to My Menu. My Menu has been added to “ ”.
Setting Up the Camera Card/Folder/File Settings Formatting the card (Card Formatting) P A S M B Cards must be formatted with this camera before first use or after being used with other cameras or computers. All data stored on the card, including protected images, is erased when the card is formatted.
Setting the card to record to (KCard Slot Settings / nCard Slot Settings) P A S M B When there are cards in both slots 1 and 2, you can select which card to record still images and movies to. Q n KSave Settings Super Control Panel MENU n e n1.
Page 243
Configuring KSave Settings Pictures are recorded to the memory card in the slot selected for Standard [KSave Slot] (P. 242). Shooting ends when the card is full. Pictures are recorded to the memory card in the slot selected for [KSave Slot] (P. 242). Pictures will be recorded to the remaining card when the card in the selected slot fills.
Specifying a folder to save images in (Assign Save Folder) P A S M B Specify the folder on the card in which the images will be saved. MENU n e n 1. Card/Folder/File n Assign Save Folder Menu [New Folder]: Specify a 3-digit folder number. 1st digit: [0] - [9] 2nd digit: [0] - [9] Assign *...
Naming Files (Edit Filename) P A S M B Change the file names the camera uses when saving photos and movies to memory cards. MENU n e n 1. Card/Folder/File n Edit Filename Menu [Date (mdd)]: The 2nd to 4th digits will be made up of the numbers corresponding to the month and day of the recording date (A to C sill be used for October to December).
User information Saving lens info (Lens Info Settings) P A S M B The camera can store information for up to 10 lenses that do not conform to the Micro Four Thirds or Four Thirds system standards. These data also supply the focal length used for the image stabilization and keystone compensation features.
Output Resolution (dpi Settings) P A S M B Choose the output resolution information (in dots per inch, or dpi) stored with photo image files. The selected resolution will be used when the images are printed. The dpi setting is stored as an Exif tag. MENU n e n 2.
Page 248
Configuring Copyright Info. Copyright Info. Configure options. Copyright Info. • Press FG to select an item and press the Q button to Artist Name display the setting menu. Copyright Name • After configuring options, press the Q button to return to Copyright Info.
Monitor/Sound/Connection Settings Disabling Touch Controls (Touchscreen Settings) P A S M B Enable or disable touch controls. MENU n e n 3. Monitor/Sound/Connection n Touchscreen Settings Menu Disable touch controls. Enable touch controls. Monitor Brightness and Hue (Monitor Adjust) P A S M B Adjust monitor color temperature and brightness.
Viewfinder Brightness and Hue (EVF Adjust) P A S M B Adjust viewfinder brightness and hue. The display switches to the viewfinder while these settings are being adjusted. MENU n e n 3. Monitor/Sound/Connection n EVF Adjust Menu Adjust color temperature. Use the front dial or HI to adjust the “amber–blue”...
[Operative]: When [EVF Auto Switch] is [On] and you put your eye to the viewfinder, the display switches to the viewfinder even if the monitor is open. When Monitor is Opened [Inoperative]: When [EVF Auto Switch] is [On] and you put your eye to the viewfinder, the display does not switch to the viewfinder if the monitor is open.
Choosing a USB Connection Mode (USB Settings) P A S M B Choose how the camera functions when connected to external devices via USB. MENU n e n 3. Monitor/Sound/Connection n USB Settings Menu [Select]: The menu for selecting the connection mode appears each time a USB cable is connected..
Battery/Sleep Settings Displaying Battery Status (NBattery Status) P A S M B View the status of the batteries inserted in the camera. Status of the battery in the camera and of the battery in the power battery holder are displayed individually. MENU n e n 5.
Dimming the Backlight (Backlit LCD) P A S M B Choose the length of time before the monitor backlight dims when no operations are performed. Dimming the backlight reduces the drain on the battery. MENU n e n 5. Battery/Sleep n Backlit LCD Menu The monitor backlight dims after the specified time.
Reducing Power Consumption (Quick Sleep Mode) P A S M B Further reduce power consumption during viewfinder photography. The delay before the backlight turns off or the camera enters sleep mode can shortened. # Power saving is not available: during live view photography, while the viewfinder is on, while multiple exposure or interval timer photography is in progress, while connected to an HDMI device, while connecting to a smartphone via Wi-Fi, while connecting to a computer via Wi-Fi or USB, or while Bluetooth is enabled...
Page 256
• When power-saving is in effect and the super control panel is displayed (P. 37), “ECO” is displayed on the monitor. 100 % 100 % 2022.02.01 16:30:43 Auto ± Small WB Auto S-AF ± 4 : 3 S-IS Auto 60p L - 8 1023 9999 1:02:03...
Reset/Clock/Language/Others Settings Restoring Default Settings (Reset/Initialize Settings) P A S M B Reset the camera to factory default settings. You can opt to reset almost all settings or only those directly related to photography. MENU n e n 6. Reset/Clock/Language/Others n Reset/Initialize Menu Settings Reset Shooting Settings...
Calibrating the Level Gauge (Level Adjust) P A S M B Correct deviation in the level gauge. Calibrate the gauge if you find it is no longer truly plumb or level. MENU n e n 6. Reset/Clock/Language/Others n Level Adjust Menu Reset Reset the gauge to factory default settings.
Connecting the Camera to External Devices A number of tasks can be accomplished by connecting the camera to an external device such as a computer or smartphone. Choose a connection type and software according to your goals. ® Precautions for Using Wi-Fi and Bluetooth ®...
Disabling the camera’s wireless communication (Airplane Mode) P A S M B ® You can disable the wireless communication (Wi-Fi/Bluetooth ) of the camera. MENU n e n4. Wi-Fi/Bluetooth n Airplane Mode Menu Wireless communication is enabled. Wireless communication is disabled. You cannot use it until you change the setting to [Off].
Pairing the Camera and Smartphone (Wi-Fi Connection) Follow the steps below when connecting the devices for the first time. • Adjust pairing settings using OM Image Share, not the settings app that is part of the smartphone operating system. Super Control Panel MENU n e n 4.
Wireless Connection Standby Setting for When the Camera Is On (Bluetooth) You can choose whether the camera will be on standby for wireless connection with the smartphone or the optional remote control when the power is on. %Complete the pairing of camera and smartphone or the optional remote control beforehand.
Wireless Settings for When the Camera Is Off (Power-off Standby) You can choose whether the camera will maintain a wireless connection to the smartphone when off. MENU n e n 4. Wi-Fi/Bluetooth n d Settings n Power-off Menu Standby When you turn the camera off, you will be prompted to choose Select whether to maintain the wireless connection to the smartphone.
Transferring images to a smartphone You can select images in the camera and load them to a smartphone. You can also use the camera to select images you want to share in advance. g “Selecting Pictures for Sharing (Share Order)” (P. 195) •...
Shooting remotely with a smartphone (Live View) You can shoot remotely by operating the camera with a smartphone while checking the live view on the smartphone screen. • The camera shows the connection screen and all operations are performed from the smartphone.
Adding position information to images Using the smartphone’s GPS function, you can add position information when taking pictures with the camera. • If [Bluetooth] (P. 262) is set to [Off] or [Onr<], set it to [Onr]. • If [Bluetooth] (P. 262) is set to [Onr], the camera will be on standby for wireless connection.
Changing the password (d Connection Password) ® To change the Wi-Fi/Bluetooth passwords: MENU n e n 4. Wi-Fi/Bluetooth n d Settings n d Connection Menu Password Follow the operation guide and press the R button. • A new password will be set. %Both the Wi-Fi connection password and Bluetooth ®...
Readying the Computer (Windows) If Windows is unable to detect a camera connected via a router or access point, follow the steps below to register the device manually. Click the [Start] button on the computer desktop to display the Start menu. Click (Settings) to display [Windows Settings] options.
Pairing the Computer with the Camera (New Link) P A S M B The camera and computer must be paired in order to connect. Up to four computers can be paired with the camera at a time. To pair a computer with the camera, connect it via USB.
Page 270
Click the [+] to the right of [Create new link]. • If nothing happens, reconnect the camera. • Enter the name that will be used on the camera to identify the computer. The default is the computer’s “Computer Name”. • The name used on the camera can be up to 15 characters long.
Adjusting Wi-Fi Settings (Wi-Fi Connection) Adjust settings for connection to the network to which the paired computer belongs. Before the camera can connect to the computer via Wi-Fi, it must be configured for connection to the network via the Wi-Fi router or access point. Multiple network profiles can be stored on the camera and recalled as desired.
Page 272
Enabling Camera Wi‑Fi Before connecting to a network via Wi-Fi, you will need to enable Wi-Fi on the camera. If [Airplane Mode] (P. 260) is set to [On], set it to [Off]. Connecting via WPS (Connect by WPS) Connect using the WPS feature on the router or access point.
Page 273
Connecting Manually (Connect manually) Adjust network settings manually. You will need to provide: MENU n e n 4. Wi-Fi/Bluetooth n Wi-Fi Connection Menu SSID The network name (SSID). Authentication The type of security used on the network. Password The password for connection to a secured network. Choose whether the camera IP address is assigned automatically by IP Address Assign the network DHCP server.
Page 274
PC Connection If the camera is able to connect, the network will SSID_001 be displayed with a check (v) next to the network Connect by WPS Connect manually name. • If the camera has been paired with more than one computer, you will be prompted to choose a computer before the network is displayed.
Page 275
If the camera is able to connect, the network will be displayed with a check (v) next to the network name. • Password-protected networks are indicated by a t icon. • If the camera has been paired with more than one computer, you will be prompted to choose a computer before the network is displayed.
Displaying the MAC address / Resetting Wi‑Fi settings for PC connection (Wi‑Fi PC Settings) You can display the camera’s MAC address for Wi-Fi connection and reset the Wi-Fi settings used for connection to a computer. MENU n e n 4. Wi-Fi/Bluetooth n Wi-Fi PC Settings Menu Wi-Fi MAC Address Display the camera’s MAC address for Wi-Fi connection.
Page 277
Take pictures using camera controls. • The pictures will be uploaded to the computer after they are saved to the camera memory card. • A p (“image upload”) icon will be displayed while Image upload upload is in progress. 60p L - 8 L - 8 1023 1023 [ 1 : 02 : 03 ]...
Ending the Connection End the Wi-Fi connection. The use of Wi-Fi may be prohibited in some countries or regions, in which case Wi-Fi should be disabled. Ending the Current Connection Tap O in the camera monitor. 1023 1023 [ 1 : 02 : 03 ] [ 1 : 02 : 03 ] 60p L - 8 L - 8 100 %...
Using the Remote Control You can control the camera from the optional remote control (RM-WR1) and take pictures. Names of parts 1 Shutter button 2 Data transfer indicator 3 Shutter button lock 4 Mode dial ( b /OFF / K / n / CONNECT) 5 Cable connector 6 Battery-compartment lid 7 Battery-compartment cover...
Page 280
Wireless connection For wireless connection, you must pair the camera and the remote control first. MENU n e n 4. Wi-Fi/Bluetooth n Wireless Shutter Setting Menu Follow the on-screen instructions. When pairing is complete, Start Pairing [Bluetooth] will be set to [Onr<]. If you select [Yes] and press the Q button, the paired device will be Delete Pairing deleted.
Deleting pairing Select [Delete Pairing] and press the Q button. Select [Yes] and press the Q button. # When you have paired the camera with a remote control, you have to perform [Delete Pairing] to reset pairing information before you pair the camera with a new remote control. Shooting from the remote control P A S M B To connect the camera and remote control wirelessly, be sure that [Bluetooth] (...
Data transfer indicator of the remote control Lights once Remote control operation is sent to the camera correctly. Remote control operation is not sent to the camera correctly. Flashes rapidly (1 Shorten the distance between the camera and the remote control. If second) the problem is not solved, check the setting of the camera.
Connecting to Computers via USB Connect the camera to a computer using the USB cable. Installing Software Install the following software to access the camera while it is connected directly to the computer via USB. OM Capture Use “OM Capture” to automatically download and view pictures as they are taken or control the camera remotely.
Uploading Pictures as They Are Taken (0RAW/Control) P A S M B Connect the camera to a computer via USB to upload pictures as they area taken. You can take pictures using the controls on the camera body or while controlling the camera remotely from the computer.
Configure “OM Capture” for download. • Choose a destination for the downloaded pictures. Take pictures using camera or computer controls. • The pictures will be downloaded to the computer according to the options chosen. • See online help for more information on using the software. •...
Process RAW images. • Adjustments can be made to the shooting settings available on the camera and RAW pictures processed accordingly. • The processed copies will be saved in JPEG format. • Enabling USB RAW data editing cancels any changes previously made in the edit window.
Powering the Camera via USB (USB Power Delivery) Mobile batteries or USB AC adapters conforming to the USB Power Delivery (USB PD) standard can be used to power the camera. The devices must: Standard: Conform to the USB Power Delivery (USB PD) standard Output: Be rated for an output of 27 W (9 V 3 A, 15 V 2 A, or 15 V 3 A) or more After confirming that the camera is off, use the USB cable to connect it to the device.
Connecting to TVs or External Displays via HDMI Pictures can be displayed on televisions connected to the camera via HDMI. Use the television to display pictures to an audience. You can also film movies while the camera is connected to an external monitor or video recorder via HDMI.
Cautions Information about Dust and Water Resistant Features • This camera has a water resistant specification of IPX3 (when used in combination with an IPX3 or higher water resistant lens supplied by our company). • This camera has a dust resistant specification of IP5X (under our company’s test conditions).
Battery and charger • This camera uses one of our lithium-ion batteries. Use the specified genuine battery. • The camera’s power consumption varies widely with usage and other conditions. • As the following consume a lot of power even without shooting, the battery will be drained quickly.
Information Interchangeable lenses Choose a lens according to the scene and your creative intent. Use lenses designed exclusively for the Micro Four Thirds system and bearing the M.ZUIKO DIGITAL label or the symbol shown at right. With an adapter, you can also use Four Thirds System lenses. The optional adapter is required.
MF Clutch Lenses The “MF clutch” (manual focus clutch) mechanism on MF clutch lenses can be used to switch between auto and manual focus simply by repositioning the focus ring. • Check the position of the MF clutch before shooting. •...
Camera Displays for Lens SET and CALL Functions The camera displays “(Set” when the focus position is saved using the SET option and “(Call” when a saved focus position is restored using the CALL option. For more information on SET and CALL, see the lens manual. 1023 1023 60p L - 8 L - 8...
Optional Accessories Using the charger (BCX-1) Two batteries can be inserted. It can also be used with only one battery inserted. Charge the battery. AC wall Direction indicating mark (▲) outlet Charging indicators USB-AC adapter (F-7AC: supplied) Lithium ion charger Lithium ion battery USB cable (CB-USB13: supplied)
HLD-10 Power Battery Holder An optional HLD-10 battery holder can be used to power the camera for extended periods. # Make sure to turn the camera off when attaching and removing the holder. Part names AF-ON button Terminal cover F (Exposure compensation) button Attachment wheel Shutter button...
Charging the battery in the power battery holder To charge the battery in the power battery holder, load a battery in the holder and attach the holder to the camera. Charge the battery in the same way as described on P.
Designated External Flash Units When using an optional flash unit designed for use with the camera, you can choose the flash mode using camera controls and take pictures with the flash. See the documentation provided with the flash unit for information on flash features and their use.
Wireless remote control flash photography P A S M B Wireless flash photography is available with compatible flash units that support wireless remote control (RC). The remote flash units are controlled via a unit mounted on the camera hot shoe. Settings can be adjusted separately for the units in up to three other groups.
Page 299
Adjust flash settings. • Highlight items using the FGHI buttons and rotate the front dial to choose settings. A Mode Auto ± Small WB Auto ± ± Group, flash control mode Channel 1:02:03 1023 Optical signal strength Flash compensation Flash mode Choose a group.
Wireless Flash Control Range The illustration is intended as a guide only. The flash control range varies with the type of flash mounted on the camera and the conditions in the surrounding area. Flash Control Range for Camera-Mounted FL-LM3 Flash Units 30°...
Principal Accessories Converter lenses Converter lenses attach to the camera lens for quick and easy fish-eye or macro photography. See our website for information on the lenses that can be used. Eyecup (EP-18) Removal Push both levers inward and lift the eyecup.
Cleaning and storing the camera Cleaning the camera Turn off the camera and remove the battery before cleaning the camera. • Do not use strong solvents such as benzene or alcohol, or a chemically treated cloth. Exterior: • Wipe gently with a soft cloth. If the camera is very dirty, soak the cloth in mild soapy water and wring well.
Cleaning and checking the image pickup device This camera incorporates a dust reduction function to keep dust from getting on the image pickup device and to remove any dust or dirt from the image pickup device surface with ultrasonic vibrations. The dust reduction function operates when the camera is turned on.
Shooting tips and information The camera does not turn on even when a battery is loaded The battery is not fully charged • Charge the battery with the USB-AC adapter. The battery is temporarily unable to function because of the cold •...
Page 307
AF confirmation mark lights up but the subject is not focused. Subjects at different Fast-moving subject Subject not inside distances AF area Noise reduction is activated • When shooting night scenes, shutter speeds are slower and noise tends to appear in images.
Page 308
Functions that cannot be selected from menus When you open the menu, items that cannot be set are displayed in gray. If you press the Q button while selecting a gray item, the reason it cannot be set will be displayed.
Error codes Monitor indication Possible cause Corrective action The card is not inserted, or it Insert a card. Or reinsert the cannot be recognized. card properly. No Card There is a problem with the Remove and reinsert the memory card in Slot 1. memory card.
Page 310
Monitor indication Possible cause Corrective action The selected file is damaged View the picture using computer and cannot be played back. imaging software or the like. If 5Picture Error Alternatively, the picture is in a the picture cannot be displayed on a computer, the file may be format that is not supported by the camera.
Default Settings *1: Can be added to [Assign]. *2: Default can be restored by selecting [Initialize All Settings] for [Reset/Initialize Settings]. *3: Default can be restored by selecting [Reset Shooting Settings] for [Reset/Initialize Settings]. Super Control Panel Shooting mode Function Default ―...
Page 312
Shooting mode Function Default ― ― nMode n (movie) ― Shutter Speed 1/250 Aperture Value F5.6 — nISO ISO Auto — AMiddle nAF Target Mode — ±0.0 Exposure Comp. Wi-Fi/Bluetooth —...
G Tab Page Function Default 1. Operations KButton ― Button Exposure Settings Function Comp. ― High Res Shot ― ― AF-ON ― ― u View Selection ― ...
Page 322
Page Function Default k: Exposure Dial Settings KDial ― Lever 1 Function Comp. i: Ps k: ISO Lever 2 i: WB k: Exposure Lever 1 Comp. i: Aperture Value k: ISO Lever 2 i: WB k: Exposure Lever 1 Comp.
Page 323
Page Function Default ― SCenter Button Multi Selector ― Settings TDirection Key ― ― KFn Lever Function Fn Lever mode2 nFn Lever Function ― ― Settings mode2 ― ― Fn Lever/Power Lever ― KElec.
Page 324
Page Function Default 4. Information VStyle 2 ― ― EVF Style KInfo Settings ― [Image Only], [Information 1] and [Information 2]: Info by half-pressing a ― VKInfo Settings ― [Image Only], [Information 1] and [Information 2]: ...
Memory Card Capacity Memory Card Capacity: Photos Figures are for a 64 GB SDXC card used to record photos with an aspect ratio of 4:3. Number of Image size Compression File File size (MB) Record mode storable still (Pixel Count) ratio format (approx.)
Page 328
• The number of storable still pictures may change according to the subject, whether or not print reservations have been made, and other factors. In certain instances, the number of storable still pictures displayed on the monitor will not change even when you take pictures or erase stored images.
Specifications Camera Product type Product type Digital camera with interchangeable Micro Four Thirds Standard lens system Lens M.ZUIKO DIGITAL, Micro Four Thirds System Lens Lens mount Micro Four Thirds mount Equivalent focal length on Approx. twice the focal length of the lens a 35 mm film camera Image pickup device Product type...
Page 330
White balance Mode setting Auto/Preset WB (7 settings)/Customized WB/One-touch WB (camera can store up to 4 settings) Recording Memory SD, SDHC and SDXC UHS-II compatible Recording system Digital recording, JPEG (DCF2.0), RAW Data Applicable standards Exif 2.31, Digital Print Order Format (DPOF) Sound with still pictures Wave format Movie...
Page 331
Flash MODEL NO. FL-LM3 Guide number 9.1 (ISO100•m) 12.7 (ISO200•m) Covers the picture angle of a 12 mm lens (equivalent to 24 mm in 35 mm Firing angle format) Dimensions Approx. 43.6 mm (W) × 49.4 mm (H) × 39 mm (D) (1.7” × 1.9” × 1.5”) Weight Approx.
SAFETY PRECAUTIONS SAFETY PRECAUTIONS CAUTION RISK OF ELECTRIC SHOCK DO NOT OPEN CAUTION: TO REDUCE THE RISK OF ELECTRICAL SHOCK, DO NOT REMOVE COVER (OR BACK). NO USER-SERVICEABLE PARTS INSIDE. REFER SERVICING TO QUALIFIED SERVICE PERSONNEL. An exclamation mark enclosed in a triangle alerts you to important operating and maintenance instructions in the documentation provided with the product.
Page 333
• Do not look at the sun or strong lights • To protect the high-precision technology with the camera. contained in this product, never leave the camera in the places listed below, no matter if • Keep young children, infants away from in use or storage: the camera.
Page 334
• If rechargeable batteries have not been • Keep batteries dry at all times. recharged within the specified time, stop • The battery may become hot during charging them and do not use them. prolonged use. To avoid minor burns, do not •...
Page 335
• The camera may malfunction if it is used in Using the wireless LAN/ a location where it is subject to a magnetic/ ® Bluetooth functions electromagnetic field, radio waves, or high • Turn off the camera in hospitals and other voltage, such as near a TV set, microwave, locations where medical equipment is video game, loud speakers, large monitor...
Page 336
PDF file stored at trademarks of Microsoft Corporation. • SDXC Logo is a trademark of SD-3C, LLC. https://cs.olympus-imaging.jp/en/support/imsg/ digicamera/download/notice/notice.cfm • Apical logo is a registered trademark of Apical Limited. 336 EN...
Index N Battery Priority ......253 Symbols N Battery Status ......253 #+WB ..........154 qRFunction ........205 #RC Mode ........298 qa Default Setting......205 # Slow Limit........124 qDial Function ........205 # X-Sync..........124 qInfo Settings .........206 0 (Protect) ........193 R (automatic rotation) .....205 0 (Uploading Pictures) ....284 v Lock ..........223 8 ............251 V K Grid Settings ......235...
Page 338
Anti-Flicker Shooting ......135 Card Formatting.........241 Anti-shockr settings ......131 Card Slot Settings Aperture-Priority AE ......45 Movie ..........242 Art LV Mode ........226 Still image ........242 Assign Save Folder ....244, 246 Center marker........183 Certification........258 Assign to Custom Mode ......56 Audio Playback ........199 Charger..........294 Audio recording .........199 Charging via USB ......22, 23 Auto Power Off ........254...
Need help?
Do you have a question about the OM System OM-1 and is the answer not in the manual?
Questions and answers
I want to see the first picture when taking the second one in multiple exposure. But when I set the overlay to ON, it only calls up Raw files in my memory card but does not allow me to see the first picture when I take the second How can I set the Multiple Exposure in my OM-1 to see the first picture while taking the second
To view the first picture while taking the second using the Multiple Exposure feature on the Olympus OM System OM-1:
1. Set [Multiple Exposure] to [On] in the menu.
2. Set [Overlay] to [On] (this enables using an existing RAW image as an overlay).
3. Press the MENU button to exit the settings and return to the shooting screen. A "X" icon will appear.
4. Take the first picture. It will be shown superimposed in the viewfinder or screen as you compose the second shot.
5. Take the second picture. The "X" icon turns green while composing.
6. A multiple exposure image is created after the second shot.
You can press the D button to retake the first shot if needed.
This answer is automatically generated
AS far as i can tell my OM-1 is set to take RAW only, which is fine until I use focus stacking. How can i stop OM-1 taking jpegs in addition to RAW when using focus stacking. For each focus stack i expect the one final jpeg, but number of shots is doubled (because it records not just RAW but duplicate jpegs)