
Related Manuals for Mistral MBF851WH


Summary of Contents for Mistral MBF851WH
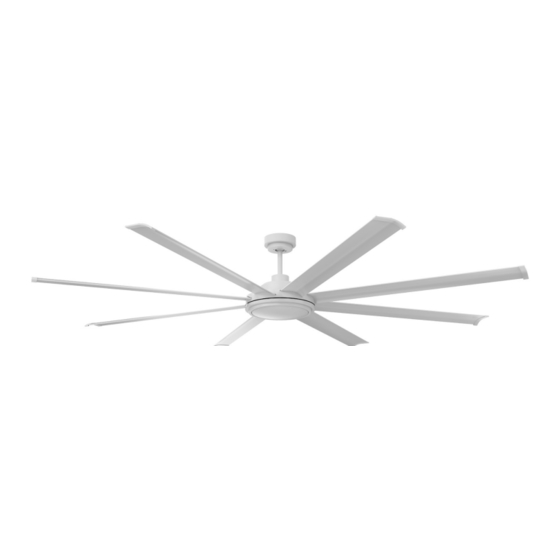
- Page 1 203cm Matte White Aluminium Ceiling Fan with Remote Instruction Manual Model: MBF851WH...
-
Page 2: Important Safeguards
Important Safeguards • Do not connect the fan motor to a dimmer switch. This may give an unsatisfactory performance (motor hum) and cause When using electrical appliances, in damage to the motor. order to reduce the risk of fire, electric •... -
Page 3: Energy Efficient Use Of Ceiling Fans
Energy Efficient Use of Note: The important safeguards and instructions given in this manual are not Ceiling Fans meant to cover all possible conditions and situations that may occur. It must be Ceiling fan performance and energy efficiency understood that common sense, caution rely heavily on the proper installation and use and care are factors, which cannot be of the ceiling fan. -
Page 4: Getting Ready
Getting Ready Important Notes Warning: The ceiling fan must be installed Fan Installation only by a licensed electrician. Under our warranty terms, this ceiling fan must be electrically installed by a licensed electrician. Warning: Improperly installed ceiling fans can be Do not install or use fan if any part is dangerous and expensive to repair. - Page 5 Features of Your Ceiling Fan with Remote Control Mounting Bracket Receiver Fan Motor Assembly Remote Control METAL PLATE METAL SHADE Blade X8 12” Downrod...
- Page 6 Getting to Know Your Assembly the downrod Ceiling Fan with Remote of your ceiling fan Control The ceiling fan has been pre-assembled with the short (15cm) downrod. If required you can Congratulations on the purchase of your new change to fit the 30 cm downrod provided, Ceiling Fan.
- Page 7 Installing the Ceiling mounting bracket Securely attach the ceiling mounting bracket to the ceiling near a supply wire and using the mounting bracket screws and washers supplied with the ceiling fan. 1. Choose a location for the fan which will ensure adequate clearance from all objects and walls and with blade height greater than 2.1 metres from the floor.
- Page 8 Assembly of Your Ceiling The Electrical terminations must only be carried out by a Licensed Electrician that can issue an installation compliance certificate on completion. For ease of assembling the fan blades to the 3. Connect the supply wiring Active, Neutral ceiling fan motor housing, turn entire motor and Earth into the terminal block on mounting housing upside down , allow for clearance of...
- Page 9 Hanging The Ceiling On completion of fitting the 8 blades , fit metal plate with 3 screws and push motor shade to fit Fan And Electrical into motor plate by align the groove then turning anti-clockwise to secure in position. (Fig.6/7). Connection Before hoisting the ceiling fan assembly in position , the fan motor cowl,ceiling canopy...
- Page 10 If your ceiling is vaulted or angled ceiling. Should refer below Angle Mounting recommended for a vaulted or angled ceiling instruction to installation: 10° Max Fig.12 Warning : All electrical connections for Slide the remote control receiver module above installation of this ceiling fan must only be the downrod inside the hanging bracket and carried out by an Licensed Electrician.
-
Page 11: Installing The Remote Control Holder
Allow Electrician to test and confirm safe operation.(Fig.15) Fig. 13 The ceiling fan installation process is now Fig.15 completed. WARNING: Battery should insert correctly. Note: On completion of installation the Do not recharge, do not dispose of in a distance from floor to lowest point of fan fire or oven, may explode, leak or cause blades must not be less than 2.1 Meter. -
Page 12: Remote Reset
Remote Reset On/Off button( ) Operating the ceiling fan direct press any of the dedicated speed buttons (1-6) to select your Turn on your main power source of the ceiling desired speed setting and Press ( ) button to fan. turn fan Off. -
Page 13: Care And Cleaning
Care & Cleaning Cool weather - (Reverse) An upward airflow moves warm air off the ceiling area as shown in (Fig.19) This allows you to set your heating unit Periodic cleaning of your ceiling fan is the only on a cooler setting without affecting your maintenance required. -
Page 14: Troubleshooting Checklist
Trouble - Shooting Checklist Trouble Probable Cause Suggested remedy 1.Fan Will not Start A: Fuse or circuit breaker A/ Check main and branch circuit blown fuses or circuit breakers. B:Loose line wire connections B/ Check line wire connections to to the fan C:Speed controller not in C/ Check speed controller’s correct position... -
Page 15: Warranty Exclusions
Warranty Conditions for purchase in Australia & New Zealand Any claim under this warranty must be made within 2 years of the date of purchase of the product. To make a claim under the warranty in Australia, take the product (with proof of purchase) to any Bunnings store (see www.bunnings.com.au in Australia or www.bunnings.co.nz in New Zealand for store locations). - Page 16 Cat. No. MBF851WH April 2020...
Need help?
Do you have a question about the MBF851WH and is the answer not in the manual?
Questions and answers