Advertisement
Quick Links
Advertisement

Related Manuals for B-Tech Ventry BTV513


Summary of Contents for B-Tech Ventry BTV513
-
Page 2: Installation Safety Instructions
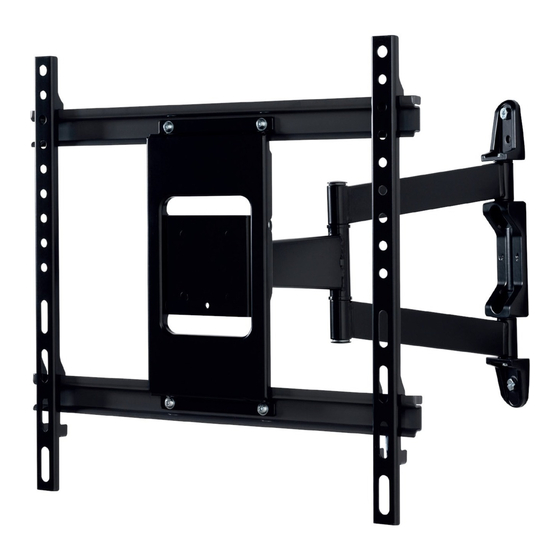
Please check carefully to make sure there are no missing or defective parts - defective parts must never be used. B-Tech AV Mounts, its distributors and dealers are not liable or responsible for damage or injury caused by improper installation, improper use or failure to observe these safety instructions. In such cases, all guarantees will expire. - Page 4 BTV513 PARTS LIST PLEASE KEEP THIS FOR FUTURE REFERENCE...
-
Page 5: Installation Tools Required
PART NAME ITEM WALL PLATE INTERFACE ARM CABLE MANAGEMENT CLIP 5AF HEX KEY S10mm SOCKET WRENCH SCREEN INTERFACE KIT M4 x 12mm SCREW M4 x 25mm SCREW M4 x 40mm SCREW M6 x 16mm SCREW M6 x 25mm SCREW M6 x 40mm SCREW M8 x 16mm SCREW M8 x 25mm SCREW M8 x 40mm SCREW... -
Page 6: Installation Instructions
INSTALLATION INSTRUCTIONS FIX WALL PLATE Fix item 1 to the wall using one of the following methods: i. Concrete / brick walls. 10mm (7/16") masonry bit ii. Wood / stud walls. STUD FINDER (Optional) 6mm (1/4") wood bit... - Page 7 ATTACH INTERFACE ARMS TO SCREEN Fix item 2 to the rear of the screen using items A - M. Note: Ensure the arms are facing the correct way round and the same holes are used on both arms. A - I SCREEN Use spacers (items K, L &...
- Page 8 MOUNT SCREEN ONTO WALL PLATE Hook screen onto item 1 (this may require two people). SCREEN WALL SECURE THE MOUNT Tighten the safety screws on the bottom of item 2 securing the screen to the mount. WALL SAFETY SCREW...
-
Page 10: Cable Management
CABLE MANAGEMENT Use item 3 to clip any screen cables to item 1. Note: Ensure there is enough slack in the cable to allow for the movement of the bracket. CABLE...
Need help?
Do you have a question about the Ventry BTV513 and is the answer not in the manual?
Questions and answers