Advertisement
Quick Links
Advertisement

Subscribe to Our Youtube Channel
Related Manuals for Bebe Care SORRENTO LETTO


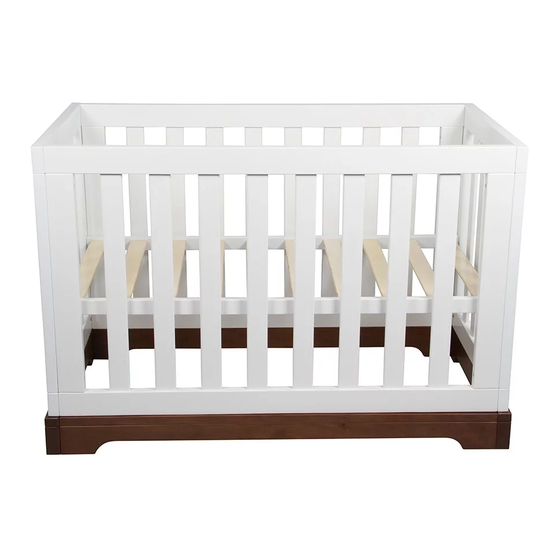
Summary of Contents for Bebe Care SORRENTO LETTO
- Page 1 IMPORTANT: RETAIN FOR FUTURE REFERENCE, READ CAREFULLY...
-
Page 2: Safety Precautions
SAFETY PRECAUTIONS Read all instructions before assembly and use of the cot. Keep instructions for future use. WARNING ADULT ASSEMBLY REQUIRED: DUE TO THE PRESENCE OF SMALL PARTS DURING ASSEMBLY, KEEP OUT OF REACH OF CHILDREN UNTIL ASSEMBLY IS COMPLETE. TO PREVENT FALLS, THE MATTRESS BASE OF THIS COT SHOULD BE ADJUSTED TO THE LOWEST POSITION BEFORE THE CHILD CAN SIT UP. - Page 3 CONGRATULATIONS Congratulations on your purchase of the Sorrento Letto Cot. This product has been designed and developed with safety, comfort and functionality in mind. Please take the time to read this manual carefully before using this product and keep it in a safe place for future reference.
-
Page 4: Assembly Contents
ASSEMBLY CONTENTS Check what you have received... You have received 1 box. Please check the contents of the box against the list below. If anything is missing, please contact Customer Service. In Australia, contact CNP Brands on 1300 667 137, in New Zealand contact Wainhouse Distribution on 0800 567 5000. - Page 5 ASSEMBLY CONTENTS Supplied loose in Box A continued: 52mm Plinth to Cam Lock Plinth Bolt 40mm Wooden 52mm Cam Bolt x 20 Dowel Filler Bolt & Nut Filler Bolt (Pre-assembled) Allen Key Supplied loose in Box B: End Panel Cot Bed End Panel...
- Page 6 ASSEMBLY / OPERATING INSTRUCTIONS It is advisable that two people assemble the cot in the room in which it is to be used. As small parts are involved in assembly, children should be kept clear of the assembly area. Dispose of all packaging material immediately after the cot is assembled. Identify all parts and components.
- Page 7 ASSEMBLY / OPERATING INSTRUCTIONS To connect Plinths to End and Side Panels continued... Slide the Plinth over the dowels and with the protruding edge facing outwards, secure with three 85mm bolts. Repeat the procedure for the remaining Side Panel. To connect the End and Side Panels... Insert 2 x Wooden dowels into the End panel Plinth on each side.
- Page 8 ASSEMBLY / OPERATING INSTRUCTIONS To connect the End and Side Panels continued... Repeat for the other Side Panel. After inserting the wooden dowels in to the other End Panel Plinth, align the End Panel with the two Side Panels and slide them together.
- Page 9 ASSEMBLY / OPERATING INSTRUCTIONS To fit Mattress Base Height... With the Cot still on its Side Panel and carefully slide the Mattress Base along to meet the mounting holes in the End Panel. Secure with 4 x 40mm bolts. PLEASE NOTE! Please ensure that the “This Side Up” is facing the top of the cot. Carefully stand the cot upright.
- Page 10 ASSEMBLY / OPERATING INSTRUCTIONS Mattress Base Heights... Mattress base in High Position The base height is set for when your baby is young and cannot sit up unaided. Mattress base in Low Position. This is the normal position for an active baby who can sit up unaided. To adjust Mattress Base Heights...
- Page 11 ASSEMBLY / OPERATING INSTRUCTIONS To adjust Mattress Base Heights continued... Remove the 4 x Mattress Base bolts. Carefully slide the Mattress Base down to the lower setting and re-fit the bolts. Replace the 4 x Filler bolts in the higher setting holes to avoid any possible finger entrapment.
- Page 12 ASSEMBLY / OPERATING INSTRUCTIONS To convert to Cot Bed Mode... PLEASE NOTE! Recommended procedure with 2 people. Lay the Cot on a Side Panel. Remove the 3 x Side Panel Plinth bolts While supporting the Side Panel, remove the 4 x Side Panel to End Panel bolts.
- Page 13 ASSEMBLY / OPERATING INSTRUCTIONS To convert to Cot Bed Mode continued... Remove the Mattress Base bolts on the end to be converted. Remove 3 x End Panel Plinth bolts from the bottom of the Plinth. Separate and remove the End Panel. Mount the Cot Bed Panel to the Plinth dowels and refit the 3 x Plinth bolts.
- Page 14 ASSEMBLY / OPERATING INSTRUCTIONS To convert to Cot Bed Mode continued... 11a. Replace the 3 x 85mm bolts through the Plinth into the Mattress Retainer Panel. 12a. From the lower Side Panel, remove the 3 x Plinth bolts. 13a. Remove the 2 remaining Side Panel to End Panel bolts.
- Page 15 ASSEMBLY / OPERATING INSTRUCTIONS To convert to Cot Bed Mode continued... 16a. Replace the 3 x 85mm bolts through the Plinth and into the Mattress Retainer Panel. 17a. Carefully stand the Cot bed upright. PLEASE NOTE! Use extra 2 x Filler Bolts supplied in the top exposed holes to avoid any possible finger entrapment.
- Page 16 ASSEMBLY / OPERATING INSTRUCTIONS To convert from Cot Bed to Sofa Bed Mode... PLEASE NOTE! Recommended procedure with 2 people. Remove 2 x Mattress Retainer bolts from both ends on one side and from the Cot Bed Panel end on the other Mattress Retainer.
- Page 17 ASSEMBLY / OPERATING INSTRUCTIONS To convert from Cot Bed to Sofa Bed Mode continued... Remove the 3 x Plinth bolts on the Cot Bed End Panel. Remove the 2 x Mattress Base bolts from the Cot Bed End Panel and remove the panel. Slide the End Panel on to the Plinth dowels and secure with the 3 x Plinth bolts.
- Page 18 ASSEMBLY / OPERATING INSTRUCTIONS To convert from Cot Bed to Sofa Bed Mode continued... Secure the Side Panel to the End Panels using 4 x 85mm bolts. 10a. Replace the remaining Mattress Retainer bolt to the End Panel. 11a. Carefully stand the sofa bed upright. PLEASE NOTE! Use extra 2 x Filler Bolts supplied in the top exposed holes to avoid any possible finger entrapment.
- Page 19 ASSEMBLY / OPERATING INSTRUCTIONS To convert from Cot to Sofa Bed Mode... PLEASE NOTE! Recommended procedure with 2 people. Lay the cot on a Side Panel. Remove 3 x Side Panel Plinth bolts. Remove 4 x Side Panel to End Panel bolts and Slide the panel away from the Plinth.
- Page 20 ASSEMBLY / OPERATING INSTRUCTIONS To convert from Cot to Sofa Bed Mode continued... Insert the Mattress Retainer on the dowels and secure with the 3 x Plinth bolts. Stand the sofa bed upright. PLEASE NOTE! Use extra 2 x Filler Bolts supplied in the top exposed holes to avoid any possible finger entrapment.
-
Page 21: Maintenance
HOW TO CARE FOR YOUR BEBE CARE COT Cleaning This product has been designed and developed with safety, comfort and functionality in mind. Please take the time to read this manual carefully before using this product and keep it in a safe place for future reference. - Page 22 Distributed in Australia by CNP Brands Distributed in New Zealand by Wainhouse 20 Calarco Drive, Distribution Derrimut, VIC, 3030 2-6 Argyle St, Morningside, Customer Service 1300 667 137 PO Box 41-014, St Lukes, Auckland, New Zealand W: www.cnpbrands.com.au Customer Service: 0800 567 5000 E: info@cnpbrands.com.au E: helpline@wainhousedist.co.nz F: www.facebook.com/CNPBrands...
Need help?
Do you have a question about the SORRENTO LETTO and is the answer not in the manual?
Questions and answers