Table of Contents
Advertisement
Available languages
Available languages
Quick Links
Advertisement
Table of Contents

Related Manuals for AsVIVA KH3


Summary of Contents for AsVIVA KH3
- Page 1 BEDIENUNGSHANDBUCH / MANUAL VERSION: C-BU www.AsVIVA.de...
-
Page 2: Table Of Contents
INHALTSVERZEICHNIS GEWÄHRLEISTUNGSBESTIMMUNGEN ............................ 3 WICHTIGE HINWEISE ZU IHREM PRODUKT........................... 4 WICHTIGE SICHERHEITSHINWEISE ............................5 TEILELISTE ......................................6 SPEZIFIKATIONEN .................................... 6 SENSOR MODUL ....................................7 APP ........................................10 HARDWARE ANWEISUNGEN ..............................12 AKKU ........................................12 GEWÄHRLEISTUNGSRECHT ..............................13 TABLE OF CONTENTS WARRANTY TERMS..................................15 IMPORTANT INFORMATION ABOUT YOUR PRODUCT ....................16 IMPORTANT SAFETY INSTRUCTIONS ............................17 PARTS LIST ......................................18 SPECIFICATIONS .....................................18... -
Page 3: Gewährleistungsbestimmungen
Ersatzteilbestellungen und Reparaturaufträge richten Sie bitte unter Angabe der Kundennummer bzw. Rechnungsnummer an Ihren Händler oder direkt an uns. Unsere Serviceadresse: https://www.asviva.de/kontakt-formular Damit Ihnen unsere Service-Mitarbeiter optimal weiterhelfen können, beachten Sie bitte folgende Vorgehensweise: Ist ein bestimmtes Teil beschädigt? Teilen Sie uns bitte anhand der Teileiste die genaue Teilenummer mit. -
Page 4: Wichtige Hinweise Zu Ihrem Produkt
WICHTIGE HINWEISE ZU IHREM PRODUKT Danke, dass Sie sich für eines unserer Produkte entschieden haben und für das damit entge- gengebrachte Vertrauen. Um Ihnen ein einwandfreies Produkt liefern zu können, obliegen alle unsere Produkte und deren Produktion einer ständigen sowie ausführlichen Qualitätskontrolle. Sollte dennoch ein Fehler auftreten, Ihnen das Produkt nicht zusagen oder sollten Sie Anmerkungen und Vorschläge haben, so bitten wir Sie nicht zu zögern und Kontakt mit unserem Support unter support@... -
Page 5: Wichtige Sicherheitshinweise
WICHTIGE SICHERHEITSHINWEISE Bitte lesen Sie die Anleitung genau durch, bevor Sie mit den Zusammenbau beginnen! • Bauen Sie das Gerät nach der Aufbauanleitung auf und verwenden Sie nur die für den Aufbau des Gerätes beigefügten gerätespezifischen Einzelteile. • Stellen Sie sicher, dass der Sensor korrekt eingebaut ist, so dass eine Trainingsaufzeichnung per App gewährleistet werden kann. -
Page 6: Teileliste
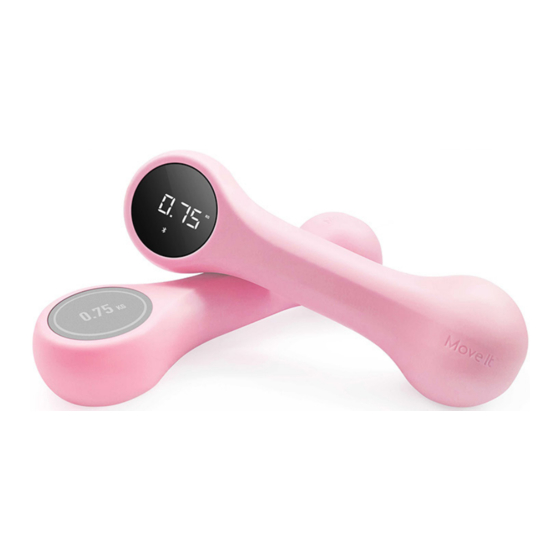
TEILELISTE 1x Kurzhantel mit Sensormodul 1x Kurzhantel (ohne Modul) 1x USB Ladekabel SPEZIFIKATIONEN Model: IA-DB-001 Software-Plattform: Apple iOS 9.0 oder Android 4.4 oder höher Verbindung: Bluetooth 4.0 Sensor: 6-axis Gyroscope Sensor Batterie/Akku: 180mAh Lithium Batterie Ladeanschluss: Micro USB Input: 5V - 1A Abmessungen: 0,5 kg: W 58 x H 58 x L 190 cm... -
Page 7: Sensor Modul
SENSOR MODUL ENTNAHME DES SMART MODULS Drücken Sie vorsichtig das kleine Loch auf der Rückseite der Hantel und nehmen Sie das Sensomodul heraus. AKTIVIEREN DES SMART MODULS Schließen Sie das Sensormodul, für eine Stromversorgung und Ladung, über das USB-Kabel an. Der LED-Anzeigebildschirm wird aktiviert wenn es leuchtet. - Page 8 SENSOR MODUL MONTAG / EINSETZEN DES SMART MODULS Achten Sie auf die Steckplatzposition und setzen Sie das Smart-Modul wie abgebildet in die Hantel ein. Das Display leuchtet auf.
- Page 9 SENSOR-MODUL STATUS-ANZEIGE Langsam blinkend: Aufladen (1 Linie entspricht ca. 25 % Leistung) Linien vollständig: vollständig geladen Schnelles Blinken: Warnung bei niedrigem Batteriestand (verbleibende Leistung: 10 %) Langsam blinkend: Warten auf Verbindungsaufbau mit Move it-App Anhaltendes Leuchten: Verbunden mit Move it-App Langsam blinkend: Aufladen (1 Lienie entspricht ca.
-
Page 10: App
INSTALLATION MOVE-IT APP Scannen Sie den QR-Code, um die Move It-App herunterzuladen. Alternativ können Sie auch im Appstore oder Playstore nach Move it Fitness suchen. KOPPELN DES GERÄTS Hinweis: Bitte koppeln Sie das Produkt über die App und nicht über die System-Bluetooth-Einstellung Ihres Telefons. - Page 11 TRAINING STARTEN - rufen Sie die Move It APP auf - klicken Sie unten im Menü auf „Workouts“ - klicken Sie oben auf der Seite auf „Dumbbell“, um verschiedene Trainingsmodi auszuwählen.
-
Page 12: Hardware Anweisungen
HARDWARE ANWEISUNGEN • Das Produkt schaltet sich automatisch ab, wenn es über 3 Minuten nicht benutzt wird. • Es gibt keinen Netzschalter am Produkt. Der LED-Bildschirm leuchtet automatisch auf, wenn die APP angeschlossen wird. Das Gerät wird ausgeschaltet und geht in den Ruhezustand wenn die App „Move it“ länger als 15 Sekunden unterbrochen wird. -
Page 13: Gewährleistungsrecht
GEWÄHRLEISTUNGSRECHT Herzlichen Glückwunsch zu Ihrer Entscheidung zum Kauf eines Produkts aus dem Hause AsVIVA. Gemäß des zum 01. Januar 2002 geänderten europäischen Gewährleistungsrechts, steht Ihnen eine gesetzliche Gewährleistungsfrist von 2 Jahren zu. Die Gewährleistungsfrist beginnt mit der Übergabe der Ware durch den Fachhändler. -
Page 15: Warranty Terms
Four our equipment we provide the leaga warranty of 2 years. For spare parts and repair orders, please contact your dealer or directly to AsVIVA, indictating the customer number or invoice number. Our service is available 24 hours. -
Page 16: Important Information About Your Product
If nevertheless an item is defective and needs to be repaired, you do not like the product or you have any suggestions about it, please do not hesitate to contact our support team at service@asviva.de. We will find a solution for your request together. -
Page 17: Important Safety Instructions
IMPORTANT SAFETY INSTRUCTIONS Please read the instructions carefully before you start the assembly! • Assemble the device according to the assembly instructions and use only the device-specific individual parts enclosed for the assembly of the device. • Make sure that the sensor is correctly installed so that a training recording via app can be guaranteed. -
Page 18: Parts List
PART LIST 1x Dumbell with intelligent sensor module 1x Dumbell (Non-intelligent) 1x USB charging cable SPECIFICATIONS Model: IA-DB-001 Platform: Apple iOS 9.0 or Android 4.4 or higher Connection: Bluetooth 4.0 Sensor: 6-axis Gyroscope Sensor Battery: 180mAh Lithium battery Charging Port: Micro USB Input: 5V - 1A... -
Page 19: Sensor Module
SENSOR MODULE TAKE OUT THE SMART MODULE Carefully push the small hole on the back of the dumbbell and remove the sensor module. ACTIVE SMART MODULE Connect the sensor module, for power supply and charging, via the USB cable. The LED display screen is activated when it is lit. Please charge the sensor module over 20 minutes before first use. - Page 20 SENSOR MODULE ASSEMBLY SMART MODULE Pay attention to the slot position and insert the smart module into the dumbbell as shown. The display lights up.
- Page 21 SENSOR-MODULE STATUS-DISPLAY Slowly flashing: Charging (1 grid is about 25% power) Last lighting: Fully charge Fast flashing: Low battery reminding (Remaining: 10% power) Slowly flashing: Waiting for connecting Move it App Last lighting: Connected Move it App Slowly flashing: Charging (1 grid is about 25% power) SOUND Feedback Disconnect with Move it App...
-
Page 22: App
INSTALLATION MOVE-IT APP Scan the QR code to download the Move It app. Alternatively, you can search for Move it Fitness in the Appstore or Playstore. PAIRING THE DEVICE Hinweis: Please pair the product through the app and not through your phone‘s system Bluetooth setting. Google‘s updated framework may require Android users to turn on GPS in addition to Bluetooth to maintain a stable connection with the product. - Page 23 TRAINING STARTEN - Enter the Move It APP - click on „Workouts“ at the bottom of the menu, - click „Dumbbell“ at the top of the page to select different workout modes.
-
Page 24: Hardware Instructions
HARDWARE INSTRUCTIONS • The product will turn off automatically if it is not used for more than 3 minutes. • There is no power switch of the product. The LED screen will light up automatically when the APP is connected. The device will turn off and go into sleep mode when the app „Move it“ is interrupted for more than 15 seconds. -
Page 25: Warranty Device
WARRANTY DEVICE Congratulations on your decision to purchase a device from AsVIVA. According to the European guarantee law, amended as of January 1, 2002, You have a legal warranty period of 2 years. The guarantee period begins with the handover of the device by the specialist dealer.