
Related Manuals for Charmhigh CHM-T36VA


Summary of Contents for Charmhigh CHM-T36VA
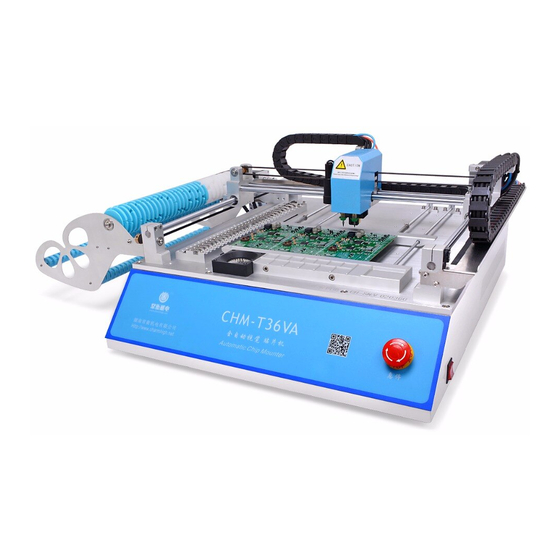
- Page 1 2016 Automatic Chip Mounter (CHM-T36VA) Operating Manual 长沙常衡机电设备有限公司 http://www.charmhigh.net...
-
Page 2: Table Of Contents
Table of Contents REVISION HISTORY ........................ 4 INSTALL THE MACHINE ......................4 PRODUCT LIST ........................4 HARDWARE REQUIREMENTS AND COMPATIBLE SOFTWARE ......... 5 4.1...................... 5 ARDWARE EQUIREMENTS 4.2......................5 OMPATIBLE OFTWARE NOTICES ............................ 5 TECHNICAL PARAMETERS ....................6 GLOSSARY AND SOFTWARE PARAMETERS.............. - Page 3 FEEDER HARDWARE ......................42 NOZZLE HARDWARE ......................44 PCB CLAMPS ......................... 44 WORK FLOW .......................... 45 MAINTENANCE ........................46 WARRANTY ..........................46...
-
Page 4: Revision History
1. Revision History Date Description Version 2016-06-01 Create document V1.0 CHM-T36VA_UserManual_OpenSource1p0 This revision document is a user-contributed translation of the user manual by a native English speaker that is hopefully clearer than the original CharmHighV1.0. Names have been changed to be more intuitively obvious, consistent across the functions and compatible with industry jargon. -
Page 5: Hardware Requirements And Compatible Software
4. Hardware Requirements and Compatible Software 4.1. Hardware Requirements All equipment is built-in. An external control computer is needed for the CHM-T36VA model. It is recommended the machine be placed on a sturdy table or floor. Strong room lights may degrade the visual alignment system. -
Page 6: Technical Parameters
6. Technical Parameters model CHMT36VA PCB area 10mm×10mm~355mm×355mm X, Y axis stroke 400×460mm Z axis stroke 15mm number of nozzles feeders ordinary feeders 29 pcs, front bulk IC tray 14 pcs visual support dual cameras Closed-loop servo high-voltage drive system Motor drive (Ensures the accuracy of operation) Z axis back position... - Page 7 Nozzle part that holds component with vacuum suction Nozzle nozzle section 1 or 2 when picking part Pick picking up component at feeder Pick angle part orientation in tape, normally in 90 degree increments Pick offset x and y offset of nozzle at pick up Pick mode selects normal or dual (nozzle) placement mode Vision centering...
-
Page 8: Mechanical Structure
8. Mechanical Structure The figure below shows the machine layout as a whole. IC tray(PCB)clamping area down camera pull needle ordinary meterial stack power nozzle Belt receiving wheel PCB clamping area tape placeing area IC material stack power switch emergency stop up camera Figure 8.1. -
Page 9: Booting The Machine
(13) Power switch: Turn on this switch to boot software. When shutting down, first close the software and then turn off this switch. 9. Booting the Machine Turn on the power switch and then run the “SmtMain” program. If camera device not connected, close software, power down, unplug/plug USB cable and then turn on again. -
Page 10: Run
10. Run The machine needs to select a work file to run. From the main screen, click on the “Run” button to display the following screen, where the work file can be selected. Figure 10.1. Window after “Run”, showing work files. (1) Work file list: The middle of the screen lists existing work files “*.dpv”. -
Page 11: Component
Figure 10.2. Window after “Run / Edit / Component tab”, listing components. 10.1.1. Component The screen shown above is used for managing individual components in PCB. It shows a list of all components in the selected work file. The rows are color coded: Gray skip component;... - Page 12 Figure 10.3. Window for editing components. (1) Component ID: Set the Component ID number. This number is unique and cannot repeat in the same work file; (2) Feeder: Set the feeder number (location) of this component. When specifying a new feeder, the feeders list will automatically add a new entry; (3) Place speed: Sets the placement speed, in range 50%-100%.
- Page 13 advanced and pick attempted 2 times. After tape is advanced 2 times (3 positions with 6 tries total) with insufficient vacuum, the machine will alarm and stop. It is suggested to uncheck this function when mounting expensive or difficult parts, such as cylindrical components;...
-
Page 14: Feeder
Additional commands for the two modes are: (6) Vision mode: The center of the down-camera image is moved to the component coordinate. The image is displayed on the right. Move the image until the crosshairs are centered on the component. Enlarge: Toggles between a normal and zoomed-in image;... - Page 15 the feeder information. Changing feeder parameters make global changes to all components associated to that feeder. Here, when function descriptions are the same as in components tab, it is left blank. Figure 10.6. Window after “Run” / “Edit” / Feeder tab, listing feeders. (1) Feeder: Displays feeder information from work file.
- Page 16 Figure 10.7. Window for editing feeders. should be assigned by the user according to feeder type: 1-29: feeder tapes, at side of machine; 60-74: fixed IC tray, at front of machine; 80-99: user supplied IC tray, placed in PCB area; (2) Pick offset X\Y: Offset used to center nozzle to component at feeder;...
- Page 17 window to align the feeder system. Details in next section; (15) Pick offsets used: Text in red, when option chosen in set parameters window. 10.1.2.1. Feeder Calibrate The feeder alignment must be checked every job since the tape is installed by hand and the tape holes must be in the correct location for the needle pull operation.
- Page 18 10.9. Window to advance the tape with the pull needle. “Needle advance” button is the Figure icon just below the Y:0.02 text. Vision mode: By clicking on the “vision” button, the image again appears. The arrow buttons can now be used to accurately center the image crosshairs over the component in the tape.
-
Page 19: Ic Tray
IC Tray 10.1.3. The IC tray is used to pick-up components in the back PCB area of the machine, with locations defined by the user. The coordinates follow a sequence from left to right and front to back. The following window shows the pickup sequence. The IC tray list will be populated automatically if the feeder number is between 80 to 99. -
Page 20: Batch
Figure 10.12. Window for editing batch parameters. Note that the IC tray should not be put on the top of fixture pillar or the pull needle may run into IC tray and be damaged. The figure below shows how to clamp properly. Figure 10.13. - Page 21 Batch is defined in two ways. One is by coordinate, where the user defines the origin of each sub-board. The batch list must have at least one record, see below. The first origin is always set with zero offset, ignoring the “Place coordinate X\Y” value. Window after “Run / Edit / batch tab”, listing batch steps.
-
Page 22: Pcb
(2) Spacing X\Y: Spacing of two neighboring circuits (3) Number X\Y: Number of circuits in X\Y direction. It is possible to skip circuits labeled by “PCB ID” by selecting the “Add skip” button. 10.1.5. PCB It is necessary to calibrate the position of the PCB in the machine. Two or three calibration points are defined in the screen shown below;... -
Page 23: Load Work File
and clicking calibrate to verify the component is now centered; (4) Save: Saves the set offsets for the PCB calibration; Figure 10.17. Window for calibrating PCB points. 10.2. Load Work File The load work window is used to run the machine and monitor its progress. (1) Current step: Showing current component step and total number, click to set the component step which will mount next;... -
Page 24: Diagnostics
(13) Step++: Place components one step and operation at a time. Used for testing; (14) Run: Run normally; (15) Stop: Stop placement; Window after “Run / Load”, to run work file. Figure 10.18. 11. Diagnostics The test window is used for testing modules to check for proper operation. (1) Nozzle 1\2 down: Nozzle lowers when button pressed;... -
Page 25: Set
(12) Origin reset, home: Reset the origin at front-left, then move to home; (13) Nozzle 1\2 to UpCamera: Move nozzle 1\2 to position of up camera; (14) Home (back-right): Move head to home at back-right. Note: Parameters changed in this window will not be saved. 11.1. -
Page 26: System Set
(9) Clear system logs: Click to clear all system logs; (10) Component place offset: Global offset for all components in X, Y and angle, applied only during place operation and not during vision and calibration. Used to fine-tune component locations on the PCB. Offsets are not saved when closing the software. - Page 27 12.2. Window after “Set / System set”, showing system set choices. Figure After clicking, a window opens with the up-camera image, as shown below; Place the calibration board on the up camera. Manually adjust its position to center on the crosshairs; Click “Set”...
- Page 28 Figure 12.4. Down-camera image of the calibration board. (2) Calibrate nozzle 1\2: This alignment must be done after the step “calibrate cameras”. In the popup window, move the nozzle to the center of the crosshairs and click “Set”; (3) Calibrate pull needle, single …: This alignment was described previously in the “Align Feeders”...
-
Page 29: Vacuum Detection Set
12.2. Vacuum Detection Set The window is show below. 12.4. Window after “Set / System Set / Vacuum detection set”, for editing vacuum Figure threshold parameters. (1) Vacuum 1\2-suction\blow \toggle: Toggle nozzle for suction or blowing gas; (2) Air pressure status list: The pressure values here are only valid after at least one suction operation, or it will display 0. -
Page 30: Backup/Restore
12.3. Backup/Restore Screen as show below. 12.5. Window after “Set / System Set / Backup/Restore”, used to change storage of Figure system parameters. (1) Backup system set: Backup all of system parameters; (2) Restore system set: Restore all of system parameters; (3) Restore factory set: Restore all of system parameters to factory;... -
Page 31: Generating The Csv File
13.1. Window after “File”, for converting CSV files and file functions. Figure (1) File Convert: To use CSV files generated by the PCB software, the CSV file must first be converted. The usage of convert tool is shown below; (2) File view: Browse all CSV and work files in system; (3) File Import\Export: Import or export CSV file or work file. - Page 32 Figure 13.2. Image of Altium program, showing setting the origin. (3) Altium showing “File / Assembly Output / Generates pick and place files”; Figure 13.3. Image of Altium program making a pick and place file.
-
Page 33: Protel
(4) As shown below, select “CSV” and “Metric” in the popup dialog box, click “OK” to finish. The generated CSV file can be found in same directory as project outputs. (5) The CSV format is given by Designator/Footprint/MidX/MidY/RefX/RefY/PadX/PadY/Layer/Rotation/Comment where black=input data, blue=displayed green=not used. - Page 34 Figure 13.5 (4) See figure below, select “Pick Place” and then click “Next” in popup dialog box; Figure 13.6. (5) See figure below, input file name, then click “Next”;...
- Page 35 Figure 13.7. (6) See figure below, select “CSV” then click “Next”; Figure 13.8. (7) See figure below, select “Metric” then click “Next”; Figure 13.9 (8) See figure below, right click the file just generated in the list, select “Generate CAM Files” from popup menu;...
-
Page 36: File Convert
Figure 13.10 (9) See figure below, right click the “CAM” folder just generated, select “Export” from popup menu to finish. Figure 13.11 13.2. File Convert After selecting Convert File, the CSV files are listed as show below. - Page 37 13.12. Window after “File / Convert File”, listing CSV files. Figure (1) Open:Open selected CSV file; (2) Delete:Deletes selected CSV file; The read-in file is shown below. Click “Settings” and then “convert”. 13.13. Window after “File / Open”, showing CSV entries. Figure (1) Edit: Edit information of selected CSV item;...
-
Page 38: Feeders
(3) Settings: Set conversion for top or bottom layer. When bottom, mirroring is normally checked; (4) Convert: Convert CSV file to work file; 13.2.1. Feeders After conversion, the feeders tab is displayed, as shown below. The converted file is typically saved next since it can be edited later in the “Run / Edit” menu. The height listing of 50 seems to be an error as it is set to 0.5 when loaded to run. -
Page 39: Batch
13.15. Window after “File / Convert File / Open / Convert / Component tab”. Figure (1) Use dual nozzle1: Check indicates that two components will be picked at one time by two nozzles, from the same feeder. (2) Use dual nozzle2: Check indicates that two components will be picked at one time by two nozzles, from different feeders;... -
Page 40: Log
13.16. Window after “File / Convert File / Open / Convert / Batch tab”. Figure 14. Log The log window is show below. 14.1. Window after “Log”, showing past work jobs. Figure (1) Log list: Each line records information of running one time; (2) Sum: Shows component count mounted for each feeder in table. -
Page 41: System Log
14.2. Window after “Log / Sum”, showing more detailed statistics. Figure 15. System Log System log is used to view records generated by the system. 15.1. Window after “System Log”, showing system records. Figure... -
Page 42: Feeder Hardware
16. Feeder Hardware Parts are installed in feeders corresponding to its feeder number set in the software. Feeder parameters are displayed in the feeders tab. There are 3 feeder types: (1) Tape feeders: Feeders 1-29 are used to load parts embedded in tape, which accommodates 3 different widths: 8 mm feeders 1-22;... - Page 43 Figure 16.2. Tape feeders, with cover film (semi-transparent) pulled back over batten (blue line). Green circle is the position for the needle pull. If cover film is short, attach a tape extender. Thread it under a second rod and to the top of the belt receiving wheel, as pictured in below. Figure 16.2.
-
Page 44: Nozzle Hardware
program the machine to pick up the part at its center instead of the tray center. (3) User IC tray: Feeders 80-99 are used to load external trays of parts from the back of the PCB area, as discussed previously. 17. -
Page 45: Work Flow
19. Work Flow (1) Create CSV file: Export CSV (pick-and-place) file by your PCB design software. Units must be mm. (13.1); (2) Start Machine: Turn on the power switch on right side. (9); (3) Run SmtMain: Double click on icon to start control program. (9); (4) Check origin (optional): When starting, the stage sets its origin using limit switches. -
Page 46: Maintenance
20. Maintenance Close software before switching off the power; Clean after using; According to use, smear some grease to bearings regularly; Cover machine if unused for a long time. 21. Warranty Warranty range: SMT machine itself; ...
Need help?
Do you have a question about the CHM-T36VA and is the answer not in the manual?
Questions and answers