Coltri Compressors MCH-6 Assembly Manual
Hide thumbs
Also See for MCH-6:
- Use and maintenance manual (60 pages) ,
- Use and maintenance manual (28 pages) ,
- Use and maintenance manual (88 pages)
Advertisement
Quick Links
Manuale montaggio automatismi:
Assembly manual of automatic controls:
PRESSOSTATO PER LO SPEGNIMENTO
AUTOMATICO
AUTOMATIC SHUT-OFF SWITCH
SCARICO CONDENSA AUTOMATICO
AUTOMATIC CONDENSATE DISCHARGE
CONTAORE DI FUNZIONAMENTO
MA-MCH6-0014
WORKING HOUR METER
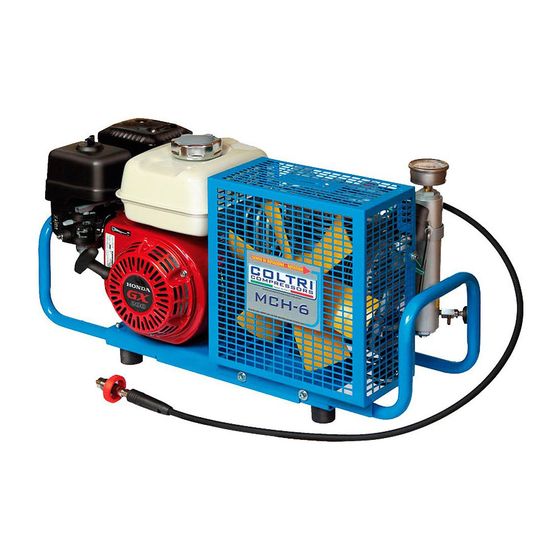
MCH-6
Compressore ad alta pressione per aria respirabile e gas tecnici
High pressure compressors for pure breathing air and technical gases
Advertisement

Related Manuals for Coltri Compressors MCH-6


Summary of Contents for Coltri Compressors MCH-6
- Page 1 PRESSOSTATO PER LO SPEGNIMENTO AUTOMATICO AUTOMATIC SHUT-OFF SWITCH SCARICO CONDENSA AUTOMATICO AUTOMATIC CONDENSATE DISCHARGE CONTAORE DI FUNZIONAMENTO MA-MCH6-0014 WORKING HOUR METER MCH-6 Compressore ad alta pressione per aria respirabile e gas tecnici High pressure compressors for pure breathing air and technical gases...
-
Page 3: Safety Precautions
MA-MCH6-0014 PRESSOSTATO PER LO SPEGNIMENTO AUTOMATICO AUTOMATIC SHUT-OFF SWITCH SCARICO CONDENSA AUTOMATICO AUTOMATIC CONDENSATE DISCHARGE CONTAORE DI FUNZIONAMENTO WORKING HOUR METER PRECAUZIONE DI SICUREZZA: Qualsiasi intervento di manomissione al compressore e/o a componenti (incluso l’utilizzo di ricambi non originali) non autorizzato da AEROTECNICA COLTRI S.p.A. solleva la ditta costruttrice da qualsiasi responsabilità... - Page 4 MA-MCH6-0014 PRESSOSTATO PER LO SPEGNIMENTO AUTOMATICO AUTOMATIC SHUT-OFF SWITCH Kit Pressostato per lo spegnimento automatico Automatic shut-off switch kit 27mm Svitare il tappo superiore Togliere il tappo superiore Unscrew the upper cap Remove the upper cap PRESSOSTATO PER LO SPEGNIMENTO AUTOMATICO - AUTOMATIC SHUT-OFF SWITCH pag.
- Page 5 MA-MCH6-0014 27mm Mettere il tappo superiore forato Avvitare il tappo superiore forato Place the perforated upper cap Screw the perforated upper cap Loktite Applicare Loktite 243 sul filetto del pressostato Mettere il pressostato sul tappo superiore forato Apply Loktite 234 on the pressure switch threads Place the pressure switch on the perforated upper cap 17mm Avvitare il pressostato sul tappo superiore forato...
- Page 6 MA-MCH6-0014 Preparare i fili elettrici per il collegamento Posizionare i fili sui contatti Prepare the electrical wires for the connection Position the wire to the contact part Fissare i fili ai contatti Montare il connettore Connect the wire to the contact part Assemble the connector Togliere le 4 viti di fissaggio Remove the 4 fixing screws...
- Page 7 MA-MCH6-0014 Togliere il coperchio Togliere le 2 viti di fissaggio del fermo condensatori Remove the cover Remove the 2 fixing screws condensers lock Togliere il fermo condensatori e le spugne superiori Spostare i condensatori e togliere le spugne inferiori Remove the condensers lock and the upper pads Move the condensers lock and remove the lower pads Ø16 Con un trapano realizzare un foro da Ø16 mm...
- Page 8 MA-MCH6-0014 Passare il filo nel passacavo Preparare il filo elettrico Pass the cable in the cable bushing Prepare the electrical wire Preparare i fili elettrici per il collegamento Togliere una delle viti di fissaggio della scatola elettrica Prepare the electrical wires for the connection Remove one electrical boards fixing screw Attorcigliare il filo di massa alla vite Mettere la vite di fissaggio della scatola elettrica...
- Page 9 MA-MCH6-0014 Staccare il filo bianco relè Tagliare il filo bianco relè Disconnect the white relay wire Cut the white relay wire Preparare il filo bianco relè Unire il filo bianco con quello marrone Prepare the electrical wires for the connection Join the white wire with the brown Mettere un morsetto sui fili marrone e bianco e fissarli Mettere un connettore Faston F sul filo blu...
- Page 10 MA-MCH6-0014 Collegare, con crimpatrice, il filo blu con un connettore Faston F Posizionare il connettore del filo blu sulla sede dell’interruttore Connect the blue wire to a Faston F crimp connector with a crim- Place the blue wire connector on the pin switch ping tool Schema di collegamento Mettere le spugne inferiori e riposizionare i condensatori nella...
- Page 11 MA-MCH6-0014 Mettere il coperchio Mettere le 4 viti di fissaggio Place the cover Place the 4 fixing screws Montare il connettore sul pressostato Fissare il connettore Assemble the connector in the pressure switch Set the connector Pressostato per lo spegnimento automatico Schema elettrico Automatic shut-off switch Wiring diagram...
- Page 12 MA-MCH6-0014 SCARICO CONDENSA AUTOMATICO AUTOMATIC CONDENSATE DISCHARGE Kit Scarico condensa automatico Automatic condensate discharge kit Loktite 17mm Togliere il rubinetto scarico condensa dal separatore Applicare Loktite 243 sul filetto del raccordo Remove the condensate drain from the separator Apply Loktite 234 on the fitting threads SCARICO CONDENSA AUTOMATICO - AUTOMATIC CONDENSATE DISCHARGE pag.
- Page 13 MA-MCH6-0014 Loktite 12mm Avvitare il raccordo sul raccordo a T Applicare Loktite 243 sul filetto del raccordo Screw the fitting on the “T” fitting Apply Loktite 234 on the fitting threads 12mm Avvitare il raccordo sul separatore di condensa Assemblare il connettore filtro sinterizzato Screw the fitting on the condensate separator Assemble the connector in-line filter Loktite...
- Page 14 MA-MCH6-0014 Loktite 17mm Avvitare il raccordo sul connettore filtro Applicare Loktite 243 sul filetto del raccordo Screw the fitting on the filter connector Apply Loktite 234 on the fitting Loktite 17mm Avvitare il connettore filtro sul raccordo a T Applicare Loktite 243 sul filetto del rubinetto scarico condensa Screw the filter connector on the “T”...
- Page 15 MA-MCH6-0014 Posizionare l’entrata IN della valvola solenoide alta pressione sul Avvitare la valvola solenoide alta pressione connettore filtro Screw the high pressure solenoid valve Place the entrance-IN of the high pressure solenoid valve to the fil- ter connector Loktite Applicare Loktite 243 sul filetto del raccordo a L Avvitare il raccordo a L sulla valvola solenoide alta pressione Apply Loktite 234 on the L fitting Screw the L fitting on the high pressure solenoid valve...
- Page 16 MA-MCH6-0014 Avvitare il dado di tenuta sulla bobina Prendere il timer e settarlo come raffigurato Screw the lock nut on the coil Take the timer and set it as shown in the picture Posizionare il timer sul solenoide Smontare il connettore Place the timer on the solenoid valve Disassemble the connector Preparare il filo elettrico...
- Page 17 MA-MCH6-0014 Posizionare i fili sui contatti Fissare i fili ai contatti Position the wire to the contact part Connect the wire to the contact part Montare il connettore Assemble the connector Posizionare il connettore sul timer Fissare il connettore Place the connector on the timer Set the connector SCARICO CONDENSA AUTOMATICO AUTOMATICO - AUTOMATIC CONDENSATE DISCHARGE pag.
- Page 18 MA-MCH6-0014 Togliere le 4 viti di fissaggio Remove the 4 fixing screws Togliere il coperchio Togliere le 2 viti di fissaggio del fermo condensatori Remove the cover Remove the 2 fixing screws condensers lock Togliere il fermo condensatori e le spugne superiori Spostare i condensatori e togliere le spugne inferiori Remove the condensers lock and the upper pads Move the condensers lock and remove the lower pads...
- Page 19 MA-MCH6-0014 Ø16 Con un trapano realizzare un foro da Ø16 mm Posizionare il passacavo Use a drill to make a hole Ø16 mm Place the cable bushing Passare il filo nel passacavo Preparare il filo elettrico Pass the cable in the cable bushing Prepare the electrical wire Preparare i fili elettrici per il collegamento Mettere un connettore Faston M/F sul filo marrone...
- Page 20 MA-MCH6-0014 Collegare, con crimpatrice, il filo marrone con un connettore Mettere un connettore Faston M/F sul filo blu Faston M/F Place the Faston M/F crimp connector in the blue wire Connect the brown wire to a Faston M/F crimp connector with a crimping tool Collegare, con crimpatrice, il filo blu con un connettore Faston M/F Togliere una delle viti di fissaggio della scatola elettrica...
- Page 21 MA-MCH6-0014 Staccare il filo bianco relè Staccare i fili rosso e grigio Disconnect the white relay wire Disconnect the red and gray whites Collegare il filo rosso con il filo blu Schema di collegamento Connect the red wire with blue wire Connection Diagram Collegare il filo grigio con il filo marrone Schema di collegamento...
- Page 22 MA-MCH6-0014 Riposizionare i fili rosso e grigio nella sede originale Schema di collegamento Place the red and gray wires in its original location Connection Diagram Riposizionare il filo bianco relè nella sede originale Mettere le spugne inferiori Place the white relay wire in it original location Place the lower pads Riposizionare i condensatori nella propria sede Mettere il fermo condensatori e le spugne superiori...
- Page 23 MA-MCH6-0014 Mettere le 2 viti di fissaggio del fermo condensatori Mettere il coperchio Place the 2 fixing screws condensers lock Place the cover Mettere le 4 viti di fissaggio Fissare con fascette il filo al carter Place the 4 fixing screws Secure with wire ties to the fan cover Scarico condensa automatico Schema di collegamento...
- Page 24 MA-MCH6-0014 CONTAORE DI FUNZIONAMENTO WORKING HOUR METER Posizionare il contaore sul carter copriventola Fissare con fascette il contaore al carter copriventola Place the hour meter in the fan cover Secure with wire ties to the fan cover CONTAORE DI FUNZIONAMENTO - WORKING HOUR METER pag.
- Page 25 MA-MCH6-0014 Togliere la calotta elettrica della candela del motore Seleziona il cavo rosso del contaore Remove the electric cover from the spark plug Select the red wire Attorcigliare il cavo rosso sul cavo della candela Mettere la calotta elettrica sulla candela del motore Twist the red wire in the spark plug cable Place the electric cover on the spark plug 10mm...
- Page 26 MA-MCH6-0014 10mm Inserire il connettore sotto la vite Avvitare la vite di fissagio del carter motore Insert the connector under the screw Screw the engine cover screw Fissare con fascette il filo al telaio Fissare con fascette il filo al telaio Secure with wire ties to the frame Secure with wire ties to the frame Contaore di funzionamento...
- Page 28 COLTRI ASIA PACIFIC No. 94/5 , Moo. 3 , T. Khao Hin Sorn A .Phanomsarakarm, Chachoengsao. 24120 Thailand Tel: + 66 38 855 103 to 5 Fax: + 66 38 855 106 www.aerotecnicacoltriasiapacific.com e-mail: c.benelli@aerotecnicacoltriasiapacific.com COLTRI SUB EGYPT El Rowayset (Industrial Area) Sharm El Sheikh - South Sinai - Egypt Tel: +20 (0) 366 44 74 Fax: +20 (0) 366 44 73...
Need help?
Do you have a question about the MCH-6 and is the answer not in the manual?
Questions and answers