Table of Contents
Advertisement
Advertisement
Table of Contents

Related Manuals for RedMax EBZ8560


Summary of Contents for RedMax EBZ8560
- Page 1 Workshop manual EBZ8560, EBZ8560RH English 1662 - 003 - 04.11.2021...
-
Page 2: Table Of Contents
Contents 1 Introduction 1.1 Document description..........3 1.2 Target group............3 1.3 Revisions..............3 1.4 Safety..............3 1.5 Servicing tools............3 2 Safety 2.1 Safety definitions............4 2.2 General safety instructions........4 2.3 Special safety instructions........4 2.4 Symbols on the product......... 4 3 Prepare and do servicing on the product 3.1 Maintenance schedule for the service center..5 4 Servicing data 4.1 Servicing data ............ -
Page 3: Introduction
1.5 Servicing tools The manual gives information about necessary servicing tools. Always use original tools from RedMax. 1662 - 003 - 04.11.2021 Introduction - 3... -
Page 4: Safety
2 Safety 2.1 Safety definitions Use approved hearing protection and approved eye protection. If the Warnings, cautions and notes are used to point out environment contains dust, use specially important parts of the manual. respiratory protection. WARNING: Used if there is a risk of injury or death for the operator or bystanders if the instructions in the manual are not obeyed. -
Page 5: Prepare And Do Servicing On The Product
3 Prepare and do servicing on the product 3.1 Maintenance schedule for the service center Maintenance Daily Weekly Monthly Clean the external surfaces. Make sure that the throttle control operates correctly. Handle and Make sure that the start/stop switch operates correctly. Refer to throttle trigger on page 39 . -
Page 6: Servicing Data
4 Servicing data 4.1 Servicing data ● Lubricate with grease. ■ Lubricate with two-stroke oil. 2–3 Nm 2–3 Nm 2x 8–12 Nm 3x 1.5–2 Nm 2x 3–4.5 Nm 2x 3–4 Nm 9–13 Nm 16 mm 8–12 Nm 4x 6–9 Nm 4x 4–6 Nm 4x 2–3 Nm 2x 2.5–4 Nm... - Page 7 2x 2.5–3.5 Nm 4–5 Nm 2x 4–6 Nm 10 mm 2x 2.5–3.5 Nm 1662 - 003 - 04.11.2021 Servicing data - 7...
- Page 8 1-1.5 Nm 40–50 Nm 14 mm 3x 3–4 Nm 8x 3–4 Nm 4x 3–4 Nm 2x 0.5–1 Nm 6x 3–4 Nm 8 - Servicing data 1662 - 003 - 04.11.2021...
-
Page 9: Servicing Tools
5 Servicing tools 5.1 Servicing tools 1662 - 003 - 04.11.2021 Servicing tools - 9... - Page 10 Item Description Use to Article number Torx wrench Remove and install torx screws. 578 28 90-01 Socket key Remove and attach nuts. 502 50 23-01 Puller Remove the rotor. 577 40 97-01 Air gap gauge 0.3 mm Install the ignition module. 516 88 03-01 Piston stop Lock the piston when the crankshaft...
-
Page 11: Function Overview
3. Loosen the fuel tank cap to release the pressure in stroke engines. the fuel tank. • If RedMax two-stroke oil is not available, use a different two-stroke oil of good quality that is 4. Remove the fuel tank cap. formulated for air-cooled engines. Consult your servicing dealer when you select an oil. -
Page 12: Repair Instructions
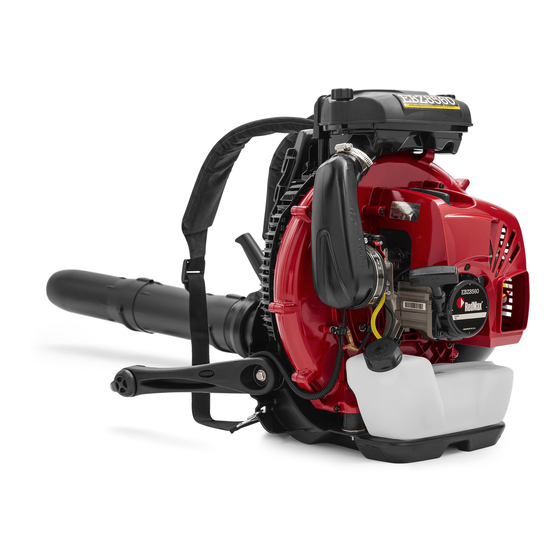
7 Repair instructions 7.1 Product overview for repair instructions 12 11 1. Frame 7.2 To clean and examine the product parts 2. Harness • Clean and examine all parts fully. You find more 3. Fan guard instructions in the chapter for each part if special 4. -
Page 13: Covers
7.3 Covers 4. Discard the 4 old screws. 5. Install in the opposite sequence. 7.3.1 To remove and install the cylinder cover CAUTION: Use 4 new screws when you 1. Remove the 5 screws and the cylinder cover. install the starter. 7.4.2 To disassemble the starter WARNING: Use protective glasses to prevent injury to the eyes if the recoil spring ejects. - Page 14 6. Remove the screw (A) and the washer (B). 4. Remove the 2 snap rings. 5. Remove the 2 starter pawls. 7. Remove the puller (C) and the spring (D). 8. Remove the washer (E) and the pulley (F). 9. Carefully remove the recoil spring (G) from the starter housing.
-
Page 15: Muffler
7.5 Muffler 4. Attach the muffler and screw (A), temporary tighten the screw (A). 7.5.1 To remove and install the muffler To remove and 1. Remove the cylinder cover. Refer to install the cylinder cover on page 13 . 2. Remove the 3 screws. CAUTION: Use a new gasket when you install the muffler. -
Page 16: Air Filter
3. Remove the screws (E) and remove the exhaust interval of 40 hours of operation or less if it is heavy duct (D). operation conditions. 1. Loosen the knobs that hold the air filter cover. Note: The inner surfaces of the muffler contain chemicals that can cause cancer. -
Page 17: Carburetor
9. Install the foam filter (B) into the air filter cover (A). 11. Install the air filter cover (A) to the air filter body (D) Make sure it is set correctly. with the knobs (E). 7.7 Carburetor 10. Install the paper filter (C) into the air filter body (D). Make sure it is set correctly. - Page 18 7.7.2 Overview of the carburetor 15. Screw 1. Throttle cable adjustment screw 16. Metering lever 2. Locknut 17. Metering lever spring 3. Throttle cable bracket 18. Metering lever pin 4. Screw 19. Needle valve 5. Throttle cable swivel 20. Fuel screen 6.
- Page 19 7.7.3 To disconnect and connect the throttle cable 4. Remove the fuel hoses. 1. Remove the carburetor cap. 5. Remove the 3 screws (A) and the spit back plate (B) 2. Remove the swivel cap and the throttle cable. 3. Connect in the opposite sequence. 6.
- Page 20 4. Remove the metering diaphragm (D) and the CAUTION: Use 4 new screws and a new metering gasket (E). insulator gasket when you install the insulator. 5. Remove the fuel pump assembly (F), the fuel pump diaphragm (G) and the fuel pump gasket (H). CAUTION: Use a new gaskets when you 6.
- Page 21 10. Assemble in the opposite sequence. Make sure that 7.7.7 Carburetor adjustments the distance (A) between the surface of metering To adjust the carburetor means that you adjust the chamber (B) and the metering lever (C) is 1.65±0.16 engine to the local conditions such as weather, altitude and fuel.
-
Page 22: Ignition System
4. Do the procedure again for the needle cap of the 8. Set the product to full throttle and turn the high high speed needle. speed needle clockwise or counterclockwise to get the maximum engine speed (A). Engine speed (rpm) 5. - Page 23 7.8.2 To examine the ignition system 5. If no spark occurs, remove the spark plug and connect the ignition tester (A) to the spark plug cap 1. Examine the flywheel for wear or damages. Replace Servicing tools on page 9 . (B).
-
Page 24: Flywheel
7.9 Flywheel 5. Remove the 2 screws (A), the ignition module and the 2 spacers (B). 7.9.1 To remove and install the flywheel To remove and 1. Remove the cylinder cover. Refer to install the cylinder cover on page 13 . To remove and 2. -
Page 25: Cylinder And Piston
8. Remove the key. 8. Remove the 2 screws and the heat shield. 9. Clean the crankshaft and the center hole in the 9. Remove the 4 screws. flywheel before you install the flywheel. 10. Install in the opposite sequence. CAUTION: Make sure that you install the correct nut. - Page 26 14. Remove the piston pin from the piston with a piston 16. Remove the piston rings, if it is necessary. Servicing tools on page 9 . pin tool. Refer to 17. Examine the piston, piston rings and cylinder for To examine the piston on page 27 . wear.
- Page 27 7.10.2 To clean the cylinder and piston • Make sure that the cylinder does not have score marks. CAUTION: Clean carefully. The soft aluminum parts are easily damaged. • Remove the carbon deposits from these parts: 7.10.4 To examine the piston •...
- Page 28 • Put the piston ring in the cylinder and measure the 3. Put the inlet seal between the carburetor and the Servicing tools on page 9 . space with an air gap tool. The space must not be insulator. Refer to more than 1 mm.
-
Page 29: Crankshaft And Crankcase
8. Tighten the 3 muffler screws. WARNING: The engine and the muffler will be hot. 9. Remove the spark plug. 10. Attach the pressure test plug in the spark plug hole. 2. Remove the attachment of the compression tester. Servicing tools on page 9 . Refer to 11. - Page 30 To remove and install 9. Remove the muffler. Refer to 10. Remove the 4 screws. the muffler on page 15 . 10. Remove the 4 screws and the engine. 11. Push a flat screwdriver into the 2 notches on the crankcase and remove the flywheel side of the crankcase.
- Page 31 7.11.3 To clean and examine the crankshaft and 7.11.4 To assemble the crankcase crankcase 1. Put one of the crankcase halves on the crankcase Servicing tools on page 9 . support. Refer to The crankshaft cannot be repaired, replace it if it is worn or damaged.
- Page 32 4. Turn the part with the key slot away from the fan 10. Do a check of the distance between crank weight side of the crankcase. and the crankcase on the two sides. If the distances are not equal, use a plastic hammer to adjust the crankshaft.
-
Page 33: Fuel Tank
To remove and install 14. Push the oil seals into the crankcase on the fan side 23. Install the starter unit. Refer to the starter unit on page 13 . and the starter side. Make sure that the Servicing measurement (X) is 1.5±0.2 mm. Refer to 24. -
Page 34: Harness Frame
7.13 Harness frame 7.12.2 To clean and examine the fuel filter 1. Remove the fuel tank cap. 7.13.1 To remove and install the frame 2. Use the fuel filter hook to pull out the fuel hose (A) 1. Remove the fuel hoses from the carburetor. and the fuel filter (B) from the fuel tank. - Page 35 4. Remove the 2 screws on the top vibration damping 7.13.2 To remove and install the top vibration system. damping unit To remove and install 1. Remove the frame. Refer to the frame on page 34 . 2. Remove the screw, washer and the vibration damping unit.
- Page 36 7.13.3 To remove and install the lower vibration 7.13.5 To replace the harness damping unit WARNING: A damaged harness can make the To remove and install 1. Remove the frame. Refer to product fall and cause injuries. Make sure to the frame on page 34 .
-
Page 37: Fan
7.14 Fan 8. Install in the opposite sequence. CAUTION: Make sure that you install the 7.14.1 To remove and install the fan correct fan nut. The fan nut is different from To remove and install 1. Remove the frame. Refer to the nut on the flywheel side and have a the frame on page 34 . - Page 38 4. Remove the air outlet. Note: Lubricate the control pipe and the flexible hose to make them more easy to assemble. 2. Attach the handle (E) to the control pipe and put the knob through the handle. 5. Put grease on the O-ring on the air outlet before you install the air outlet.
-
Page 39: Handle And Throttle Trigger
7.14.4 To assemble the tube and handle on the 5. Attach the intermediate pipe (F) to the control pipe. If it is a tight fit, lubricate with grease in the area product EBZ8560 shown. 1. Attach the flexible tube (A) to the pipe angle with the clamp (C). - Page 40 3. Remove the 3 screws, the handle bracket and the 7. Remove the spring. right handle half. 4. Remove the trottle trigger and the throttle trigger 8. Remove the throttle cable and the stop switch wires. spring. Note: Make a note of the positions of the black and red cable.
- Page 41 11. Remove the stop switch lever. 12. Install in the opposite sequence. 7.15.2 To disassemble and assemble the control handle EBZ8560 To disconnect 1. Disconnect the throttle cable. Refer to and connect the throttle cable on page 19 .
- Page 42 9. Install in the opposite sequence. Note: Put the cables in the ribs of the housing tightly. Note: Be careful when you install the control handle to prevent damage to the cables. 42 - Repair instructions 1662 - 003 - 04.11.2021...
-
Page 43: Troubleshooting
8 Troubleshooting 8.1 Troubleshooting The engine does not start, there is no spark in the spark plug. Product part to exam- Possible causes Recommended step Spark plug The spark plug is dirty or wet. Make sure that the spark plug is dry and clean. - Page 44 The engine does not start, there are sparks in the spark plug. Conditions Possible causes Recommended step The compression of There is too much fuel in the engine. Drain the fuel. Adjust or replace the carburet- the engine is correct and the fuel con- The air filters are dirty.
- Page 45 The engine does not stop Conditions Possible causes Recommended step The engine is too hot. The carburetor must be adjusted. Adjust the carburetor. The cooling system is blocked. Clean the cooling fins on the cylinder and the air intake screen. The type of fuel is not correct or the fuel is not Replace the fuel to the correct type of fuel mixed correctly.
- Page 46 There is no output power or the engine speed is not stable Conditions Possible causes Recommended step Other conditions The type of fuel is not correct or the fuel is not Replace the fuel to the correct type of fuel mixed correctly.
-
Page 47: Technical Data
9 Technical data 9.1 Technical data EBZ8560 EBZ8560RH Engine Cylinder displacement, cm 75.6 75.6 Idle speed, rpm 2000 2000 Operating speed, rpm 7500 7500 Carburetor type Walbro WYA-237A Walbro WYA-237A Ignition system Spark plug NGK CMR7H NGK CMR7H Electrode gap, mm / in. - Page 48 1142770-49 2021-11-04...
Need help?
Do you have a question about the EBZ8560 and is the answer not in the manual?
Questions and answers