Table of Contents

Subscribe to Our Youtube Channel
Related Manuals for Chino IR-AH Series


Summary of Contents for Chino IR-AH Series
- Page 1 INST.No.INE-374-P11 IR-AH □ □ Series PORTABLE DIGITAL RADIATION THERMOMETE R Model : IR-AHS□,IR-AHU□,IR-AHT□ Always keep these instruction with the unit. Please be sure to deliver these instructions with the unit to the end user.
-
Page 2: Table Of Contents
INST.No.INE-374-P11 CONTENTS 1. Introduction..............1 9. Maintenance and check..........22 1.1 General..............1 9.1 Self-diagnostic function ......... 22 1.2 Configuration............1 9.1.1 Low battery ............. 22 9.1.2 Abnormal internal temperature ...... 22 2. Model and accessories..........2 9.1.3 EEPROM error ..........22 2.1 Model................ - Page 3 Request to the operator of the thermometer This instruction manual describes the maintenance of the thermometer, too. Keep this instruction manual with the thermometer. If you have unclear points or need technical assistance, please contact CHINO' s sales agent. Notices 1.
- Page 4 ● When the thermometer is not used for 2 weeks or more, take out the batteries from it. Otherwise, the thermometer may be damaged by liquid leakage of the batteries. ● When the thermometer has any trouble, please contact to CHINO' s sales agent. 3. Symbol in this instruction manual The symbols shown below are used depending on important degrees for using the thermometer safely and avoiding unexpected situations.
- Page 5 ! These may cause fire. When the thermometer is broken, smoking, or nasty smelling, turn the power supply switch off at once and take out the batteries, and contact to CHINO' s sales agent. ! Caution (May cause injury or physical damage) Do not use other batteries than the batteries specified.
-
Page 6: Introduction
INST.No.INE-374-P11 1. Introduction 1.1 General IR-AH series handheld radiation thermometers can easily measure temperature without any contact over a wide range from -50 C to 3000 C. The thermometers can store the temperature data measured into memory up to maximum 1000 data. -
Page 7: Model And Accessories
INST.No.INE-374-P11 2. Model and accessories 2.1 Model □□ I R-AH Analog output (option) 0: Not provided 2: 0 to 1V DC Thermometer types T: For low temperature S: For medium/high temperature U: For high temperature 2.2 Accessories Names Quantity Remarks AA (UM-3) battery Tripod mounting adapter Instruction manual... -
Page 8: Names And Functions Of Component Parts
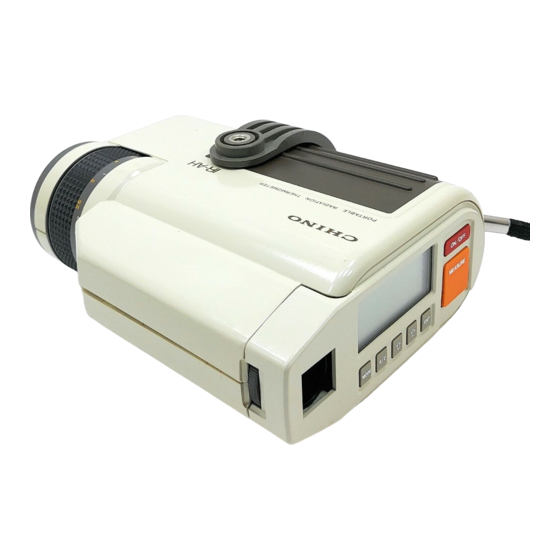
INST.No.INE-374-P11 3. Names and functions of component parts ■Front Collimation mark (Page7) Internal display External display Meas Set Mem M I F Error ℃ O N / O F F F Viewfinder M E A S U R E E N T M... - Page 9 INST.No.INE-374-P11 ■External display M I F (10) M ea s S e t M em E rro r ℃ (11) F (12) Measured value display Parameters display ● Markers Indications in Markers Major functions this manual “AL” Lights when the low alarm is on. “AH”...
- Page 10 INST.No.INE-374-P11 ■Right side panel Adapter mounting screw Connector cover hook Connector cover Hand strap Battery cover ■Inside connector cover (Ref: [8.2 Connections) (Ref: [10.4 Data Logging Software (IR-AH Data Logging Software)]) (Ref: [10.2 AC adapter (Model IR-VHRA)]) (Ref: [4.1 Loading batteries]) Connector cover - 5 -...
-
Page 11: Preparation For Measurement
INST.No.INE-374-P11 4. Preparation for measurement 4.1 Loading batteries ・Removing the battery cover Remove the battery cover by sliding it in the arrow direction while slightly pushing the asterisked (*) part. Battery cover ※ ・Removing the inside cover Remove the inside cover by turning the cover fixing screw in the arrow direction by using a coin. Caution If you mistakes polarity and insert of the battery, there is the fear that the explosion/liquid leakage of the battery occurs and become the cause of a fire... - Page 12 INST.No.INE-374-P11 ・Loading batteries Load the new batteries so that their polarities meet the polarity marks on the battery case. The dimensions of the inside cover is as follows. Caution Attach and combine the direction of 凹 department (B) of protrusion department (A) and inside cover of the battery case.
-
Page 13: Start And Stop
INST.No.INE-374-P11 4.2 Start and stop 4.2.1 Start Press ON/OFF key to turn the power supply on. This thermometer checks the system just after the power supply has been turned on. The message “System Check” appears on the parameter display during the system is checked After the system check is finished, the measurement screen is displayed. -
Page 14: Measuring
INST.No.INE-374-P11 5. Measuring 5.1 Measuring procedure ・Press ON/OFF key to turn the power supply on. ・Set the measuring distance roughly by the distance adjusting ring. ・Adjust the diopter adjusting ring to see the collimation mark on the internal display clearly. ・Adjust the distance measuring ring to see the object measured clearly in the collimation mark. -
Page 15: Auto Power Off
INST.No.INE-374-P11 5.3 Auto power off The back-light for internal display lights out in 10 seconds after the stop of measurement. On the continuous measurement, it lights out in 10 seconds after the start of measurement. For lighting the back-light again, press ENT key. The back-light lights for 10 seconds. For saving the battery life, the power supply is turned off automatically if this thermometer is not operated for 5 minutes !... -
Page 16: Measuring
INST.No.INE-374-P11 5.5 Measuring This thermometer has various measuring parameters. The list of parameters is shown in [11. List of starting modes/screens]. By pressing MODE key when the measurement screen is displayed, the measuring parameter programming screen is appears with the “Set”... -
Page 17: Programming Signal Modulation Mode
INST.No.INE-374-P11 5.5.2 Programming signal modulation mode The maximum value, average value, and minimum value can be extracted continuously from the measurement signal (real signal). ・Press MODE key to get the signal modulation mode programming screen. ・Press key to program the mode. Real The temperature measured is displayed on the real signal without any signal modulation. -
Page 18: Programming Modulation Time Constant
INST.No.INE-374-P11 5.5.3 Programming modulation time constant The modulation time constant is programmed on the signal modulation modes. The first-order lag degree can be adjusted by the modulation time constant. The increase of modulation time constant makes the first-order lag degree increase and the temperature measured is displayed smoothly. ・Press MODE key to get the modulation time constant programming screen. -
Page 19: Programming Alarms
INST.No.INE-374-P11 5.5.4 Programming alarms Two kinds of high alarm and low alarm can be programmed. If an alarm is on, either the “AH” (high alarm) or the “AL” (low alarm) marker lights on the external display and the buzzer sounds. Program to “OFF”... -
Page 20: Temperature Data Storage
INST.No.INE-374-P11 6. Temperature data storage This thermometer provides a function of storing temperature data measured up to maximum 1000 data into memory. Two kinds of storage modes are prepared. The manual storage mode is to store the temperature data being measured at the time pressing [MEM] key, and the storage-with-interval mode is to store the temperature data being measured at every interval time programmed 6.1 Manual storage mode ・Press [MODE] key for about 2 seconds on the measurement screen to get the storage mode... -
Page 21: Storage-With-Interval Mode
INST.No.INE-374-P11 6.2 Storage-with-interval mode ・Press [MODE] key for about 2 seconds on the measurement screen to get the storage mode programming screen. M M O D ・Press key for programming to “Int”. ・Press ENT key to store the storage-with-interval mode. The I marker lights when the storage-with-interval mode is stored. -
Page 22: Display Of Data Stored
INST.No.INE-374-P11 6.3 Display of data stored ・Press MODE key for about 2 seconds on the measurement screen to get the storage mode programming screen. ・Press MODE key to display the temperature data stored. . Index numbers (serial number from 1 to 1000 showing data storing numbers) are displayed on the left side and temperature data are displayed on the right side. -
Page 23: Deletion Of All Storage Data
INST.No.INE-374-P11 6.6 Deletion of all storage data ・The following procedure is to delete all temperature data stored, ・Press MODE key for about 2 seconds on the measurement screen to get the storage mode programming screen. ・Press MODE key to get all temperature data deletion screen. A D D E ・Press ... -
Page 24: User Calibration
INST.No.INE-374-P11 7. User calibration For the routine calibration of this thermometer, the user calibration function is provided to recalibrate this thermometer by using your black body furnace for calibration. The calibration is executed on two optional temperature points. 7.1 Calibration method ・Press ON/OFF key while pressing MODE key to turn the power supply on. -
Page 25: Recovery Of Calibration Data
INST.No.INE-374-P11 ・Measure the temperature of your black body furnace, and program and store the calibrated temperature of black body furnace in the same way as the programming of calibration data at zero side. Make sure that the calibration data at span side is greater than the calibration data at zero side Set up it so in this case, it becomes span calibration data>zero calibration data. -
Page 26: Analog Output
INST.No.INE-374-P11 8. Analog Output If your thermometer is with the optional analog output function, the analog output of 0 to 1V corresponding to the temperature data measured. (Models IR-AHT2, IR-AHS2 and IR-AHU2) You can record the temperature data measured on a recorder by this function 8.1 Programming scale An optional temperature scaling to an analog output of 0 to 1V can be programmed. -
Page 27: Maintenance And Check
The parameters and the temperature data can be stored into memory under this Caution condition. Contact your nearest CHINO’s sales agent. 9.1.4 Status display If key is pressed for about 2 seconds on the measurement screen in the stop condition, the status of this thermometer are displayed on the external display. -
Page 28: Storage
INST.No.INE-374-P11 9.2 Storage ・Don’t store this thermometer at a hot and/or wet place. Caution ・Make sure to mount the lens cap for storage. ・Remove the batteries if this thermometer is not used for longer than 2 weeks, otherwise this thermometer may become defective due to an electrolyte leak failure of the batteries. -
Page 29: Accessories
INST.No.INE-374-P11 10. Accessories 10.1 Close-up lens (Model: IR-VHD: For IR-AHS and IR-AHU) This lens is used for the measuring distance less than 0.5m. The measuring diameter is determined by the distance factor. The measuring diameter is expressed by the following formula. (Measuring diameter) / (Measuring factor) –... -
Page 30: Ac Adapter (Model Ir-Vhra)
INST.No.INE-374-P11 ! 10.2 AC adapter (Model IR-VHRA) The adapter is for operation of this thermometer with AC power supply and is effective for use in the continuous measurement mode. For the connection, insert the plug of the adapter into the DC power jack. For the place of the DC power jack, refer to [Inside connector cover] in [3. -
Page 31: List Of Starting Modes/Screens
INST.No.INE-374-P11 11. List of Starting Modes/Screens 11.1 Modes at start time The following operation modes are available by the key combinations at the start time. Keys Modes Remarks Standard measurement Press ON/OFF key only Press ON/OFF while pressing MEASURE key Continuous measurement Press ON/OFF key while pressing MODE key System programming No measurement can be executed. -
Page 32: Status Display Items
INST.No.INE-374-P11 11.2.3 Status display items Screen Display Inside temperature Dtemp Model Model Serial number Measuring temperature range Measuring wavelength 11.2.4. System programming display items Screen Display Programming range Default Temperature unit Unit Output scaling high limit *1 -50 to 1000 C (IR-AHT) 1000 C (IR-AHT) -
Page 33: Specifications
INST.No.INE-374-P11 12.2 Specifications Model IR-AHS IR-AHU IR-AHT Measuring System Narrow band radiation thermometer Wide band radiation thermometer Detecting Element Thermopile Measuring 0.96µm 0.65µm 8 to 13µm Wavelength Measuring Range 600 to 3000°C 900 to 3000°C -50 to 1000°C Lower than 1500°C: ±0.5% of measured value ±... -
Page 34: Emissivity Table
INST.No.INE-374-P11 13. Emissivity table The emissivity are values determined by the material of object, profile of its surface, surface roughness, oxidized or not, measuring temperature, measuring wavelength and other factors. They are represented by the thermal radiation ratio "" when a black body furnace at the same temperature is measured in the same wavelength band. -
Page 35: Emissivity Table (Λ= 0.9Μm)
INST.No.INE-374-P11 13.2 Emissivity table (λ= 0.9µm) 13.3 Emissivity table (λ= 1.55µm) Metal Emissivity Metal Emissivity Aluminum 0.10 to 0.23 Aluminum 0.09 to 0.40 Gold 0.015 to 0.02 Chrome 0.34 to 0.80 Chrome 0.36 Cobalt 0.28 to 0.65 Cobalt 0.28 to 0.30 Copper 0.05 to 0.80 Iron... - Page 36 32-8, KUMANO-CHO, ITABASHI-KU, TOKYO 173-8632 Telephone: +81-3-3956-2171 Facsimile: +81-3-3956-0915 Web site http://www.chino.co.jp/...
Need help?
Do you have a question about the IR-AH Series and is the answer not in the manual?
Questions and answers