Advertisement
Quick Links
https://appliancetechmanuals.com
Installation assistance available at:
YAMAHA
®
YXZ
®
DASH KIT FOR
www.rockfordfosgate.com/rftech
PMX COMPACT DIGITAL
MEDIA RECEIVERS
RFYXZ-PMXDK
Serial Number:
Date of Purchase:
600 South Rockford Drive • Tempe, Arizona 85281 United States
Direct: (480) 967-3565 • Toll Free: (800) 669-9899
R O C K F O R D F O S G A T E . C O M
Installation & Operation
Advertisement

Related Manuals for Rockford Fosgate RFYXZ-PMXDK


Summary of Contents for Rockford Fosgate RFYXZ-PMXDK
- Page 1 ® DASH KIT FOR www.rockfordfosgate.com/rftech PMX COMPACT DIGITAL MEDIA RECEIVERS RFYXZ-PMXDK Serial Number: Date of Purchase: 600 South Rockford Drive • Tempe, Arizona 85281 United States Direct: (480) 967-3565 • Toll Free: (800) 669-9899 R O C K F O R D F O S G A T E . C O M...
- Page 2 12 Warranty ©2016 Rockford Corporation. All Rights Reserved. ROCKFORD FOSGATE and associated logos where applicable are registered trademarks of Rockford Corporation in the United States and/or other countries. All other trademarks are the property of their respective owners. Specifications subject to change without notice.
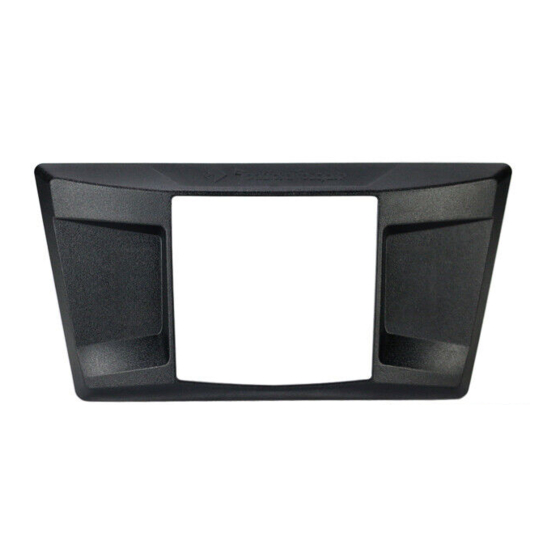
- Page 3 https://appliancetechmanuals.com Specifications 10.5” (267mm) 5.3” (135mm) Main Dash Bezel 5.6” 5.6” (142mm) (142mm) 4.8” 4.8” (123mm) (123mm) PMX-2 Carrier PMX-0 Carrier Fig. 1...
- Page 4 https://appliancetechmanuals.com Mounting PMX-2 Mounting Option Mounting Screw PMX-2 Source Unit (not included) Mounting Screw PMX-2 Carrier Main Dash Bezel Nut Main Dash Bezel PMX-0 Mounting Option Mounting Screw Metal Bracket Foam Gasket (included with PMX-0) PMX-0 Source Unit (not included) PMX-0 Carrier Mounting Screw Main Dash Bezel Nut...
- Page 5 This section focuses on some considerations for installing your Yamaha YXZ dash kit. This manual will illustrate the installation process with a 2016 Yamaha YXZ1000R with a RFYXZ-PMXDK dash kit. If you feel unsure about installing this system yourself, have it installed by a qualified technician.
- Page 6 https://appliancetechmanuals.com Installation Step 3 - Use Drill Guide Step 6 - Insert Vehicle Harness Next, take the drill guide template and overlay it on top of the center pocket. Using the supplied PMX-2 vehicle harness, insert the 12-pin plug end Mark the (4) hole locations that will need to be drilled for the main dash through the grommet.
- Page 7 Secure the source unit with the supplied screws with a 3mm allen driver. The unit is now powered and ready for additional speaker connections. This wire harness is designed to work specifically with Rockford Fosgate Yamaha YXZ wire harnesses.
- Page 8 https://appliancetechmanuals.com Installation 2016 & Up YXZ1000R/YXZ1000R SS w/ PMX-0 Step 3 - Use Drill Guide Step 1 - Remove Hood Next, take the drill guide template overlay it on top of the center pocket. You will need to mark the (4) hole locations that will need to be drilled for Using a 4mm allen wrench, loosen the hood bolts and remove the hood the main dash bezel.
- Page 9 https://appliancetechmanuals.com Installation Step 6 - Insert Vehicle Harness Step 9 - Mount Carrier to Main Dash Bezel Using the supplied PMX-0 vehicle harness, insert the 4-pin plug end Take the PMX-0 carrier and mount it to the main dash bezel. Use the through the grommet.
- Page 10 https://appliancetechmanuals.com Installation Step 12 - Secure Source Unit to Main Dash Bezel Step 15 - Place Main Dash Bezel Assembly Use the supplied screws with a 3mm allen driver. Place the bezel and radio assembly over the center pocket. Insert the studs into the (4) holes that were previously drilled.
- Page 11 https://appliancetechmanuals.com Installation Step 15 - Battery Connection The last wire connection that needs to be run is the Yellow power wire to the battery. The easiest way to run this wire is to remove the center console and passenger transmission tunnel panel. To do this, the passenger seat will need to be removed first, then the center console.
- Page 12 What is Covered This warranty applies only to Rockford Fosgate products sold to consumers by authorized Rockford Fosgate dealers in the United States of America. Prod- ucts purchased by consumers from an Authorized Rockford Fosgate Dealer in another country are covered only by that country’s Distributor and not by Rockford Corporation.
Need help?
Do you have a question about the RFYXZ-PMXDK and is the answer not in the manual?
Questions and answers