
Related Manuals for Master Meter Madness PD


Summary of Contents for Master Meter Madness PD
- Page 1 M e t e r M a d n e s s P D A s s e m b l y I n s t r u c t i o n s Category: Meter Madness Type: Instruction Manual Issue: Operation...
- Page 2 Meter Assembly Instructions This guide is designed to assist you in the assembly of the Master Meter PD meter used in the 2014/2015 Meter Madness competition. These steps do not have to be followed in this precise order for the competition.
- Page 3 Insert diaphragm into the chamber housing. Note: The notch in the diaphragm must be lined up with the outer wall of the chamber housing. Insert piston into chamber housing. The piston has two different diameter shafts that must be installed in the proper position.
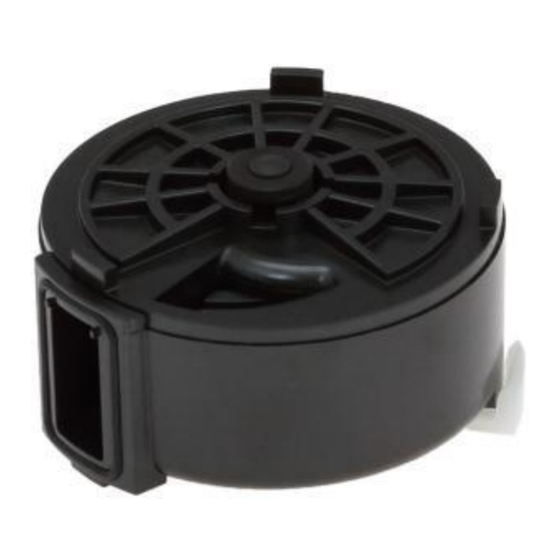
- Page 4 Attach chamber lid to the chamber housing. Align the notch in the chamber lid with the diaphragm. Align the piston shaft with one of the two sockets in the chamber lid. Snap lid into place. Insert strainer into the meter body, as shown, with the notches pointed in the proper direction.
- Page 5 Insert assembled chamber into the meter body. Note the chamber outlet must be opposite the strainer. The magnet side goes into the body. It should not be seen when the chamber is inserted. Insert plastic chamber locking bracket and secure into place.
- Page 6 Insert flat gasket. The grooved side should be pointed towards the chamber and the flat side towards the bottom plate. Place bottom plate onto meter body and secure in place with the supplied bolts. Tighten with a ½” wrench.
- Page 7 10) Turn meter over and place register on bayonet at an approximate 45° angle as shown in the top picture. Secure register in place by turning clockwise. *If locking pin was provided with your meter, disregard this part. It is not needed for the competition.
Need help?
Do you have a question about the Madness PD and is the answer not in the manual?
Questions and answers