Advertisement
Quick Links
Advertisement

Related Manuals for Vintage Model Co JODEL D-18


Summary of Contents for Vintage Model Co JODEL D-18
- Page 1 JODEL D-18 VMC Instruction Booklet - Jodel JAN19.indd 1 19/01/2019 12:06...
- Page 2 vintagemodelcompany.com VMC Instruction Booklet - Jodel JAN19.indd 2 19/01/2019 12:06...
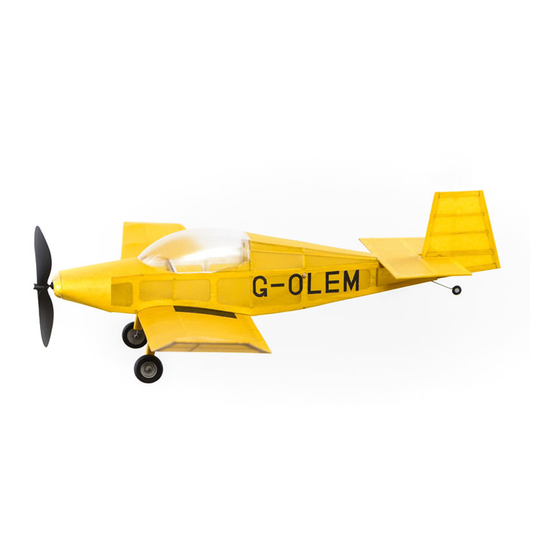
- Page 3 THE JODEL D-18 – A FUN FRENCH HOMEBUILT PLANE The Jodel D18 is a two-seater, homebuilt light the aeroplane with stable and predictable flying aircraft. Introduced in the mid 1980s and still characteristics, making it a very suitable candidate available today, it is a derivative of the tiny Jodel D9 for a rubber powered free flight model.
- Page 4 YOUR KIT This kit is for building a traditionally constructed, Power is provided by rubber strip motor that is rubber powered, free flight model of a Jodel wound up before flight. Free flight means just that – D18. The kit is provided with the materials (other once the model is launched, it is on its own.
-
Page 5: Kit Contents
– one for the propeller and two for the sheet (X), scheme diagram sheet (Y) and scheme undercarriage wheels. markings (Z) printed on lightweight paper. • One vacuum formed canopy and spinner. Jodel D-18 VMC Instruction Booklet - Jodel JAN19.indd 5 19/01/2019 12:06... - Page 6 OTHER THINGS THAT YOU WILL NEED CONSUMABLES • Glue. ‘Cyano’ (sometimes called ‘superglue’), • Tissue sealant – if you want to fly your model quick setting epoxy and a ‘glue stick’. outdoors (see ‘Covering’ for details). • Cling film or waxed paper to cover your plan or a •...
- Page 7 ‘Trimming and flying your model’. you remove excess glue that squishes out, as not doing so can make the parts harder to sand and in internal corners, may leave an undesirable glue ‘fillet’. Jodel D-18 VMC Instruction Booklet - Jodel JAN19.indd 7 19/01/2019 12:06...
- Page 8 TIPS TO MAKE A GOOD JOB OF YOUR MODEL Read and follow the instructions and the plan carefully. foil from a yoghurt pot lid. Alternatively, save pistachio nut shells – one held upright and firm • A light model will fly much better than a heavy on a piece of Blu-Tack or plasticine makes an one, so use glues and adhesives sparingly.
- Page 9 Wood is a natural material and its thickness may vary – it will contract and/or expand after the parts are laser cut. Jodel D-18 VMC Instruction Booklet - Jodel JAN19.indd 9 19/01/2019 12:06...
- Page 10 MAKING UP THE SANDING BLOCK A number of steps in these instructions call for 1) Identify and remove the two sanding block parts the sanding of parts. Using sand paper on a flat from the balsa sheets. Note how the grain runs block offers much more control that holding it in along the length of one piece and across the other.
- Page 11 3) Glue in position the R1 and R2 ribs (4 in total) making sure that they are securely glued to all of the other parts, then glue W6 in position. Jodel D-18 VMC Instruction Booklet - Jodel JAN19.indd 11 19/01/2019 12:06...
- Page 12 THE WING TIP PANELS 1) Identify and remove one set of parts in the 4) Now fit and glue rib R4 using the dihedral following quantities from the laser cut sheets: gauges DG to tilt the top edge outwards as 1 off each W3, W4, W5, W7, R4, R5, R6 and shown on the plan.
- Page 13 The two pieces can be clamped together using a sprung clothes peg or gentle modellers clamp. Just make sure that the wood is not crushed as it is clamped. Jodel D-18 VMC Instruction Booklet - Jodel JAN19.indd 13 19/01/2019 12:06...
- Page 14 THE TAIL PLANE (STABILIZER) For the tail plane, and fin/rudder use the shorter 5) Trial fit parts T4 and T5 each side. Once you are lengths of 1.6mm square strip from the lighter sheet 3. satisfied they are a good fit, glue into position. Allow this outline to set.
- Page 15 4) Offer up parts FR2, FR4, FR5, and the rib which surface by over sanding. meets the fuselage. When you are happy, glue in position with snug butt joints. Allow this outline to set. Jodel D-18 VMC Instruction Booklet - Jodel JAN19.indd 15 19/01/2019 12:06...
- Page 16 THE FUSELAGE Note: The major side pieces of the fuselage (K1) 5) Laminate parts F1 and F2 together making should be very carefully handled as, before the sure that the profiles and the square holes align various stiffeners and other structural parts are correctly.
- Page 17 F2 - it should appear to be at a slight downward 9) Fit the 3.2mm wide strip ‘backbone’ between angle. Leave to set for a while then add parts F7 and F9. F2A each side. Jodel D-18 VMC Instruction Booklet - Jodel JAN19.indd 17 19/01/2019 12:06...
- Page 18 10) Fit strong 1.6mm square strip stringers between 12) Epoxy the rear tail wheel in place. Do not use F2 and F5 at the front and between F7 and F9 at too much epoxy, a small amount is all that is the rear, noting the bottom stringer each sides required, as it is heavy and excess may add too butts up to F9.
- Page 19 Jodel D-18 VMC Instruction Booklet - Jodel JAN19.indd 19 19/01/2019 12:06...
- Page 20 THE WHEELS , UNDERCARRIAGE AND SPINNER 1) Identify and remove parts in the following 7) In all four parts LG1, make a groove following the quantities from the laser cut sheets: 4 off WH1, line etched into them. This is best achieved using 4 off WH2.
- Page 21 Two pin the model parts down each time you apply a alternatives are available: coat, as you do when you shrink them following the instructions overleaf: Jodel D-18 VMC Instruction Booklet - Jodel JAN19.indd 21 19/01/2019 12:06...
- Page 22 THE FIN, RUDDER AND TAIL PLANE 1) For the covering you will need a glue stick, until there are no wrinkles and the tissue is nice PVA, fine brush, scissors, an old perfume bottle and smooth. You do not have to make the or fine mist sprayer and a sharp knife.
- Page 23 Then shrink each wing tip panel one at a time using the same method. Jodel D-18 VMC Instruction Booklet - Jodel JAN19.indd 23 19/01/2019 12:06...
- Page 24 THE FUSELAGE 1) Cover the fuselage in a similar way to the flying 2) Allow the glue to go off for a few hours or surfaces using a glue stick and thinned PVA on preferably overnight, then shrink the tissue. You overlapping joints or where the glue stick cannot need not constrain the fuselage in any way as the reach.
- Page 25 Use the excess tissue to make a neat joint to the fuselage side (K1) and use thinned PVA to smooth and glue the front tissue edges over the nose. Jodel D-18 VMC Instruction Booklet - Jodel JAN19.indd 25 19/01/2019 12:06...
-
Page 26: Final Assembly
FINAL ASSEMBLY 1) If you want to draw on the control surfaces, do so moulding provided (curved nail scissors are now using a fine marker or strips of black paper handy here). The canopy can be secured with referring to the chain dashed lines on the plan. tiny drops of cyano, but do not use too much or the fumes will ‘fog’... - Page 27 More detailed duration of the flights can be slowly increased. information and help are available from the many Jodel D-18 VMC Instruction Booklet - Jodel JAN19.indd 27 19/01/2019 12:06...
- Page 28 TO MAKE UP AND FIT THE MOTOR The motor consists of the rubber strip provided. hole in the nose. Wetting the rubber makes it easier This strip is more refined than that used in rubber to tie a knot, however, do not pull the knot too tight bands and is very stretchy, allowing it to hold lots otherwise it can tear.
- Page 29 Carry on test gliding and adjusting the nose weight until the glide is smooth, and the model lands about halfway towards the imaginary point. Stall Wind direction Correct Glide Dive Jodel D-18 VMC Instruction Booklet - Jodel JAN19.indd 29 19/01/2019 12:06...
- Page 30 POWERED FLIGHTS Wind up the motor with approximately 50 turns the model spirals in, then add an acetate tab to the (wind clockwise looking at the front of the model) left hand wing and bend it down a little. Gradually and launch it into the direction of the wind (if increase the turns on the motor in steps of 50 turns present).
- Page 31 From all the team at The Vintage Model Company. The Vintage Model Company, The Cattle Sheds, Main Road, Flagg, Derbyshire, SK17 9QT Jodel D-18 VMC Instruction Booklet - Jodel JAN19.indd 31 19/01/2019 12:06...
-
Page 32: Building Notes
BUILDING NOTES Use these pages for notes during your build vintagemodelcompany.com VMC Instruction Booklet - Jodel JAN19.indd 32 19/01/2019 12:06... - Page 33 BUILDING NOTES Jodel D-18 VMC Instruction Booklet - Jodel JAN19.indd 33 19/01/2019 12:06...
-
Page 34: Flight Log
FLIGHT LOG Keep a log of your flight durations here vintagemodelcompany.com VMC Instruction Booklet - Jodel JAN19.indd 34 19/01/2019 12:06... - Page 35 Jodel D-18 VMC Instruction Booklet - Jodel JAN19.indd 35 19/01/2019 12:06...
- Page 36 vintagemodelcompany.com vintagemodelcompany.com VMC Instruction Booklet - Jodel JAN19.indd 36 19/01/2019 12:06...
Need help?
Do you have a question about the JODEL D-18 and is the answer not in the manual?
Questions and answers