Advertisement
Quick Links
Introduction
Welcome to KBC Networks' Quick Start Guide for
ThruLink. This document has been designed to
provide a step-by-step guide to setting up a
ThruLink server, client and linking them together.
For more detailed information, please see the
Downloads section below.
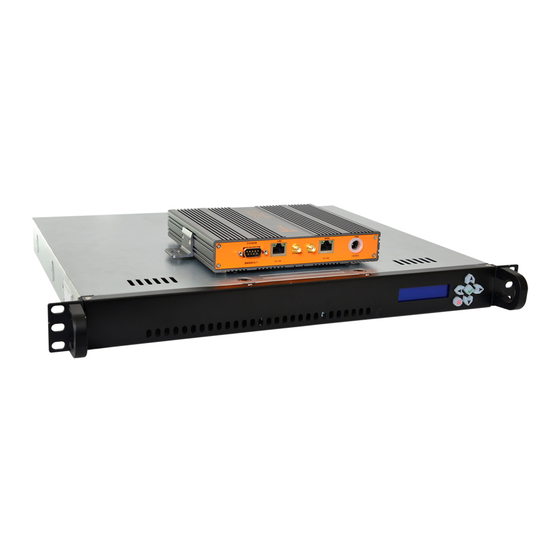
The KBC ThruLink is an industrial hardware VPN that allows secure communications to be established
over any standard public or private IP network infrastructure. ThruLink performs behind Firewalls,
NAT and through almost any type of network configuration while offering advanced encrypted
communication for all IP protocols regardless of the type of traffic. When deployed, ThruLink provides
an advanced secure and encrypted private network that will not affect TTL, UPnP, VLAN information,
broadcast, multicast or any other traffic. ThruLink can also be provided with an integrated 3G/4G
modem that supports all primary network providers.
Features
•
Multiple hardware encryption engines ranging in complexity from 128 to 256bit
•
Encryption throughput models: SC (Standard Capacity): 15Mbps, SP (Standard Capacity
Plus): 30Mbps, HC (High Capacity): 100Mbps, HP (High capacity Plus): 200Mbps
•
Optimized for stability, reduced latency of large packet streams over Public networks.
•
Automatically switch between GSM and LTE networks for best performance.
•
Supports MESH topology – no central server required.
•
Hardened against DOS and known common network attacks.
•
Level 2 and Level 3 capable device.
•
Auto re-syncing/authentication after a network failure, enabling a self-healing
Encryption tunnel network.
•
Support Multiple failover paths
•
Multiple networks can flow separately or combined over the same encryption tunnel.
•
Simplified installation.
•
Easy-to-use graphical user interface.
•
Can be installed within an existing network infrastructure.
Downloads
Full specifications, features and additional support information can be found on the relevant product
page within the KBC Networks site: www.kbcnetworks.com.
QSG-THLK_Series-Rev2004
Copyright © KBC Networks Ltd. 2020
ThruLink Quick Start Guide
www.kbcnetworks.com
Advertisement

Related Manuals for KBC ThruLink


Summary of Contents for KBC ThruLink
- Page 1 For more detailed information, please see the Downloads section below. The KBC ThruLink is an industrial hardware VPN that allows secure communications to be established over any standard public or private IP network infrastructure. ThruLink performs behind Firewalls, NAT and through almost any type of network configuration while offering advanced encrypted communication for all IP protocols regardless of the type of traffic.
-
Page 2: System Contents
IP address subnet within a Class that hasn’t already been used on the network. By default, ThruLink runs a DHCP service on the LAN port for convenience and is within the network range of 193.163.1.0/24 (ThruLink LAN IP is 193.163.1.1) Connect an appropriate RJ45 Ethernet cable to ThruLink WAN port. - Page 3 WAN segment. In order to facilitate this requirement, the force password change policy has been implemented on all version of ThruLink installed with version 6.1.0.18 onwards. This policy is only executed when in factory default mode and won’t affect any existing unit that upgrades to the latest version while maintaining their existing configuration.
- Page 4 When your screen looks similar to the one below, you are connected to the ThruLink Web GUI and ready to start the configuration. Configuring ThruLink Configuring ThruLink as a Server Important: Ensure the steps in ‘Connecting to ThruLink’ have been followed.
- Page 5 The LAN interface represents your private and secure network. The default range on ThruLink is 193.163.xxx.xxx, which you can change to conform to your own network requirements; however, for purposes of this guide we will leave the default IP in place for the server.
- Page 6 Important: Ensure the steps in ‘Connecting to ThruLink’ have been followed. Click ‘GENERAL->Configuration’ menu link on the left and give ThruLink a unique name in the Hostname field (every ThruLink on the network requires a unique name). Click ‘Save Update’ at the bottom of the page.
- Page 7 Set the ‘Port’ field the same as the Server configuration (default: 32000). Click ‘Save update’ at the bottom of the page and confirm your setup is the same as the following image. QSG-THLK_Series-Rev2004 Copyright © KBC Networks Ltd. 2020 www.kbcnetworks.com Page 7 of 12...
- Page 8 Ensure the DATA SIM has been inserted in the SIM slot before powering up the unit. Click ‘GENERAL->Configuration’ menu link on the left and give ThruLink a unique name in the Hostname field (every ThruLink on the network requires a unique name).
- Page 9 LTE networks). Set the ‘LAN interface’ to 193.163.3.1 (or a unique subnet of your choosing). Click ‘Save update’ (you will be prompted to reboot the unit). QSG-THLK_Series-Rev2004 Copyright © KBC Networks Ltd. 2020 www.kbcnetworks.com Page 9 of 12...
- Page 10 Please remember to change the preshared key value when implementing this system within a LIVE environment to something more complicated. Any ASCII character is supported except the space character (all units must have the same key). QSG-THLK_Series-Rev2004 Copyright © KBC Networks Ltd. 2020 www.kbcnetworks.com Page 10 of 12...
- Page 11 Every IP network process uses one of the 65535 available ports to communicate, e.g. The general HTTP protocol makes use of port 80 and FTP is port 21. The default port used for the ThruLink is 32000, which can be changed to suit your own port preference.
-
Page 12: Warranty
1. Create a document with the name and LAN IP address used on each of the ThruLink units 2. Configure a single client and confirm it is connecting correctly. You should see a statement similar to the pink line below where it states the connection 3.
Need help?
Do you have a question about the ThruLink and is the answer not in the manual?
Questions and answers