Table of Contents
Advertisement
Available languages
Available languages
OWNER'S MANUAL
COMMERCIAL DRYER
Before beginning installation, read these instructions carefully. this will
simplify installation and ensure that the dryer is installed correctly and
safely. leave these instructions near the dryer after installation for future
reference.
MODEL
RP1329AD1S / RV1329AD1S
RP1329AD5S / RV1329AD5S
RP1329AD6S / RV1329AD6S
MFL67863707
RP1329AN4S / RV1329AN4S
RP1329AN7S / RV1329AN7S
RP1329AN1S / RV1329AN1S
RP1329A4S / RV1329A4S
RP1329A7S / RV1329A7S
RP1329A1S / RV1329A1S
www.lg.com
Advertisement
Table of Contents

Related Manuals for LG RP1329AD1S


Summary of Contents for LG RP1329AD1S
- Page 1 Before beginning installation, read these instructions carefully. this will simplify installation and ensure that the dryer is installed correctly and safely. leave these instructions near the dryer after installation for future reference. MODEL RP1329AD1S / RV1329AD1S RP1329AN4S / RV1329AN4S RP1329A4S / RV1329A4S RP1329AD5S / RV1329AD5S RP1329AN7S / RV1329AN7S...
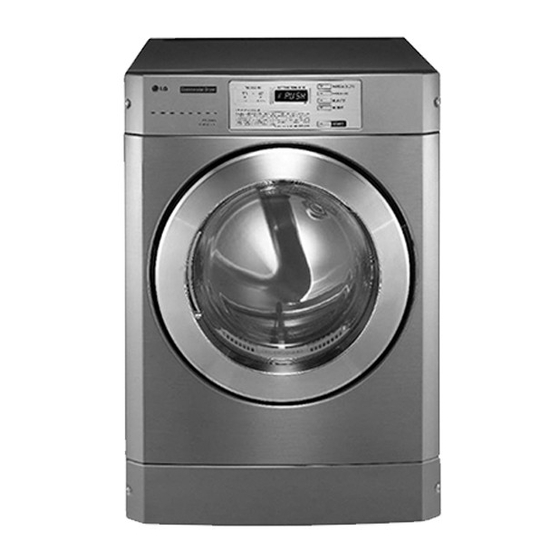
- Page 2 PRODUCT FEATURES PRODUCT FEATURES OUTSTANDING PERFORMANCE The dryer features the largest capacity, quick drying times, quiet operation, and an energy-saving system. ARTISTIC DESIGN Modern front panel look and big clear glass door make your dryer look stylish EASY OF USE An entire selection of user-friendly functions makes operating the dryer easy.
-
Page 3: Important Safety Instructions
IMPORTANT SAFETY INSTRUCTIONS IMPORTANT SAFETY INSTRUCTIONS READ ALL INSTRUCTIONS BEFORE USE WARNING For your safety, the information in this manual must be followed to minimize the risk of fire or explosion, electric shock, or to prevent property damage, Injury to persons, or death. Your Safety and the safety of others is very important. - Page 4 IMPORTANT SAFETY INSTRUCTIONS IMPORTANT SAFETY INSTRUCTIONS READ ALL INSTRUCTIONS BEFORE USE BASIC SAFETY PRECAUTIONS WARNING To reduce the risk of fire, electric shock, or injury to persons when using this appliance, follow basic precautions, including the following: Items that have been soiled with substances such as cooking oil, this manual.
- Page 5 IMPORTANT SAFETY INSTRUCTIONS IMPORTANT SAFETY INSTRUCTIONS READ ALL INSTRUCTIONS BEFORE USE Disposal of your old appliance municipal waste stream via designated collection facilities appointed by the government or the local authorities. consequences for the environment and human health. 3. For more detailed information about disposal of your old appliance, please contact your city office, waste disposal service or the shop where you purchased the product.
-
Page 6: Grounding Instructions
IMPORTANT SAFETY INSTRUCTIONS IMPORTANT SAFETY INSTRUCTIONS READ ALL INSTRUCTIONS BEFORE USE WARNING For your safety, the information in this manual must be followed to minimize the risk of fire or explosion, electric shock, or to prevent property damage, injury to persons, or death. GROUNDING INSTRUCTIONS This appliance must be grounded. - Page 7 IMPORTANT SAFETY INSTRUCTIONS IMPORTANT SAFETY INSTRUCTIONS READ ALL INSTRUCTIONS BEFORE USE WARNING For your safety, the information in this manual must be followed to minimize the risk of fire or explosion, electric shock, or to prevent property damage, injury to persons, or death. SAFETY INSTRUCTIONS FOR INSTALLATION be used and that old hose-sets should not be reused.
-
Page 8: Safety Instructions For Connecting Electricity
IMPORTANT SAFETY INSTRUCTIONS IMPORTANT SAFETY INSTRUCTIONS READ ALL INSTRUCTIONS BEFORE USE WARNING For your safety, the information in this manual must be followed to minimize the risk of fire or explosion, electric shock, or to prevent property damage, injury to persons, or death. SAFETY INSTRUCTIONS FOR CONNECTING ELECTRICITY WARNING To reduce the risk of fire, electric shock, or injury to persons when using this appliance, follow basic precautions,... - Page 9 IMPORTANT SAFETY INSTRUCTIONS IMPORTANT SAFETY INSTRUCTIONS READ ALL INSTRUCTIONS BEFORE USE CAUTION These instructions are only valid if the following country code is on the appliance. If this code is not present on the appliance, it is necessary to refer to the technical instructions which will provide the necessary information the local distribution conditions, nature of gas and pressure, and the adjustment of the appliance are compatible.
-
Page 10: Table Of Contents
CONTENTS CONTENTS Programming Mode - Collect Mode PRODUCT FEATURES IMPORTANT SAFETY 46 MAINTENANCE INSTRUCTIONS BASIC SAFETY PRECAUTIONS 47 STACK MACHINE INSTALLATION GROUNDING INSTRUCTIONS INSTRUCTIONS SAFETY INSTRUCTIONS FOR INSTALLATION SAFETY INSTRUCTIONS FOR CONNECTING Suitable model for stacking ELECTRICITY Sliding kit Stacking kit INTRODUCING YOUR DRYER Stacking the machine Stacking bracket installation... -
Page 11: Introducing Your Dryer
INTRODUCING YOUR DRYER INTRODUCING YOUR DRYER Specifications Type : Electric and Gas Dryer Rating : Please refer to the rating label regarding detailed information. Specifications are subject to change by manufacturer. NOTE Specifications subject to change by manufacturer. -
Page 12: Control Panel Features
INTRODUCING YOUR DRYER Control panel features Card type - Side by side(RP1329AD1S / RV1329AD1S) - Stack upper(RP1329AD5S / RV1329AD5S) - Stack lower(RP1329AD6S / RV1329AD6S) OPL type - Side by side(RP1329A4S / RV1329A4S) - Stack upper(RP1329A7S / RV1329A7S) - Stack lower(RP1329A1S / RV1329A1S) 1. - Page 13 INTRODUCING YOUR DRYER Control panel features Coin type - Side by side (RP1329AN4S / RV1329AN4S) - Stack upper (RP1329AN7S / RV1329AN7S) - Stack lower (RP1329AN1S / RV1329AN1S) 1. Display LED 3. Start/Pause button 2. Cycle button 4. Status LED...
- Page 14 INTRODUCING YOUR DRYER Status LED Display LED Cycle button Start/Pause button Display LED Start/Pause button The Display shows the vend price, remaining time, and The Start LED flashes when the full vend price has been programming options. satisfied then the cycle has been chosen or the machine Error codes are also displayed here.
-
Page 15: Operating Your Dryer
OPERATING YOUR DRYER OPERATING YOUR DRYER 1. Ready mode 4. Top off (To add more time) After a debit card is inserted, the operating time can - The cycle LEDs flash at the same time, when the price of cycles are equal. Start button or the chosen course button has been pressed. -
Page 16: Programming Mode
PROGRAMMING MODE PROGRAMMING MODE 1. Programming mode You can check machine information or change setting on Program setup or Diagnostic test. There are two methods that you can enter programming mode. How to enter “Programming mode” How to use button You can enter programming mode only for Idle state You can change Dryer vend price, cycle time and Cycle and pause state. - Page 17 PROGRAMMING MODE Card / Coin type Algorithm Flow Chart shows how to control programming mode. Before program set, check the structure of programming mode. 3. Press Med Temp.(+) or Low Temp.(-) button if you want to be at the same level. is to set price value, time value and vend type etc.
- Page 18 PROGRAMMING MODE OPL type Algorithm Flow Chart shows how to control programming mode. Before program set, check the structure of programming mode. OPL/Coin Type 3) Push the Start button. is to set price value, time value and vend type etc. consists of line test, reset, free cycle and kill cycle.
-
Page 19: Programming Mode - Setup Mode
PROGRAMMING MODE PROGRAMMING MODE - Setup Mode Setup Mode : (display) You can change dryer vend price, cycle time, and cycle parameters, etc. Entering set up mode 1. How to change regular price. Entering set up Button Display mode. You will see LqC1 Press the High Temp. -
Page 20: 20 2. How To Change Special Price
PROGRAMMING MODE 2. How to change special price Entering set up Button Display mode. You will see LqC1 Press the High Temp. button. Press the Med Temp. or the Low Temp. button until appears in the display. Press the Start button. Press the Med Temp. -
Page 21: 21 3. How To Enter The Fea1
PROGRAMMING MODE 3. How to enter the Entering set up Button Display mode. You will see LqC1 Press the High Temp. button. Press the Med Temp. or the Low Temp. button until appears in the display. Press the Start button. Press the Med Temp. - Page 22 PROGRAMMING MODE 3-1. Special price day setup Entering set up Button Display mode. You will see LqC1 Press the High Temp. button. Press the Med Temp. or the Low Temp. button until appears in the display. Press the Start button. Press the Med Temp.
- Page 23 PROGRAMMING MODE 3-2. Vend type setup - card type or coin type setup Entering set up Button Display mode. You will see LqC1 Press the High Temp. button. Press the Med Temp. or the Low Temp. button until appears in the display. Press the Start button.
- Page 24 PROGRAMMING MODE 3-3. Top off apply or not setup Entering set up Button Display mode. You will see LqC1 Press the High Temp. button. Press the Med Temp. or the Low Temp. button until appears in the display. Press the Start button. Press the Med Temp.
-
Page 25: 25 4. How To Enter The Special Price Day Setup
PROGRAMMING MODE 4. How to enter the special price day setup Entering set up Button Display mode. You will see LqC1 Press the High Temp. button. Press the Med Temp. or the Low Temp. button until appears in the display. Press the Start button. - Page 26 PROGRAMMING MODE 4-1. How to change sunday Entering set up Button Display mode. You will see LqC1 Press the High Temp. button. Press the Med Temp. or the Low Temp. button until appears in the display. Press the Start button. Press the Med Temp.
-
Page 27: Special Price Beginning Time Setup
PROGRAMMING MODE 5. Special price beginning time setup Entering set up Button Display mode. You will see LqC1 Press the High Temp. button. Press the Med Temp. or the Low Temp. button until appears in the display. Press the Start button. Press the Med Temp. -
Page 28: Special Price Ending Time Setup
PROGRAMMING MODE 6. Special price ending time setup Entering set up Button Display mode. You will see LqC1 Press the High Temp. button. Press the Med Temp. or the Low Temp. button until appears in the display. Press the Start button. Press the Med Temp. -
Page 29: 29 7. Regular Priced Dryer Cycle Time
PROGRAMMING MODE 7. Regular priced dryer cycle time Entering set up Button Display mode. You will see LqC1 Press the High Temp. button. Press the Med Temp. or the Low Temp. button until appears in the display. Press the Start button. Press the Med Temp. -
Page 30: 30 8. Special Priced Dryer Cycle Time
PROGRAMMING MODE 8. Special priced dryer cycle time Entering set up Button Display mode. You will see LqC1 Press the High Temp. button. Press the Med Temp. or the Low Temp. button until appears in the display. Press the Start button. Press the Med Temp. -
Page 31: Value Of Coin
PROGRAMMING MODE 9. Value of coin 1 Entering set up Button Display mode. You will see LqC1 Press the High Temp. button. Press the Med Temp. or the Low Temp. button until appears in the display. Press the Start button. Press the Med Temp. - Page 32 PROGRAMMING MODE 10. Value of coin 2 (Set up for top off price and e-suds coin pulse) Entering set up Button Display mode. You will see LqC1 Press the High Temp. button. Press the Med Temp. or the Low Temp. button until appears in the display.
-
Page 33: Penny Increment Pricing Offset
PROGRAMMING MODE 11. Penny increment pricing offset This represents the cent increment price offset used when debit card is setup. Entering set up Button Display mode. You will see LqC1 Press the High Temp. button. Press the Med Temp. or the Low Temp. button until appears in the display. -
Page 34: Top Off Time
PROGRAMMING MODE 12. Top off time Entering set up Button Display mode. You will see LqC1 Press the High Temp. button. Press the Med Temp. or the Low Temp. button until appears in the display. Press the Start button. Press the Med Temp. or the Low Temp. button until appears in the display. -
Page 35: Beep Volume
PROGRAMMING MODE 13. Beep volume Entering set up Button Display mode. You will see LqC1 Press the High Temp. button. Press the Med Temp. or the Low Temp. button until appears in the display. Press the Start button. Press the Med Temp. or the Low Temp. button until appears in the display. -
Page 36: Time To Keep The Coin (Use Only For Coin Type)
PROGRAMMING MODE 14. Time to keep the coin (Use only for coin type) Entering set up Button Display mode. You will see LqC1 Press the High Temp. button. Press the Med Temp. or the Low Temp. button until appears in the display. Press the Start button. -
Page 37: 15. Product Type Setup - Coin/Card Type Or Opl Setup
PROGRAMMING MODE 15. Product type setup – coin/card type or OPL setup Entering set up Button Display mode. You will see LqC1 Press the High Temp. button. Press the Med Temp. or the Low Temp. button until appears in the display. Press the Start button. -
Page 38: Programming Mode - Test Mode
PROGRAMMING MODE PROGRAMMING MODE - Test Mode Diagnostic tests : (display) This program has been added for testing the dryer and detecting errors. Entering the test mode Data Machine Button Display Description Name programming (Coin type). mode CARD / COIN Then appears in the display. - Page 39 PROGRAMMING MODE Pressing the Start button cycles to the next test function. Number of times the Start Checking point Display button is pressed None Check the version and code of Version and code of machine (All LED on) machine. Display P3:OE or P3:Og and gU:XX alternately. XX is the ELECTRIC TYPE : P3 OE version number.
- Page 40 PROGRAMMING MODE 2. Factory reset - EEPt After a factory reset, all values are reset to the default values. Entering set up Button Display mode. You will see LqC1 Press the Med Temp. or the Low Temp. appears in the display. Press the Start button.
- Page 41 PROGRAMMING MODE 3. Time Set Up Entering set up Button Display mode. You will see LqC1 Press the Med Temp. or the Low Temp. button until appears in the display. Press the Start button. The display cycles through 2000 --> 0101 --> Sat --> 0000. Press the Start button.
- Page 42 PROGRAMMING MODE 4. Courtesy cycle Courtesy cycle is like a complimentary cycle given to the customer when the dryer goes out of order when the customer has made the payment to dry one’s clothes. Entering set up Button Display mode. You will see LqC1 Press the Med Temp.
- Page 43 PROGRAMMING MODE 5. Cycle Kill Coin Entering set up Button Display mode. You will see LqC1 Press the Med Temp. or the Low Temp. appears in the display. Press the Start button. Press the Med Temp. button until appears in the display.
- Page 44 PROGRAMMING MODE PROGRAMMING MODE - Collect Mode Collect Information Data : CLCt (display) The dryer collects the usage data so that the owner can check various information like number of various cycles used, how many times card or coins used, etc. Entering the collect mode Data Name Button...
- Page 45 PROGRAMMING MODE Collect Mode Data lists Abbreviation Meaning Description Itnr Interval No Runs Itnr is not available in dryer. Ittb Interval Trouble Cycles Money inserted, but no run. ItPd Interval Power Downs No money, but ran. Interval Unauthorized Service Door Number of Unauthorized Service Door Itdd Openings...
- Page 46 MAINTENANCE MAINTENANCE Regular cleaning Cleaning the Lint Filter WARNING Always clean the lint filter after every cycle. To reduce the risk of fire, electric shock, or injury to persons when using this appliance, follow basic precautions, including the following: of electric shock. Failure to follow this warning can cause serious injury, fire, electric shock, or death.
- Page 47 STACK MACHINE INSTALLATION INSTRUCTIONS STACK MACHINE INSTALLATION INSTRUCTIONS 1. Suitable model for stacking Upper Lower Stack position Dryer Washer Dryer RP1329AD5S F1069FDP RP1329AD6S RP1329AN7S F1069FD2P RP1329AN1S RP1329A7S F1069FD6P RP1329A1S Stack position RV1329AD5S RV1329AD6S RV1329AN7S RV1329AN1S RV1329A7S RV1329A1S 2. Sliding kit - Sliding kit is provided in the upper dryer.
- Page 48 STACK MACHINE INSTALLATION INSTRUCTIONS 4. Stacking the machine - Lift and stack the upper dryer on the lower washer. - Set the rear of the upper dryer and the rear of the lower washer in the same position. - Push the upper dryer matching the slide & stacking bracket to make upper and lower front parallel. 5.
- Page 49 ERROR MODE / POWER FAIL RECOVERY / DEFAULT DRYER SETTINGS ERROR MODE Meaning of Error Codes that LED displays during occurrence or problem. Dryer error code PROBLEM POSSIBLE CAUSE SOLUTION It is displayed when thermistor is opened or Thermistor should be replaced. shorted It is displayed when thermistor temperature Thermistor should be replaced.
- Page 51 ะปลอดภั ย โปรดเก็ บ คู ่ ม ื อ นี ้ ไ ว้ ใ กล้ เ ครื ่ อ งอบผ้ า หลั ง จากทำการติ ด ตั ้ ง เสร็ จ แล้ ว เพื ่ อ ใช้ ส ำหรั บ การอ้ า งอิ ง ในอนาคต รุ ่ น RP1329AD1S / RV1329AD1S RP1329AN4S / RV1329AN4S RP1329A4S / RV1329A4S...
- Page 52 คุ ณ ลั ก ษณะเฉพาะ คุ ณ ลั ก ษณะเฉพาะ ประสิ ท ธิ ภ าพที ่ โ ดดเด่ น เครื ่ อ งอบผ้ า มี ค วามจุ ส ู ง สุ ด ใช้ เ วลาอบผ้ า รวดเร็ ว ทำงานเงี ย บ และประหยั ด พลั ง งาน การออกแบบแนวศิ...
- Page 53 คำแนะนำความปลอดภั ย ที ่ ส ำคั ญ คำแนะนำความปลอดภั ย ที ่ ส ำคั ญ อ่ า นคำแนะนำด้ า นล่ า งนี ้ ท ั ้ ง หมดก่ อ นใช้ ง านเครื ่ อ งอบผ้ า คำเตื อ น เพื ่ อ ความปลอดภั ย ของท่ า น ควรปฏิ บ ั ต ิ ต ามคำแนะนำที ่ แ สดงในคู ่ ม ื อ การใช้ ง านเล่ ม นี ้ เ พื ่ อ ป้ อ งกั น การเกิ ด เพลิ ง ไหม้ ห รื อการระเบิ...
- Page 54 คำแนะนำความปลอดภั ย ที ่ ส ำคั ญ คำแนะนำความปลอดภั ย ที ่ ส ำคั ญ อ่ า นคำแนะนำด้ า นล่ า งนี ้ ท ั ้ ง หมดก่ อ นใช้ ง าน การป้ อ งกั น ความปลอดภั ย ขั ้ น พื ้ น ฐาน คำเตื...
- Page 55 คำแนะนำความปลอดภั ย ที ่ ส ำคั ญ คำแนะนำความปลอดภั ย ที ่ ส ำคั ญ อ่ า นคำแนะนำด้ า นล่ า งนี ้ ท ั ้ ง หมดก่ อ นใช้ ง านเครื ่ อ งอบผ้ า การทำลายซากเครื ่ อ งอบผ้ า เก่ า 1.
- Page 56 คำแนะนำความปลอดภั ย ที ่ ส ำคั ญ คำแนะนำความปลอดภั ย ที ่ ส ำคั ญ อ่ า นคำแนะนำด้ า นล่ า งนี ้ ท ั ้ ง หมดก่ อ นใช้ ง านเครื ่ อ งอบผ้ า คำเตื อ น ท่ า นสามารถปฏิ บ ั ต ิ ต ามข้ อ ระวั ง เบื ้ อ งต้ น รวมทั ้ ง คำแนะนำที ่ แ สดงในด้ า นล่ า งนี ้ เ พื ่ อ ลดความเสี ่ ย งต่ อ การเกิ ด เพลิ ง ไ หม้...
- Page 57 คำแนะนำความปลอดภั ย ที ่ ส ำคั ญ คำแนะนำความปลอดภั ย ที ่ ส ำคั ญ อ่ า นคำแนะนำด้ า นล่ า งนี ้ ท ั ้ ง หมดก่ อ นใช้ ง านเครื ่ อ งอบผ้ า คำเตื อ น ท่ า นสามารถปฏิ บ ั ต ิ ต ามข้ อ ระวั ง เบื ้ อ งต้ น รวมทั ้ ง คำแนะนำที ่ แ สดงในด้ า นล่ า งนี ้ เ พื ่ อ ลดความเสี ่ ย งต่ อ การเกิ ด เพลิ ง ไ หม้...
- Page 58 คำแนะนำความปลอดภั ย ที ่ ส ำคั ญ คำแนะนำความปลอดภั ย ที ่ ส ำคั ญ อ่ า นคำแนะนำด้ า นล่ า งนี ้ ท ั ้ ง หมดก่ อ นใช้ ง านเครื ่ อ งอบผ้ า คำเตื อ น ท่ า นสามารถปฏิ บ ั ต ิ ต ามข้ อ ระวั ง เบื ้ อ งต้ น รวมทั ้ ง คำแนะนำที ่ แ สดงในด้ า นล่ า งนี ้ เ พื ่ อ ลดความเสี ่ ย งต่ อ การเกิ ด เพลิ ง ไ หม้...
- Page 59 คำแนะนำความปลอดภั ย ที ่ ส ำคั ญ คำแนะนำความปลอดภั ย ที ่ ส ำคั ญ อ่ า นคำแนะนำด้ า นล่ า งนี ้ ท ั ้ ง หมดก่ อ นใช้ ง านเครื ่ อ งอบผ้ า ข้ อ ควรระวั ง คำแนะนำเหล่ า นี ้ ส ามารถถู ก ใช้ ก ั บ รหั ส ประเทศที ่ ถ ู ก ระบุ บ นเครื ่ อ งใช้ ไ ฟฟ้ า หากรหั ส นี ้ ไ ม่ อ ยู ่ บ นเครื ่ อ งใช้ ไ ฟฟ้ า ต้ อ งอ้ างอิ...
-
Page 60: 39 1.Lqc1
สารบั ญ สารบั ญ คุ ณ ลั ก ษณะเฉพาะ โหมดการตั ้ ง โปรแกรม – โหมดแสดงข้ อ มุ ล การใช้ ง าน คำแนะนำความปลอดภั ย ที ่ ส ำคั ญ 46 การบำรุ ง รั ก ษา การป้ อ งกั น ความปลอดภั ย ขั ้ น พื ้ น ฐาน คำแนะนำเกี... - Page 61 แนะนำเครื ่ อ งอบผ้ า แนะนำเครื ่ อ งอบผ้ า คุ ณ สมบั ต ิ ประเภท : เครื ่ อ งอบผ้ า ด้ ว ยไฟฟ้ า และ เครื ่ อ งอบผ้ า ด้ ว ยก๊ า ซ มาตรวั ด : โปรดตรวจสอบจากคำอธิ บ ายมาตรวั ด เพื ่ อ ศึ ก ษารายละเอี ย ด ขนาดของเครื...
- Page 62 แผงควบคุ ม และคุ ณ ลั ก ษณะ ประเภทใส่ บ ั ต ร - วางเรี ย งต่ อ กั น (RP1329AD1S / RV1329AD1S) - วางซ้ อ นด้ า นบน (RP1329AD5S / RV1329AD5S) - วางซ้ อ นด้ า นล่ า ง (RP1329AD6S / RV1329AD6S) ประเภท...
- Page 63 แนะนำเครื ่ อ งอบผ้ า แผงควบคุ ม และคุ ณ ลั ก ษณะ ประเภทหยอดเหรี ย ญ - วางเรี ย งต่ อ กั น (RP1329AN4S / RV1329AN4S) - วางซ้ อ นด้ า นบน (RP1329AN7S / RV1329AN7S) - วางซ้ อ นด้ า นล่ า ง (RP1329AN1S / RV1329AN1S) 1.หน้...
- Page 64 แนะนำเครื ่ อ งอบผ้ า ไฟสถานะ หน้ า จอแสดงผล LED ปุ ่ ม เลื อ กอุ ณ หภู ม ิ เริ ่ ม / หยุ ด ชั ่ ว คราว Start/Pause หน้ า จอแสดงผล LED เริ ่ ม / หยุ ด ชั ่ ว คราว Start/Pause จะแสดงราคา...
- Page 65 การใช้ ง านเครื ่ อ งอบผ้ า ของคุ ณ การใช้ ง านเครื ่ อ งอบผ้ า ของคุ ณ 1.โหมดเตรี ย มพร้ อ ม 4.การเติ ม เงิ น (เพื ่ อ เพิ ่ ม เวลา) 1) ประเภทหยอดเหรี ย ญ / ประเภทใส่ บ ั ต ร หลั...
- Page 66 โหมดการตั ้ ง โปรแกรม โหมดการตั ้ ง โปรแกรม 1.โหมดการตั ้ ง โปรแกรม คุ ณ สามารถตรวจสอบข้ อ มู ล ของเครื ่ อ งและเปลี ่ ย นการตั ้ ง ค่ า ของเครื ่ อ ง หรื อ สามารถตรวจสอบหาปั ญ หาของเครื ่ อ งได้ โดยมี...
- Page 67 โหมดการตั ้ ง โปรแกรม ประเภทใส่ บ ั ต ร / หยอดเหรี ย ญ ผั ง งาน (Flow Chart) แสดงถึ ง การควบคุ ม โหมดการตั ้ ง โปรแกรม ก่ อ นการตั ้ ง โปรแกรม โปรดตรวจสอบโครงสร้ า งของโหมดการตั ้ ง โปรแกรม 1. เปิ ด on/off สวิ ท ช์ หรื อ ใส่ บ ั ต ร Service เพื ่ อ เข้ า สู ่ โ หมดตั ้ ง ค่ า 2.
- Page 68 โหมดการตั ้ ง โปรแกรม ประเภท OPL ผั ง งาน (Flow Chart) แสดงถึ ง การควบคุ ม โหมดการตั ้ ง โปรแกรม ก่ อ นการตั ้ ง โปรแกรม โปรดตรวจสอบโครงสร้ า งของโหมดการตั ้ ง โปรแกรม ประเภท OPL/เหรี ย ญ 1) กดปุ ่ ม High Temp. และ Low Temp. พร้ อ มกั น 2) กดปุ...
- Page 69 โหมดการตั ้ ง โปรแกรม โหมดการตั ้ ง โปรแกรม – โหมดการตั ้ ง ค่ า โหมดการตั ้ ง ค่ า : (หน้ า จอแสดงผล) คุ ณ สามารถเปลี ่ ย นราคา, ระยะเวลาการทำงานและค่ า ต่ า งๆของวงรอบการทำงานได้ การเข้ า สู ่ โ หมดการตั ้ ง ค่ า •...
- Page 70 โหมดการตั ้ ง โปรแกรม 2.การเปลี ่ ย นราคาพิ เ ศษ เข้ า สู ่ โ หมดการตั ้ ง ค่ า ปุ ่ ม การแสดงผล คุ ณ จะเห็ น ข้ อ ความ LqC1 กดปุ ่ ม High Temp. กดปุ ่ ม Med Temp. หรื อ Low Temp. จนหน้ า จอแสดง กดปุ...
- Page 71 โหมดการตั ้ ง โปรแกรม 3.การเข้ า สู ่ เข้ า สู ่ โ หมดการตั ้ ง ค่ า ปุ ่ ม การแสดงผล คุ ณ จะเห็ น ข้ อ ความ LqC1 กดปุ ่ ม High Temp. กดปุ ่ ม Med Temp. หรื อ Low Temp. จนหน้ า จอแสดง กดปุ...
- Page 72 โหมดการตั ้ ง โปรแกรม 3-1. การตั ้ ง ค่ า ใช้ ง านวั น ที ่ ม ี ร าคาพิ เ ศษ เข้ า สู ่ โ หมดการตั ้ ง ค่ า ปุ ่ ม การแสดงผล คุ ณ จะเห็ น ข้ อ ความ LqC1 กดปุ...
- Page 73 โหมดการตั ้ ง โปรแกรม 3-2. การตั ้ ง ค่ า ประเภทการขาย – ประเภทใส่ บ ั ต รหรื อ ประเภทหยอดเหรี ย ญ เข้ า สู ่ โ หมดการตั ้ ง ค่ า ปุ ่ ม การแสดงผล คุ ณ จะเห็ น ข้ อ ความ LqC1 กดปุ...
- Page 74 โหมดการตั ้ ง โปรแกรม 3-3. การตั ้ ง ค่ า การเปิ ด ใช้ ง านการเพิ ่ ม ระยะเวลา เข้ า สู ่ โ หมดการตั ้ ง ค่ า ปุ ่ ม การแสดงผล คุ ณ จะเห็ น ข้ อ ความ LqC1 กดปุ...
- Page 75 โหมดการตั ้ ง โปรแกรม 4.การเข้ า สู ่ ก ารตั ้ ง ค่ า วั น ที ่ ม ี ร าคาพิ เ ศษ เข้ า สู ่ โ หมดการตั ้ ง ค่ า ปุ ่ ม การแสดงผล คุ ณ จะเห็ น ข้ อ ความ LqC1 กดปุ...
- Page 76 โหมดการตั ้ ง โปรแกรม 4-1 การเปลี ่ ย นวั น อาทิ ต ย์ เข้ า สู ่ โ หมดการตั ้ ง ค่ า ปุ ่ ม การแสดงผล คุ ณ จะเห็ น ข้ อ ความ LqC1 กดปุ ่ ม High Temp. กดปุ...
- Page 77 โหมดการตั ้ ง โปรแกรม 5.การกำหนดเวลาเริ ่ ม ต้ น ของราคาพิ เ ศษ เข้ า สู ่ โ หมดการตั ้ ง ค่ า ปุ ่ ม การแสดงผล คุ ณ จะเห็ น ข้ อ ความ LqC1 กดปุ ่ ม High Temp. กดปุ ่ ม Med Temp. หรื อ Low Temp. จนหน้ า จอแสดง กดปุ...
- Page 78 โหมดการตั ้ ง โปรแกรม 6.การกำหนดเวลาสิ ้ น สุ ด ของราคาพิ เ ศษ เข้ า สู ่ โ หมดการตั ้ ง ค่ า ปุ ่ ม การแสดงผล คุ ณ จะเห็ น ข้ อ ความ LqC1 กดปุ ่ ม High Temp. กดปุ ่ ม Med Temp. หรื อ Low Temp. จนหน้ า จอแสดง กดปุ...
- Page 79 โหมดการตั ้ ง โปรแกรม 7.การตั ้ ง ค่ า ระยะเวลาวงรอบสำหรั บ ราคาปกติ เข้ า สู ่ โ หมดการตั ้ ง ค่ า ปุ ่ ม การแสดงผล คุ ณ จะเห็ น ข้ อ ความ LqC1 กดปุ ่ ม High Temp. กดปุ ่ ม Med Temp. หรื อ Low Temp. จนหน้ า จอแสดง กดปุ...
- Page 80 โหมดการตั ้ ง โปรแกรม 8.การตั ้ ง ค่ า ระยะเวลาวงรอบสำหรั บ ราคาพิ เ ศษ เข้ า สู ่ โ หมดการตั ้ ง ค่ า ปุ ่ ม การแสดงผล คุ ณ จะเห็ น ข้ อ ความ LqC1 กดปุ ่ ม High Temp. กดปุ...
- Page 81 โหมดการตั ้ ง โปรแกรม 9.การตั ้ ง ค่ า มู ล ค่ า ของเหรี ย ญ 1 เข้ า สู ่ โ หมดการตั ้ ง ค่ า ปุ ่ ม การแสดงผล คุ ณ จะเห็ น ข้ อ ความ LqC1 กดปุ ่ ม High Temp. กดปุ...
- Page 82 โหมดการตั ้ ง โปรแกรม 10. การตั ้ ง ค่ า มู ล ค่ า ของเหรี ย ญ 2 (เป็ น การตั ้ ง ค่ า สำหรั บ ต่ อ ระยะเวลาหรื อ เหรี ย ญ e-suds) เข้ า สู ่ โ หมดการตั ้ ง ค่ า ปุ...
- Page 83 โหมดการตั ้ ง โปรแกรม 11. การตั ้ ง ค่ า สั ด ส่ ว นการเพิ ่ ม ขึ ้ น ของราคาสำหรั บ เพ็ น นี ใช้ ใ นการตั ้ ง ค่ า สั ด ส่ ว นการเพิ ่ ม ขึ ้ น ของเซนต์ เ มื ่ อ ใช้ ก ั บ บั ต รเงิ น สด เข้...
- Page 84 โหมดการตั ้ ง โปรแกรม 12.การตั ้ ง ค่ า การเพิ ่ ม ขึ ้ น ของเวลา เข้ า สู ่ โ หมดการตั ้ ง ค่ า ปุ ่ ม การแสดงผล คุ ณ จะเห็ น ข้ อ ความ LqC1 กดปุ ่ ม High Temp. กดปุ...
- Page 85 โหมดการตั ้ ง โปรแกรม 13. การตั ้ ง ค่ า ความดั ง ของเสี ย งเตื อ น เข้ า สู ่ โ หมดการตั ้ ง ค่ า ปุ ่ ม การแสดงผล คุ ณ จะเห็ น ข้ อ ความ LqC1 กดปุ ่ ม High Temp. กดปุ...
- Page 86 โหมดการตั ้ ง โปรแกรม 14.การตั ้ ง ค่ า เวลาที ่ ใ ช้ ใ นการเก็ บ เหรี ย ญ (เฉพาะประเภทหยอดเหรี ย ญ) เข้ า สู ่ โ หมดการตั ้ ง ค่ า ปุ ่ ม การแสดงผล คุ ณ จะเห็ น ข้ อ ความ LqC1 กดปุ...
- Page 87 โหมดการตั ้ ง โปรแกรม 15.การตั ้ ง ค่ า ประเภทของผลิ ต ภั ณ ฑ์ เข้ า สู ่ โ หมดการตั ้ ง ค่ า ปุ ่ ม การแสดงผล คุ ณ จะเห็ น ข้ อ ความ LqC1 กดปุ ่ ม High Temp. กดปุ...
- Page 88 โหมดการตั ้ ง โปรแกรม โหมดการตั ้ ง โปรแกรม – โหมดการทดสอบ โหมดการตรวจสอบหาความผิ ด พลาด : (หน้ า จอแสดงผล) โปรแกรมนี ้ ใ ช้ ส ำหรั บ การทดสอบการทำงานของเครื ่ อ งอบผ้ า และตรวจสอบหาข้ อ ผิ ด พลาดของเครื ่ อ ง วิ ธ ี ก ารเข้ า สู ่ โ หมดทดสอบ ประเภท...
- Page 89 โหมดการตั ้ ง โปรแกรม กดปุ ่ ม Start เพื ่ อ ไปยั ง ฟั ง ก์ ช ั น ถั ด ไป จำนวนครั ้ ง ของการ การตรวจสอบ การแสดงผล กดปุ ่ ม Start LqC 1 ตรวจสอบเวอร์ ช ั น และรหั ส ของเครื ่ อ ง เวอร์...
- Page 90 โหมดการตั ้ ง โปรแกรม 2. รี เ ซ็ ท กลั บ ไปค่ า เริ ่ ม ต้ น จากโรงงาน – EEPt หลั ง จากรี เ ซ็ ท กลั บ ไปที ่ ค ่ า เริ ่ ม ต้ น จากโรงงาน ทุ ก ๆค่ า จะเปลี ่ ย นเป็ น ค่ า เริ ่ ม ต้ น ทั ้ ง หมด เข้...
- Page 91 โหมดการตั ้ ง โปรแกรม 3.การตั ้ ง ค่ า เวลา เข้ า สู ่ โ หมดการตั ้ ง ค่ า ปุ ่ ม การแสดงผล คุ ณ จะเห็ น ข้ อ ความ กดปุ ่ ม Med Temp. หรื อ Low Temp. จนหน้ า จอแสดง LqC1 กดปุ...
- Page 92 โหมดการตั ้ ง โปรแกรม 4. วงรอบการทำงาน Courtesy วงรอบการทำงานแบบ Courtesy จะคล้ า ยกั บ วงรอบการทำงานแบบฟรี ท ี ่ ม อบให้ ก ั บ ลู ก ค้ า เมื ่ อ เครื ่ อ งอบผ้ า ไม่ ส ามารถใช้ ง านได้ เข้ า สู ่ โ หมดการตั ้ ง ค่ า ปุ...
- Page 93 โหมดการตั ้ ง โปรแกรม 5.ยกเลิ ก วงรอบการทำงาน ประเภทหยอดเหรี ย ญ เข้ า สู ่ โ หมดการตั ้ ง ค่ า ปุ ่ ม การแสดงผล คุ ณ จะเห็ น ข้ อ ความ กดปุ ่ ม Med Temp. หรื อ Low Temp. จนหน้ า จอแสดง LqC1 กดปุ...
- Page 94 โหมดการตั ้ ง โปรแกรม โหมดการตั ้ ง โปรแกรม – โหมดแสดงข้ อ มุ ล การใช้ ง าน แสดงข้ อ มู ล การใช้ ง าน : CLCt (หน้ า จอแสดงผล) เครื ่ อ งอบผ้ า จะเก็ บ ข้ อ มุ ล การใช้ ง านเผื ่ อ ให้ เ จ้ า ของสามารถตรวจสอบข้ อ มู ล เช่ น จำนวนครั ้ ง ของการทำงาน, จำนวนครั...
- Page 95 โหมดการตั ้ ง โปรแกรม ตารางแสดงข้ อ มู ล การใช้ ง าน หมา ตั ว ย่ อ ความหมาย คำอธิ บ าย ยเลข ACrt เวลาการทำงานแบบสะสม เวลาการทำงานเป็ น นาที (0~65535) Itnr จำนวนวงรอบที ่ ไ ม่ ไ ด้ ท ำงาน Itnr ไม่ เ ปิ ด ให้ ใ ช้ ง านบนเครื ่ อ งอบผ้ า Ittb จำนวนวงรอบที...
- Page 96 การบำรุ ง รั ก ษา การบำรุ ง รั ก ษา การทำความสะอาดแบบปกติ การทำความสะอาดแผ่ น กรองเศษผ้ า ทำความสะอาดแผ่ น กรองเศษผ้ า ทุ ก ครั ้ ง หลั ง วงรอบการท คำเตื อ น ำงาน ท่ า นสามารถปฏิ บ ั ต ิ ต ามข้ อ ระวั ง เบื ้ อ งต้ น รวมทั ้ ง คำแนะนำที ่ แ สด งในด้...
- Page 97 คำแนะนำในการติ ด ตั ้ ง เครื ่ อ งอบผ้ า แบบวางซ้ อ นกั น คำแนะนำในการติ ด ตั ้ ง เครื ่ อ งอบผ้ า แบบวางซ้ อ นกั น 1. รู ป แบบที ่ เ หมาะสมต่ อ การวางซ้ อ นกั น ชั...
- Page 98 คำแนะนำในการติ ด ตั ้ ง เครื ่ อ งอบผ้ า แบบวางซ้ อ นกั น 4. การวางเครื ่ อ งใช้ ไ ฟฟ้ า ซ้ อ นกั น - ยกและซ้ อ นเครื ่ อ งอบผ้ า บนเครื ่ อ งซั ก ผ้ า - จั...
- Page 99 โหมดแสดงการทำงานผิ ด พลาด / กู ้ ค ื น ระบบจากไฟฟ้ า ดั บ / การตั ้ ง ค่ า ค่ า เริ ่ ม ต้ น ของเครื ่ อ งอบผ้ า โหมดแสดงการทำงานผิ ด พลาด ความหมายของรหั ส แสดงความผิ ด พลาดที ่ จ อแสดงผล LED ระหว่...
Need help?
Do you have a question about the RP1329AD1S and is the answer not in the manual?
Questions and answers
No enciende el fuego la secadora a qué se debe
The LG RP1329AD1S dryer may not be igniting due to a faulty thermistor. The manual states that if the thermistor is open or shorted, or if its temperature increases by about 17 degrees in 10 seconds, it should be replaced. These conditions can prevent proper ignition.
This answer is automatically generated