inVENTer Easy Connect e16 Setup
Hide thumbs
Also See for Easy Connect e16:
- Quick manual (16 pages) ,
- Quick start manual (2 pages) ,
- Manual (2 pages)
Table of Contents
Advertisement
Quick Links
Advertisement
Table of Contents

Subscribe to Our Youtube Channel
Related Manuals for inVENTer Easy Connect e16


Summary of Contents for inVENTer Easy Connect e16
- Page 1 Quick Guide inVENTer Connect Set-up 1505-0036 www.inventer.eu 1505-0037...
-
Page 2: User And Safety Instructions
TIP: A TIP symbol indicates practical and useful tips for handling the inVENTer Connect system. Action required: This prompts the user to perform a specifc action. Check the results: requires the user to check the results of the action performed. -
Page 3: Installation
Installation: 230 V AC 230 V AC Download Manual... - Page 4 System overview and function The inVENTer Connect controller platform is an innovative control system for decentralised iV ventilation units with heat recovery from inVENTer. It allows the individual devices of a usage unit to be integrated into an 868 MHz wireless network, controlled and programmed wirelessly.
- Page 5 In addition to the fixed system components, the free app „inVENTer Mobile“ is required for complete control and programming. The system can also be put into operation without the app and can be controlled on a basic level via...
-
Page 6: Initial Setup
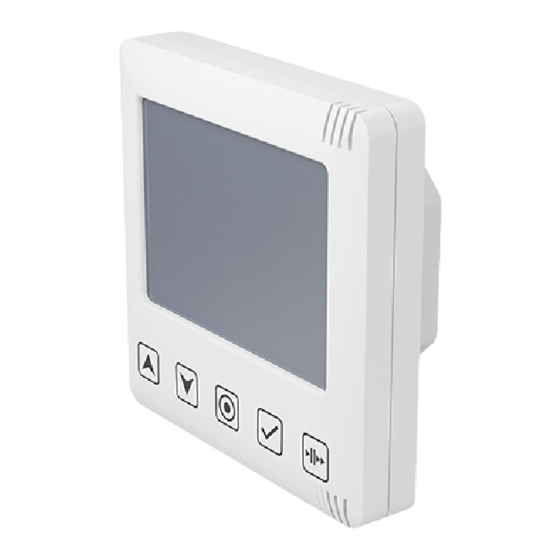
Installation Install the components included in the scope of delivery according to the instructions provided: • Easy Connect e16 5040-0032 • Connect inner cover V - 240 x 240 UP / AP 5040-0030 • CS2-Connect CO sensor 5040-0034 • FTS19-Connect indoor humidity/temperature sensor •... - Page 7 Step 1: Connecting to mains power Establish the power connection. The controller performs firmware and hardware checks for the system, the LED flashes RED, GREEN and BLUE during this process. (1). After a successful firmware and hardware check, the LED lights up WHITE (2).
- Page 8 Optional: Step 3: Time and date setting A flashing value/setting on the controller‘s display can be changed/set using the navigation keys. Setting the time Initially the hour setting is flashing (1). Minutes Hours Press the navigation keys to set the current hour.
-
Page 9: Device Pairing
Device pairing Up to 16 system components (ventilation units [Connect inner covers], sensors, switching contact) can be paired with the Easy Connect e16 controller and thus be integrated into the inVENTer Connect controller platform. To do so: •... - Page 10 Step 1: Activate component pairing on the Easy Connect e16 controller Press the mode key (approx. 3 seconds, (1) ), until the LED flashes WHITE (2). The display illuminates. Release the mode key.
- Page 11 Activated components are automatically recognised and paired by the controller. Activation of Connect system components is executed analogous and is shown here as an example on the Connect inner cover. Press the push-button on the respective component to activate: Connect inner cover: button inside the housing;...
- Page 12 Step 3: Ending component pairing on the controller After all components are paired, the pairing must be completed, if • less then 16 components are paired, or • time limit of 5 minutes after pairing activation on the controller is not exceeded. ...
- Page 13 Once all system components are paired, refit the inner cover. NOTICE: For this purpose the locking arm must be swivelled to the right! Pause the ventilation unit: press the pause key on the controller twice. The pause symbol II flashes. ...
- Page 14 Setup with the app For advanced settings, like setting up ventilation zones or assigning and changing ventilation profiles the app „inVENTer Mobile“ is compulsory. To connect the app to the controller, Bluetooth must be enabled and the app must be given location access.
- Page 15 A message appears on your mobile CONGRATULATIONS! device when the connection is You have just completed the setup of your inVENTer. The app allows you to set the unit’s ventilator speed and automatic functions. completed. Select „COMPLETE SETUP“.
- Page 16 You can enter a freely selectable name Enter the new (max. 24 characters) in the window that product name appears. Easy Connect e16 ABBRECHEN Confirm by pressing „OK“. The controller appears on the display to indicate that it is connected and available.
- Page 17 Text in gey: ventilation zone cannot be changed. The menu item „Device overview“ is described in the inVENTer Connect controller platform‘s detailed operating instructions (5022-0006). Easy Connect e16 Press the arrow in the upper left corner of a display window to return to the menu window.
- Page 18 Assigning ventilation profiles If all ventilation zones have been assigned, predefined ventilation profiles can be assigned to them. The assignment is based on ventilation planning and room use.. Easy Connect e16 Select the Ventilation zone overview in the Ventilation zone overview menu window.
- Page 19 Current ventilator power level 1 Override Override Override Override 18,4°C 39,2% 22,8°C 33,7% 24,3°C 55,4% 25,8°C 24,9% For these settings, follow the menu navigation on your mobile device or the description in the inVENTer Connect controller platform‘s detailed operating instructions ( 5022-0006).
- Page 20 It is only necessary to set up this function if the radio signal from the controller does not reliably reach all of the components integrated in the ventilation system. Easy Connect e16 When setting up an amplifier the use selects a device that requires signal amplification.
-
Page 21: Guarantee And Service
The selected component acts as repeater. Guarantee and service inVENTer GmbH provides a five-year guarantee for electronic components. This covers premature product wear. In the case of a warranty or guarantee claim, contact your local distributor or factory representative. - Page 24 | Tento dokument je platný pouze ve spojení s původním návodem pro pou- žití řadičů inVENTer. Přečtěte si pozorně originální návod na použití a dodržujte bezpečnostní pokyny. | Esta documentación solo es válida junto con las instrucciones originales de los controladores inVENTer.
Need help?
Do you have a question about the Easy Connect e16 and is the answer not in the manual?
Questions and answers