Table of Contents
Advertisement
Advertisement
Table of Contents

Subscribe to Our Youtube Channel
Related Manuals for DigiTech AP4010


Summary of Contents for DigiTech AP4010
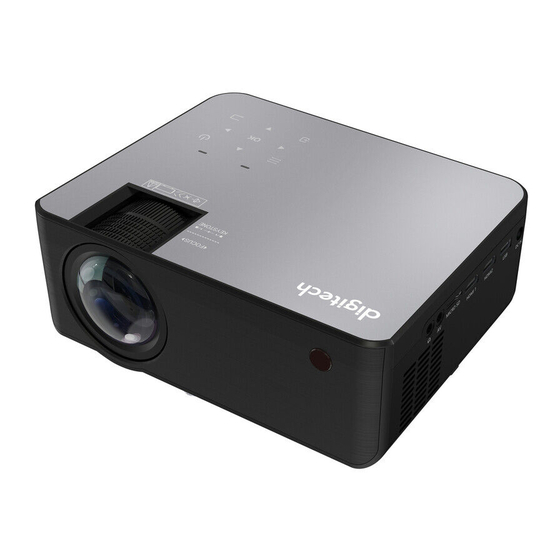
- Page 1 Portable HD LED Projector with Built-in Speakers Model: AP4010 Instruction Manual...
-
Page 2: Table Of Contents
Table of Contents Portable HD LED Projector In the Box Mains Power Top View Rear View Left Side View Remote Control Quick Setup Picture Menu Audio menu Options Menu Time Menu Operation Power Projector Placement Viewing Options Ceiling Mount Angle Adjustment Image Adjustment HDMI Audio/Video Input... -
Page 3: Portable Hd Led Projector
PORTABLE HD LED PROJECTOR: In the Box Carefully remove your HD LED Projector from the packaging. Inside the box you will find: • 1 x HD LED Projector • 1 x Power Adapter • 1 x Remote Control: requires 2 x AAA batteries (not included) •... -
Page 4: Top View
PORTABLE HD LED PROJECTOR: Top View Projector Lens Arrows/OK Press to navigate on-screen Focus Adjustment menus and make selections Keystone Adjustment Return Menu Press to return to a previous Press to access on-screen page or setting in the on-screen menus and options menus. -
Page 5: Rear View
PORTABLE HD LED PROJECTOR: Rear View VGA/PC Input Remote Sensor Duplicated on the front of the projector. Height Adjustment Peg Left Side View 3.5mm Audio Output HDMI Input 1 & 2 3.5mm AV Input USB Port Micro SD Card Port DC Power Port... -
Page 6: Remote Control
PORTABLE HD LED PROJECTOR: Remote Control Power Press to ON/OFF power. FLIP VOL – VOL + Mute Press to mute volume. SOURCE Previous / Next Press to skip between chapters or tracks. MENU EXIT Back / Fwd Press to search through an individual chapter or track. -
Page 7: Quick Setup
QUICK SETUP: Picture Menu Picture Mode: Select Dynamic, User (custom), Mild, or Standard. Contrast, Brightness, etc: Set Picture Mode to “User” to adjust these settings. Color Temperature: Select Warm, Cool, or Medium. 4. Aspect Ratio: 16:9, 4:3, Auto. Noise Reduction: Select low, middle, high, default, off. PICTURE AUDIO OPTION... -
Page 8: Audio Menu
QUICK SETUP: Audio Menu Sound Mode: Select Music, Movie, User (custom), Sports, or Standard. Treble, Bass: Set Sound Mode to “User” to adjust these settings. Auto Volume: Turn Auto Volume ON or OFF. PICTURE AUDIO OPTION TIME Select MENU Enter Options Menu OSD Language: Select English, French, or Spanish for the On Screen Display. -
Page 9: Time Menu
QUICK SETUP: Time Menu Sleep Timer Select sleep timer to Off, 10min, 20min, 30min, 60min, 90min, 120min, 180min, 240min Auto Sleep Select auto sleep function to Never, 4 hours, 6 hours, 8 hours. PICTURE AUDIO OPTION TIME Select MENU Enter... -
Page 10: Operation
OPERATION: Power Plug the AC/DC power adapter (included) into a standard wall outlet and the DC power input on the left side of the unit. After connecting power, please allow approximately 5 seconds to pass before powering the unit ON. Projector Placement For best results, place the projector in a dark room or other dimly lit area. -
Page 11: Viewing Options
OPERATION: Viewing Options The projector can be used to project onto a wall or screen, mounted from the ceiling or on a table. When projecting from the rear position, a special screen will be needed (not included) to display the image. FRONT TABLE REAR TABLE FRONT CEILING... -
Page 12: Ceiling Mount
OPERATION: Ceiling Mount To mount the projector from the ceiling, you will need mounting hardware recommended by a professional. Mounting hardware and instructions are not included. Before mounting, be sure the ceiling structure can support the weight of the projector and the mount itself. It is recommended to have this unit mounted by a professional. -
Page 13: Angle Adjustment
OPERATION: Angle Adjustment Use the Angle Adjustment Screw to fine tune the projector’s height. Image Adjustment Focus Adjustment Increase or reduce to image size to sharpen image. CAUTION Keystone Adjustment Adjust image corners to reduce image distortion. -
Page 14: Hdmi
OPERATION: HDMI HDMI offers superior sound and picture quality, and is the easiest way to play media from a computer, Blu-Ray player, or other device with an HDMI output. Requires an HDMI cable (not included) and a device with a HDMI output. Using a HDMI cable, connect the HDMI 1 or 2 input on the projector to the HDMI output on your media player or computer. -
Page 15: Audio/Video Input
OPERATION: Audio/Video Input Requires a 3.5mm to RCA audio/video cable (not included). Connect 3.5mm jack to the AV input of unit. Connect RCA jack to stereo audio output and composite video of the media player. Set the projector’s Source to AV and use the controls on the connected player to select and play media. -
Page 16: Micro Sd & Usb Storage Devices
OPERATION: Micro SD & USB Storage Devices Supports Micro SD cards and USB drives up to 1TB. Supports AVI, MOV file formats. Insert a USB drive and micro SD card into the USB port and micro SD card slot. Set the Source to Media Player, then use the Arrow buttons to select “C:Drive” or “D:Drive”... -
Page 17: Computer Video (Vga)
OPERATION: Computer Video (VGA) Note: VGA connections do not support audio. You will need to use the computer’s speakers to hear audio. Requires a VGA cable (not included) and a desktop PC or laptop with a VGA output. Using a VGA cable, connect the VGA input on the projector to the VGA output on your computer. -
Page 18: Headphone Jack/Audio Out
OPERATION: Headphone Jack/Audio Out Requires a 3.5 mm to RCA audio/video cable (not included) or 3.5mm audio cable (not included). Note: External speakers must have their own power supply. Using a 3.5 mm to RCA stereo cable (not included), connect the external powered speakers to the Headphone Jack on the projector. -
Page 19: Troubleshooting
TROUBLESHOOTING: Issues Solutions The projector shuts Check the power adaptor is fitted firmly into the projector. down automatically. In case of overheating, turn off the projector for approximately an hour to allow it time to cool completely. No signal on screen. Check whether the input signal source of the projector is switched to the existing signal source. -
Page 20: Technical Specifications
SPECIFICATIONS: Native Resolution: 1280 x 720 (720p) Supported 1080P, 1080i, 720p, 576i, 480p and 480i via HDMI input Resolutions: Supported Files: Video: AVI, MKV, MP4, MPG, WMV, MOV, FLV Image: JPEG, BMP, PNG Audio: MP3, MP4A, WAV, AAC, WMA Text: Projection Type: 1 LED light source + 4”...
Need help?
Do you have a question about the AP4010 and is the answer not in the manual?
Questions and answers