Table of Contents
Advertisement
Quick Links
Advertisement
Table of Contents

Related Manuals for Viessmann Vitoligno 200-S


Summary of Contents for Viessmann Vitoligno 200-S
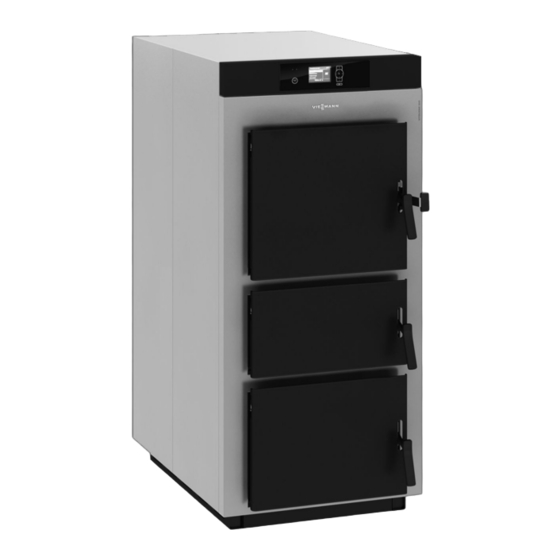
- Page 1 VIESMANN Installation and service instructions for contractors Vitoligno 200-S Type VL2A High performance wood gasification boiler for split logs up to 50 cm long For applicability, see the last page VITOLIGNO 200-S Please keep safe. 5777 985 GB 3/2017...
- Page 2 Prior to commencing work, touch earthed lidate our warranty. objects such as heating or water pipes, to dis- For replacements, use only original spare parts charge static loads. supplied or approved by Viessmann.
- Page 3 Safety instructions Safety instructions (cont.) Safety instructions for operating the system If you smell flue gas Danger Flue gas can lead to life threatening poisoning. ■ Shut down the heating system. ■ Ventilate the installation site. Close doors to living spaces to prevent flue ■...
- Page 4 Index Index 1. Information Disposal of packaging ................Symbols ....................Intended use ..................Maintenance and cleaning ..............2. Preparing for installation ........................ 3. Installation sequence Fitting the thermal insulation ..............12 Fitting the retaining rails ..............12 ■ Fitting the tie-bars ................13 ■...
- Page 5 Index Index (cont.) Calibrating the Lambda probe ............67 ■ Lambda probe specification ..............68 ■ Extension kit for heating circuit with mixer ..........69 Overview of electrical connections ............. 69 ■ Required settings ................69 ■ Extension kit specification ..............70 ■...
- Page 6 Please dispose of packaging waste in line with statu- tory regulations. DE: Use the disposal system organised by Viessmann. AT: Use the ARA statutory disposal system (Altstoff Recycling Austria AG, licence number 5766). CH: Packaging waste is disposed of by the HVAC contractor.
- Page 7 Information Intended use The appliance is only intended to be installed and Any usage beyond this must be approved by the man- operated in sealed unvented heating systems that ufacturer in each individual case. comply with EN 12828, with due attention paid to the associated installation, service and operating instruc- Incorrect usage or operation of the appliance (e.g.
- Page 8 Preparing for installation Preparing for installation Clearance dimensions (480) (480) (380) (380) Fig. 1 Required clearance for cleaning, heat-up and recharging The wall clearance can be reduced to 200 mm if the ignition is not located on this side of the boiler. Rated heating output 20/30 40/50...
- Page 9 Preparing for installation Preparing for installation (cont.) Handling and siting Observe the shipping information on the packag- Transport: ing. Transport the boiler to the installation location in an ■ upright position and, if possible, on the pallet. Please note ■ The boiler can be secured for transportation: Severe jolts can damage the combustion cham- –...
- Page 10 Preparing for installation Preparing for installation (cont.) 1. Test the hopper door, ignition door and ash door with a paper strip (approx. 20 mm wide). You should not be able to pull out the jammed paper strip from any of the 4 sealing faces. Alternatively: Carry out a chalk test In order to accurately test the door tightness, apply chalk to the sealing contour of the boiler body.
- Page 11 Preparing for installation Preparing for installation (cont.) Removing the doors M8 x 25 Fig. 4 1. Remove headless screws. 2. Unhook the doors. Keep washers safe. 3. Remove the display panel with outside tempera- ture sensor and boiler water temperature sensor from the boiler.
- Page 12 Installation sequence Fitting the thermal insulation Fitting the retaining rails 4,8 x 9,5 Fig. 5 Loosely fit the retaining rails; do not tighten the screws. ■ When fitting the front left rail, pay attention to the cables of the door contact switch. Note ■...
- Page 13 Installation sequence Fitting the thermal insulation (cont.) Fitting the tie-bars 4,8 x 9,5 Fig. 6...
- Page 14 Installation sequence Fitting the thermal insulation (cont.) Inserting the lower thermal insulation mat 90° 90° Fig. 7 1. Bend the tabs on both sides of the base protection 4. Insert the base protection plate. plate downwards. 5. Slide the base protection plate with the recess onto 2.
- Page 15 Installation sequence Fitting the thermal insulation (cont.) Aligning the retaining rails and fitting the front panel Fig. 8 Cleaning gate 1. If necessary, align the retaining rails on the r.h. and 4. Position the front panel on the location studs and l.h.
- Page 16 Installation sequence Fitting the thermal insulation (cont.) 3.9 x 9.5 aBÖ Fig. 9 Flow temperature sensor Sensor for high limit safety cut-out Sensor for thermally activated safety valve (not part of the standard delivery) High limit safety cut-out aBÖ 1. Open the control unit cover panel. 7.
- Page 17 Installation sequence Fitting the thermal insulation (cont.) Routing cables from all components to the control unit Fig. 10 1. Route cables (e.g. external electrical cables) to the Please note control unit. When doing this, take account of the Contact with hot components causes damage to system components in accordance with the system cables.
- Page 18 Installation sequence Fitting the thermal insulation (cont.) Fitting the doors Fig. 11 Washer (1 per door)
- Page 19 Installation sequence Fitting the thermal insulation (cont.) Fitting the side panels and back panel Route external cables through the opening in the back panel. 3,9 x 9,5 Fig. 12 Type plate Secure the side panels with the screws supplied. Electrical connections When connecting external switching contacts and Please note components to the safety low voltage of the control...
- Page 20 Installation sequence Electrical connections (cont.) Overview of electrical connections Overview of PCB and connection/wiring diagram from page 94. Inserting cables and applying strain relief Line entry ■ Secure all cables to the control unit additionally with cable ties. ■ Seal unnecessary apertures in the control unit base with cable grommets (not cut out).
- Page 21 Installation sequence Fitting the covers 4.8 x 9.5 4.8 x 9.5 Fig. 14 1. Close the control unit enclosure. 2. Fit the top panel.
- Page 22 Installation sequence Connections on the flue gas side Note 1. Install the flue pipe with a rise to the chimney (pref- Install a flexible connection piece in the flue to prevent erably 45°). sound transmission from the flue gas fan. Flue pipe (internal diameter): 150 mm Never brick the flue pipe into the chimney.
- Page 23 Installation sequence Connections on the water side (cont.) K L M Fig. 16 Boiler flow G 1 Sensor for thermally activated safety valve (not ½ Cold water inlet for thermally activated safety valve part of the standard delivery) Thermally activated safety valve ¾...
-
Page 24: Table Of Contents
Commissioning, inspection, maintenance Steps - commissioning, inspection and maintenance Commissioning steps Inspection steps Maintenance steps Page • 1. Filling the heating system....................26 • • • 2. Checking all connections on the heating water side for leaks • 3. Switching on the power and starting the commissioning sequence......27 •... - Page 25 Commissioning, inspection, maintenance Steps - commissioning, inspection and… (cont.) Commissioning steps Inspection steps Maintenance steps Page • • • 40. Checking the draught......................45 • 41. Instructing the system user....................45...
-
Page 26: Filling The Heating System
Commissioning, inspection, maintenance Filling the heating system Fill water According to EN 1717 with DIN 1988-100, as a heat Please note transfer medium for DHW heating, the heating water Unsuitable fill water increases the level of must meet fluid category ≤ 3. This requirement is met if deposits and corrosion and may lead to appli- water of potable quality is used as heating water. -
Page 27: Switching On The Power And Starting The Commissioning Sequence
Commissioning, inspection, maintenance Switching on the power and starting the commissioning sequence After switching the power on, a commissioning While making the following inputs, these keys may sequence commences. If it does not start automati- also be pressed: cally, press simultaneously and hold for to go back one step Ù... -
Page 28: Selecting An Additional Boiler
Commissioning, inspection, maintenance Selecting an additional boiler If an additional heat source is to be selected, press the to confirm. following keys: for additional boiler "Yes/No" Selecting the connection for heating circuits 1 to 3 To specify where the respective heating circuit is con- to confirm. -
Page 29: Selecting The Solar Type
Commissioning, inspection, maintenance Selecting the solar type Only available if "On the boiler" was previously selec- to confirm. ted. Press the following keys: for diverter valve "Yes/No" Changing the heating circuit designations Press the following keys: to select the next character. Ù... -
Page 30: Calibrating The O Probe
Commissioning, inspection, maintenance Checking the outputs and actuators (cont.) The following boiler actuators can be switched, subject to the system equipment level (not required dur- ing commissioning): Display Explanation "Boiler pump On" "Boiler valve, open" Valve on return temperature raising facility "Boiler valve, close"... -
Page 31: Displaying The Menu Structure
Commissioning, inspection, maintenance Displaying the menu structure If you exit the commissioning sequence by pressing " ", the structure of the commissioning menu is dis- å played. From here, you can change to the standard menu or the main menu. Matching the control unit to the heating system The control unit must be matched to the system equip- Note... - Page 32 Commissioning, inspection, maintenance Adjusting the heating curves (cont.) Standard room temperature 26°C Press the following keys in the standard menu: å 20°C for "Heating". to confirm. -20°C for selecting the heating circuit. to confirm. Fig. 19 Changing the standard room temperature for "Standard room temp."...
-
Page 33: Heat Up
Commissioning, inspection, maintenance Adjusting the heating curves (cont.) Changing the slope and level Individually adjustable for each heating circuit. for "Heating". to confirm. for selecting the heating circuit. to confirm. for "Heating curve". to confirm. for "Slope" or "Level". to confirm. Outside temperature in °C for the required value. - Page 34 Commissioning, inspection, maintenance Shutting down the system (cont.) Measure Every 350 Once a Every 3 Every 5 hours run year years years Check the system pressure. Clean the hopper. Clean the secondary heating surfaces and flue gas collec- tor chamber. Clean the ash chamber and combustion chamber.
-
Page 35: Hopper Cleaning (If Required)
Commissioning, inspection, maintenance Hopper cleaning (if required) Fig. 22 1. Use a scraper or spatula to remove dry and flaking 2. Check primary air vents in side elements deposits (ash, carbon and tar) from the walls and unrestricted flow. Clean with a vacuum cleaner if from the front and rear corners. -
Page 36: Cleaning The Secondary Heating Surfaces
Commissioning, inspection, maintenance Cleaning the secondary heating surfaces Fig. 23 1. Remove back top panel 5. Only slide retaining bracket a little way towards the side panel on both sides. Shift until rear 2. Cut open thermal insulation mat at the perfora- bracket can be removed. -
Page 37: Cleaning The Ash Chamber And Combustion Chamber
Commissioning, inspection, maintenance Cleaning the secondary heating surfaces (cont.) 9. Reassemble all parts in reverse order. Cleaning the ash chamber and combustion chamber Fig. 24 1. Open ash door and thermal insulation door 3. If necessary, clean combustion chamber and ash chamber. -
Page 38: Checking The Doors For Tightness
Commissioning, inspection, maintenance Checking the doors for tightness Fig. 25 1. Check hopper door , ignition door and ash 3. After this, check the function of the door contact switch. door for tightness. Test with paper strips. You should not be able to pull out a paper strip (approx. -
Page 39: Cleaning The Flue Gas Fan
Commissioning, inspection, maintenance Checking the doors for tightness (cont.) Fig. 26 Observe the following sequence: ■ Undo nuts Shift the hinge or lock plate. To do this with the lock ■ plate, adjust the nuts on the eye screw. ■ Retighten nuts Cleaning the flue gas fan Danger... -
Page 40: Cleaning The Lambda Probe And Air Dampers
Commissioning, inspection, maintenance Cleaning the flue gas fan (cont.) Fig. 27 1. Disconnect cables. 4. Reassemble the flue gas fan in reverse order. 2. Undo 6 screws on flue gas fan Please note . Pull out motor with the impeller. Contact with hot components causes damage to cables. - Page 41 Commissioning, inspection, maintenance Cleaning the Lambda probe and air dampers (cont.) Removing the maintenance cover Remove maintenance cover on the back of the boiler. Fig. 28 Performing maintenance 1. Remove Lambda probe . Carefully clean with a wire brush or oil-free compressed air. 2.
-
Page 42: Cleaning The Air Box And Secondary Air Supply
Commissioning, inspection, maintenance Cleaning the air box and secondary air supply Fig. 30 1. Remove top panel and side panels 2. Fold up thermal insulation mat... -
Page 43: Cleaning The Sensor Well For Flue Gas Temperature Sensor
Commissioning, inspection, maintenance Cleaning the air box and secondary air supply (cont.) Fig. 31 1. Remove air box and replace self-adhesive gas- 3. Replace packing cord if required. 2. Remove sealing flange Cleaning the sensor well for flue gas temperature sensor Remove and clean sensor well Note When replacing the flue gas temperature sensor, do... -
Page 44: Checking The Safety Valve Function
■ Only use dry natural wood (see operating instruc- The Vitoligno 200-S is a high performance wood gasifi- tions, chapter "Fuel"). Wood with a higher moisture cation boiler and must therefore be operated with a content results in a reduced flame temperature and sufficiently large buffer cylinder. - Page 45 Commissioning, inspection, maintenance Emissions test (cont.) Preheat the boiler (at least 2 hours before testing) Set the residual oxygen on the control unit to ■ ■ and form the firebed. For this, only half fill the hop- between 6 and 7 %. per.
- Page 46 Codes Code 1 Calling up code 1 Press the following keys: Exit the service menu. ä simultaneously for approx. 4 s. Overview å The "Service" menu appears. The coding addresses are displayed in groups, subject for "Code 1". to system configuration: "General"...
- Page 47 Codes Code 1 (cont.) Coding in the delivered condition Possible change Buffer type Buffer type:0 When heat is drawn from the buf- Buffer type:1 When heat is drawn from the buffer, fer, system temperature = temper- system temperature = temperature ature at buffer temperature sensor at buffer temperature sensor 2 Only available if code "Buffer: 3, 4...
- Page 48 Codes Code 1 (cont.) Coding in the delivered condition Possible change Solar (if heating circuit extension module installed) Solar:No No solar group installed Solar:On the boil- The solar group is connected to the er (if heating cir- boiler control unit at the heating cir- cuit extension cuit extension module.
- Page 49 Codes Code 1 (cont.) Coding in the delivered condition Possible change Summer eco function absolute A6:36 Extended economy mode inactive A6:5 Extended economy mode active, i.e. the heating circuit pump is switched A6:35 off at a variable value, adjustable from 5 to 35 °C plus 1 °C. The mixer is closed.
- Page 50 Codes Code 1 (cont.) Parameter ad- Heating circuit pump "OFF" Heating circuit pump "ON" dress "B5": Summer eco function active Summer economy function passive + 5 K < RT + 4 K > actual actual + 4 K < RT + 3 K >...
- Page 51 Codes Code 1 (cont.) Boiler Coding Coding in the delivered condition Possible change Flue gas temperature limit 1:... Boiler regulates to a maximum of 1:100 Max. flue gas temperature adjusta- the factory-set flue gas tempera- ble from 100 to 250 °C ture.
- Page 52 Codes Code 1 (cont.) Coding in the delivered condition Possible change Set buffer temperature ignition FD:50 If the average heating water buffer FD:20 Min. average temperature in °C cylinder temperature falls below 50 °C, the boiler can be started. FD:70 This code is only available if auto- matic ignition is used.
- Page 53 Codes Code 1 (cont.) Coding in the delivered condition Possible change Solar circuit pump minimum speed 74:30 Minimum permissible speed of so- 74:10 Setting range in % lar circuit pump, 30 % of maximum possible pump speed 74:100 Nominal flow rate collector circuit 75:0.0 No flow rate 75:0.1...
- Page 54 Codes Code 1 (cont.) Coding in the delivered condition Possible change Buffer charging until temperature D1:75 The additional heat generator D1:50 Adjustable value in °C charges the heating water buffer cylinder until the temperature of D1:100 75 °C at the selected sensor (code "D0:1-5") is reached.
- Page 55 Codes Code 2 (cont.) for "Code 2". Exit the service menu. ä to confirm. Overview for the required coding address. The coding addresses are displayed in groups, subject to system configuration: to confirm. "General" ■ See page 55 for the required value. ■...
- Page 56 Codes Code 2 (cont.) Heating Coding Coding in the delivered condition Possible change DHW priority A2:0 No priority control during cylinder A2:1 During cylinder heating, the mixer heating. closes. When the heating circuit is wired to the boiler control unit, the Note heating circuit pump remains switch- Individually adjustable for each...
- Page 57 Codes Code 2 (cont.) Coding in the delivered condition Possible change Room sensor offset E2:50 Is available if code "A0:1" or E2:0 Correction - 5 K to display correction "A0:2", heating group, is set. - 0.1 K No correction of actual room tem- E2:49 perature E2:51...
- Page 58 Service checks Service menu The following service functions can be selected: "Code 2"; see page 54 onwards ■ ■ "Diagnosis"; see page 58 onwards ■ "Service functions" ■ "Actuator test"; see page 29 onwards ■ "Fault history"; see page 61 onwards ■...
- Page 59 "Central fault" Ext. output for on-site fault signalling unit "Time" Displays the set time. "Date" Displays the set date. "Boiler" Vitoligno 200-S "Firmware version" Display of current firmware "Userware version" Display of current userware "Boiler" sub-menu "Boiler water temperature" "Return temperature"...
- Page 60 Service checks Calling up operating conditions and sensors (cont.) "Set DHW temperature" "Actual DHW temp" "Set return temp" "Actual return temp" "KM-BUS" sub-menu Select the relevant KM-BUS subscriber by pressing Ù Ú "Communication" "Fault" "Commands" "Status" "Sensor 1" "Sensor 2" "Mixer"...
- Page 61 Troubleshooting Fault display Faults are signalled on the display by means of a "Fault" message and by an illuminated red fault indi- cator. Checking and acknowledging faults Note to select the fault message to be acknowl- If an acknowledged fault is not remedied, the fault edged, if several faults are present.
- Page 62 Troubleshooting Fault display (cont.) Deleting the fault codes from the fault memory Press the following keys: for "Delete". simultaneously for approx. 4 s. to confirm. å The "Service" menu appears. for "Yes". for "Fault history". to confirm. to confirm. until the default display is shown. ä...
- Page 63 Troubleshooting Fault display (cont.) Fault code dis- System characteristics Cause Measures played Control unit set to 0 °C out- Lead break, outside tem- Check outside temperature sensor side temperature perature sensor No DHW heating Lead break, top buffer Check top buffer temperature sen- temperature sensor Lead break, centre buffer Check centre buffer temperature...
- Page 64 Troubleshooting Fault display (cont.) Fault code dis- System characteristics Cause Measures played Fuel too damp Use suitable dry fuel ■ ■ Lambda probe inaccu- Recalibrate the Lambda probe ■ ■ rate (see page 67) Logs poorly charged Acknowledge with ■ ■...
- Page 65 Maintenance Fuse For installation position, see page 94. ■ 10A (slow) ■ 230V 50/60 Hz Power cable KSK ■ Battery The battery serves to save the time and date in the ■ Button cell, type CR2032, 3 V event of a power failure. Installation position, see ■...
- Page 66 Maintenance High limit safety cut-out (cont.) 4. Acknowledge excess temperature at the program- ming unit of the control unit with Sensors Sensor type Pt1000: For the curve of the sensor from the extension kit for Flow temperature sensor heating circuit with mixer, see page 70. ■...
- Page 67 Maintenance Sensors (cont.) 3. Compare the test result with the actual tempera- ture. For calling up the actual temperature, see chapter "Diagnosis". In the case of severe deviation, check sensor installation and replace the sensor if required. Lambda probe For measuring the residual oxygen content in the flue gas.
- Page 68 Maintenance Lambda probe (cont.) Lambda probe specification Make NGK, type OZAS-S1 Curve 10 12 16 18 20 22 Flue gas oxygen content O2 in % Fig. 39 Test point: Plug , no. 3 and 4, see page 96 Probe type OZAS-S1 Permiss.
- Page 69 Maintenance Extension kit for heating circuit with mixer Overview of electrical connections Fig. 40 S1 Rotary switch Sensor connections for one heating circuit: F1 Fuse Flow temperature sensor 230 V~ plugs Sensor connections for DHW heating: sÖ Pump DHW return temperature sensor (extension kit Power supply 230 V/50 Hz standard delivery) fÖ...
- Page 70 Flow temperature sensor (contact temperature sen- ■ sor) Specification Flow temperature sensor Sensor type Viessmann cylinder temperature sensor (NTC) IP rating IP 53 to EN 60 529; ensure through design/installation Permissible ambient temperature During operation 20 to +90 °C −...
- Page 71 Maintenance Extension kit for heating circuit with mixer (cont.) Mixer motor Changing the rotational direction (if required) Danger An electric shock can be life threatening. Before opening the boiler, disconnect it from the mains voltage, e.g. at the fuse or mains isolator.
- Page 72 Maintenance Extension kit for heating circuit with mixer (cont.)
- Page 73 Parts lists Overview of assemblies The following details are required when ordering parts: ■ Serial no. (see type plate ■ Assembly from this parts list ■ Position number of the individual part within the assembly (from this parts list) Fig. 44 Type plate Thermal insulation assembly Control unit assembly...
- Page 74 Parts lists Thermal insulation assembly 0005 0005 0007 0015 0002 0014 0011 0001 0006 0001 0002 0002 0004 0005 0005 0001 0018 0012 0018 0001 0009 0008 0002 0010 0018 0013 0018 0003 0009 0010 0017 0016 Fig. 45...
- Page 75 Display panel 0005 Side panel 0006 Back panel 0007 Top panel 0008 Base protection plate 0009 Viessmann logo 0010 Vitoligno 200 label 0011 Thermal insulation jacket 0012 Lower thermal insulation mat 0013 Thermal insulation mat, front 0014 Thermal insulation mat, back...
- Page 76 Parts lists Control unit assembly 0019 0016 0008 0007 0005 0017 0015 0022 0018 0004 0009 0010 0006 0002 0002 0011 0004 0003 0012 0013 0014 0020 0003 0023 Fig. 46...
- Page 77 Parts lists Control unit assembly (cont.) Pos. Part 0002 Open side section 0003 Casing 0004 Cable grommets 0005 Strain relief fittings 0006 Boiler controller 0007 Button cell 0008 Fuse, 6.3 A (slow)/250 V (10 pce) 0009 Power supply unit, boiler control unit 0010 Plug set, 24 V 0011...
- Page 78 Parts lists Control unit assembly (cont.)
- Page 79 Parts lists Overview of boiler assemblies Fig. 47 Doors assembly Fireproof material assembly Flue gas inlet/outlet assembly...
- Page 80 Parts lists Doors assembly 0002 0010 0007 0018 0001 0002 0018 0013 0003 0015 0014 0012 0025 0013 0017 0008 0006 0018 0003 0005 0004 0020 0019 0011 0027 0004 0005 0026 0006 0007 0009 0005 0012 0013 0018 0016 0014 0005 0015...
- Page 81 Parts lists Doors assembly (cont.) Pos. Part 0001 Cleaning cover, complete 0002 Thermal insulation block 0003 Door handle lock 0004 Knurled knob M5 x 25 0005 Door handle 0006 Securing hook 0007 Hinge, hopper door 0008 Hinge, ignition door 0009 Hinge, inspection door 0010 Door contact switch...
- Page 82 Parts lists Fireproof material assembly 0012 0012 0012 0012 0012 0012 0012 0011 0012 0004 0010 0010 0002 0004 0013 0003 0001 0004 0013 0002 0003 0004 0013 0009 0004 0013 0007 0006 0009 0004 0005 0013 0013 0006 0007 0005 0009 0004...
- Page 83 Parts lists Fireproof material assembly (cont.) Pos. Part 0001 Nozzle, complete 0002 Nozzle upper part 0003 Nozzle lower part 0004 Gasket 16 x 12 0005 Fireclay panel, lower (2 pce) 0006 Fireclay panel, rear (3 pce) 0007 Fireclay panel, side (2 pce) 0008 Thermal insulation panel, lower (2 pce) 0009...
- Page 84 Parts lists Flue gas inlet/outlet assembly, 20 and 30 kW 0028 0010 0011 0029 0012 0019 0013 0020 0009 0018 0010 0011 0027 0012 0015 0022 0026 0008 0005 0003 0017 0022 0004 0005 0026 0022 0002 0026 0021 0006 0017 0022 0026...
- Page 85 Parts lists Flue gas inlet/outlet assembly, 20 and 30 kW (cont.) Pos. Part 0001 Turbulator 0002 Bracket, front 0003 Bracket, rear 0004 Shaft 0005 Retaining bracket 0006 Adaptor 0007 Slider 0008 Small parts, cleaning mechanism 0009 Flue gas cover unit 0010 Flue gas fan 0011...
- Page 86 Parts lists Flue gas inlet/outlet assembly, 40 and 50 kW 0028 0009 0010 0011 0029 0017 0018 0012 0019 0008 0009 0026 0010 0011 0007 0004 0002 0014 0021 0025 0003 0021 0002 0016 0004 0025 0021 0005 0020 0025 0021 0016 0025...
- Page 87 Parts lists Flue gas inlet/outlet assembly, 40 and 50 kW (cont.) Pos. Part 0001 Turbulator 0002 Bracket, front and rear 0003 Shaft 0004 Retaining bracket 0005 Adaptor 0006 Slider 0007 Small parts, cleaning mechanism 0008 Flue gas cover unit 0009 Flue gas fan 0010 Flue gas cover...
- Page 88 Parts lists Miscellaneous assembly 0009 0010 0004 0002 0007 0001 0008 0006 0005 0003 0011 Fig. 52...
- Page 89 Parts lists Miscellaneous assembly (cont.) Pos. Part 0001 Poker 0002 Scraper 0003 Cleaning brush 0004 Brush handle 0005 Touch-up spray paint, Vitosilver, 150 ml can 0006 Spray paint, black, 400 ml can 0007 Spray paint, anthracite 0008 Touch-up paint stick, Vitosilver 0009 Installation and service instructions 0010...
- Page 90 Function description Display and operating elements Programming unit Accum. extraction Boiler Cylinder Heating Select with Fig. 53 Return to the previous step in the menu or cancel Confirm selection or save the setting made. a setting that has been started Call up help text in connection with the selected Cursor keys: menu point.
- Page 91 "C" (DHW can be set in the individual time program via the time group). switch. Operating instructions Vitoligno 200-S Screed drying The screed drying function enables screeds to be ■ Heat-up data with the relevant flow temperatures dried.
- Page 92 Function description Heating circuit control unit (cont.) Temperature profile 2 (ZV parquet and flooring technology), code "F1:2" Days Fig. 55 Temperature profile 3, code "F1:3" Days Fig. 56 Temperature profile 4, code "F1:4" Days Fig. 57 Temperature profile 5, code "F1:5" Days Fig.
- Page 93 Connection and wiring diagram Connection and wiring diagram Position of the PCB Fig. 60 PCB in the control unit wiring chamber...
- Page 94 Connection and wiring diagram Connection and wiring diagram (cont.) Overview of PCB Fig. 61 230 V connections Connection for programming unit of the control unit LV connections Battery Fuse F10...
- Page 95 Connection and wiring diagram Connection and wiring diagram (cont.) 230 V connections 250VAC/5A 250VAC/5A PE N Y1Y2 PE Y1Y2 PE Fig. 62 Boiler circ pump High limit safety cut-out and ON/OFF switch aBÖ Power supply 230 V, 50 Hz Low water indicator fÖ...
- Page 96 Connection and wiring diagram Connection and wiring diagram (cont.) valve of return temperature raising facility Plug connection Colour Description Blue Neutral conductor White Actuating signal CLOSE (230 V AC) Black Actuating signal OPEN (230 V AC) LV connections Fig. 63 Outside temperature sensor A Speed feedback, flue gas fan a-Ö...
- Page 97 Connection and wiring diagram Heating circuit extension module (accessories) PCB HKK 2.01 Fig. 64 Only left slot: Connection to the PCB of the boiler Valve, heating circuit 2 s-Ö control unit dCÖ Circulation pump for cylinder heating dYÖ Pump, heating circuit 1 or pump, heating circuit 3 Valve, heating circuit 1 or solar circuit pump...
- Page 98 Connection and wiring diagram Heating circuit extension module (accessories) (cont.) Fig. 65 Flow temperature sensor, heating circuit 1 Not assigned Flow temperature sensor, heating circuit 2 Default speed for solar circuit pump d;Ö Cylinder temperature sensor Jumper for parameter settings, output ;...
- Page 99 Commissioning/service reports Commissioning/service reports Commissioning Maintenance/service Maintenance/service Date: Maintenance/service Maintenance/service Maintenance/service Date: Maintenance/service Maintenance/service Maintenance/service Date: Maintenance/service Maintenance/service Maintenance/service Date: Maintenance/service Maintenance/service Maintenance/service Date:...
- Page 100 Specification Specification ∼ Rated voltage 230 V Rated frequency 50 Hz ∼ Rated current Power consumption 120 W (arithmetical average) Protection class IP rating IP 20 to EN 60529; ensure through design/installation Function type Type 1 B to EN 60730-1 Permiss.
- Page 101 C combustion air temperature according to EN 304. ° Install a secondary air device (draught limiter) in chimneys with a draught in excess of 0.15 mbar. For the detailed design, see "Sizing heating water buffer cylinder" in the Vitoligno 200-S technical guide.
- Page 102 Disposal Final decommissioning and disposal Viessmann products can be recycled. Components and substances from the system are not part of ordi- nary household waste. For decommissioning the system, isolate the system from the power supply and allow components to cool down where appropriate.
- Page 103 Certificates Declaration of conformity Vitoligno 200-S, type VL2A including the Ecotronic We, Viessmann Werke GmbH & Co. KG, D-35107 Allendorf, declare as sole responsible body that the named product complies with the provisions of the following directives and regulations: 2006/42/EC...
- Page 104 Keyword index Keyword index Doors Acknowledging fault message........61 – Adjusting..............38 Actuator test............... 29 – Checking............. 9, 38 Additional boiler selection.......... 28 – Fitting..............18 Air dampers – Removing..............11 – Cleaning..............40 Draught checking............45 Ash chamber.............. 37 Economy mode............90 Battery................65 Electrical connections..........
- Page 105 Keyword index Keyword index (cont.) Lambda probe............67 Scan................58 – Checking..............67 Scan temperatures.............58 – Cleaning..............40 Screed function............91 Language selection............ 27 Secondary heating surfaces, cleaning....... 36 Selecting the DHW connection........28 Selecting the solar connection........28 Mains isolator............. 20 Sensors, calling up.............58 Maintenance work, overview........33 Sensors, checking............29...
- Page 108 Applicability Serial no. (see type plate) 7543261 7543262 7543263 7543264 Viessmann Werke GmbH & Co. KG Viessmann Limited D-35107 Allendorf Hortonwood 30, Telford Telephone: +49 6452 70-0 Shropshire, TF1 7YP, GB Fax: +49 6452 70-2780 Telephone: +44 1952 675000 www.viessmann.com Fax: +44 1952 675040 E-mail: info-uk@viessmann.com...
Need help?
Do you have a question about the Vitoligno 200-S and is the answer not in the manual?
Questions and answers