Table of Contents
Advertisement
Available languages
Available languages
Quick Links
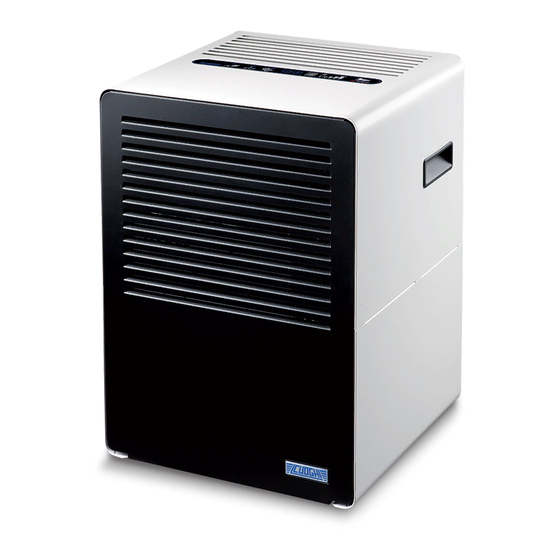
NADER midi
ITALIANO Deumidifi catore d'aria, manuale d'istruzioni
ENGLISH Air dehumidifi er, instruction manual
FRANÇAIS Déshumidifi cateur d'air, manuel d'instructions
DEUTSCH Luftentfeuchter, Bedienungsanleitung
ISTRUZIONI ORIGINALI
TRANSLATION OF THE ORIGINAL INSTRUCTIONS
INSTRUCTIONS TRADUITES DE L'ITALIEN
ÜBERSETZUNG DER ORIGINAL-ANLEITUNG
Advertisement
Table of Contents

Related Manuals for CUOGHI Nader midi 3 DL


Summary of Contents for CUOGHI Nader midi 3 DL
- Page 1 NADER midi ITALIANO Deumidifi catore d’aria, manuale d’istruzioni ENGLISH Air dehumidifi er, instruction manual FRANÇAIS Déshumidifi cateur d’air, manuel d’instructions DEUTSCH Luftentfeuchter, Bedienungsanleitung ISTRUZIONI ORIGINALI TRANSLATION OF THE ORIGINAL INSTRUCTIONS INSTRUCTIONS TRADUITES DE L’ITALIEN ÜBERSETZUNG DER ORIGINAL-ANLEITUNG...
- Page 2 M1277-0...
- Page 3 M1277-0...
-
Page 4: L Egenda Simboli
M1277-0 Nader midi 3 DL Volume indicativo trattabile [m³] Capacità di condensazione [L/24ore] 10.0 19.1 (**) Temperature di lavoro [°C] +5 / +32 Umidità relativa di lavoro [%U.R.] 40 / 95 Portata d’aria [m³/ora] Tensione di alimentazione 230 V, 50 Hz Corrente assorbita [A] 1.12... -
Page 5: Componenti Principali
M1277-0 schetta di raccolta della condensa. erbatoio • Non inserire alcun oggetto estraneo all’interno dell’apparec- chio. • Non forare né bruciare. Questo apparecchio dev’essere collegato ad un impianto elettrico dotato di messa a terra. Assicu- rarsi che la tensione di alimentazione corrisponda a quella indicata nella Tab.A, che l’impianto elettrico sia conforme alle normative vigenti e adeguatamente protetto. -
Page 6: I Nstallazione E Posizionamento
M1277-0 S2 - Spia rossa troppo pieno La spia si accende e lampeggia, La scheda elettronica gestisce il ciclo di sbrinamento in modo completamente automatico (vedi più avanti). Durante il ciclo di assieme alla S1, per indicare che il serbatoio è pieno, mancante o sbrinamento il compressore (6) viene fermato. -
Page 7: Manutenzione
M1277-0 Il serbatoio dev’ e ssere poi rimesso al suo posto in modo che i due ATTENZIONE: Prima di eseguire qualunque tipo piedini inferiori s’infilino negli appositi fori (S) predisposti sulla di intervento sull’apparecchio staccare la spina di base. Chiudere lo sportello. alimentazione della corrente. -
Page 8: Smaltimento Del Prodotto
M1277-0 maLtimento deL prodotto Ai sensi dell’art.13 del Decreto Legislative 25 Luglio 2005, n.151 “Attuazione delle Direttive 2002/95/CE, 2002/96/CE e 2003/108/ CE, relative alla riduzione dell’uso di sostanze pericolose nelle apparecchiature elettriche ed elettroniche, nonché allo smalti- mento dei rifiuti”. II simbolo del cassonetto barrato indica che il prodotto alla fine della propria vita utile deve essere raccolto separatamente dagli altri rifiuti. -
Page 9: General Safety Rules
M1277-0 Nader midi 3 DL Indicative handling volume [m³] Condensate capacity [L/24hour] 10.0 19.1 (**) Working temperature [°C] +5 / +32 Working humidity [%R.H.] 40 / 95 Air flow [m³/hour] Power supply voltage 230 V, 50 Hz Current absorption [A] 1.12... -
Page 10: Operating Principle
M1277-0 he air Filter This appliance must be connected to a grounded elec- The air filter is placed behind the front grid and can be easily trical system. Make sure that the power supply voltage removed for cleaning. corresponds to that indicated in Tab.A, that the elec- trical system complies with current regulations and is Do not run the dehumidifier without the air filter to avoid accumulating dust on the heat exchanger. -
Page 11: Control Panel
M1277-0 Functioning Functioning 60% R.H. 90% R.H. 52% R.H. 86% R.H. 46% R.H. 78% R.H. 40% R.H. 72% R.H. ALWAYS ON 65% R.H. Tab.B – Functioning modes ailureS The display is used by the electronic device to show particular situations (Tab.C). If an error message is displayed please contact Pic.4 –... -
Page 12: Maintenance
M1277-0 limeters to the connector on the tank and run it through the ow to remove the air Filter hole (F). Open the front door: the air filter simply stands on the front • Put the tank with the drain tube back in its place. grid. -
Page 13: Disposal Of The Product
M1277-0 isposaL of the product The crossed-out wheelie bin symbol indicates that the product must be collected separately from other waste at the end of its useful life. The user must therefore take the appliance at the end of its useful life to a special centre for electrical and electronic waste collection or hand it back to the retailer upon purchase of a new product of an equivalent type, on a one-for-one basis. - Page 14 M1277-0 Nader midi 3 DL Volume indicatif traitable [m³] Capacité de condensation [L/24 heures] 10.0 19.1 (**) Température de fonctionnement [° C] +5 / +32 Humidité relative de fonctionnement [% H.R.] 40 / 95 Débit d’air [m³/h] Tension d’alimentation 230 V, 50 Hz Courant absorbé...
-
Page 15: P Rincipaux Composants
M1277-0 vider le bac de récupération de la condensation. éServoir • N’insérez pas d’ o bjets étrangers à l’intérieur de l’appareil. • Ne pas percer ni brûler. Cet appareil doit être raccordé à une installation élec- trique équipée d’une mise à la terre. Vérifier que la tension d’alimentation correspond à... -
Page 16: Panneau De Commande
M1277-0 matique (voir ci-dessous). Le compresseur (6) est arrêté pendant inséré. le cycle de dégivrage. La durée du cycle dépend des conditions S3 - Voyant jaune dégivrage: Le voyant s’allume lorsque le dés- d’humidité et de température. humidificateur effectue le dégivrage automatique. T1 - Touche diminution: Appuyez sur cette touche pour dimi- nstaLLation et positionnement nuer la valeur indiquée dans le panneau D jusqu’à... -
Page 17: Entretien
M1277-0 posés sur la base. Fermez la porte. opération. ATTENTION : Avant d’effectuer toute opération sur l’appareil, débranchez la fiche d’alimentation élec- trique. ettoyaGe du Filtre Le filtre peut être nettoyé avec un aspirateur ou de l’ e au : dans ce dernier cas, attendre que le filtre soit bien sec avant de le remonter. -
Page 18: Schéma Électrique
M1277-0 é Limination du produit Le symbole de la poubelle sur roues barrée indique que le pro- duit à la fin de sa vie opérationnelle doit être collecté séparément des autres déchets. L’utilisateur devra, par conséquent, remettre l’appareil arrivé en fin de vie opérationnelle aux centres de col- lecte sélective des déchets électriques et électroniques, ou bien le remettre à... - Page 19 M1277-0 Nader midi 3 DL Aufbereitbares Volumen (Richtwert) [m³] Entfeuchtungsleistung [l/24h] 10.0 19.1 (**) Betriebstemperatur [°C] +5 / +32 Relative Betriebsluftfeuchte [% RH] 40 / 95 Luft-Umwälzleistung [m³/h] Netzspannung 230 V, 50 Hz Stromaufnahme [A] 1.12 1.32 (**) Stromverbrauch [W] (**) Stromverbrauch im Stand-by (Höchstwert) [W]...
- Page 20 M1277-0 • Um das Gerät zu verstellen, muss es zunächst ausgeschaltet ondenSwaSSerbehälter und der Kondenswasserbehälter geleert werden. • Keinen Fremdkörper in das Gerät einführen. • Weder durchstechen noch verbrennen. Dieses Gerät ist an eine geerdete elektrische Anlage anzuschließen. Sicherstellen, dass die Anschluss- spannung der in der Tab.
-
Page 21: Bedienung
M1277-0 werden, um einen ungehinderten Luftstrom zu gewährleisten. (mit Strom versorgt, jedoch ausgeschaltet). Die Platine steuert den Abtauvorgang vollkommen automatisch S2 - Rote Kontrollleuchte für Behälter voll: Die Kontrollleuchte (siehe unten). Während des Abtauvorgangs ist der Verdichter schaltet sich ein und blinkt gemeinsam mit S1, um anzuzeigen, (6) außer Betrieb. - Page 22 M1277-0 ntleerunG deS ondenSwaSSerbehälterS Bei Eingriffen am elektrischen oder mechanischen Die Klappe öffnen und den Behälter herausziehen (Abb.6). Über Teil ist die entflammbare Kühlflüssigkeit zu berück- den Schieber (L) das Wasser ausgießen. sichtigen. Vor jedem Eingriff sicherstellen, dass alle Der Behälter muss dann wieder in seinen Sitz geschoben wer- möglichen Zündquellen beseitigt wurden und prüfen, den, hierbei müssen die beiden Füßchen an der Unterseite in die dass die Kondensatoren entleert sind, dass keine Teile...
-
Page 23: E Ntsorgung Des G Erätes
M1277-0 aChher • Das Lüfterrad muss sich frei und ohne Reibung drehen. • Das Gerät den in dieser Anleitung enthaltenen Anweisungen entsprechend einschalten. ntsorgung des erätes Das Symbol der durchgestrichenen Mülltonne weist darauf hin, dass das Produkt am Ende seiner Nutzdauer getrennt von anderen Abfällen gesammelt werden muss. - Page 24 CUOGHI s.r.l. via Garibaldi, 15 35020 Albignasego (PD) - Italia Tel. +39 049 8629099 Fax +39 049 8629135 www.cuoghi-luigi.it info@cuoghi-luigi.it...
Need help?
Do you have a question about the Nader midi 3 DL and is the answer not in the manual?
Questions and answers