
Subscribe to Our Youtube Channel
Related Manuals for IN-COMMAND NCSP35CM


Summary of Contents for IN-COMMAND NCSP35CM
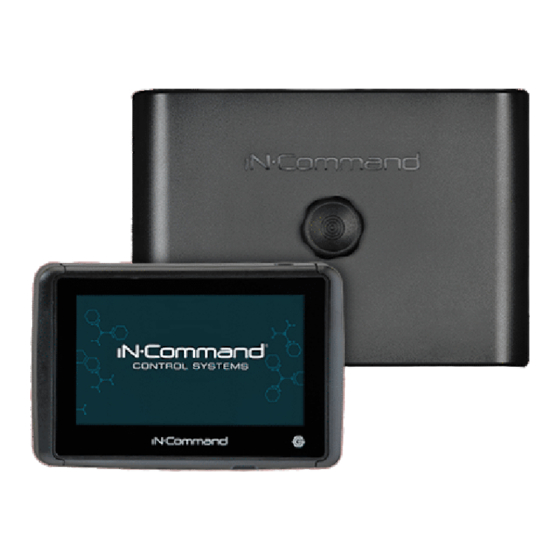
- Page 1 ™ NCSP35CM RV CONTROL AND MONITORING SYSTEM Installation and Operation Manual (English) NCSP3DCCT NCSP35CM Patent # US 9,679,735...
- Page 3 Important Safety Information Read the iN-Command Manual, and these warnings and instructions carefully before using this product. Failure to follow the use instructions in this owner’s manual, or improper use of the Mobile Application, Display Commander and/or Body Control Module, could result in personal injury, including death.
-
Page 4: Table Of Contents
NCSP35CM • TABLE OF CONTENTS INTRODUCTION ..............4 MOBILE DEVICES: ................19 Pairing iOS Mobile Device to DC ............ 20 Thank You! .................4 Pairing Android Mobile Device to DC ..........23 Features ................4 Loading the DC Floor Plan .............. 25 Precautions ................4 LANGUAGE SELECTION .............. -
Page 5: Introduction
• Use Recommended Accessories. TO REDUCE THE RISK OF FIRE OR ELECTRIC SHOCK AND Thank you for choosing iN-Command. We hope you will find the ANNOYING INTERFERENCE, USE ONLY THE RECOMMENDED instructions in this owner’s manual clear and easy to follow. If you take ACCESSORIES. -
Page 6: Installation
• Route power and transmit wires through the hole and connect • Tools and Supplies • Check and ensure correct operation You will need these tools and supplies to install your NCSP35CM : • Mount the unit using four #8 PH (0.164” x 0.75”) screws • Phillips screwdriver •... -
Page 7: Wiring
The Wiring Diagram Depicts All The Wiring Connections Required For Proper Operation Of The Unit. • WIRING Body Control Module (BCM) Connections End of Line terminator resister. End of Line terminator resister. -
Page 8: Rv-C System Layout
• RV-C SYSTEM LAYOUT... -
Page 9: Setup Menu List
NCSP35CM • SETUP MENU LIST Tanks, light groups, and motor functions can be added or removed. Slides Motor functions may include slides, awnings, jacks, or any motor Slide 1-5 In, Out that may be controlled with a momentary switch. Refer to the Wiring Diagram and Terminal List when installing new Lights equipment. -
Page 10: Travel Lockout (Safety)
NCSP35CM • TRAVEL LOCKOUT (Safety) iN-Command is equipped with a Travel Lockout feature to ensure certain system functions are unavailable during transit. When the Brake Signal (Towable) or Ignition (Motorized) is activated, the iN-Command will lock down all motorized functions. The Display Commander (DC) and mobile devices will also display “Travel Lock... -
Page 11: Override Switches
NCSP35CM • OVERRIDE SWITCHES* • DISPLAY COMMANDER BUTTONS The Body Control Module has override switches available. The DC (Display Commander) has Power buttons on the front of it. There is a knob and switch that corresponds to motor functions 1-5... -
Page 12: Specifications
To comply with the FCC RF exposure compliance requirements, the antenna(s) used for this transmitter must be installed to provide NCSP35CM System a separation distance of at least 20 cm from all persons and must EPROM Non-Volatile Memory ..... . YES not be co-located or operating in conjunction with any other Bluetooth Version . -
Page 13: Passcode Protection
• Connect DC to Wi-Fi • Change the Passcode • Customize the Floor Plan • Edit iN-Command function text and reposition functions • Customize Notifications • Touch Screen Calibration • Control the Brightness of the DC screen •... - Page 14 NCSP35CM 2. Press “Edit” to enter Edit page. 4. Long press the intended text, e.g., "Light Group 2" 5. Use the keyboard to edit the name, then press "Save". 3. Select the function to edit. Note: Editing the text on the DC will not change the text on...
-
Page 15: Scroll List Editing
NCSP35CM • Scroll List Editing 1. Select " Settings". 3. Select the function to edit. 4. Use the Up and Down arrows next to the function to move 2. Press “Edit” to enter Edit page. the item in the list. -
Page 16: Slides
NCSP35CM • Slides • Tank Heaters Slides can added to the system. 1.Press on the tank readings at the top of the Home page to enter Note: Desired devices need to be correctly wired to the BCM to function. Tank Page. -
Page 17: Passcode
NCSP35CM • Passcode 1. Select “Settings”. 2.1 Enter the correct passcode to proceed. 2. Press “ Passcode” to enter passcode setup. 3. The passcode setup window will open. -
Page 18: Set Passcode Timer
NCSP35CM • Set Passcode Timer 3. Confirm new passcode. Press the “Set Timer” select the idle time to activate the passcode protection. • Clear Passcode • Change Passcode Press the “Clear Passcode” to clear the passcode. It will have the user 1. -
Page 19: Reset All Settings
NCSP35CM • Reset All Settings 1. Press the Reset All Settings "Reset" button to reset all settings. This will restart the App, take the user to the End-User License Agreement, and have the user setup a new passcode. 2. Confirm. -
Page 20: Mobile Devices
NCSP35CM • MOBILE DEVICES: iN-Command is able to pair to Android and iOS devices using the iN-Command App. Visit the Google Play and Apple App stores on your mobile device to download and use the iN-Command App. Seven mobile devices are able to be paired iN-Command at one time, but only 1 iOS and 3 Android devices are able to be actively paired at the same time;... -
Page 21: Pairing Ios Mobile Device To Dc
NCSP35CM • Pairing iOS Mobile Device to DC 1. Enable "Bluetooth" in the system settings of the mobile device. 2.1 Select the “ Bluetooth ” tab. 2. From the DC Home Page, select "Settings". 2.2 Select "Pairing" to pair devices and view current paired devices. - Page 22 NCSP35CM 2.5 A Bluetooth Pairing request will appear on the DC and mobile device. 2.3 Press Scan to start scanning for Unpaired devices. Locate the mobile device in the Unpaired Device list. 2.6 Press "PAIR" on the DC. Select the device by pressing it.
- Page 23 NCSP35CM 2.8 The mobile device will be displayed in the "Paired devices" 2.10 The mobile device now shows that the DC is connected. list on the DC. 2.9 The DC will be displayed on the mobile device list in the format "...
-
Page 24: Pairing Android Mobile Device To Dc
NCSP35CM • Pairing Android Mobile Device to DC 3. Press Scan to start scanning for Unpaired devices. Locate the DC in the UnpairedDevice list. Select 1. From the App Home Page select settings. 2. Select the "Bluetooth" tab. the device by pressing it. - Page 25 NCSP35CM 4. A Bluetooth pairing request will appear on 6. The mobile device will be displayed in the the DC and mobile device. "Paired devices" list on the mobile App. 5. Press "OK" on the mobile device.
-
Page 26: Loading The Dc Floor Plan
NCSP35CM • Loading the DC Floor Plan 1. Press the Floor Plan button in the 2. Press RV Sync button to Load the floor plan settings menu page. configuration from the DC. The current settings will be lost/replaced upon doing this. -
Page 27: Language Selection
NCSP35CM • LANGUAGE SELECTION 3. Select one of the two options. a. English: Select English language. b. French: Select French language. 1. Select "Settings". 4. Confirm for language selection. 2. Select "Language" in the Settings page. -
Page 28: Checking Active Bluetooth Session
NCSP35CM • CHECKING ACTIVE BLUETOOTH SESSION * 1. Select “Connected devices”. * To disconnect a handheld device, press “Disconnect”, or simply shut down the device’s App. This function is used to disconnect a device that is not actively being used, and to allow another device to be connected. -
Page 29: Hvac
From the HVAC page, you can control the Heating, Ventilation and Air conditioning functions in the RV. With iN-Command, you can control up to 4 HVAC zones and schedule times for the HVAC function to be active. • Vent Fans The Vent fans for each zone can be opened, closed and the fan speed can be switched between low, medium and high. -
Page 30: Heating
NCSP35CM • Heating • Auto Auto Mode will automatically switch between Cool and Heat modes to 1. Select the desired Zone. Press the "Mode" button to switch to reach the desired Set temperature. "Heat" mode. (Heat Mode is only available in Zones with Heat Mode selected on Floor Plan). -
Page 31: Hvac Schedule
NCSP35CM • HVAC Schedule The Schedule function allows you to set a temperature and choose 4. Press the Schedule Button to turn "On" the schedule for the Zone a start and stop for when you want the HVAC function to operate. -
Page 32: Date & Time
NCSP35CM • Date & Time The Date & Time feature is used for the Generator and HVAC 3. In the Date & Time page, press the "Edit" tab to adjust the scheduling functions. date and time. 1. Select "Settings". 4. Use the Calendar to select the Date and the Clock to change the 2. -
Page 33: Software Update
NCSP35CM • SOFTWARE UPDATE * 4. In the software page, you can choose to update the Floor Plan, Software updates include floorplan redesigns and App version updates. DC Version, App Version and BCM Versions. 1. Insert USB drive loaded with updated software into the USB port at the bottom of the DC. - Page 34 NCSP35CM 5. Press the DC Version to update the DC OS sytem. 7. Press "Confirm" to continue. Press "Update". 8. Press the BCM Version to update the BCM system. 6. Framework update. Press "Update".
- Page 35 NCSP35CM 9. Press the App version to update the DC App. 11. Press Floor Plan to select a floor plan. Press " Update". Press "Load" to select the floor plan. 10. Waiting for Update. 12. Press "Dismiss" to confirm selection.
-
Page 36: Global Connect
* Requires Wi-Fi services for this feature. ** Motorized functions are not available through the Global Connect feature. To setup a cloud account, the device app first needs to be paired with the iN-Command via Bluetooth. (Follow Bluetooth pairing instructions for your device). - Page 37 NCSP35CM 6. Press on the white bar next to “Account:” and 4. From the App Home Page, select 5. Select the “Account” tab. use the device keypad to enter a valid email Settings.Select the “Global Connect” tab. address.
- Page 38 10. Enter the account and passcode that you created on the device app. Press “Login”. 8. On the device, turn Bluetooth off. As long as you have internet available through your device and iN-Command, the device app will connect to iN-Command through Global Connect.
-
Page 39: Floor Plan
NCSP35CM • FLOOR PLAN 3. Select "Reset" Customize or Reset Floor Plan settings. • Reset 1. Select "Settings". 4. Select on of the two options(Default or OEM) to restore to a previous state. a. Default: restores to default settings from ASA. -
Page 40: Custom
NCSP35CM 5. Press "Confirm" to reset floor plan back to default or OEM. 1. Select the "Custom" in the floor plan / Settings page. 2. Press the box next to the function to turn off, on and cycle • Custom* through available options. -
Page 41: Notifications
NCSP35CM 3. When finished making changes, press the Return button. Then press "Save" 3. Select "Settings" • Notifications 4. Select "Notifications". The following notifications are available to customize: Batteries Battery 1 (Off, On with range from 10.8 to 14.4V) Battery 2 (Off, On with range from 10.8 to 14.4V) Tanks Fresh 1 (Off, 0/3, <1/3) - Page 42 NCSP35CM 3. To change notification settings, press the box next to the 4. When finished making changes, press the Return button. function to cycle through options. Then press "Confirm".
-
Page 43: Touch Screen Calibration
NCSP35CM • TOUCH SCREEN CALIBRATION 3. To calibrate the Touch Screen, select "Set". Follow the 1. Select “Settings”. instructions.The DC will restart after calibration. 2. Select “Calibration”. 4. Touch the center of the cross. -
Page 44: System Calibration
NCSP35CM • SYSTEM CALIBRATION * From the Administration page, the App Data can be deleted, the Generator Hour Meter can be set, and the Water Tanks can be calibrated. 1. From the Settings page, press "Administration". 3. Make Selection. 4. Select “Tanks” to set resistor reference value for every tank. - Page 45 NCSP35CM 5. Press the Generator Hour Meter "Set" button to set the meter time. 6. Press the App Data "Delete" button to clear current App data. Note: This will remove the floor plan settings from the RV Manufacturer. * The system is calibrated by the manufacturer and should only be accessed for troubleshooting.
-
Page 46: Troubleshooting
Check to ensure 4 pin RV-C cable is connected to the back of the DC and to the BCM. DC shows 0V and no functions activate from DC Check for shorts in RV-C cable and for loose pins in the connection. For additional troubleshooting, call ASA Electronics Technical Support at 1-877-845-8750, email info@asaelectronics.com or visit our website http://www.asaelectronics.com//in-command.
Need help?
Do you have a question about the NCSP35CM and is the answer not in the manual?
Questions and answers