Table of Contents
Advertisement
Quick Links
Advertisement
Table of Contents

Related Manuals for LG PQRCHCSA


Summary of Contents for LG PQRCHCSA
- Page 1 OWNER’S & INSTALLATION MANUAL CONDITIONER Please read this manual carefully before operating your set and retain it for future reference. SIMPLE WIRED REMOTE CONTROLLER PQRCHCSA www.lg.com MFL71695701 Rev.03_110620 Copyright © 2020 LG Electronics Inc. All Rights Reserved.
-
Page 2: Table Of Contents
Simple Wired Remote Controller Owner’s & Installation Manual TABLE OF CONTENTS n Safety Precaution..............3 n Part Description ..............4 Simple Wired Remote Controller...............4 n Installation instruction............5 Remote controller installation ..............9 n Owner's instruction...............10 Standard Operation - Cooling Mode ............10 Standard Operation - Heating Mode ............11 Standard Operation - Dry Mode...............12 Standard Operation - Fan Mode ..............13 Function Setting - Fan Speed Selection ..........14... -
Page 3: Safety Precaution
Safety Precaution Safety Precaution • The installation requires expert skills, and it should be installed by the service center or other shops specialized in the installation and recognized by our company. • For all the problems arising after installation by someone who has no relevant qualifications, our company will not provide free service. -
Page 4: Part Description
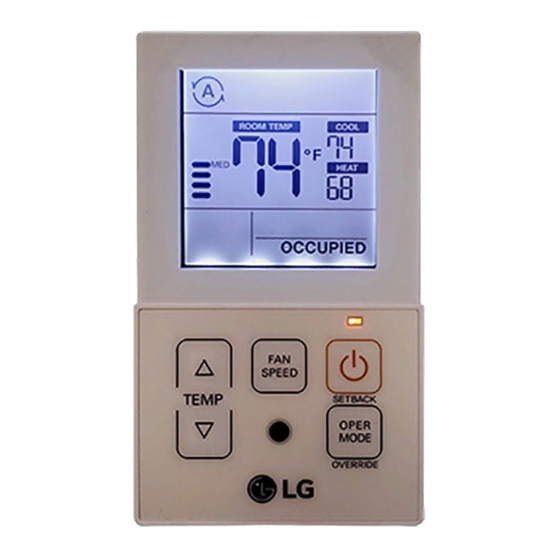
Part Description Part Description Simple Wired Remote Controller 1. Operation Display Panel 2. TEMP Button - To adjust the desired room temper- ature in cooling, heating and dry mode. 3. FAN SPEED button - To adjust the fan speed. 4. On/Off button - To turn on/off the air conditioner. -
Page 5: Installation Instruction
Installation instruction Installation instruction 1. Please fix tightly using provided screws(Type A) after placing remote controller setup board on the place where you like to setup. - Please set it up not to bend because poor setup could take place if setup board bends. Please set up remote controller board fit to the reclamation box if there is a reclamation box. - Page 6 Installation instruction 3. Please fix remote controller upper part into the <Connecting order> back plate attached to the surface of the wall, as the Fig. 1, and then, connect with back plate by pressing lower part. Wall Wall - Please make sure to leave no gaps on the top, bottom, left or right Side Side sides between the remote controller and back plate.
- Page 7 Installation instruction 2) When connecting Terminal Blocks of the indoor C/BOX and the wired remote controller, refer to the steps below. ① Remove the screw on the cable which is fastened to the wired remote controller’s Terminal Block by loos- ening with a screw driver.
- Page 8 Installation instruction ⑤ Please connect the Terminal blocks of indoor unit’s C/BOX and wired remote controller by referring to the images and contents shown below. Connect the yellow(signal) part of the wired remote controller’s terminal block and the ‘YL’ part of the indoor unit’s terminal block.
-
Page 9: Remote Controller Installation
Installation instruction Remote controller installation Since the room temperature sensor is in the remote controller, the remote controller box should be installed in a place away from direct sunlight, high humidity and direct supply of cold air to maintain proper space temperature. Install the remote controller about 5ft(1.5m) above the floor in an area with good air circulation at an average temperature. -
Page 10: Owner's Instruction
Owner's instruction Owner's instruction Standard Operation - Cooling Mode It cools the room by comfortable and clean wind. Cooling operation will begin if you press button. is displayed on the display screen. °F Press the TEMP button and set the desired room temperature lower than the current room temperature. -
Page 11: Standard Operation - Heating Mode
Owner's instruction Standard Operation - Heating Mode It supplies warm wind to the indoor If you want to set the heating operation, press the button. And press the OPER MODE button. is displayed on the display screen. °F Set the desired room temperature higher than the current room temperature. -
Page 12: Standard Operation - Dry Mode
Owner's instruction Standard Operation - Dry Mode It removes humidity while air-cooling weakly. After operating the product by pressing button, set up the dry OPER (Dehumidification) by pressing the button. MODE is displayed on the display screen. °F When the dry operation is selected, the pre-set temperature will be shown on the display window as shown on the left side. -
Page 13: Standard Operation - Fan Mode
Owner's instruction Standard Operation - Fan Mode It blows the air as it is in the indoor, not the cold wind. After operating the product by pressing button, set up the fan operation by pressing the button. OPER MODE - When the fan operation is selected, will be shown on the display window as shown on the left side. -
Page 14: Function Setting - Fan Speed Selection
Owner's instruction Function Setting - Fan Speed Selection SPEED °F Fan Speed Selection in Heating, Cooling, SPEED Dry and Fan Operation. TEMP OPER MODE 14 Wired Remote Controller... -
Page 15: Function Setting - Child Lock
Owner's instruction Function Setting - Child Lock It is the function to use preventing children or others from careless using. During the operation, when pressing the button button for approx. 3 seconds, the ‘Child Lock’ SPEED function can be used. - At the time of initial setting of the ‘Child Lock’, the ‘CL’... -
Page 16: Function Setting - Room Temperature Check
Owner's instruction Function Setting - Room Temperature Check When pressing the button of the remote SPEED controller adjustment section for approx. 3 seconds, the room temperature will be indicated for about 5 seconds before resuming to the previous display panel. °F In the case of the room temperature display, the room temperature can be different in... -
Page 17: Self-Diagnosis For Trouble Mode
Owner's instruction Self-diagnosis for Trouble Mode It automatically runs a self-diagnosis when there is a trou- ble detected in the system. It displays the trouble mode number with maintenance CODE. <Individual control> <Group control> h When detecting an error during group control, the system will display as below. -
Page 18: Checkups Before Reporting Breakdown
Owner's instruction Checkups before reporting breakdown Please first check the items below for product's defects before consulting to service center. Symptoms Check-up Management • Is air-conditioner's power on? • Please check up circuit breaker. • Please check up wire remote controller's setup condition.
Need help?
Do you have a question about the PQRCHCSA and is the answer not in the manual?
Questions and answers