Table of Contents
Advertisement
Available languages
Available languages
Quick Links
Instructions for use
HU
ES
GB
Magyar, 13
English, 1
SK
RO
Slovenský, 37
Românã, 49
WITE 127
All manuals and user guides at all-guides.com
CZ
Èeský, 25
PL
ES
Polski, 61
WASHING MACHINE
Contents
Installation, 2-3
Display, 5
Functions, 7
Bleach cycle, 8
Disposal, 9
Cleaning the detergent dispenser, 10
Troubleshooting, 11
Service, 12
GB
1
Advertisement
Chapters
Table of Contents

Related Manuals for Indesit WITE 127


Summary of Contents for Indesit WITE 127
-
Page 1: Table Of Contents
“MEMO” Programme, 5 Starting and Programmes, 6 Briefly: how to start a programme, 6 Programme table, 6 Personalisations, 7 WITE 127 Setting the spin cycle, 7 Setting the Delay Timer, 7 Setting the temperature, 7 Functions, 7 Detergents and laundry, 8... -
Page 2: Installation
All manuals and user guides at all-guides.com Installation (see figure); the angle of inclination, measured Keep this instruction manual in a safe place for according to the worktop, must not exceed 2°. future reference. Should the appliance be sold, Levelling your appliance correctly will provide it with transferred or moved, make sure the instruction stability and avoid any vibrations, noise and shifting manual accompanies the washing machine to inform... -
Page 3: The First Wash Cycle
All manuals and user guides at all-guides.com Connecting the drain hose Connect the drain hose, Do not use extensions or multiple sockets. without bending it, to a draining duct or a wall The power supply cable must never be bent or drain situated between dangerously compressed. -
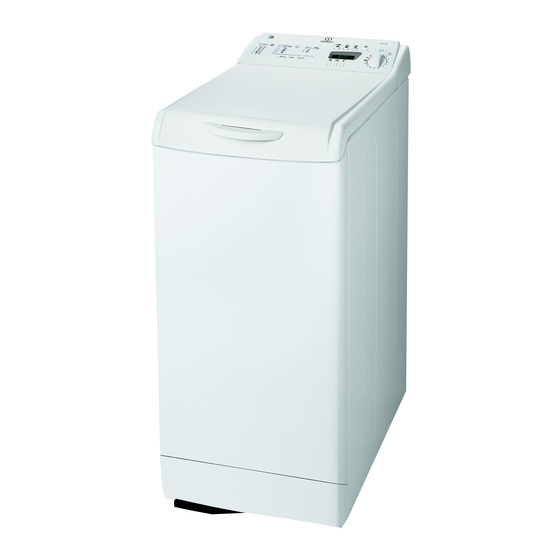
Page 4: Washing Machine Description
All manuals and user guides at all-guides.com Washing machine description Control panel START/RESET button FUNCTION Buttons START/STOP button Display Control knob SPIN button DELAY TIMER TEMPERATURE button button Display to programme the washing machine and follow Detergent dispenser to add detergent and fabric the wash cycle progress (see opposite page). -
Page 5: Display
All manuals and user guides at all-guides.com Display In addition to being a practical tool to programme your appliance (see page 7), the display provides useful information concerning the wash cycle. Once you have pressed the START/RESET button to start the programme, the display will indicate the amount of time left until the end of the wash cycle. -
Page 6: Starting And Programmes
All manuals and user guides at all-guides.com Starting and Programmes Briefly: starting a programme 4. Select any functions (see page 7). 5. Start he programme by pressing the START/RESET 1. Turn the washing machine on by pressing button button. 2. Load your laundry into the washing machine, add To cancel it, keep the START/RESET button the detergent and any fabric softener (see page 8) pressed for at least 2 seconds. -
Page 7: Personalisations
All manuals and user guides at all-guides.com Personalisations Setting the spin cycle FUNCTION buttons If, when the appliance is switched on, the KNOB is positioned on a programme with a spin cycle, a fixed appears. Press button and the maximum spin speed allowed for the programme set will be displayed, and the icon flashes. -
Page 8: Detergents And Laundry
All manuals and user guides at all-guides.com Detergents and laundry Detergent dispenser Preparing your laundry Good washing results also depend on the correct • Divide your laundry according to: dose of detergent: adding too much detergent won't - the type of fabric/the symbol on the label. necessarily make for a more efficient wash, and may - the colours: separate coloured garments from in fact cause build up on the interior of your... -
Page 9: Precautions And Advice
All manuals and user guides at all-guides.com Precautions and advice The washing machine was designed and built in human health and the environment. compliance with the applicable international safety regulations. The following information is provided for The crossed out "wheeled bin" symbol on the your safety and should consequently be read product reminds you of your obligation, that when carefully. -
Page 10: Care And Maintenance
All manuals and user guides at all-guides.com Care and maintenance Cutting off the water or electricity Make sure the wash cycle has ended and unplug supply the appliance. • Turn off the water tap after every wash. This will To recover any objects that have fallen into the pre- limit the wear of your appliance's water system chamber: and also prevent leaks. -
Page 11: Troubleshooting
All manuals and user guides at all-guides.com Troubleshooting Your washing machine could fail to work. Before calling for Assistance (see page 12), make sure the problem can't easily be solved by consulting the following list. Possible causes/Solution: Problem • The appliance is not plugged into the socket, or not enough to The washing machine won't make contact. -
Page 12: Service
All manuals and user guides at all-guides.com Service Fllwg. The machine is locked and the display This means there is a problem with the machine. Before calling flashes, indicating an error code Assistance, please follow the set of instructions below: (e.g. -
Page 13: Magyar
All manuals and user guides at all-guides.com Kicsomagolás és vízszintbe állítás, 14 Víz és elektromos csatlakozás, 14-15 Elsõ mosási ciklus, 15 Mûszaki adatok, 15 Vezérlõpanel, 16 A forgódob kinyitása és bezárása, 16 Kijelzõ, 17 “MEMO” Program, 17 Röviden: egy program elindítása, 18 Programtáblázat, 18 Centrifugálás beállítása, 19 Az idõkésleltetés beállítása, 19... - Page 14 All manuals and user guides at all-guides.com E kézikönyv megõrzése azért fontos, hogy bármikor A pontos vízszintezés biztosítja a gép stabilitását, elõvehesse, és megnézhesse. Ha a mosógépet így az a mûködés során nem fog vibrálni, zajt eladná, átadná vagy másnál helyezné el, okozni vagy elmozdulni.
- Page 15 All manuals and user guides at all-guides.com A leeresztõcsövet Ne használjon hosszabbítót vagy elosztót. csatlakoztassa lefolyóhoz vagy a Ne legyen a kábel megtörve vagy összenyomva. padlótól 65 és 100 cm közötti magasságban A hálózati kábelt csak megbízott szakember lévõ fali lefolyószifonhoz cserélheti.
- Page 16 All manuals and user guides at all-guides.com billentyû billentyûk billentyû billentyû billentyû billentyû Mosószeradagoló fiók a mosószerek és ciklusok elõrehaladásának ellenõrzésére (lásd adalékszerek betöltésére (lásd 20. oldal). szemben lévõ oldal). billentyû a centrifugálás a lehetséges funkciók fordulatszámának beállítására illetve a centrifugálás kiválasztására.
- Page 17 All manuals and user guides at all-guides.com A mosógép programozásán kívül (lásd 19. old.), a kijelzõ a mosási ciklussal kapcsolatos információk megjelenítésére szolgál. Az után, hogy a program elindításához megnyomta a START/RESET billentyût, a kijelzõn a ciklus végéig hátlalévõ idõ látható. Abban az esetben, ha az indító...
- Page 18 All manuals and user guides at all-guides.com 4. Állítsa be a mosási hõmérsékletet (lásd 19. oldal). Állítsa be a centrifugálási fordulatszámot (lásd 19. oldal). 1. Kapcsolja be a mosógépet az gomb 5. A START/RESET billentyû megnyomásával indítsa megnyomásával.Néhány másodpercre az összes el a programot.
- Page 19 All manuals and user guides at all-guides.com Ha a mosógép bekapcsolásakor a TÁRCSA olyan programra van állítva, amelynél a centrifugálást be kell állítani, az ikon folyamatosan világít. Az gomb megnyomásával megjelenik a beállított programra vonatkozó maximális centrifugálási sebesség és az ikon villogni kezd.
- Page 20 All manuals and user guides at all-guides.com A mosás eredményessége függ a mosószer helyes • Osztályozza a mosandókat a következõk adagolásától is: ha túl sokat adagol belõle, a szerint: mosás nem lesz hatékonyabb, de hozzájárul - kelme típusa / címkén lévõ szimbólum. ahhoz, hogy lerakódás képzõdjön a mosógépben, - színek: válogassa külön a színes ruhákat a valamint a...
- Page 21 All manuals and user guides at all-guides.com lévo anyagok újrahasznosítását és csökkenteni A mosógépet a nemzetközi biztonsági szabványoknak lehessen az emberi egészségre és környezetre megfelelõen tervezték és gyártották. Ezeket a gyakorolt hatásukat. Az áthúzott “szemeteskuka” jele figyelmeztetéseket biztonsági okokból írjuk le, és emlékezteti Önt arra, hogy kötelessége ezeket a figyelmesen el kell olvasni õket.
- Page 22 All manuals and user guides at all-guides.com Az esetlegesen a dob mellé esett tárgyak kiemeléséhez: • Minden mosás után zárja el a vízcsapot. Így 1. vegye le a kíméli a mosógép vízrendszerét, és megszünteti mosógép elülsõ a vízszivárgás kockázatát. oldalán alul •...
- Page 23 All manuals and user guides at all-guides.com Megtörténhet, hogy a mosógép nem mûködik. Mielõtt felhívná a Szervizt (lásd 24. oldal) ellenõrizze, hogy nem olyan problémáról van szó, amely a következõ lista segítségével egyszerûen megoldható. • A hálózati csatlakozódugó nincs bedugva az aljzatba, vagy nem eléggé ahhoz, hogy jól érintkezzen.
- Page 24 All manuals and user guides at all-guides.com • Gyõzõdjön meg arról, hogy a hibát nem tudja maga is elhárítani (lásd 23. oldal); • Újból indítsa el a programot, hogy lássa, elhárította-e a hibát; • Ellenkezõ esetben forduljon a megbízott Szakszervizhez: a telefonszámot a garanciajegyen találja. Soha ne forduljon nem megbízott szerelõhöz.
-
Page 25: Èeský
All manuals and user guides at all-guides.com... - Page 26 All manuals and user guides at all-guides.com (viz obrázek), (viz obrázek) (viz obrázek). Tlak v rozvodu vody se musí pohybovat v rozmezí hodnot uvedených v tabulce s technickými údaji (viz vedlejší strana). (viz obrázek)
- Page 27 All manuals and user guides at all-guides.com (viz obrázek) Technické údaje Model Rozmìry Kapacita Napájení Pøipojení k (viz rozvodu vody vedle) Rychlost ¡ odstøeïování (viz Kontrolní program ° podle normy IEC456 vedle) Hluènost (dB(A) re 1 pW) tupná.
- Page 28 All manuals and user guides at all-guides.com Displej Otoèný voliè Dávkovaè pracích prostøedkù viz str. 32 (viz str. 31 (viz str. 31). (viz str. 31 Displej Otoèný voliè (viz vedlejší strana) Obr. 2 Obr. 1 Obr. 3 Obr. 4...
- Page 29 All manuals and user guides at all-guides.com (viz str. 31) viz str. (viz str. 35).
- Page 30 All manuals and user guides at all-guides.com - viz str. 30 (viz str. 31 viz str. 32 V o lite ln á fu nk c e P r a c í D ob a D r u h tk a n in y a s tu p e ò je jího z n e è i P r ací...
- Page 31 All manuals and user guides at all-guides.com Aktivní pøi Funkce Efekt Poznámky k pou± z ití programech: 2, 3, 4, (viz str. 32 ) Odstranìní máchání. skvrn 1, 2, 3, 4, 7, 8, 9, 11, Intenzivní 12, máchání. máchání 3, 4, 5, 6, 7, 8, 9, máchání.
- Page 32 All manuals and user guides at all-guides.com obrázek...
- Page 33 All manuals and user guides at all-guides.com ízení. • (viz str.
- Page 34 All manuals and user guides at all-guides.com (viz obrázek): (viz obrázek)
- Page 35 All manuals and user guides at all-guides.com (viz str. 36) viz str. 31). (viz str. 27). (viz str. 27). (viz str. 30 (viz str. 31). (viz str. 27 (viz str. 26). (viz str. 26 (viz str. 26 (viz str. 26 –...
- Page 36 All manuals and user guides at all-guides.com • (viz str. 35);...
-
Page 37: Slovenský
All manuals and user guides at all-guides.com... - Page 38 All manuals and user guides at all-guides.com V pr (viïobrázok), (viï obrázok) šného vstupného hrdla, situovaného vpravo hore (viï obrázok). iné. (viï ved¾ajšia strana). (viï obrázok).
- Page 39 All manuals and user guides at all-guides.com (viï obrázok) Technické údaje Model Rozmery Kapacita Elektrické zapojenie (viï ved¾a) Pripojenie k rozvodu vody (viï Rýchlos± z ved¾a) odstreïovania Kontrolný program 0° pod¾a normy IEC456 Hluènost¡ (dB(A) re 1 pW)
- Page 40 All manuals and user guides at all-guides.com Displej Otoèný voliè Dávkovaè pracích prostriedkov Displej (viï ved¾ajšia strana) viï str. 44 (viï str. 43 (viï str. 43). (viï str. 43 Otoèný voliè Obr. 1 Obr. 2 Obr. 4 Obr. 3...
- Page 41 All manuals and user guides at all-guides.com (viï str. 43) viï str. 43) Zablokované dvierka (viï str. 47 ). V prípade výskytu poruchy bude zobrazený chybový kód, napríklad:...
- Page 42 All manuals and user guides at all-guides.com - viï str. 43 (viï str. 43). V o lite ¾ n á D o b y P r a c í p r o s tr ie d o k fu n k c ia D r u h tk a n in y a s tu p e ò...
- Page 43 All manuals and user guides at all-guides.com Aktívna pri F unkcie Efekt Poznámky k pou± z itiu programoch: viï str. 44 2, 3, 4, plákanie. Bielenie 1, 2, 3, 4, 7, 8, 9, 11, 12, Intenzívne plákanie. plákanie 3, 4, 5, 6, 7, 8, 9, plákanie.
- Page 44 All manuals and user guides at all-guides.com viï obrázok...
- Page 45 All manuals and user guides at all-guides.com • (viï str.
- Page 46 All manuals and user guides at all-guides.com viï obrázok (viï obrázok): (viï obrázok)
- Page 47 All manuals and user guides at all-guides.com (viï str. 48) viï str. 43). (viï str. 39). (viï str. 39). (viï str. 42 (viï str. 43). (viï str. 39 (viï str. 38). (viï str. 38 (viï str. 38 (viï str. 38 –...
- Page 48 All manuals and user guides at all-guides.com • (viï str. 47);...
-
Page 49: Românã
Program “MEMO”, 53 Pornire ºi Programe, 54 Pe scurt: pornirea unui program, 54 Tabel de programe, 54 Personalizãri, 55 WITE 127 Reglarea turaþiei de centrifugare, 55 Reglarea delay timerului, 55 Reglarea temperaturii, 55 Funcþii, 55 Detergenþi ºi rufe albe, 56 Sertarul detergenþilor, 56... -
Page 50: Instalare
All manuals and user guides at all-guides.com Instalare Este important sã se pãstreze acest manual pentru O nivelare precisã conferã stabilitate maºinii ºi a-l putea consulta în orice moment. În caz de evitã vibraþii, zgomote ºi deplasãri pe durata vânzare, cesiune sau schimbare a locuinþei, acesta funcþionãrii. -
Page 51: Primul Program De Spãlare
All manuals and user guides at all-guides.com CConectarea furtunului de evacuare Nu folosiþi prelungitoare ºi prize multiple. Conectaþi furtunul de ! Maºina nu funcþioneazã la temperaturi mai mici evacuare, fãrã a-l îndoi, de 16 grade. la o conductã de Nu folosiþi prelungitoare ºi prize multiple. evacuare sau la o gurã... -
Page 52: Descrierea Maºinii De Spãlat
All manuals and user guides at all-guides.com Descrierea maºinii de spãlat Panoul de control Butonul START/RESET Taste FUNCÞIONARE Butonul PORNIRE/ OPRIRE Display-ul Selectorul Butonul Turaþie Centrifugare Butonul Butonul DELAY TEMPERATURÃ TIMER Sertarul detergenþilor este folosit pentru a încãrca Taste FUNCÞIONARE: sunt folosite pentru a selecta detergenþi ºi aditivi (a se vedea pag. -
Page 53: Display-Ul
All manuals and user guides at all-guides.com Display-ul Acesta este un instrument util pentru programarea maºinii (a se vedea pag. 55), furnizându-vã totodatã informaþii referitoare la programul de spãlare. Dupã apãsarea butonului START/RESET pentru a porni programul, pe display este cronometratã durata rezidualã... -
Page 54: Pornire ºi Programe
All manuals and user guides at all-guides.com Pornire ºi Programe Pe scurt: pornirea unui program a se vedea pag. 55). 4. Selectaþi eventuale funcþii (a se vedea pag. 55). 1. Porniþi maºina de spãlat apãsând butonul 5. Porniþi programul apãsând butonul START/ 2. -
Page 55: Personalizãri
All manuals and user guides at all-guides.com Personalizãri Reglarea turaþiei de centrifugare Taste FUNCÞIONARE Dacã la pornirea maºinii, SELECTORUL este poziþionat în dreptul unui program care prevede turaþia de centrifugare, simbolul apare fix. Apãsând butonul , se vizualizeazã turaþia maximã permisã de centrifugare pentru programul selectat iar simbolul lumineazã... -
Page 56: Detergenþi ºi Rufe Albe
All manuals and user guides at all-guides.com Detergenþi ºi rufe albe Sertarul detergenþilor Sortarea rufelor Un rezultat bun la spãlare depinde ºi de dozarea • Subdivizaþi rufele în funcþie de: corectã a detergentului: cu un exces de detergent - tipul de þesãturã / simbolul de pe etichetã. nu se spalã... -
Page 57: Precauþii ºi Sfaturi
All manuals and user guides at all-guides.com Precauþii ºi sfaturi Protecþia ºi respectarea mediului Maºina de spãlat a fost proiectatã ºi construitã înconjurãtor conform normelor internaþionale de protecþie. Aceste avertizãri sunt furnizate din motive de siguranþã ºi trebuie sã fie citite cu atenþie. Economisirea de detergent, apã, energie ºi timp •... -
Page 58: Întreþinere ºi Îngrijire
All manuals and user guides at all-guides.com Întreþinere ºi îngrijire Oprirea apei ºi a curentului electric Pentru a scoate obiectele care au cãzut în anticamera tamburului, procedaþi astfel: • Închideþi robinetul de apã dupã fiecare spãlare. Se limiteazã astfel uzarea instalaþiei hidraulice a 1. -
Page 59: Anomalii ºi Remedii
All manuals and user guides at all-guides.com Anomalii ºi remedii Se poate întâmpla ca maºina de spãlat sã nu funcþioneze. Înainte de a telefona la Asistenþã (a se vedea pag. 60), verificaþi dacã aceastã problemã nu poate fi remediatã de dvs., astfel: Anomalii: Cauze posibile / Rezolvare: Maºina de spãlat nu porneºte. -
Page 60: Asistenþã
All manuals and user guides at all-guides.com Asistenþã Înainte de a lua legãtura cu Asistenþa: • Verificaþi dacã anomalia poate fi remediatã de dvs. (a se vedea pag. 59); • Porniþi din nou programul pentru a controla dacã inconvenientul a fost eliminat; •... -
Page 61: Polski
All manuals and user guides at all-guides.com... - Page 62 All manuals and user guides at all-guides.com (zobacz rysunek). (zobacz rysunek). w razie ponownego u ycia kròtsze srubki powinny byc przymocowane u gòry. (zobacz rysunek). (zobacz na s¹siedniej stronie). (zobacz rysunek) .
- Page 63 All manuals and user guides at all-guides.com Po zainstalowaniu pr zobacz rysunek (zobacz obok); ° zobacz obok...
- Page 64 All manuals and user guides at all-guides.com Display Ekran: por.str.67 por. strony 65-67 patrz str. 67 por. str. 67 patrz str. 66 Rys. 1 Rys. 2 Rys. 4 Rys. 3...
- Page 65 All manuals and user guides at all-guides.com (zobacz str. 67) zobacz str. 67 Zablokowane drzwiczki pralki: (zobacz str. 72).
- Page 66 All manuals and user guides at all-guides.com zobacz str. 67 (zobacz str. 67). (patrz str. 68) 9 0 °C 9 0 °C 6 0 °C 4 0°C 4 0°C °C 4 0°C 4 0°C 3 0 °C 6 0 °C 4 0°C °C 3 0 °C...
- Page 67 All manuals and user guides at all-guides.com (zobacz str. 68...
- Page 68 All manuals and user guides at all-guides.com zobacz rysunek...
- Page 69 All manuals and user guides at all-guides.com Pozbywanie sie starych urzadzen elektrycznych. • Europejska Dyrektywa 2002/96/EC dotyczaca Z u z y t y c h E l e k t r y c z n y c h E l e k t r o n i c z n y c h Urzadzen (WEEE) zaklada zakaz pozbywania sie s t a r y c h u r z a d z e n...
- Page 70 All manuals and user guides at all-guides.com patrz rysunek zobacz rysunek : zobacz rysunek Ris. 4 Ris. 3 Ris. 2 Ris. 1...
- Page 71 All manuals and user guides at all-guides.com zobacz str. 72 zobacz str. 67). zobacz str. 63). zobacz str. 63). zobacz str. 66 zobacz str. 67). zobacz str. 63 zobacz str. 62). zobacz str. 62 zobacz str. 62 zobacz str. 62 zobacz str.
- Page 72 All manuals and user guides at all-guides.com 195 047 421.03 10/2006 - Xerox Business Services • zobacz str. 71);...